If you follow the rule of n+1, where ‘n’ is the amount of bikes you currently own, and you keep adding to that number – eventually you’re going to need more bike storage. I crossed that bridge a long time ago. Even before my days at Bikerumor, I could have been considered a bicycle hoarder collector, and it’s only gotten worse.
Recently after moving, I found myself in need of a complete redesign for my storage of the fleet. With a new space to fill out, I eagerly researched a number of different bicycle storage products. In spite of numerous options out there, I kept coming back to the humble bicycle storage hook. The simplest solution is usually the best, right?
I’ve used various hooks for years, usually whatever version you could find at the local home center. This time though, I wanted to check out the hooks from Park Tool. Are they noticeably different than those that have dutifully supported my bikes for the past decade? Before I knew it, a box of hooks was on its way from Park Tool to find out.
Why Hooks?
In terms of storage capacity, simplicity, and cost, the bicycle storage hook simply cannot be beaten. If you have a ceiling with sufficient height with a floor above it, you likely already have a built-in mounting system. Most basement ceilings will have floor joists that are spaced at 16″ on the center. That’s almost the perfect width to space out a row of bicycle storage hooks. Simply drill a pilot hole in the center of the joist, thread in the hook, and voila, you have bicycle storage. If you use this method, there’s nothing else to buy and no need to build anything. It doesn’t matter if the ceiling is finished or completely exposed – just make sure you’re not drilling into any electrical or plumbing lines, HVAC systems, etc.
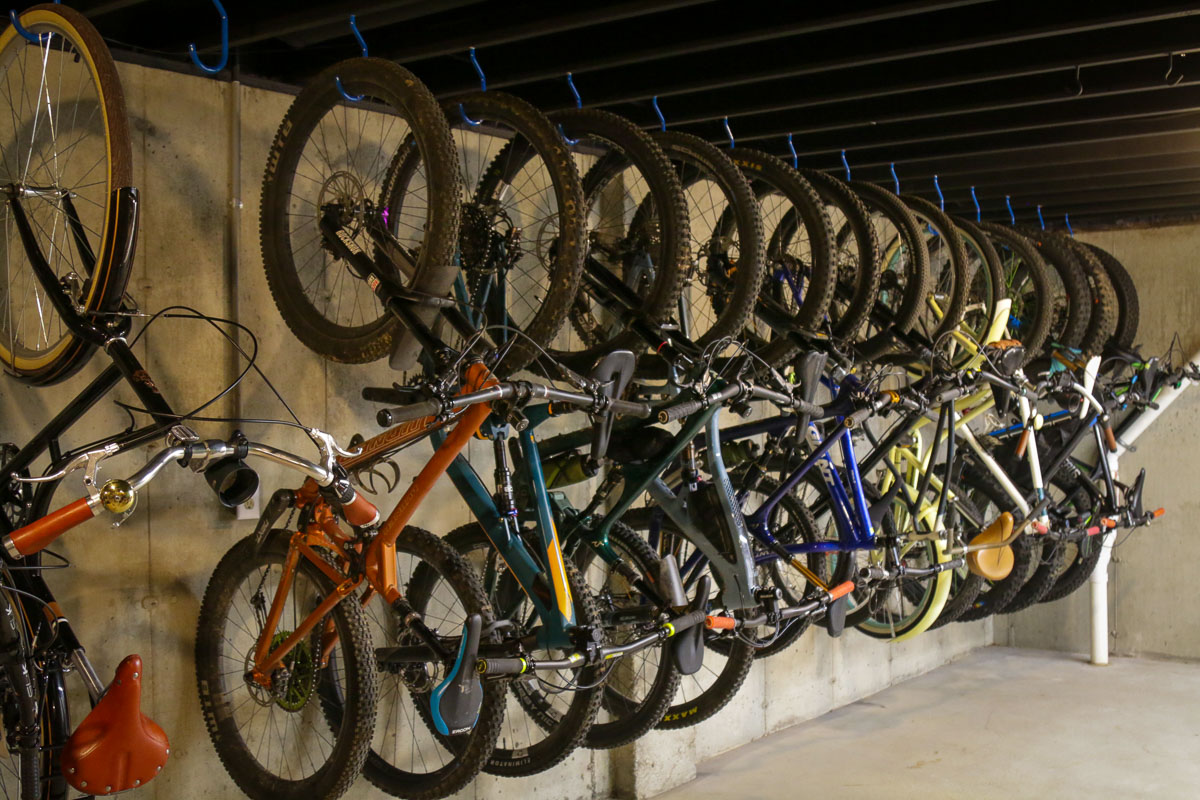
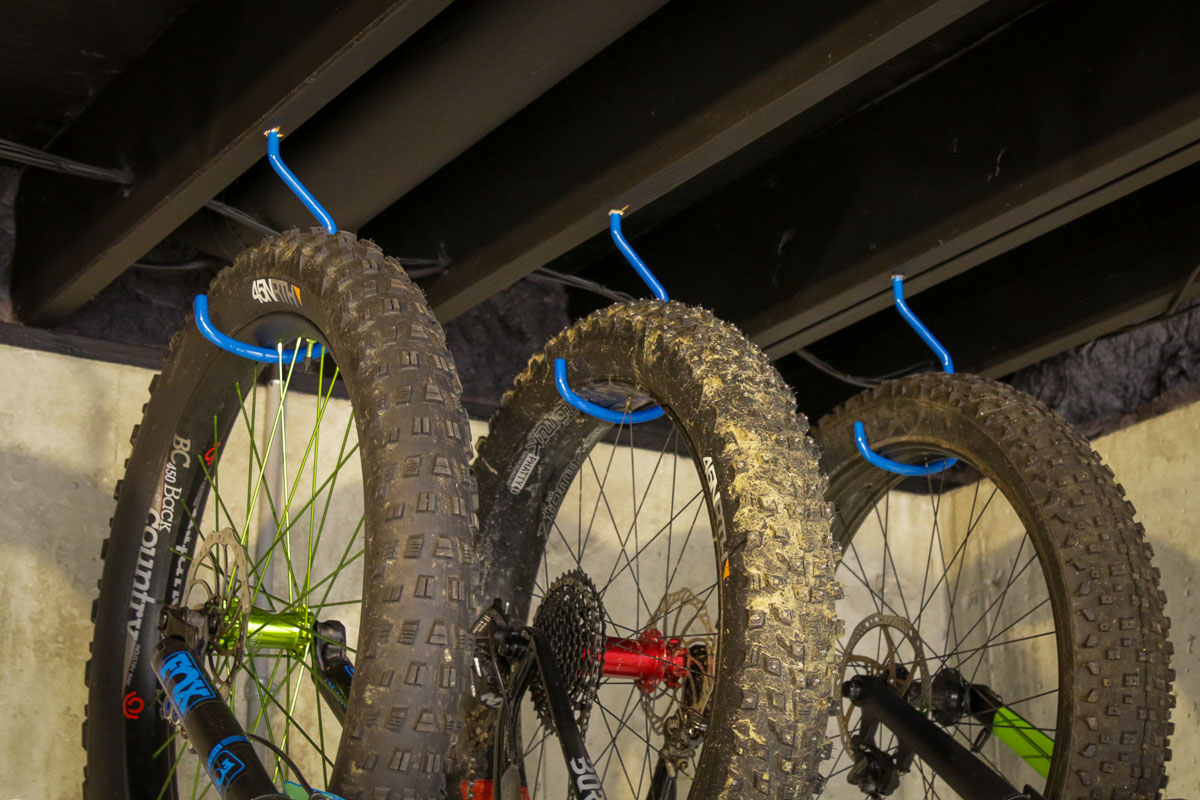
I’ve always hung my bikes in an alternating fashion with bar up/bar down. This allows you to cram a bunch of bikes into a smaller space while still allowing your fairly easy access to each individual bike.
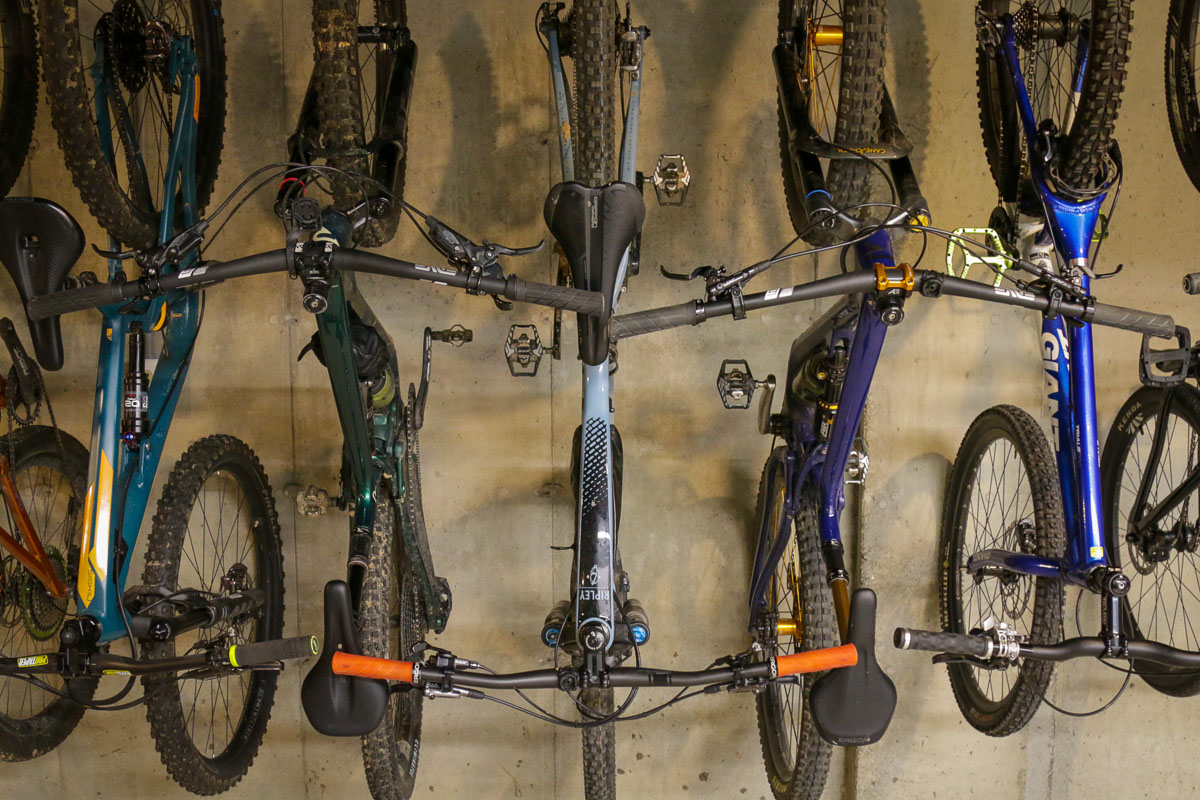
Even with the wide handlebars of modern mountain bikes, the 16″ spacing works quite well. Again, in terms of efficiency, it’s hard to find a way to store more bikes as effectively and efficiently as this. I do have a hanging rack that fits more bikes into a smaller footprint, but the spacing is too close to allow easy use with mountain bikes. The 12″ spacing is just wide enough to use with many dropbar bikes, but even for wider bars on gravel bikes it can be a challenge to wiggle the bikes in and out.

If you’re limited on ceiling height, don’t forget to think about the wheelbase measurement of various bikes. Some are quite a bit longer than others and require more height to properly hang.
Is it OK to Hang Bikes by the Wheels? Upside Down?
This is a common question, likely because there are a lot of anecdotes floating around about someone who hung their bike upside down and “now the brakes don’t work.” I’ve hung every type of bike in almost every direction for years, and chances are very good that if you look in the back of your local bike shop, you’ll find the same thing.
But to be completely sure, I reached out to a few brake and suspension companies to ask their opinion on the matter – namely, SRAM, Shimano, and Hayes/Manitou. The consensus seems to be that it’s completely OK to hang bikes with hydraulic disc brakes or suspension. Both Shimano and Hayes said that it’s fine to hang them in either direction, but is probably best to hang them with the brakes pointed up just in case there’s any air in the master cylinder.
Shimano MTB Product Manager, Nick Murdick went on to say, “Like other open system hydraulic brakes, Shimano brakes all feature a reservoir of extra fluid above the master cylinder piston. We take things a step further by using the brake’s architecture to guide air bubbles to the top of this reservoir where they won’t affect brake performance. This also makes the brakes easier to bleed when the time comes.
For brakes it shouldn’t matter since there should be no air in the system. The rider would notice air in the pressure path so if there is any air present it would be in the reservoir. In that case anywhere between bike horizontal (like it would be on the ground) and front wheel up would allow the air to remain in the reservoir. So if you are due for a bleed, avoid hanging it from the rear wheel.
As for suspension, some of our engineers hang their bikes so the bushings are at the bottom end so the bath oil can get down to the seals. But honestly, without any pressure differential the clearance between the leg and bushing is tight enough that the oil won’t break surface tension and slide down. Same goes for the damper, air shouldn’t migrate past the check valve unless there is sufficient pressure to push it through. If in doubt, the compression adjuster can be set to max before hanging the bike to eliminate the leak path for the air. In the case that air does get past the check valve, a few quick cycles of the fork should take care of bleeding those air bubbles out from under the damper.”
But What about Carbon Rims?
What Makes the Park Tool Hooks Different?
So hooks are one of the least expensive, most efficient, and easiest ways to store you bike. But why would you want to go with the hooks from Park Tool over those from Home Depot? For starters, Park has a number of different hooks, specifically designed for bikes in different applications.

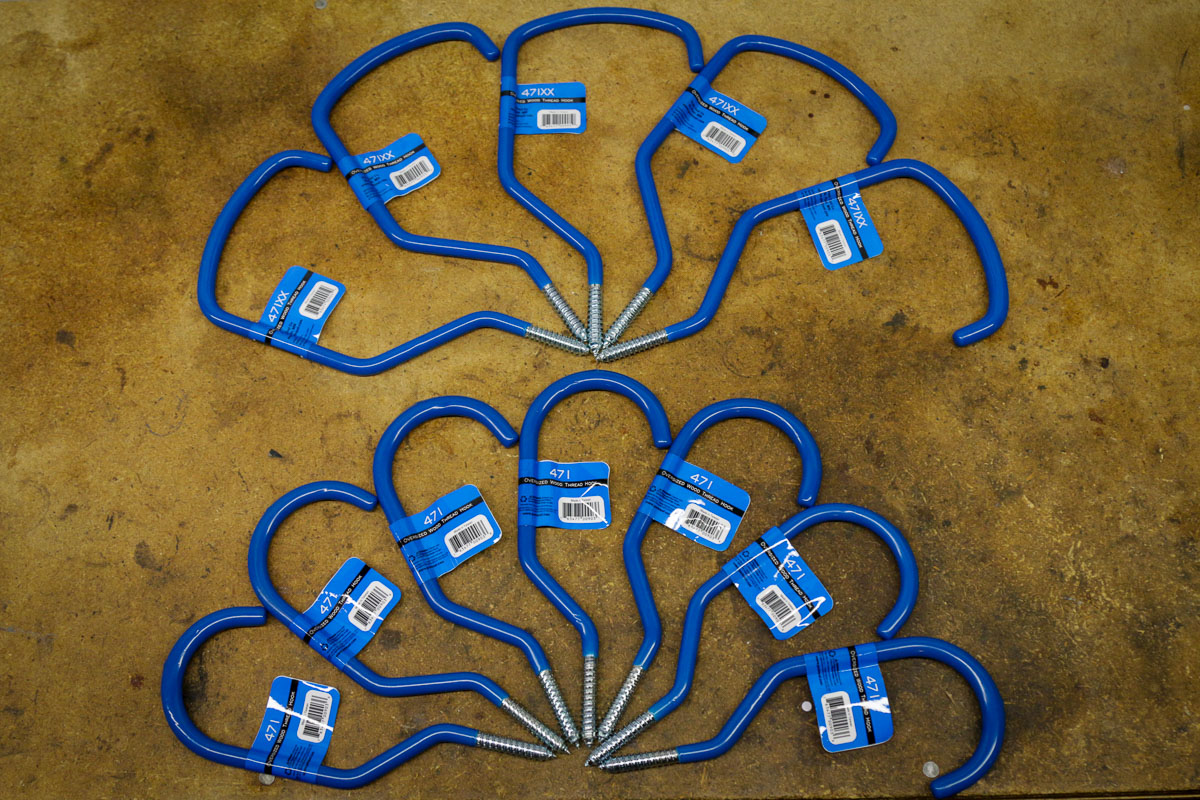
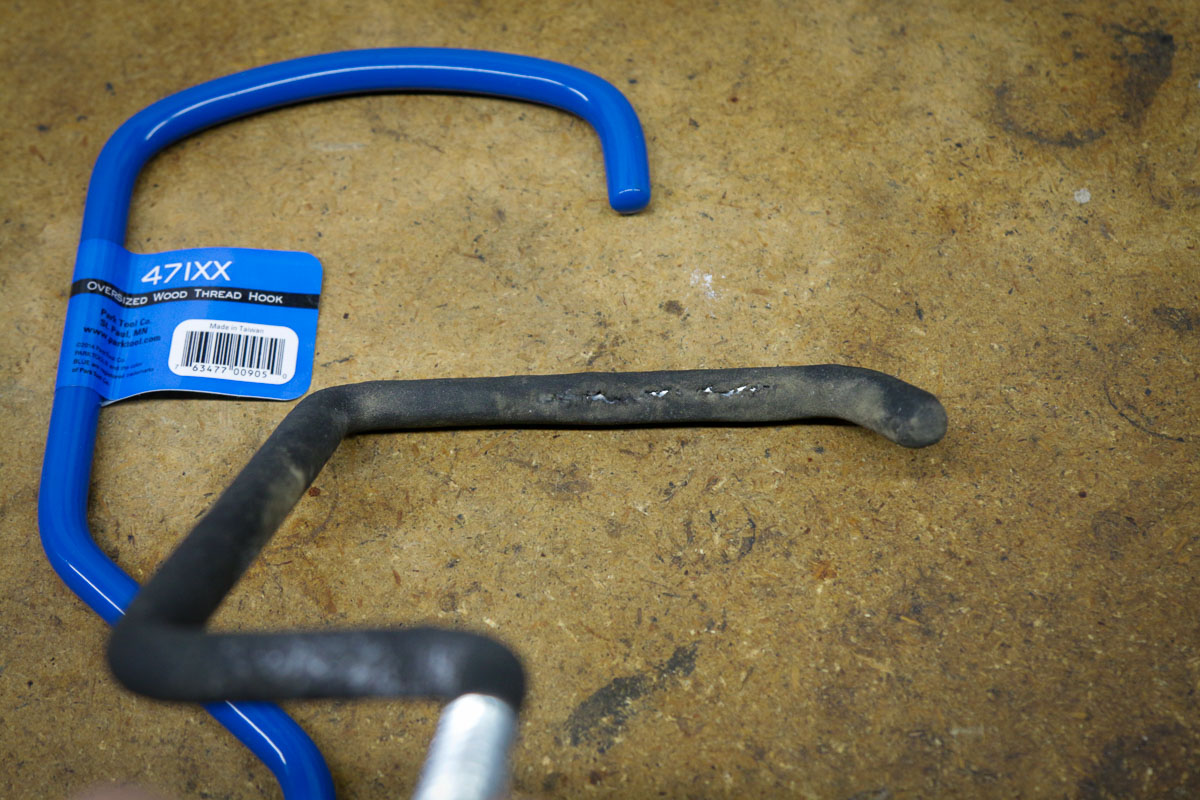
Park offers two different hook thread options with three different sized hooks for each thread. If you’re not planning on threading the hooks into the wood, Park offers hooks with a machine thread so you could attach them to metal plates, C-Channel, or other flat objects. To differentiate the two, the machine thread hooks have a black vinyl coating. Note that only the black hook shown directly above is a Park Tool hook, the other black hooks pictured throughout the story are not from Park Tool.
The same three hook sizes are also offered with a wood thread, so they can be installed directly into wood once a pilot hole has been drilled. Note that the pilot hole size varies by the hook – the smallest 451 hook recommends using a 1/4″ or 6mm drill bit for the pilot hole. Both the 471 and 471XX recommend using a slightly larger 11/32″ bit due to the larger size of the hook.
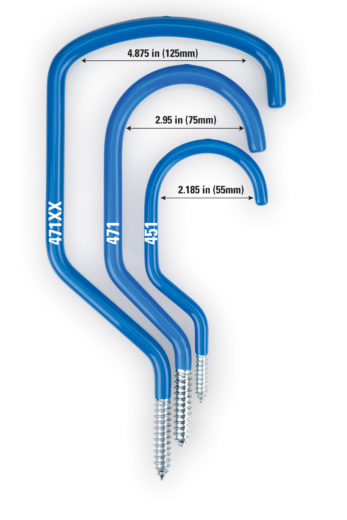
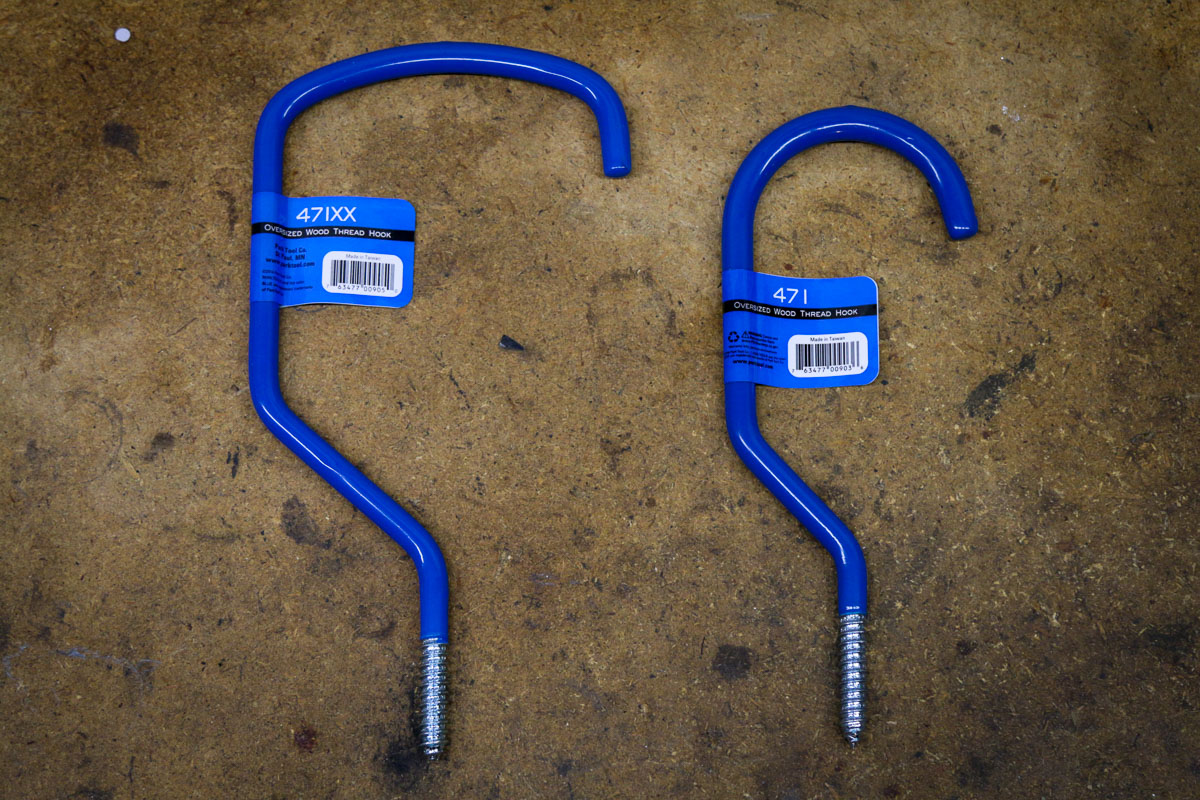
That brings us to the three sizes – the 450/451 (machine thread/wood thread), 470/471, and 470XX/471XX. At the smallest end, the 55mm wide 450/451 is sort of your standard, old-school bike hook. If your collection includes nothing but skinny tires, this one should be sufficient. But as soon as you start tracking into modern mountain bike territory, the 75mm wide 470/471 is a better option. It will still work for any road bike, but the wider hook will work with most mountain bikes including many plus bikes. Finally, the 470XX/471XX is the heavyweight of the group with a 125mm wide hook that’s big enough for most fat bikes.
I have a separate rack that I use for bikes with dropbars since the spacing is too narrow for mountain bikes, so I opted for the 471 and 471XX. The 471 is big enough to work with any mountain bike or plus bike I currently have, and the 471XX works with all of my fat bikes. It’s also perfectly acceptable to use a larger hook for smaller wheels and tires, though the bigger hooks are more expensive. Honestly, unless I only planned on hanging road bikes, I would probably skip the 451 in favor of the 471 since it’s more versatile and almost the same price.
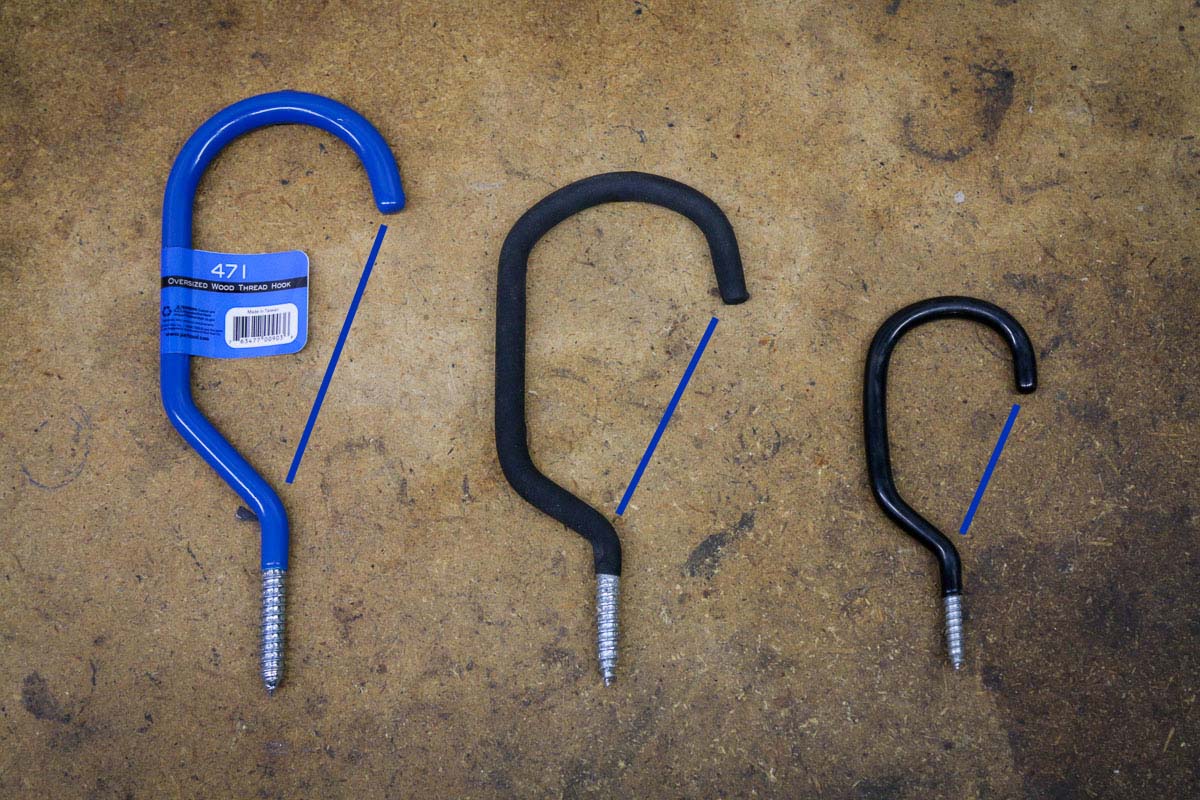
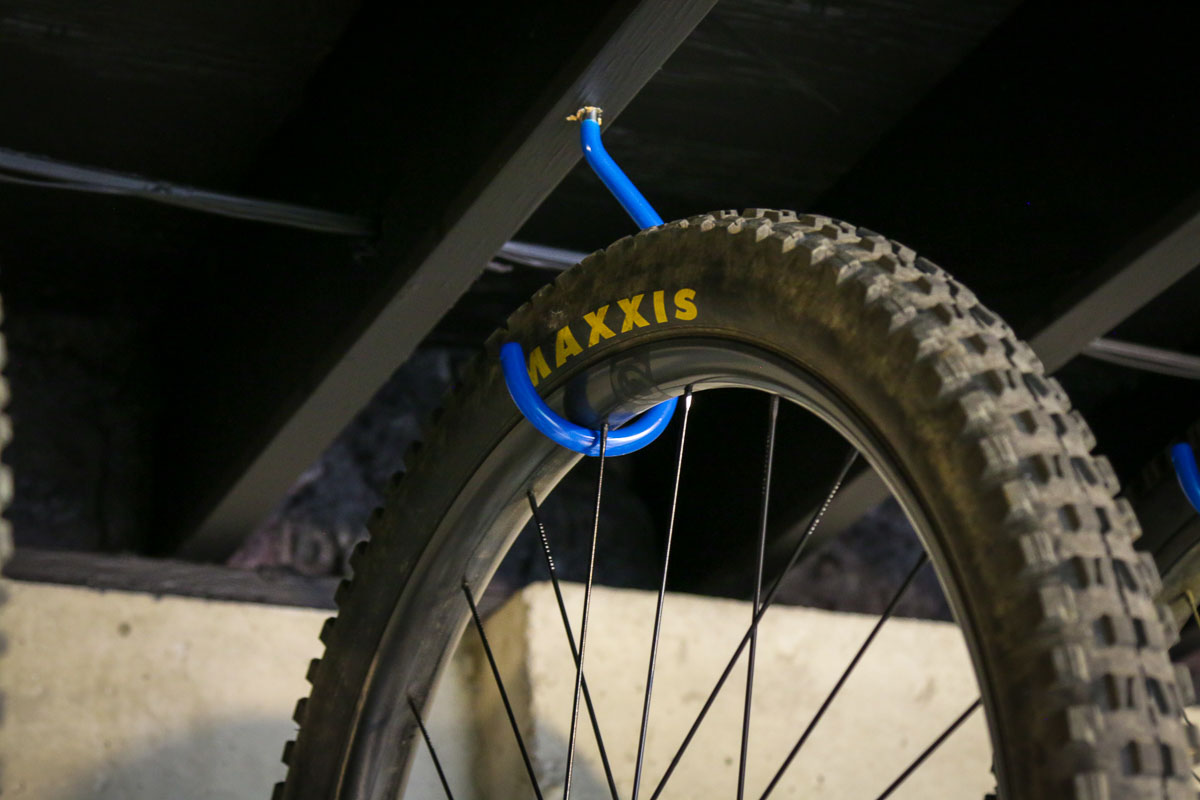
One of the most critical measurements and one of the biggest differences between the Park Hooks and generic hooks, isn’t the width. Instead, it’s the distance from the opening at the tip of the hook to the shoulder (represented above by the blue line). Taller tires with larger tread blocks and bigger volume require a bigger gap here to easily guide the wheel into the hook. Often if this gap is too small, you’ll have to tilt the wheel to guide the rim first into the hook. Depending on the tire and rim combination and whether you’re hanging it by the front or rear wheel, this can become fairly difficult – particularly on a high ceiling.
In the time that I’ve been using the Park hooks, they have proven quite a bit easier to get certain bikes with chunky tires and rims in and out of the hooks. The larger gaps from the tip to the shoulder allow you to effortlessly guide the wheel in from the side without having to tilt it at all in most cases.

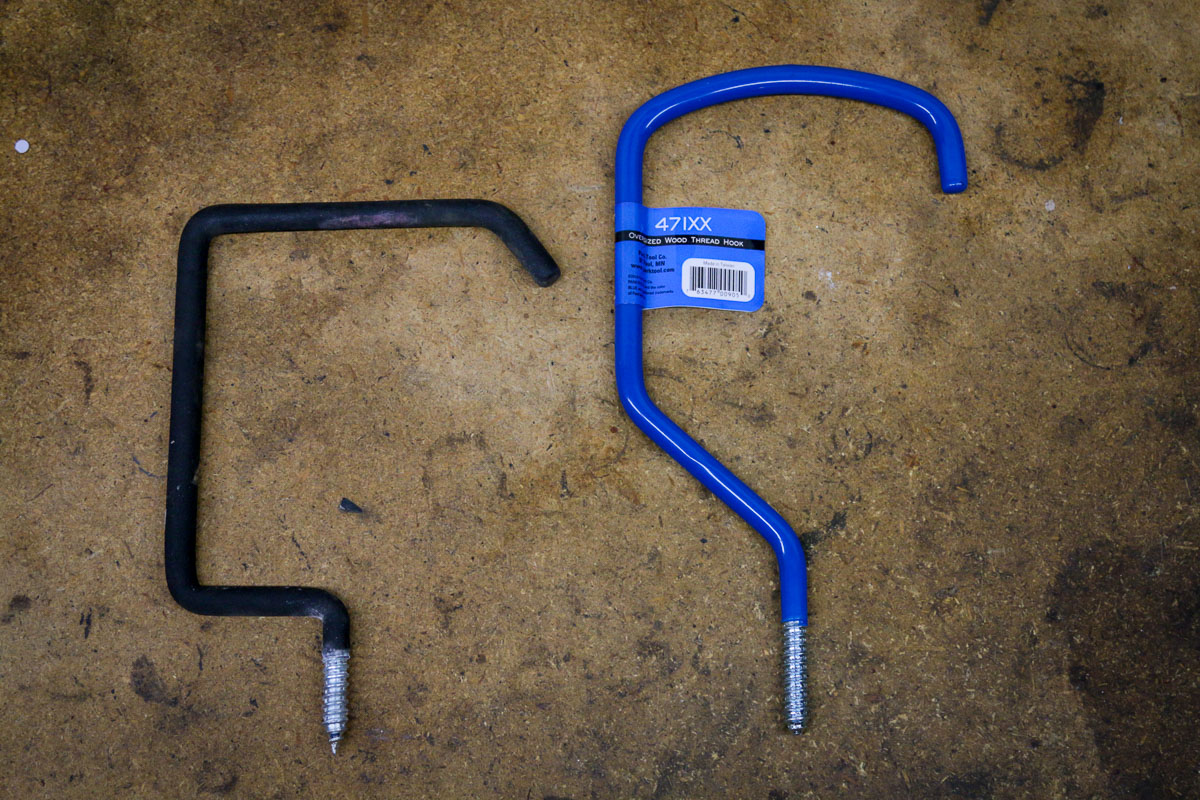
Also, most hooks that you’ll find from the hardware store that is big enough to fit a fat bike wheel are likely meant for ladders or other flat items. That means the hooks usually have a flat bottom.
This works, but the vinyl coating will quickly wear through which risks damage to your rims.

Since the Park 470/471XX is curved on the bottom, there’s a better chance of having more surface area between the vinyl coating and the rim. I’ll have to wait and see how they hold up in the long term, but theoretically, it should be better than the ladder hooks I’ve used in the past.
Pricing
The Park Tool hooks are a good bit more expensive than something you’ll find at a big box store, but in the end, I think they’re worth it. Compared to other bicycle-specific storage, you could even say these hooks are fairly cheap at $5.45/$5.95/$8.95 a piece (451/471/471XX). But more importantly, they make it easier to load or unload the bikes, and work better with bigger rims and tires. Not to mention the row of Park Tool Blue looks pretty good against the ceiling.