
It’s been a number of years, but Cane Creek is back in the fork business. Ok, technically they were known as Dia Compe USA years ago when they began to build the original RS-1 under contract for a tiny outfit called Rock Shox. Housed in the same facility they occupy today as Cane Creek Components, operations have come full circle with an all new manufacturing cell dedicated to their Helm suspension fork.
With fork competition seemingly at an all time high and Cane Creek still trying to win back customers after rear shock failures, the introduction of a new fork seems like a gutsy move – one that has a lot of riders asking what will make this better than a RS Pike or a Fox 36? For Cane Creek, the answer to ‘why’ seems to be the same reason they set out to create any new product. Thanks to a desire to do things their own way and build the products they want to ride, Cane Creek has been able to stand out in a sea of competing products. And if the first impressions of the Helm are any indication, their suspension fork should be a true contender among industry giants…
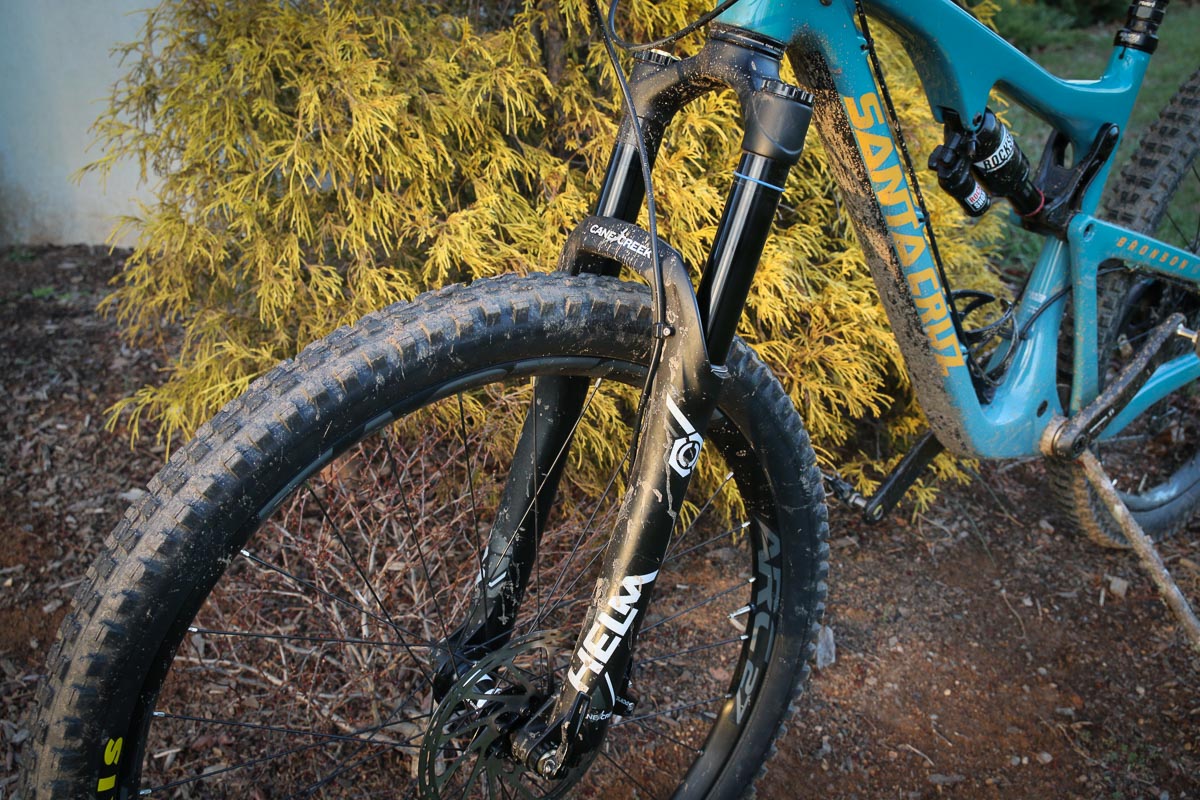
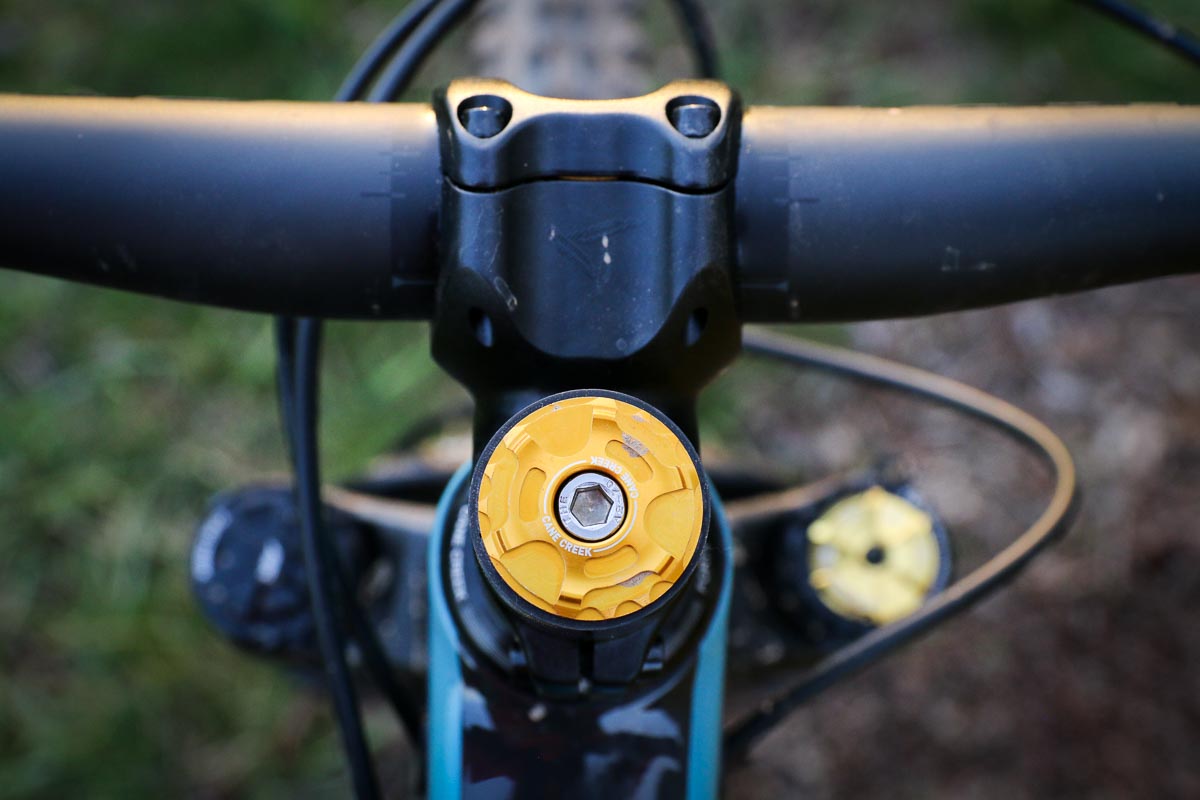

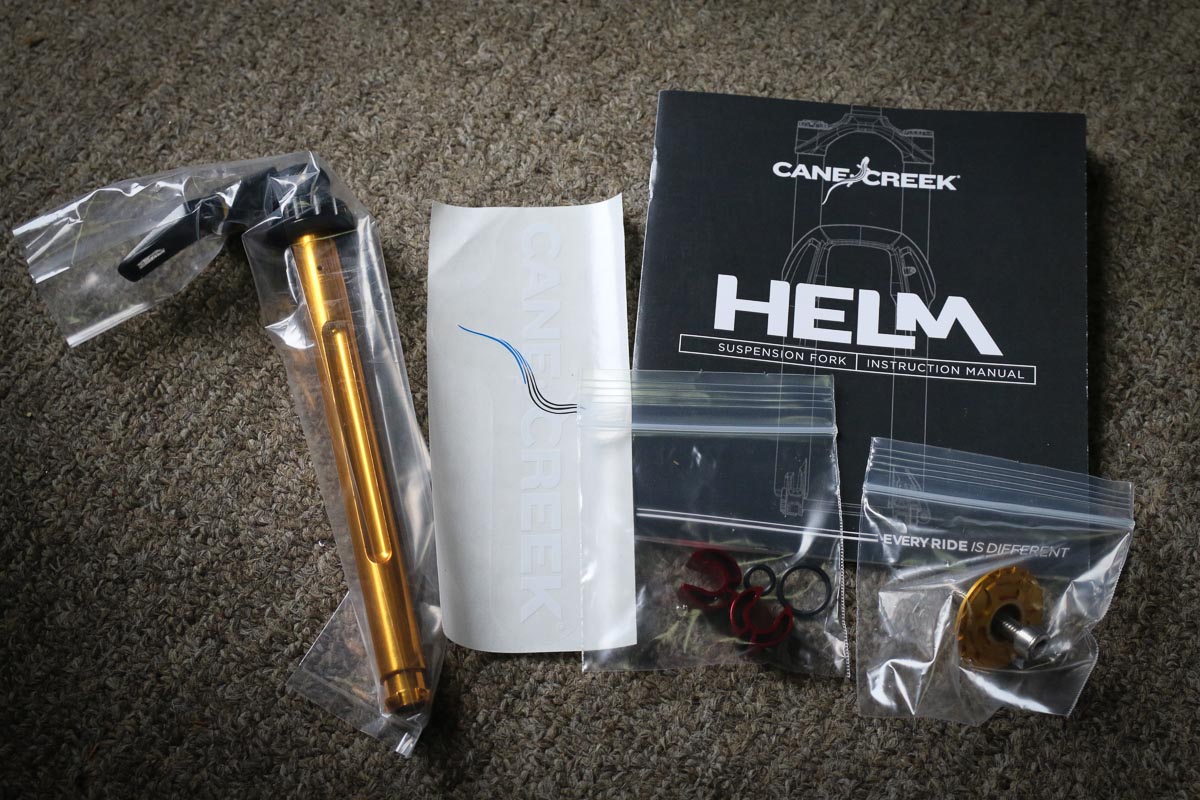
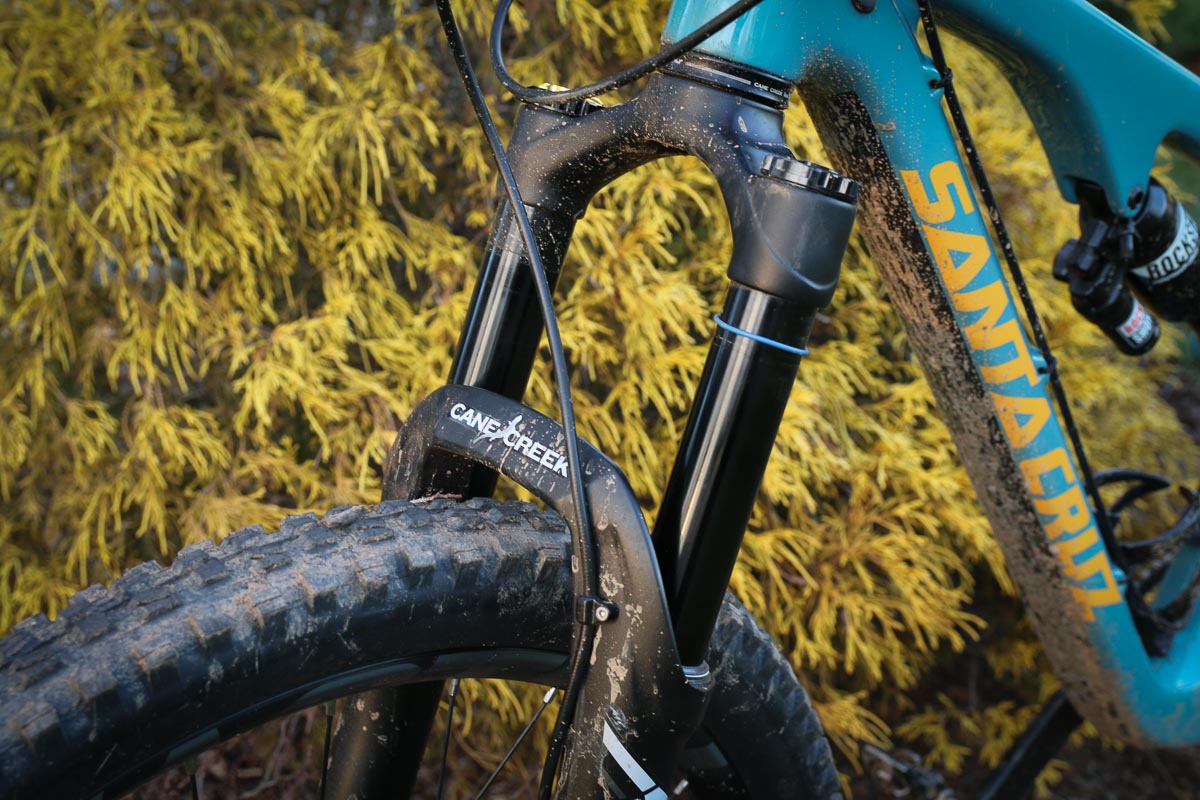
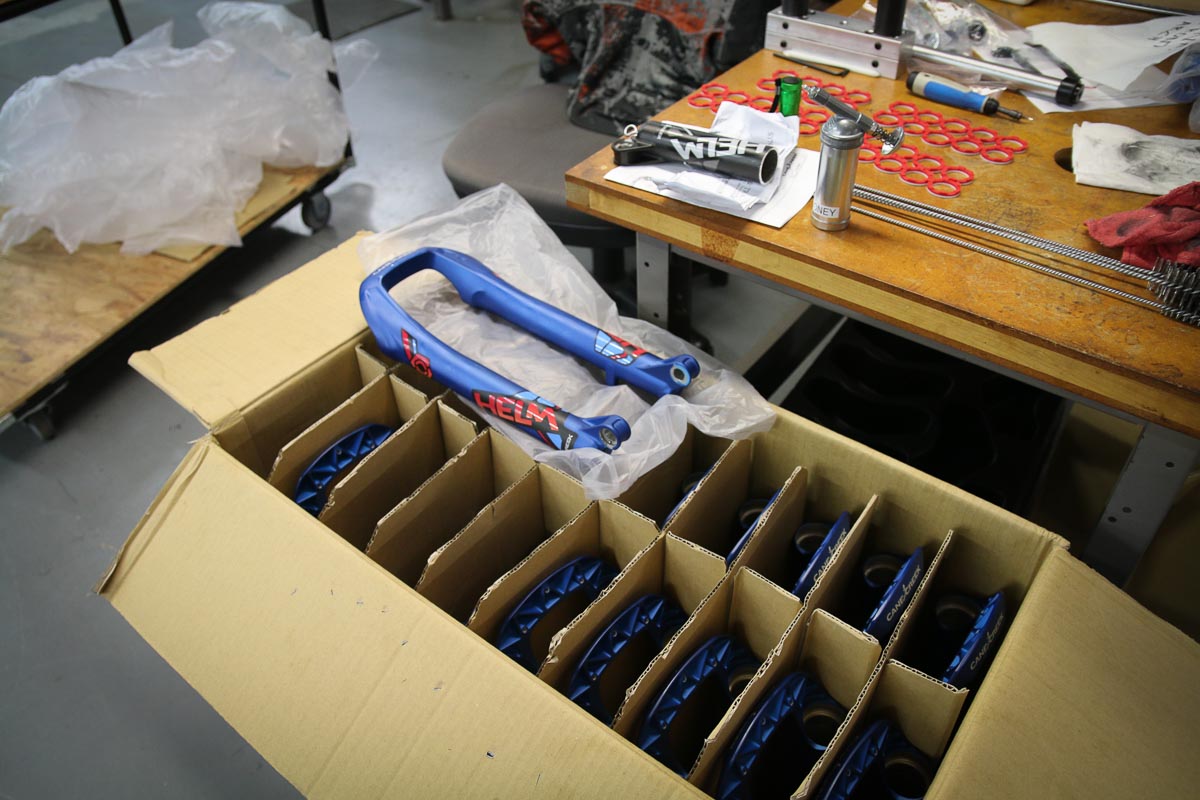
Like a lot of shops and consumers, we’ve been excitedly waiting for a chance to get on a Helm and see what it’s all about. Recently, we finally had the chance during a trip down to Asheville to not only pick up the fork, but get the full scoop, and of course get some riding in on it as well. Before I knew what was happening, the fork was out of the box and being installed on our test Santa Cruz Bronson. Inside the box you’ll find the fork, the D-Loc axle, two extra travel spacers, and a custom headset preload top cap with star nut – you know, to match the fork.
Since the fork got the steerer cut almost immediately so we could get out on a ride, Cane Creek weighed one of their other production 160mm Helms with a full uncut steerer and the D-Loc axle which came in at 2063.6g (4.55lbs).
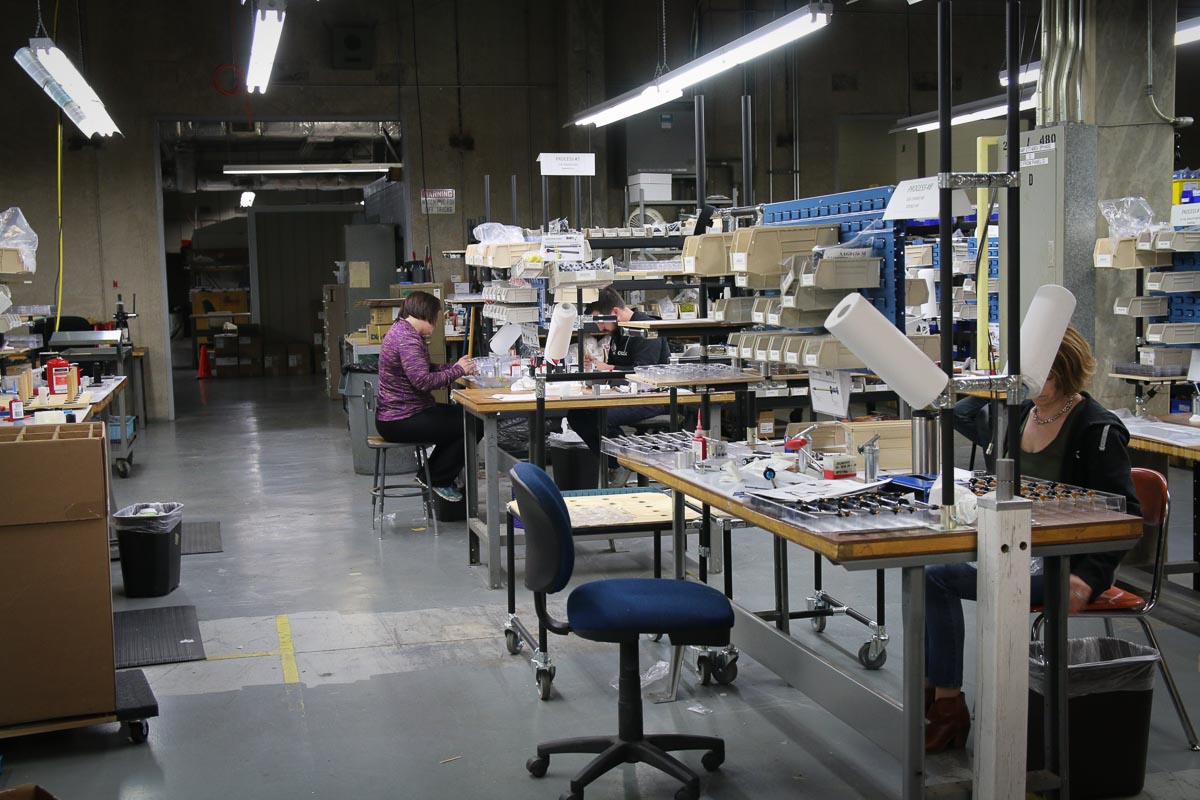
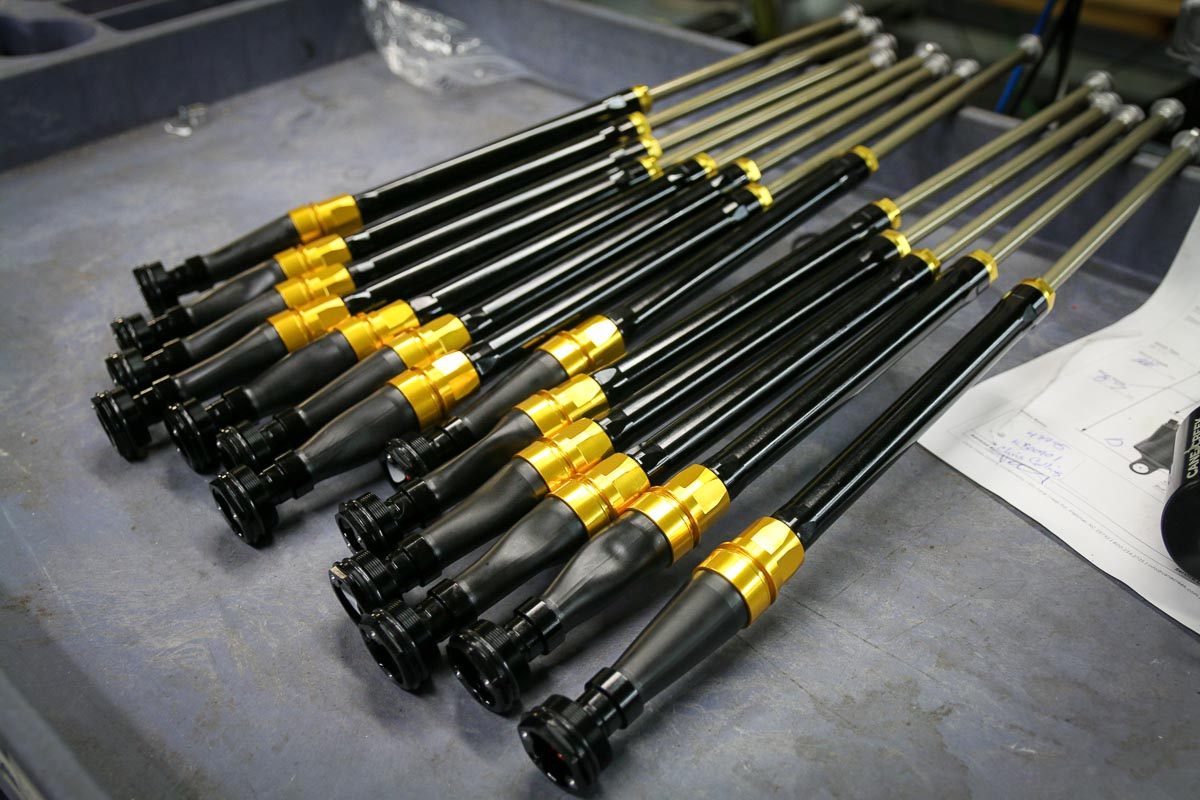
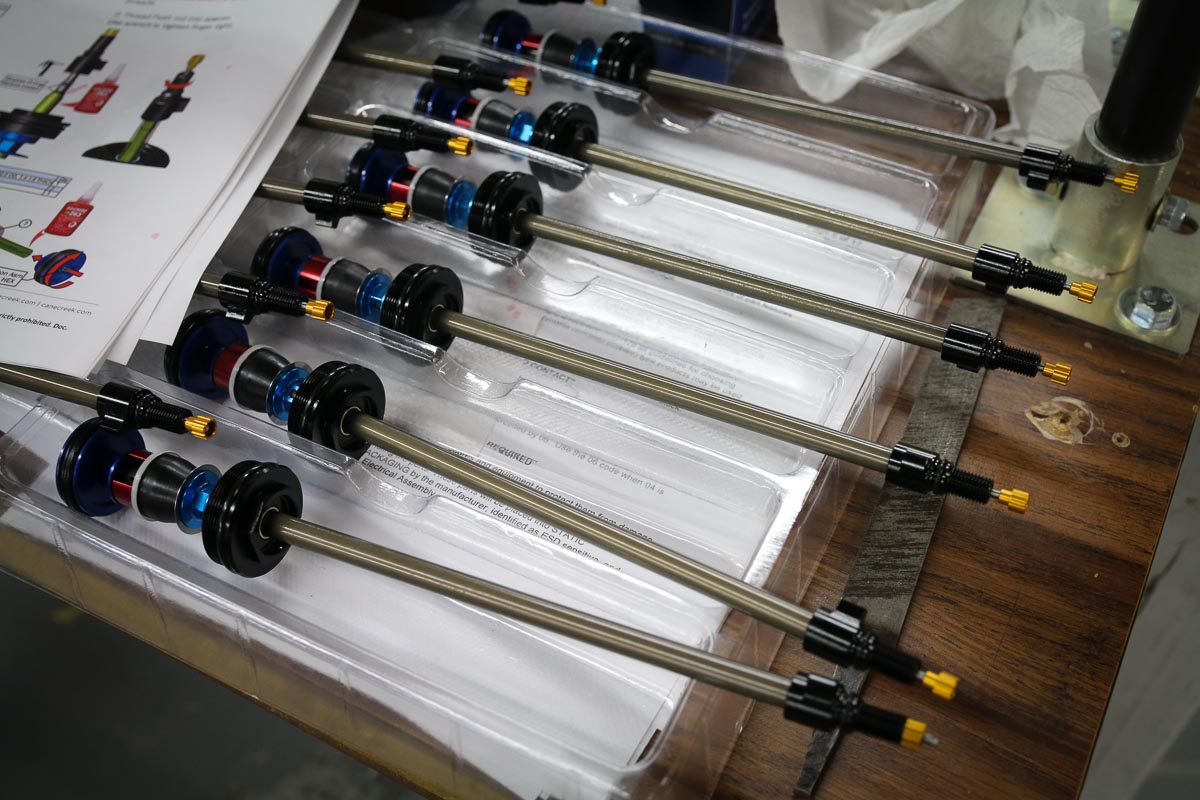
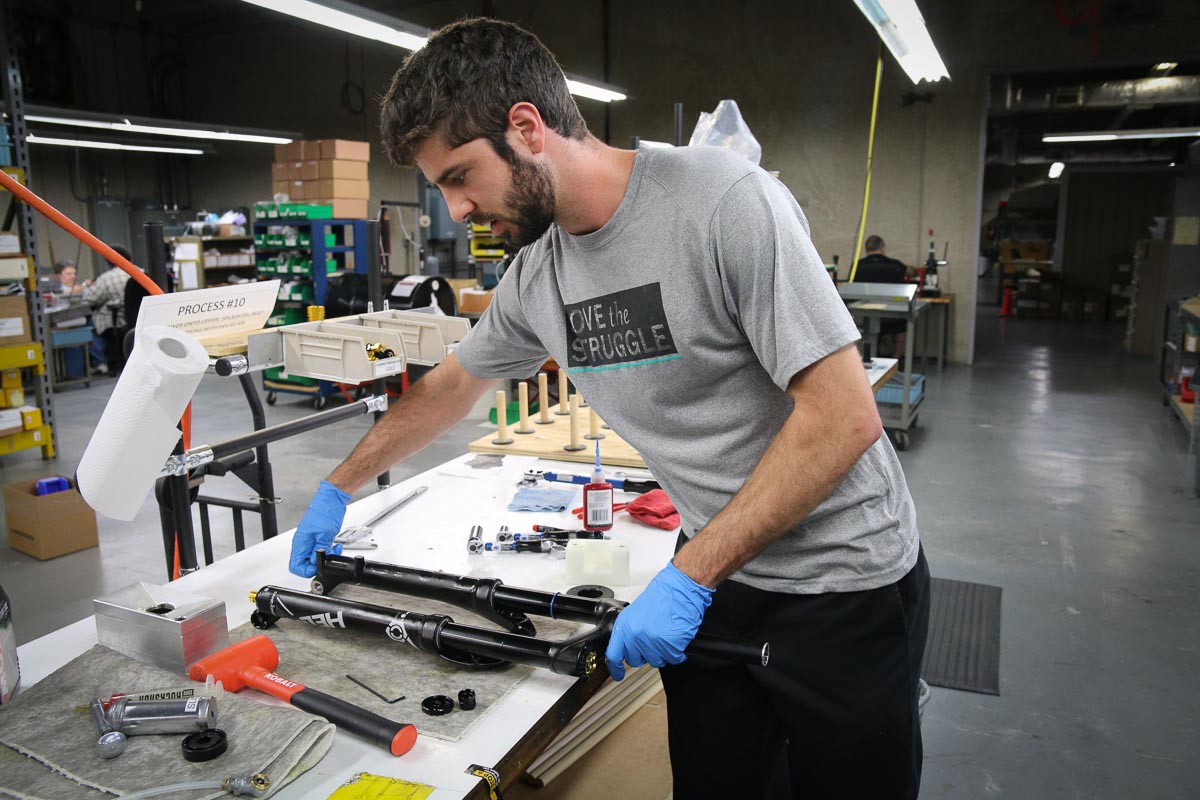
Positioned right in the middle of their warehouse floor is the assembly cell for the Helm. While most of the parts are foreign made, the forks are completely assembled in Fletcher, NC. Cane Creek is quite proud of the fact that their forks are assembled by hand and they stress that forks have been slow to leave the factory because they have to make sure everything is right. You can tell that the employees take it personally whenever they hear of a product failure, so they’re being extra cautious to slowly ramp up production with extensive testing to ensure the Helm launch goes according to plan.

Twin Tube or Not to Twin Tube?
In addition to why Cane Creek is making a fork, there seems to be a lot of questions as to why the fork is not a twin tube damper like they offer in their shocks. According to Cane Creek’s Director of Engineering, Jim Morrison, it just wasn’t worth it. Specifically, Jim said, “We tried. We spent/wasted a lot of time and money going twin tube because that’s what we do. It makes sense on shocks, but as we learned more about forks and the packaging requirements, it didn’t make as much sense.” He went on to say that with Twin Tube, everything gets really small which makes it harder to make and harder to assemble. It also makes it difficult to attain the flow rates required, and they were too high on compression damping by a factor of 10. Cane Creek ended up with a working twin tube fork, but it was essentially functioning as a mono-tube and they “just didn’t ride well.”

Instead, Jim says they focused on building a removable cartridge that is user serviceable and one that is tuned to the way they like it. Without sugar coating the issue, Jim says that the damper went from the thing that would distinguish the fork to something that performed flawlessly and was completely reliable. To guarantee consistent performance, every damper is run through a dyno test to ensure it performs as expected. Forks also see a full cycle test once assembled as well.
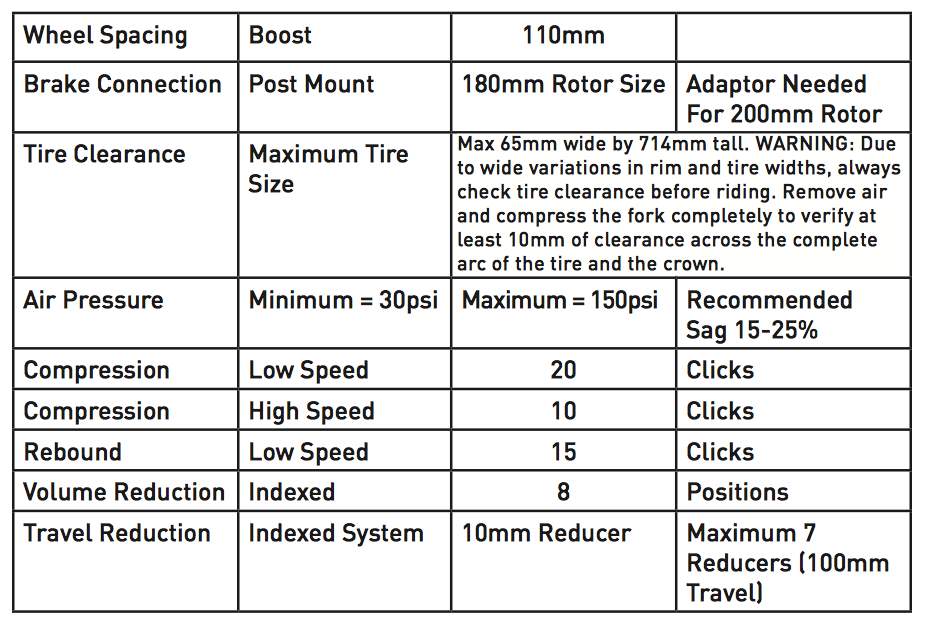
In the damper’s place, all of a sudden the air spring had turned into the differentiator thanks to their Manual Negative Charting System – or the ability to tune the positive and negative air separately. Yes, that sounds a lot like the Rock Shox Dual air system or even the Manitou Dorado air to a degree, but the Cane Creek system does have some differences in the way they go about it. Cane Creek points out that the air spring assembly has been tuned so that the stock setting has an extremely low breakaway force – which is something you can definitely feel. It also allows for a massive 100-170mm travel range with the same air spring assembly.


Manual Negative Charting System
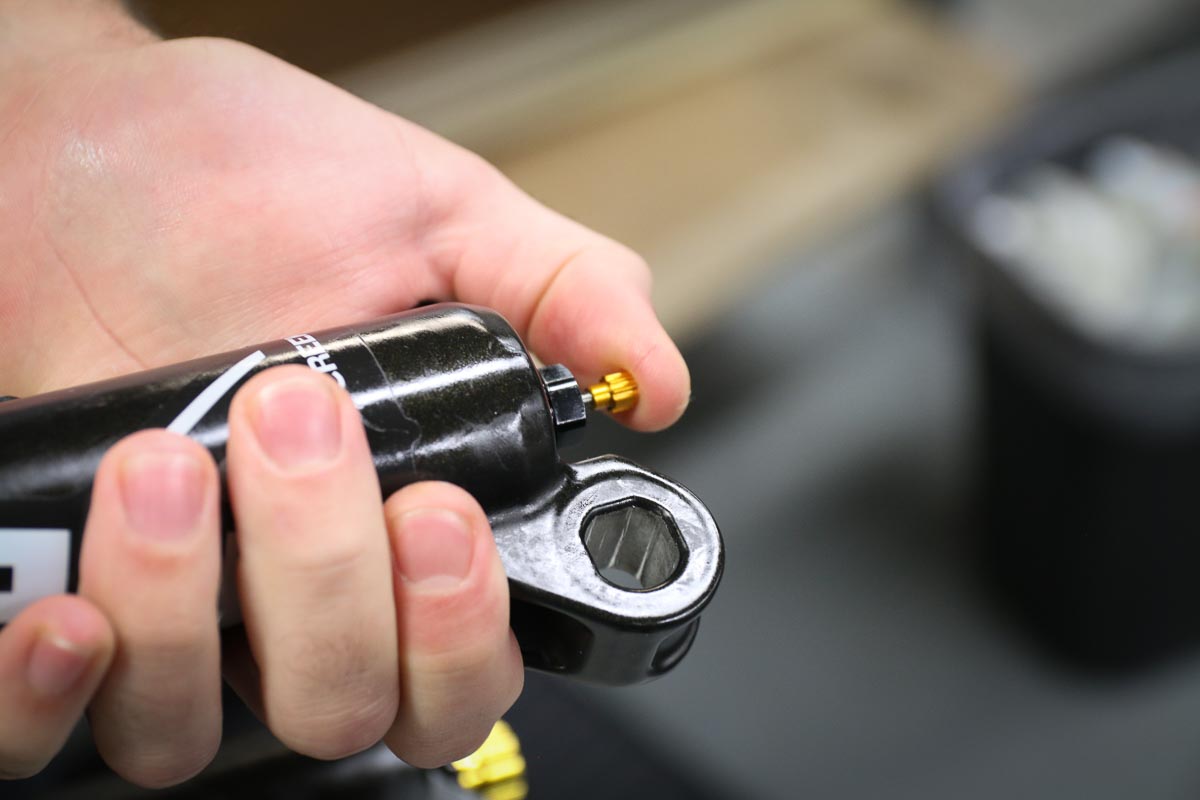
One of the most unique parts of the fork is the way you add or remove air from the fork which involves the Negative Air Chamber Equalizing System at the bottom of the left leg. Hidden under a protective cap is a small button which opens the pathway for air from the positive to negative chamber. Once the gold valve is unthreaded, it works like a little button – pushing it up into the fork lower opens ports on the air spring shaft and allows the air to equalize, reducing the pressure slightly in the positive chamber. Cane Creek recommends starting with 50% of your body weight in PSI for the positive chamber (ex. 75psi for 150lb rider). Once the fork is inflated, press the button for the equalizer to balance out the chambers, and then check sag. Too much sag, add more air to the system and repeat the equalization process. Too little, simply let air out of the valve and then equalize again. The air spring is designed in a way that creates extremely low breakaway force, and it opens up the ability to independently tune the positive and negative chambers. Every time you hit the button it equalizes the two chambers, but you could over inflate the positive spring, equalize, then let air out of the positive to create more pressure in the negative chamber, or under inflate the positive chamber, equalize, then add more pressure to the positive chamber to create more pressure in the positive side.
It’s important to note that the same system requires a bit more care when removing the lowers. After letting the air out of the air valve, you still have to let the air out of the negative chamber. So while you’re still holding the air valve open, press the equalization button to let out the rest of the air. If you’re planning on changing the travel, this is your first step.
Travel Adjustment
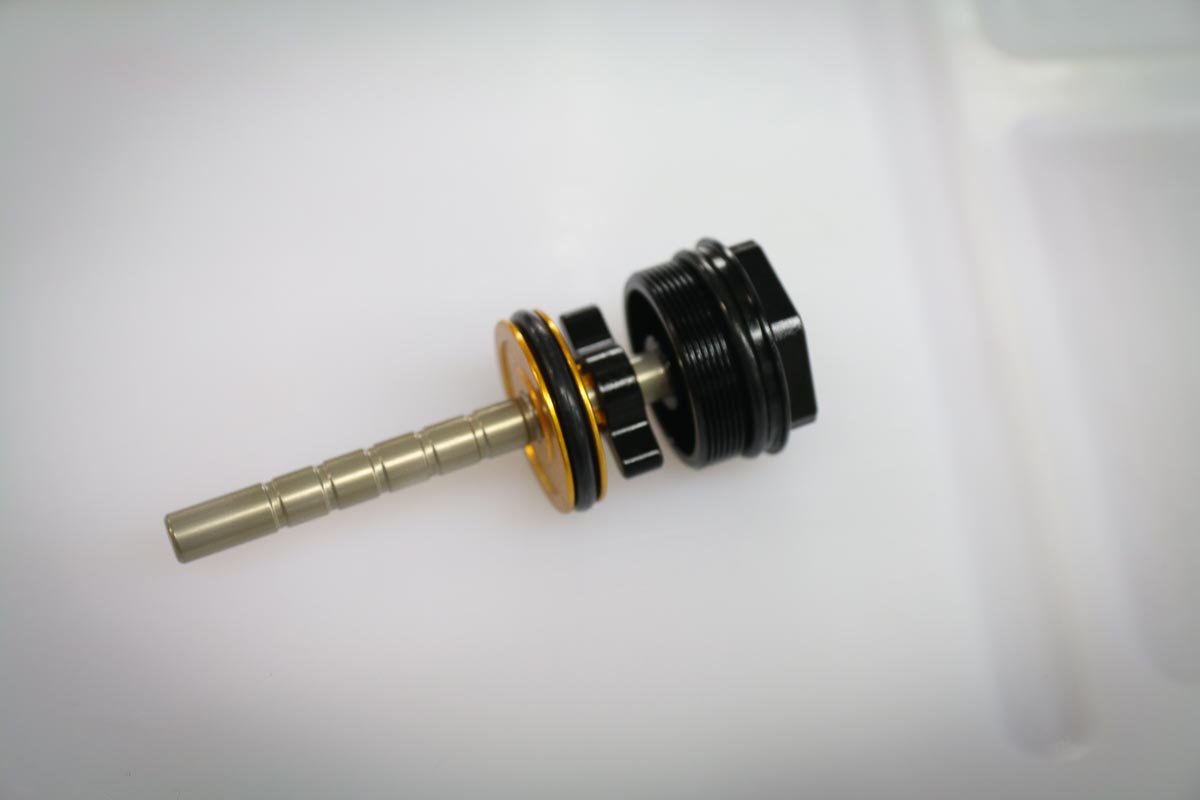
I was lucky enough to have Alex D., Cane Creek’s suspension expert and Lead for Fork Assembly, on hand to show us the Pro way to adjust travel, but after seeing it first hand it seems pretty simple provided you have a working knowledge of basic suspension maintenance. Cane Creek uses o-rings instead of crush washers on the shaft nuts, but the removal of the lowers is still the same as most other forks – however, you can probably dislodge the shafts by hand rather than having to tap them with a mallet.
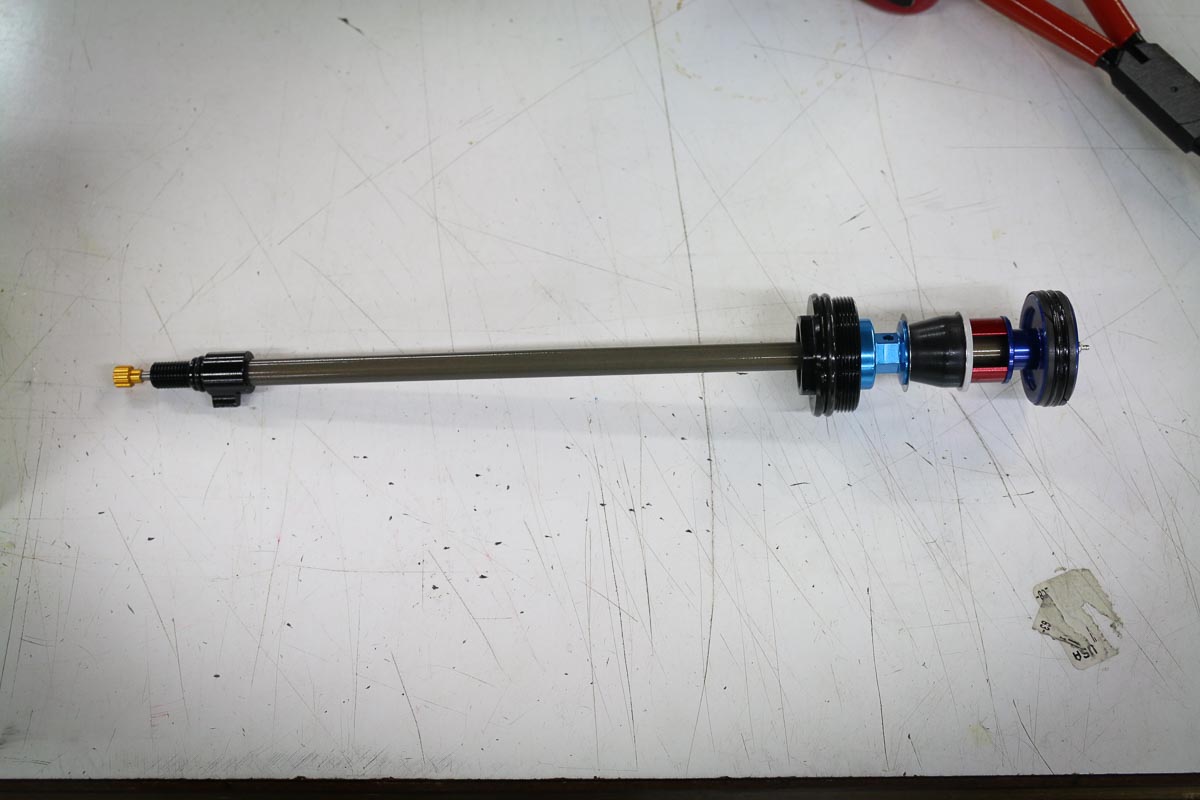
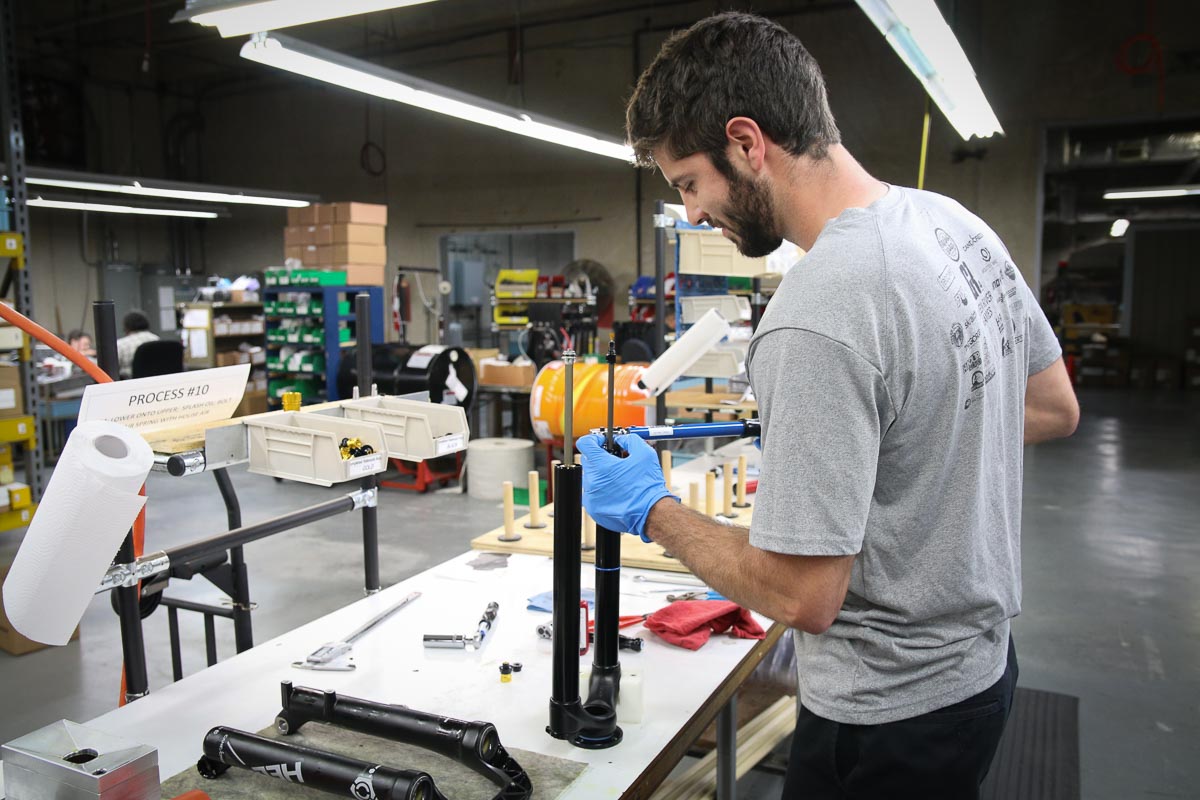
Once the shafts are loosened, Alex likes to rest the lowers flat on a work bench with the arch and dropouts facing down. This allows him to remove the stanchions without losing any of the splash oil in the lowers. With the uppers removed, the air seal head on the left leg is removed with the uppers upside down, likely clamped in a bike stand by the steerer. Again, this allows you to slide the air shaft up high enough so you can add or remove a travel spacer without having to completely remove the air spring assembly.
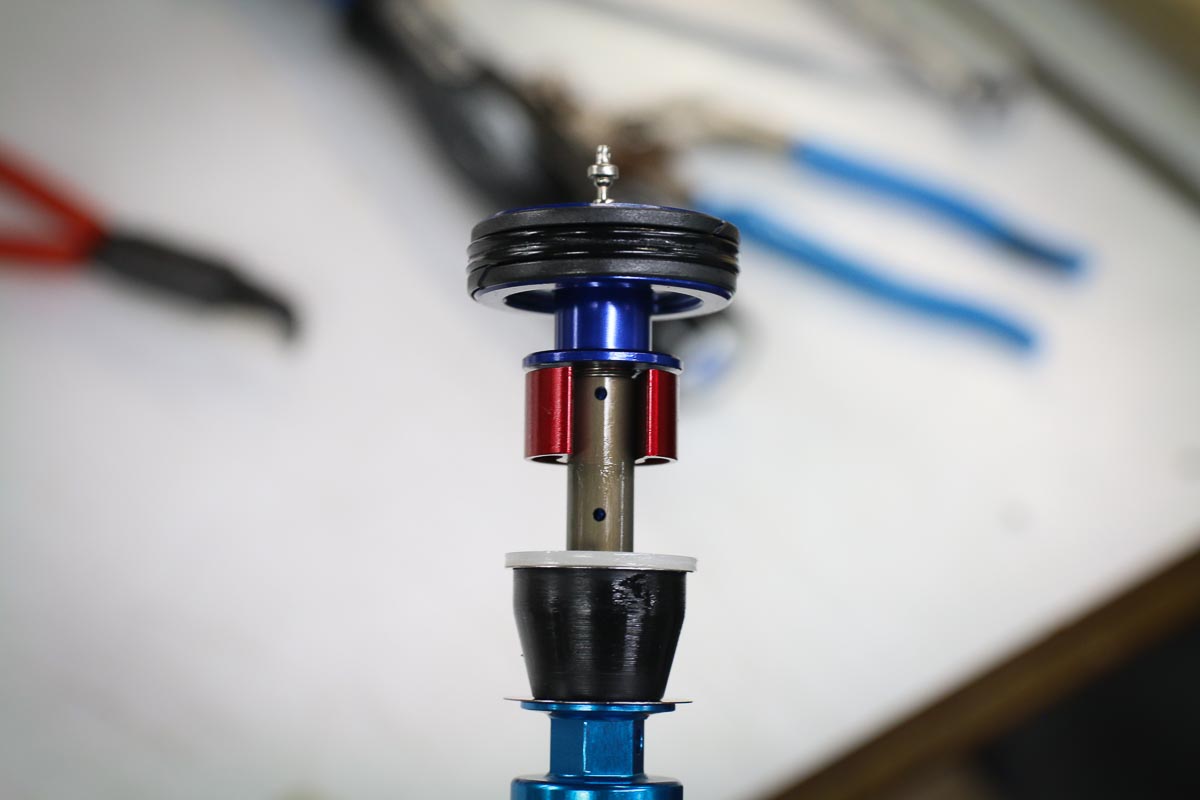
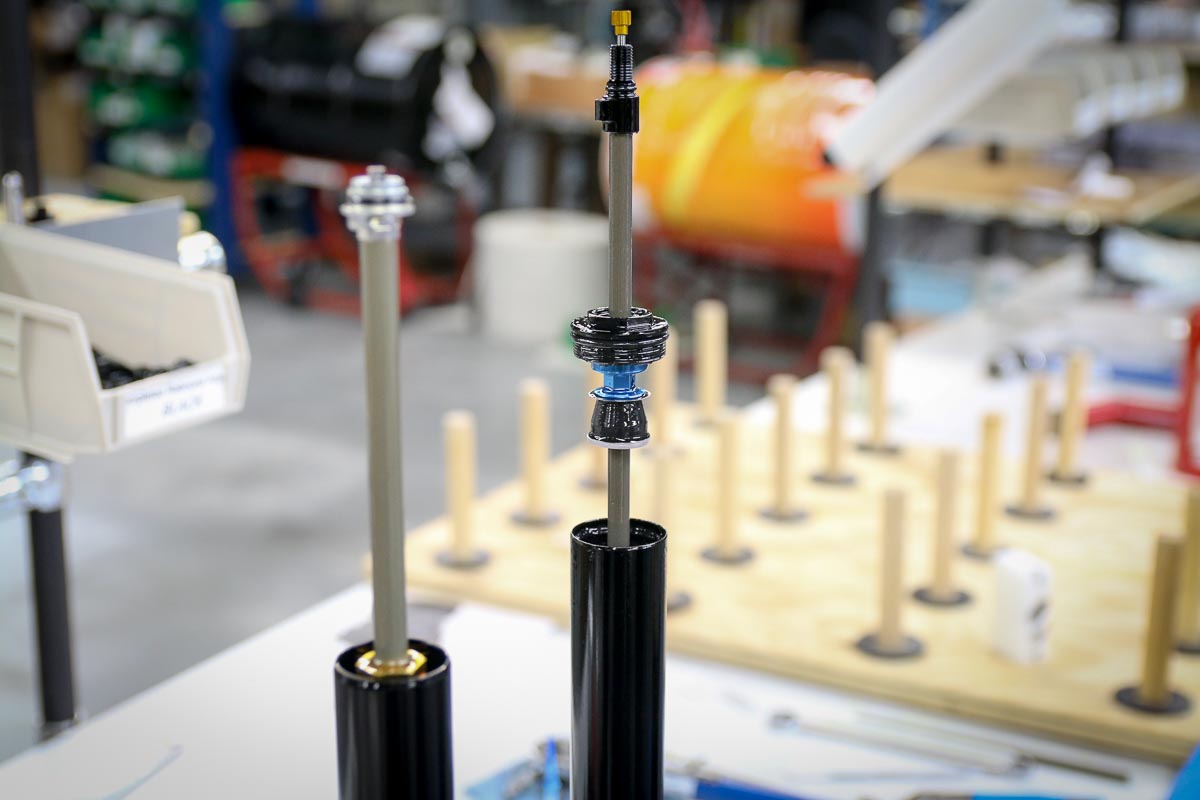
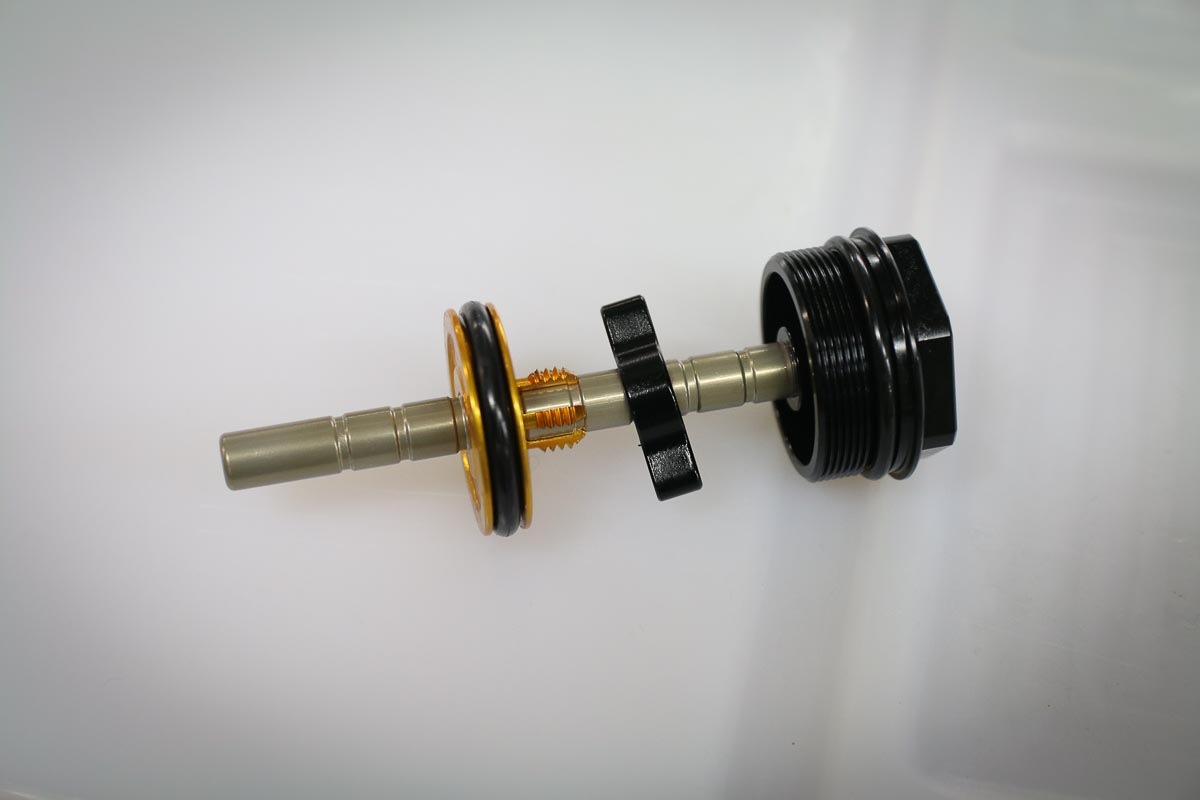
The pictures above show the air spring assembly right side up and removed from the fork, which in this case was just done to show the travel spacer configuration. Since the fork comes with one spacer installed and travel set at 160mm, we needed to add one spacer to drop the travel down to 150mm to match up with the Bronson. Up to 7 spacers can be used for a 100mm travel fork, or you can remove the one stock spacer to bump it up to 170mm. Just make sure you get the spacers between the upper air seal and the white washer as shown above. Then reinstall the Air Seal Head and torque to 16Nm.


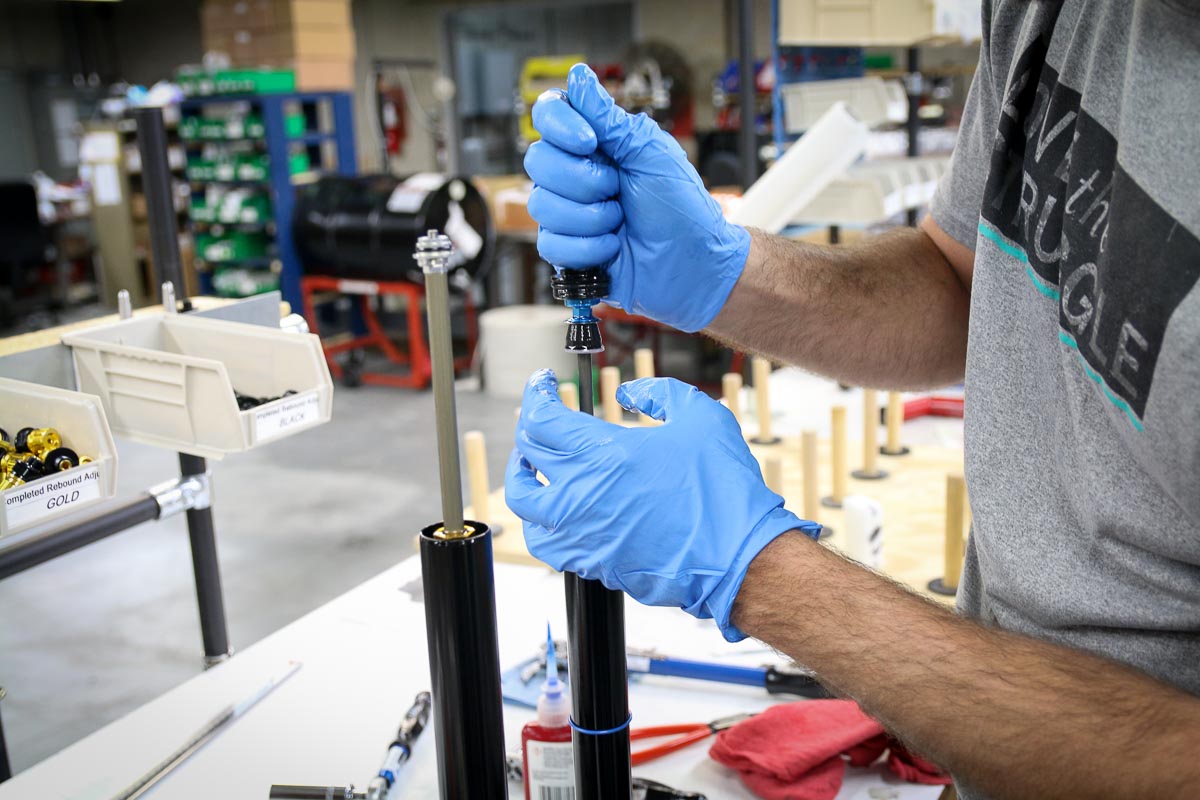
This also gives you a chance to see what’s going on with the Negative Spring Equalizing System. With the button closed, the air valve on the top of the air spring assembly is also closed. But once you press the button for the equalizing valve, it also opens the air valve, allowing air to flow through the valve and into the negative chamber through the holes on the air spring shaft.
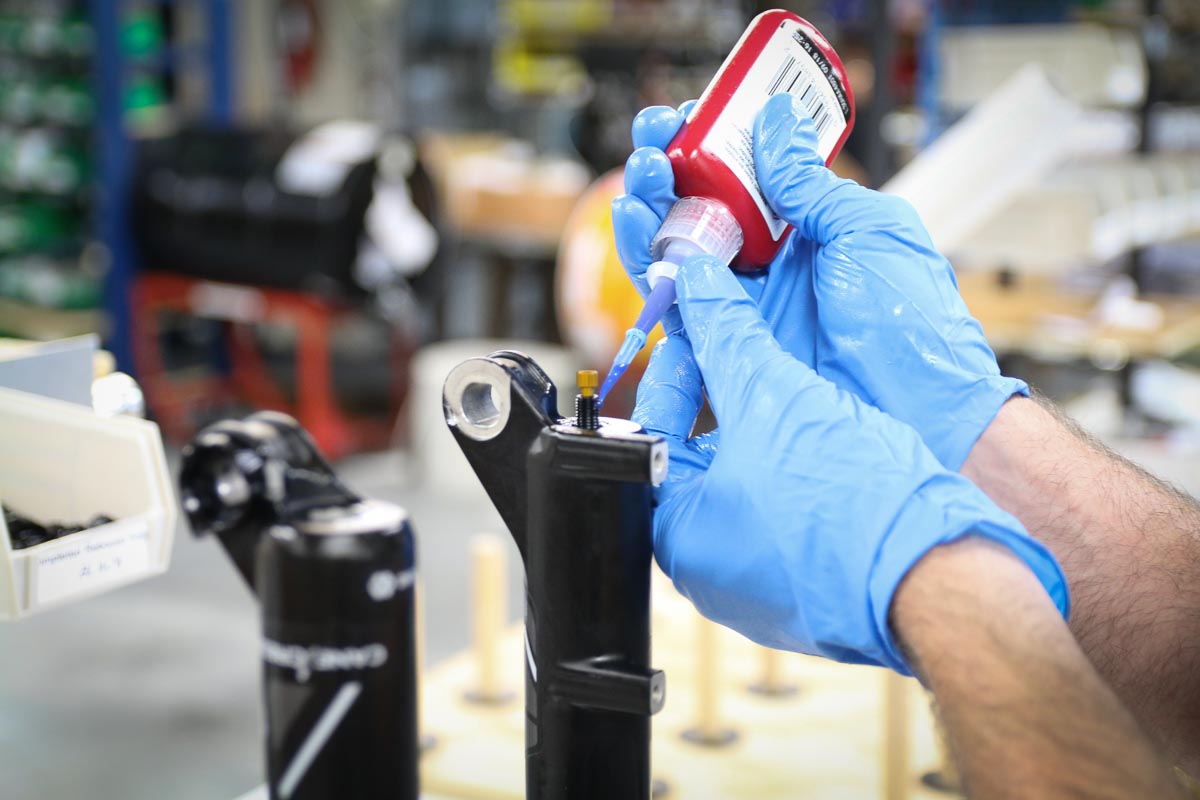
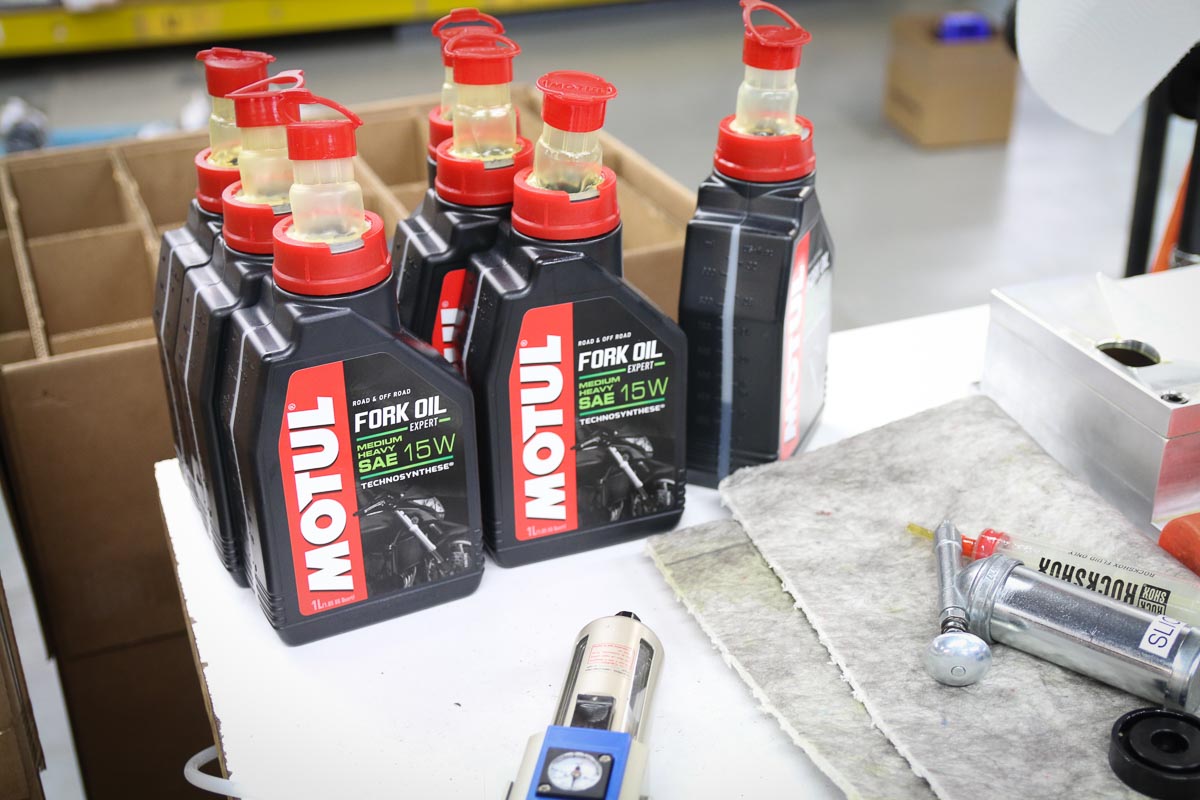
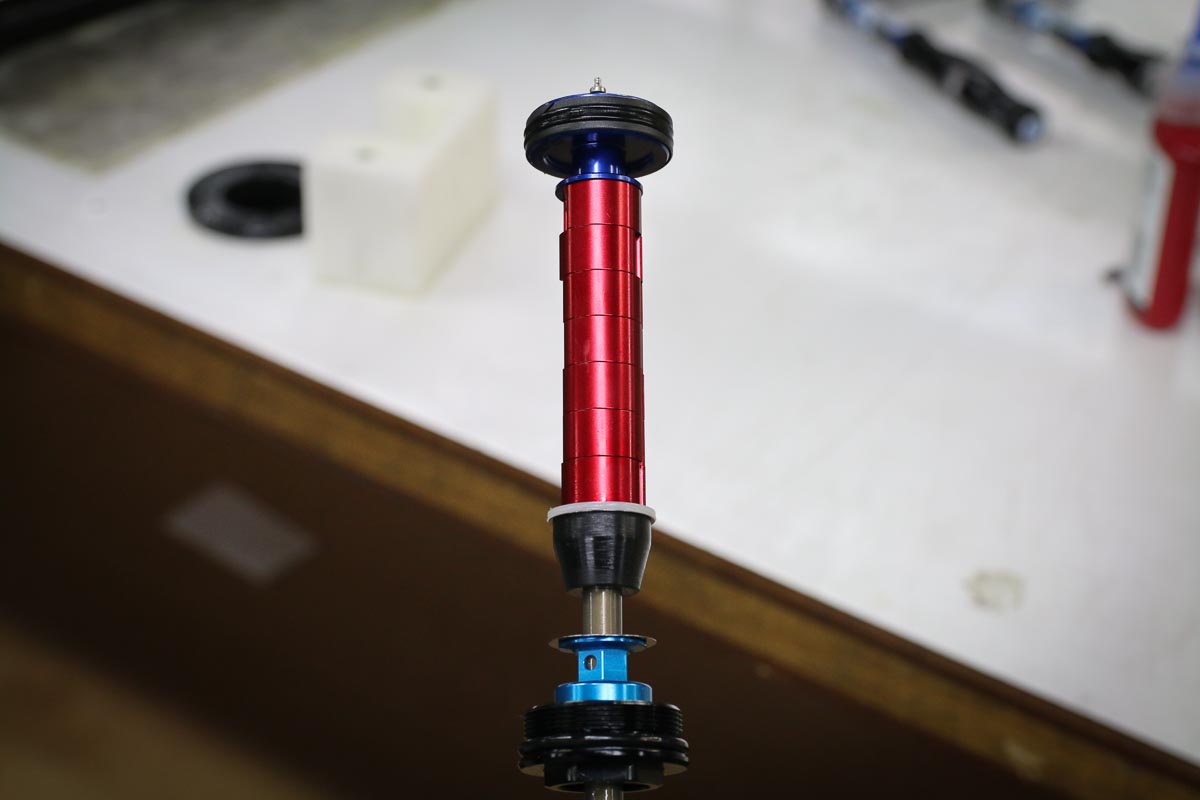
Once the travel spacers are all set, reinsert the stanchions into the lowers, and reinstall the compression rod nut and the rebound nut assembly – Alex likes to dab a bit of blue oil resistant Loc-Tite onto the threads before installing the nuts to 5Nm. If you do manage to spill the splash oil in the process, Cane Creek uses readily available 15w Motul Fork oil in this application. Now you’re ready to set sag – or make adjustments to the air volume with the integrated adjuster.
Air Volume Adjust
Stock, Cane Creek says their air spring curve is similar to that of a Pike with two Bottomless Tokens. If you want a more linear or progressive feel, you can unthread the cap on the air spring side (with all air removed first of course), to access the Air Volume Adjuster. Using a piston head that can be positioned in seven different spots on the rod with a locking wing nut, Cane Creek says for a more linear feel you can either flip the piston upside down, or remove the piston and wing nut assembly completely. For a more progressive feel (more Tokens), lower the piston to a different position and lock it in place effectively reducing the air volume. Technically, there are 14 positions if you count the seven positions with the piston flipped upside down, but that’s getting into very small increments of change.

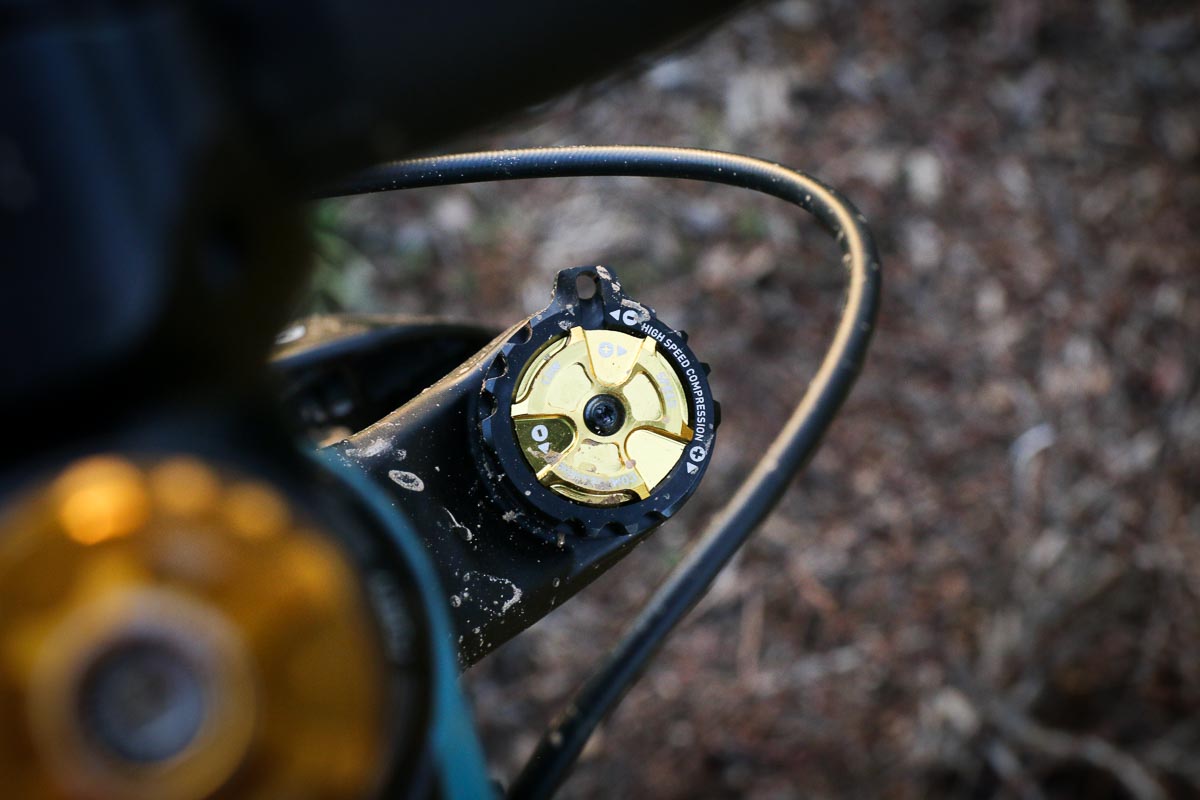
Further adjustments include low speed and high speed damping control on the top of the right fork leg, and a typical rebound adjuster down below.


Torque Caps Need Not Apply
That brings us to the install on the Santa Cruz Bronson we have in for testing, which should have been simple and straight forward. However, thanks to our favorite new standards (or lack thereof), it almost didn’t happen. You see, the DT Swiss 350 hub that came on the front of the Bronson is a Boost 110 x 15 hub with one critical difference – it includes the Torque Cap adapters to use with Rock Shox forks. Since the Helm is not Torque Cap compatible, the end caps had to be removed. Essentially just a wider end cap that fits onto the standard hub end caps with o-rings, and the hope was that removing them would leave us either with a 100 or 110mm hub width. If it was 110mm, it would fit right in without any problem, even if it was 100mm, Cane Creek had Boost spacer kits on hand, so that also wouldn’t be an issue.
After pulling off the Torque Caps and measuring the axle, it turned out to be 105mm. Crap. Thanks to the symmetrical hub spacing with the adapters, placing just one 5mm spacer on one side of the hub would result in the brake rotor spacing to be off (and a need for redishing the wheel). Obviously, DT Swiss must have different end caps for Boost 110 non-Torque Cap forks, but that didn’t help us in the moment.
Fortunately, Cane Creek was able to machine down two 5mm spacers into two 2.5mm spacers – the benefit of having your own machine shop. The 2.5mm spacers, one on each side, allowed the wheel to mount right up. Keep this in mind if you’re planning to buy a Helm and your current bike has a Boost Torque Cap front hub – you may need to order new end caps to get it to work. We’re going to look into this and get the full details for another post soon.

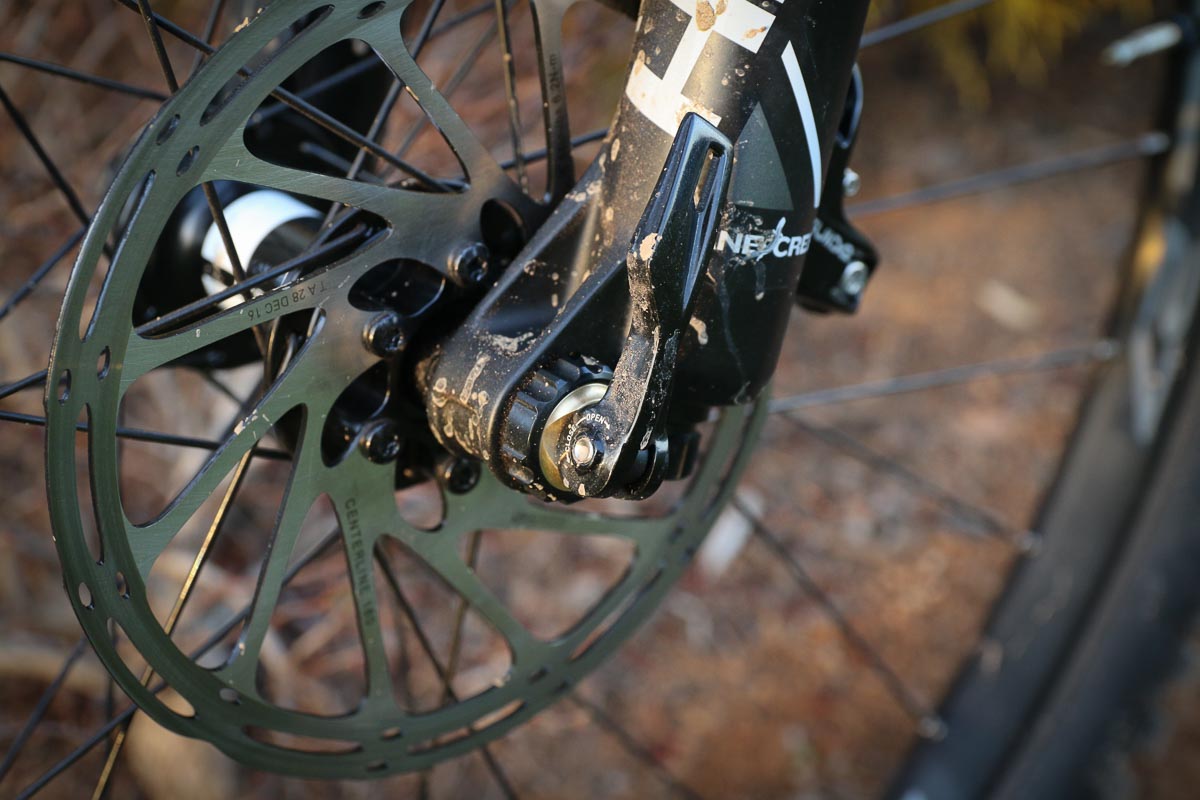

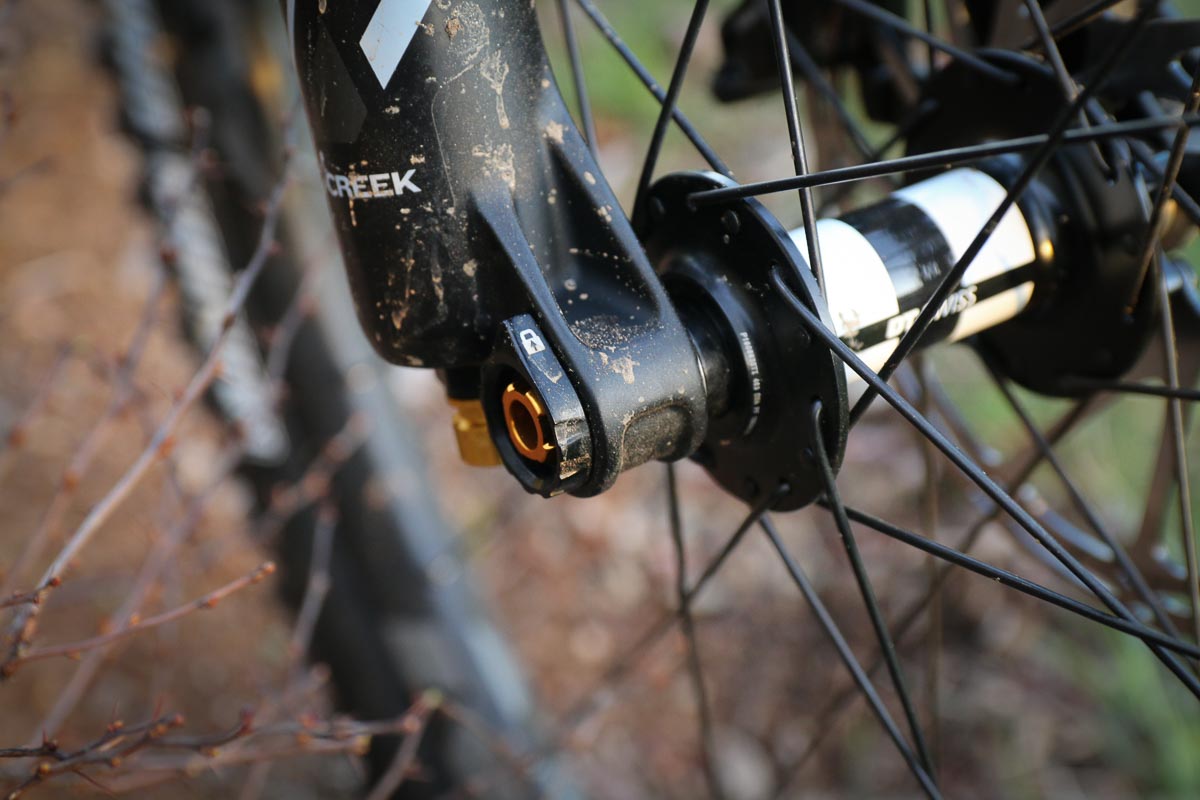
D-Loc the Wheel in Place
The D-Loc axle used by Cane Creek is a little different, but it functions quite well and is easy to get the hang of. The biggest change is the addition of a locking collar on the drive side of the fork. With the collar in the open position, you can slide in the axle (with the side labeled ‘UP’, facing up). Once the axle is installed, the collar is rotated to the locked position, and then you close the lever like any other QR TA. The black knob under the lever allows you to set the preload for each hub. Like the Manitou QR15 axle, the D-Loc is shaped so that it can’t rotate in the lowers to improve stiffness, but on both sides of the fork.
First Impressions
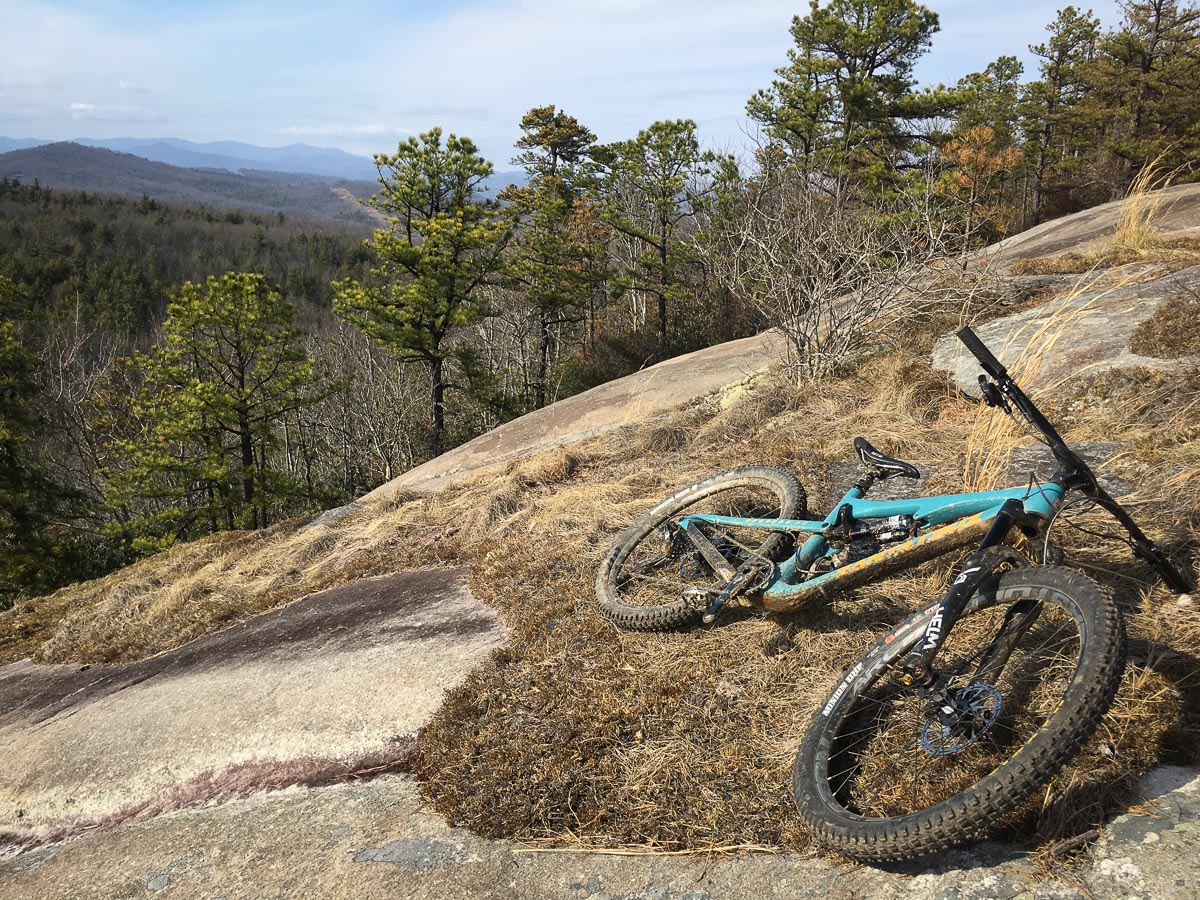
With all of the tech and install out of the way, it was time to ride. While the Torque Cap surprise set us back a bit, we were still able to get out to Bent Creek for some Green’s Lick and Ingles DH action before dark. Fortunately, I had a few more days planned in the Asheville area to get a more thorough first impression. As part of another upcoming story, day two involved a full day at Bailey Mountain Bike Park, while on day three it was a few laps of some familiar trails in DuPont Forest.
With the exception of the travel adjust and helping me set sag, my Helm’s settings were no different than one that you would find new in a box. That’s an important distinction given the fact that the first time I hopped on the bike I was sure there wasn’t enough air in the system. It was just way too supple off the top for a new fork. As the three days of aggressive riding would reveal, there absolutely was enough air in the fork. In fact, I had trouble pushing it through all of the travel even with the fork set at the stock position for the Air Volume Adjust. I’m pretty light with all my gear (~150lb/68kg), and I would say I’m a fairly smooth rider so I’m not that surprised – I can typically get away with a single Bottomless Token in a Pike, so the Helm’s stock setting of about two Tokens sounds about right. Of all the details of the new Helm, it was that plushness off the top without play in the bushings that was the most impressive.
Between the Bronson and the Helm, the suspension performance seemed to be pretty well dialed in as well if you use my Strava times as a gauge. Setting many 2nd best personal times for segments that I’ve only been faster on pre-shoulder injury, I was very happy with the precise handling and control afforded by the front end with a rear suspension system that seemed eager to follow.
There’s still a lot of riding to be done to tell for sure, but the Helm seems like it’s off to an incredible start.
Helm Specs
If you’re looking for a digital version of the Helm manual you can find it here with all the torque specs, otherwise check out their youtube channel for how-to vids, and the site for more details. Available now in limited quantities, you can pick up a Helm for $1100 in black or the limited edition Blue shown on the scale.