
Exposure Lights has been making some of the best and brightest bike lights for years. Recently, the brand updated several of its models, including its top-tier Six Pack handlebar light and Zenith helmet light. Now known as the Six Pack 15 and the Zenith 4, both models have received incremental updates to refine their performance with the goal of making them even better than their predecessors.
We reported on Exposure’s light updates a couple of months ago, and I’ve recently had the chance to see how they perform. I’ve been testing the new Six Pack 15 and Zenith 4 for the past couple of weeks. With short days and warm nights, I’ve been intentionally starting rides late and riding well past sunset. I’ve frankly been blown away by the performance of both lights, which is a good thing, considering the asking prices.
- MSRP: $540
- Type: Handlebar
- Lumens (max): 6000 (Reflex), 4240 (constant)
- Battery: 20,000 mAh
- Charge time: 5 hrs., 22 min.
- Run time: 2 to 36 hrs.
- Weight: 429 g (light and handlebar mount)
- Mounts: Handlebar
Pros
- Incredibly bright
- Self-contained
- Sturdy and stable bar mount
- "Reflex 2.0" system works well
- Digital display
- Excellent build quality
Cons
- Very expensive
- Heavier weight
- Somewhat fiddly setup
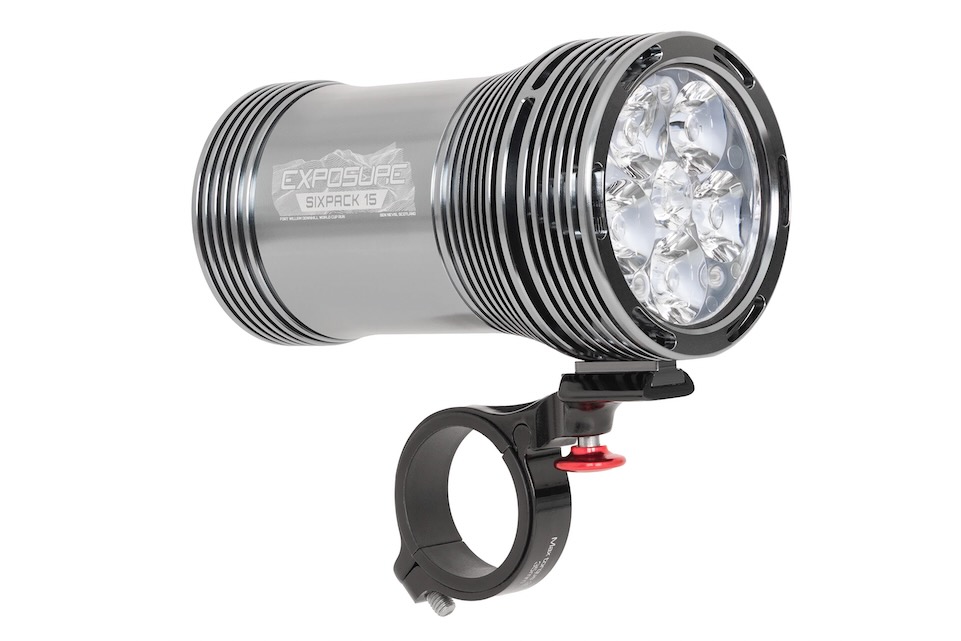
We covered the updates to the Exposure mountain bike light lineup recently, so be sure to check out this article to learn about what’s new with the Six-Pack 15. Here’s a quick recap: it maintains the same distinctive form factor, general design, and many of the features of its predecessors, but it boosts maximum output to 6,000 lumens, steps up to faster USB-C charging, and has a bigger, brighter second-generation OLED display.
Setting up the Exposure Six Pack 15
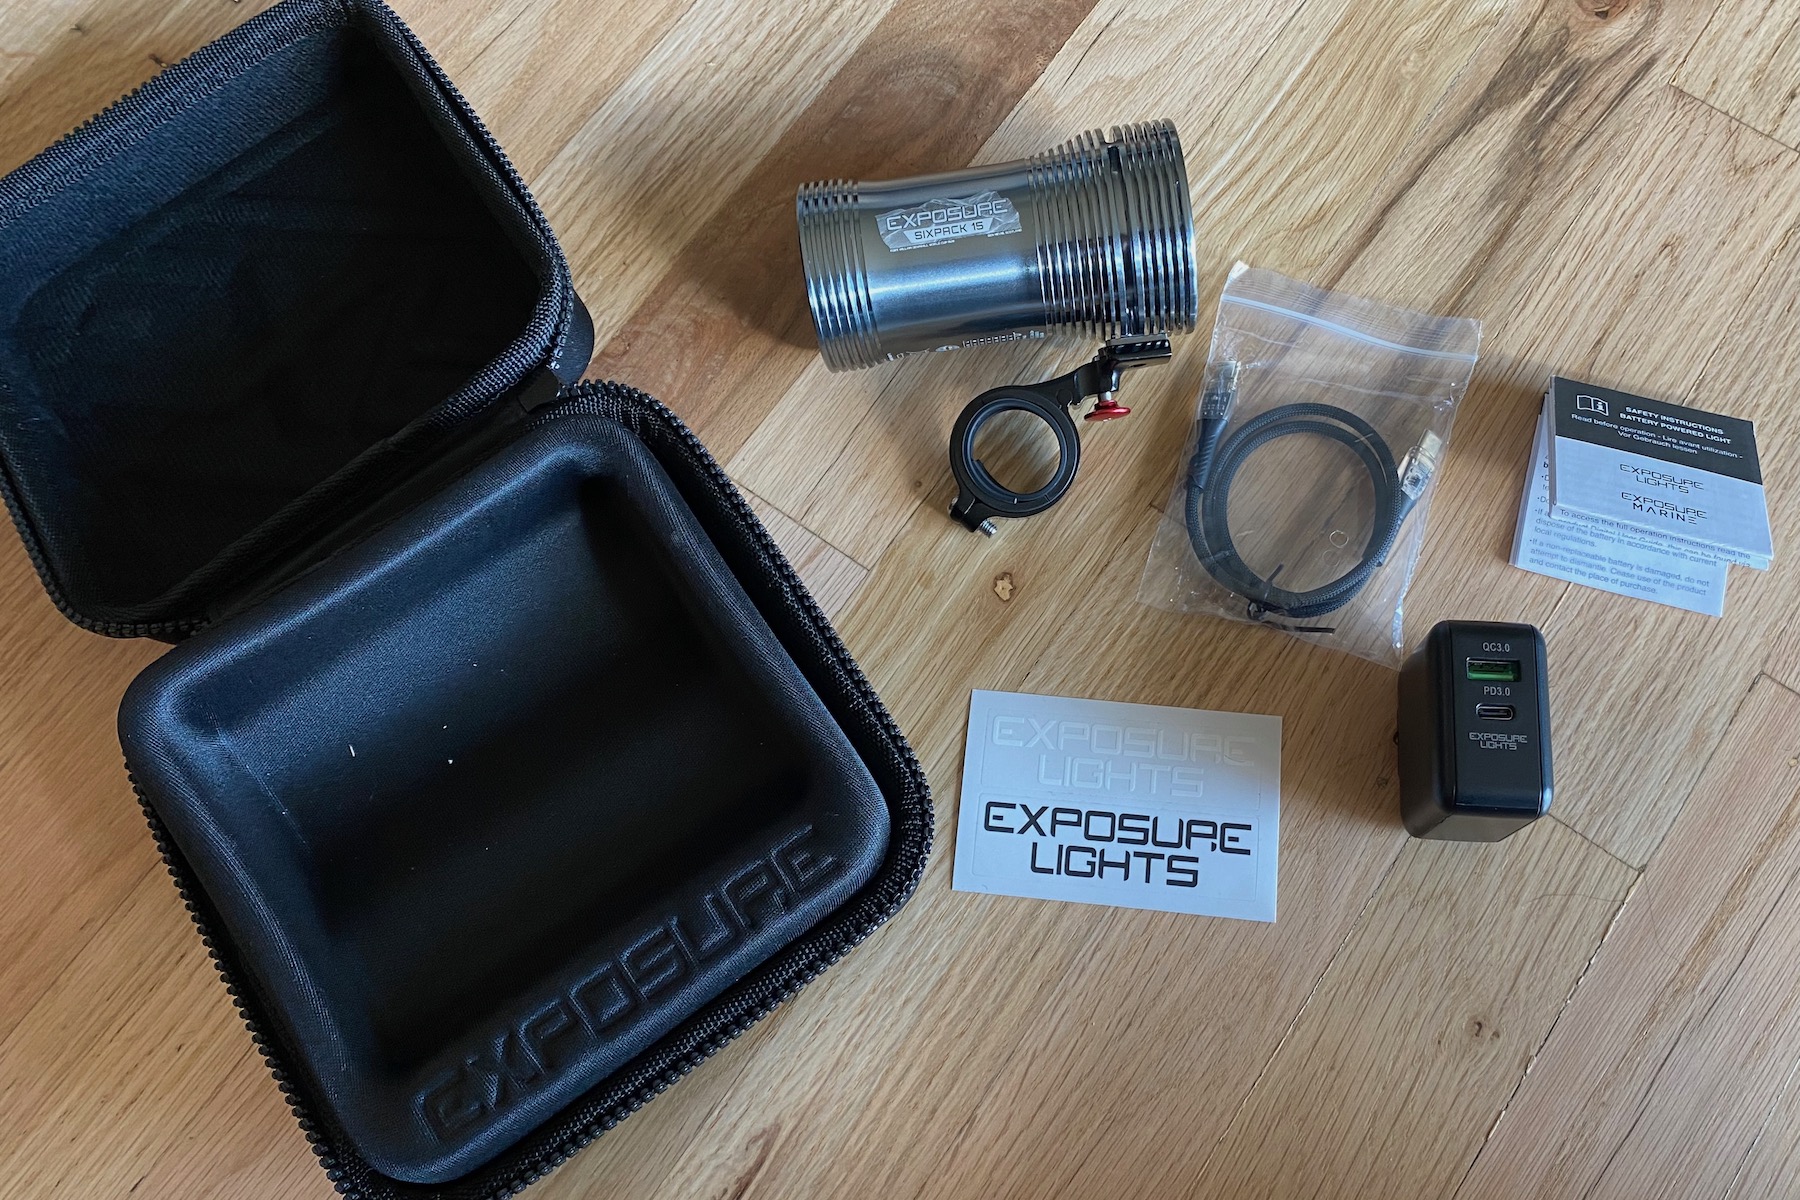
Exposure Lights makes a good first impression with a high-quality zippered storage case housing the Six Pack 15. The light sits in a cradle with a space underneath holding the handlebar mount, rubber shims for 31.8 mm and 35 mm handlebars, a USB-C cord, a USB-A and USB-C compatible charging cube, and a printed user guide. The storage case appears to be just as well-made as the light, ensuring that you have a way to keep it protected and organized for years to come.
Initial setup of the light includes fully charging it before use. That’s as simple as removing the charge port cover and plugging it in using the included charging plug and cord. It’s incredibly easy to monitor the charging status of the light, as the large OLED display on the back of the light shows the battery charge as a percentage when it’s plugged in, and two lights blink green while it is charging. To view the battery percentage again, simply press the button. The blinking green lights turn off when the battery is fully charged.

When you turn the light on — with a double tap of the control button — a startup screen indicates the program number (1 through 7) you are in, along with the run times for the light modes in that program. Switching between the light modes (high, medium, and low) is as simple as pressing the control button once. When you switch between light modes, the screen displays the remaining runtime in hours and minutes for the selected mode. There’s no guesswork here.
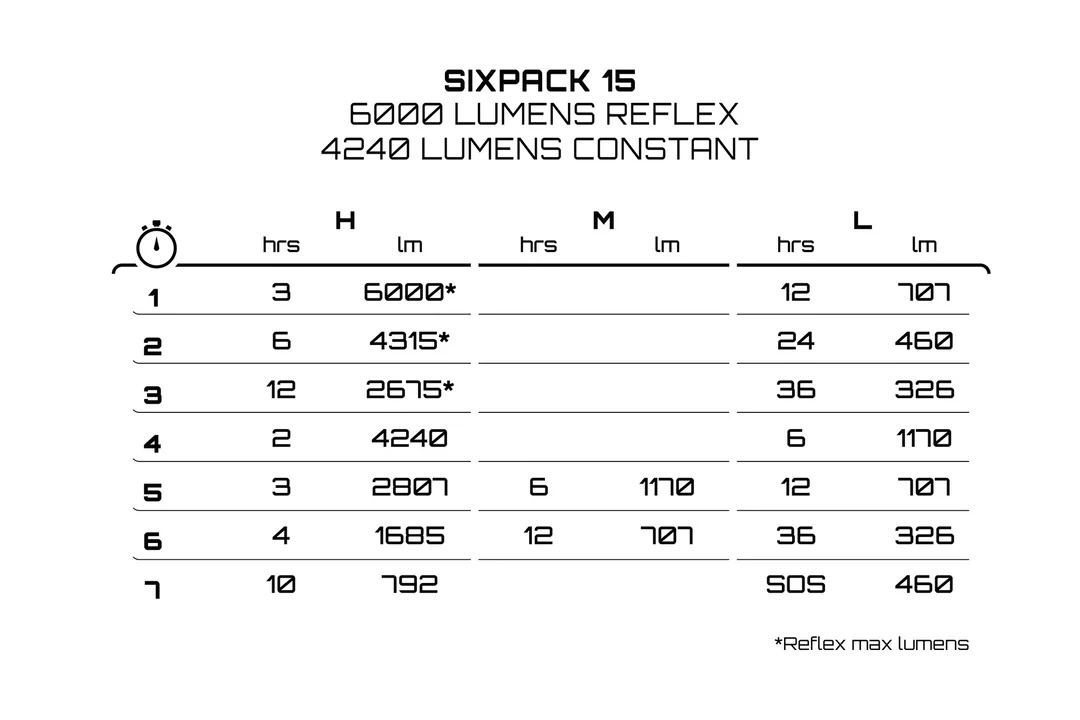
Switching between the 7 different programs of the Six-Pack 15 isn’t too difficult, but it takes a little time and fiddling with the control button to find the program that works best for you. It’s not the most intuitive system, but if you follow the instructions, it is fairly straightforward. Basically, there are three Reflex 2.0 programs — where the high setting adjusts automatically — and four standard programs with varying levels of brightness. Check out the chart below to see the options.
Reflex 2.0
The latest version of Exposure’s unique Reflex feature is known as Reflex 2.0. This system uses “thermistors, 3D gyros, and 3D accelerometers built into the light to adapt the brightness automatically based on air flow, gradient, and cornering forces.” Basically, the light senses your speed, the terrain, and whether you’re riding up or downhill, and adjusts the brightness accordingly in real time. It gets brighter when you’re riding fast downhill and dims when you’re riding uphill at a slower pace. This prolongs battery life while also ensuring the light is at the appropriate brightness level, without the need to take your hands off the bar.
According to Exposure, it takes Reflex twenty minutes to calibrate to your riding style, then it remains in the light’s memory for subsequent rides. Apparently, it also recalibrates if/when riding conditions or style change enough to warrant it. While that all sounds great, it’s even better that it actually works.
Attachment
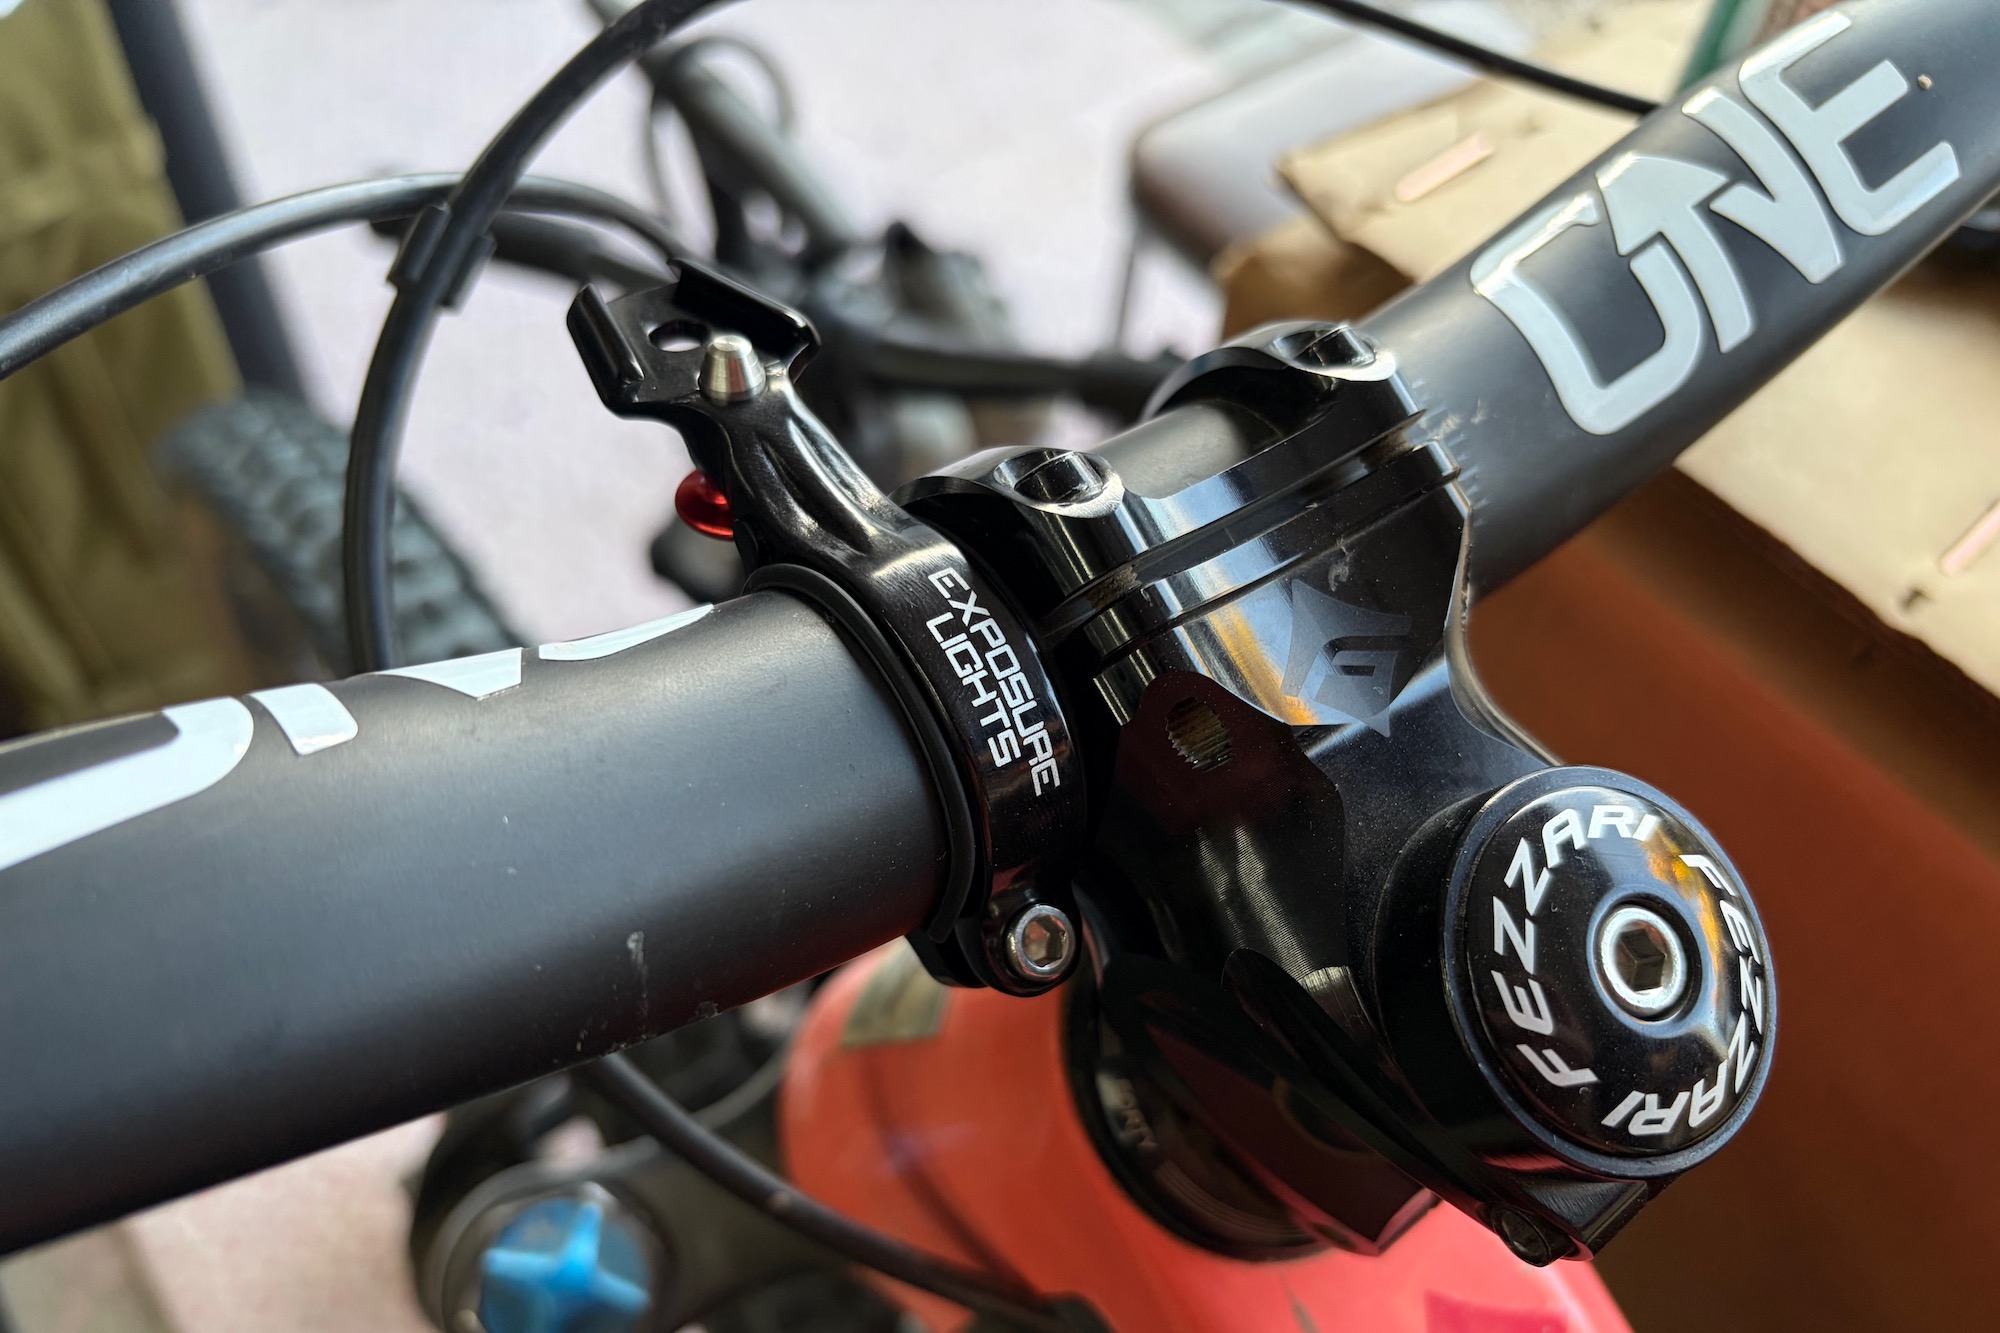
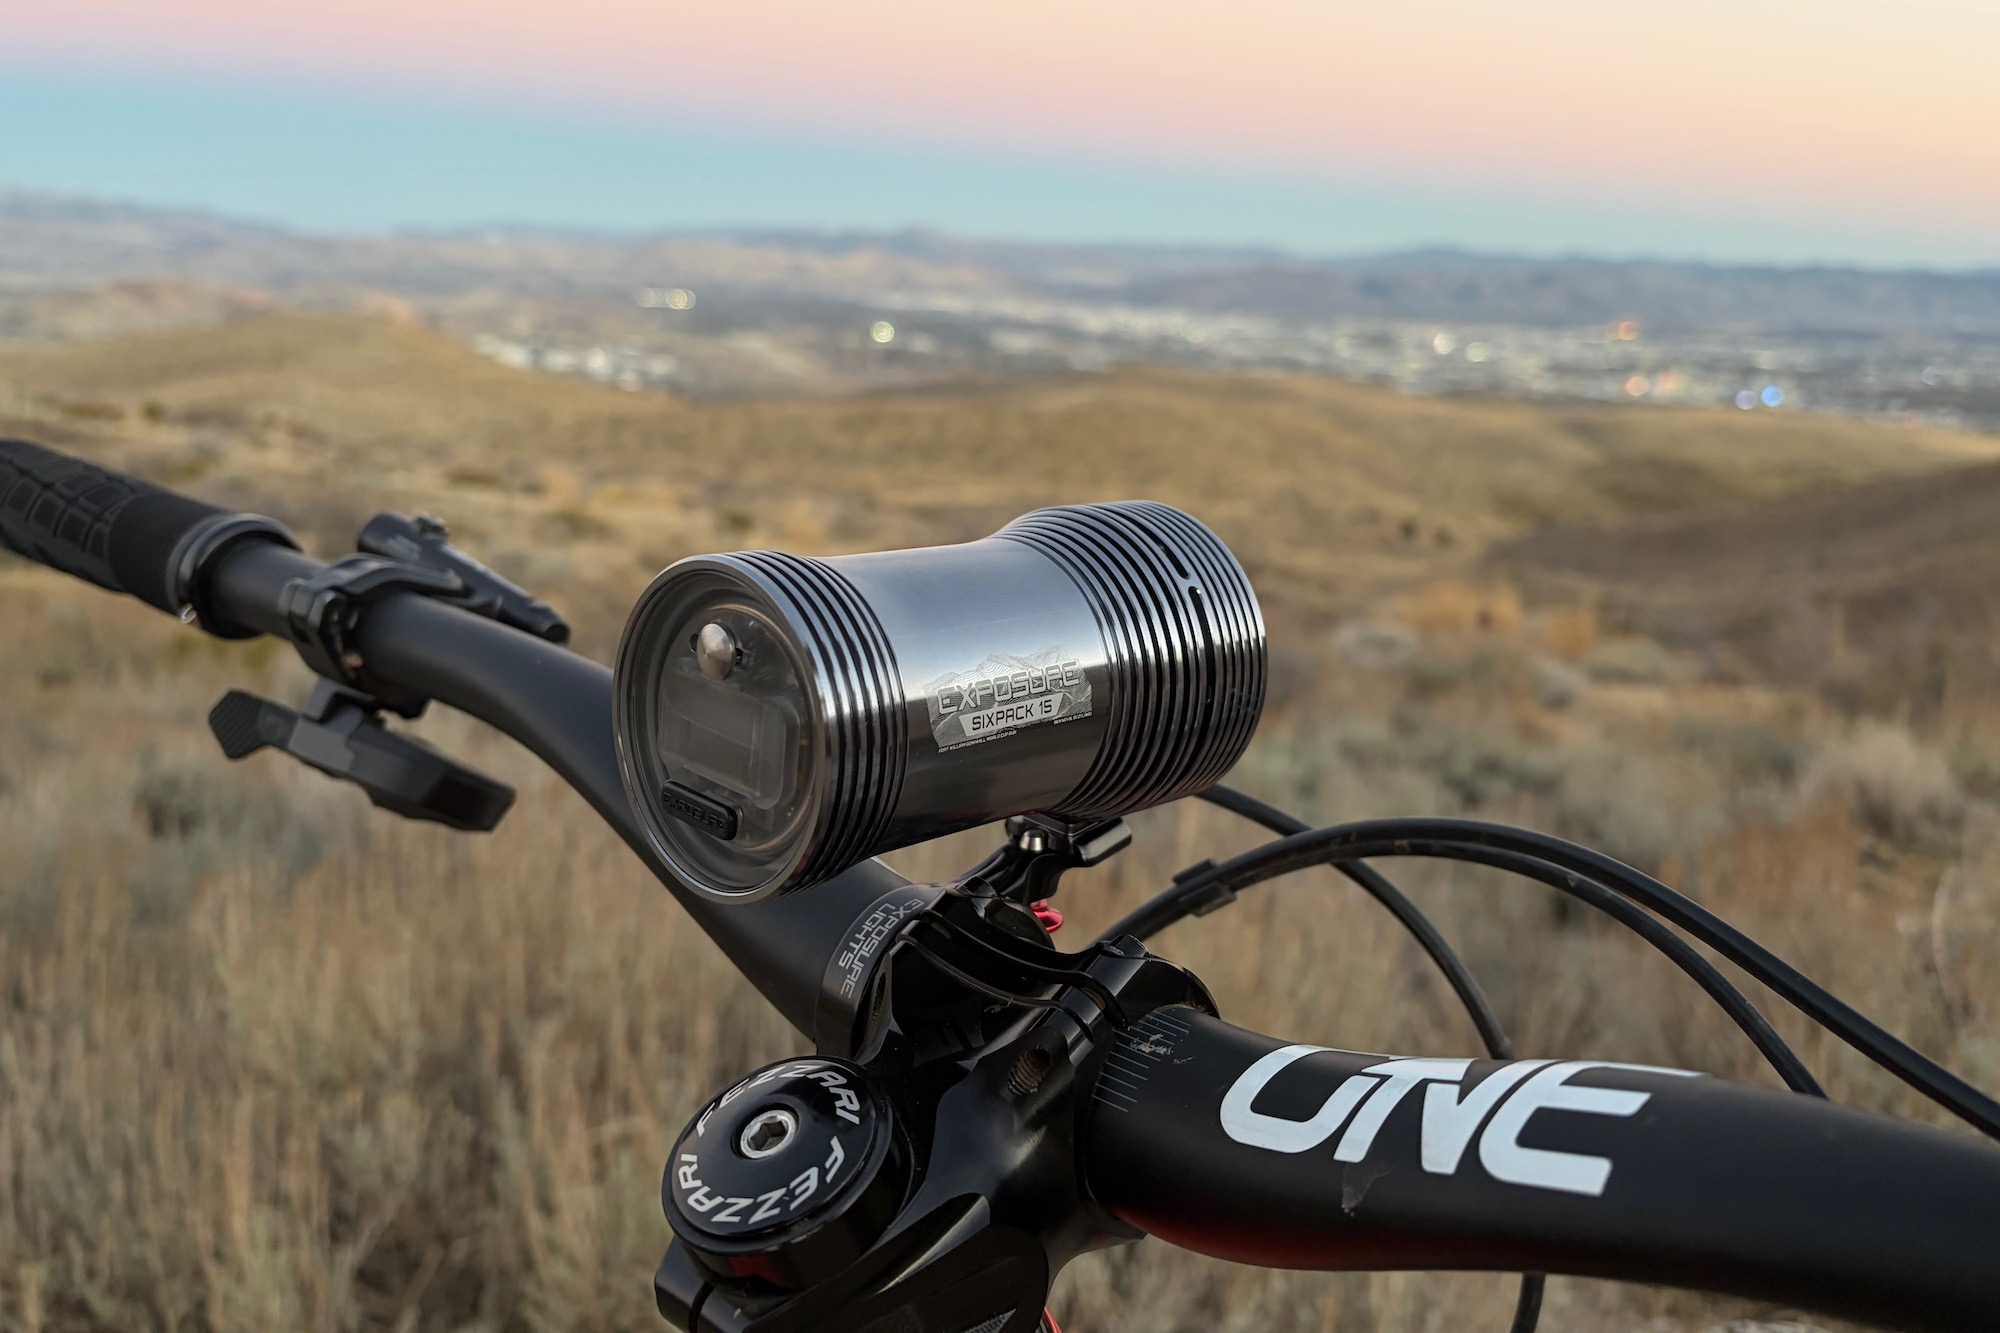
Exposure also impresses with its high-quality, sturdy, and user-friendly handlebar mount. The Six-Pack 15 is a fairly hefty unit, weighing in at 403 grams, but this mount is up to the task of keeping it secure on the handlebar. It’s a bolt-on, machined aluminum affair that has a semi-hinged design where the lower half joins the upper with a slide-in system, making it pretty easy to attach to the handlebar. A regular hinge would probably be easier to deal with, but this works, and it comes with rubber shims for both 31.8 and 35 mm handlebar diameters.
It felt a bit snug to me on the first attachment, but that’s part of what makes this mount so darn stable and secure. Once tightened, this thing isn’t moving at all. The triangular mounting bracket on the bar clamp mates with the triangular cleat on the bottom of the light, and a quick-release pin secures it in place. All of these parts are machined from aluminum and are very precise. There’s no free-play at all in the system, yet it’s exceptionally easy to attach and detach the light from the mount. It puts other handlebar mounts that I’ve used to shame.
Exposure also sells a stem fit bracket, stem cap mount, and replacement handlebar mounts separately.
Size and Weight

The Six Pack 15 is a self-contained unit, so there are no cords or external battery packs to deal with. That said, it houses an internal 20,000 mAh battery, which explains its considerable size and weight. At 403 grams for the light and 429 grams including the handlebar mount, this is among the heaviest self-contained lights around. It’s also one of the brightest and longest-lasting self-contained handlebar lights, so… Still, it’s lighter than some models with external batteries. For example, the Knog Blinder X 1800 weighs 433 grams, with a maximum brightness of 1800 lumens and a 10,000 mAh battery — plus you have to deal with an external battery and cord.
But, the Six Pack is definitely not lightweight, and it’s almost the same size as a 12-ounce can. This isn’t the type of light that I’d throw in the pack “just in case” it gets dark before I finish my ride. The size and weight put it more in the “definitely” category for me, where I’m 100% sure I’ll be using it and probably even starting my ride with it attached to the handlebar.

Other Features
- Power Bank Mode: With the light off, the Six Pack 15 can be used as a power bank and supply power to other devices via USB-C.
- Reserve: When your on-screen runtime is up and you think you are completely out of power, the Six Pack’s Reserve mode kicks on and provides an additional 30 minutes at ~10% power.
On the Trail
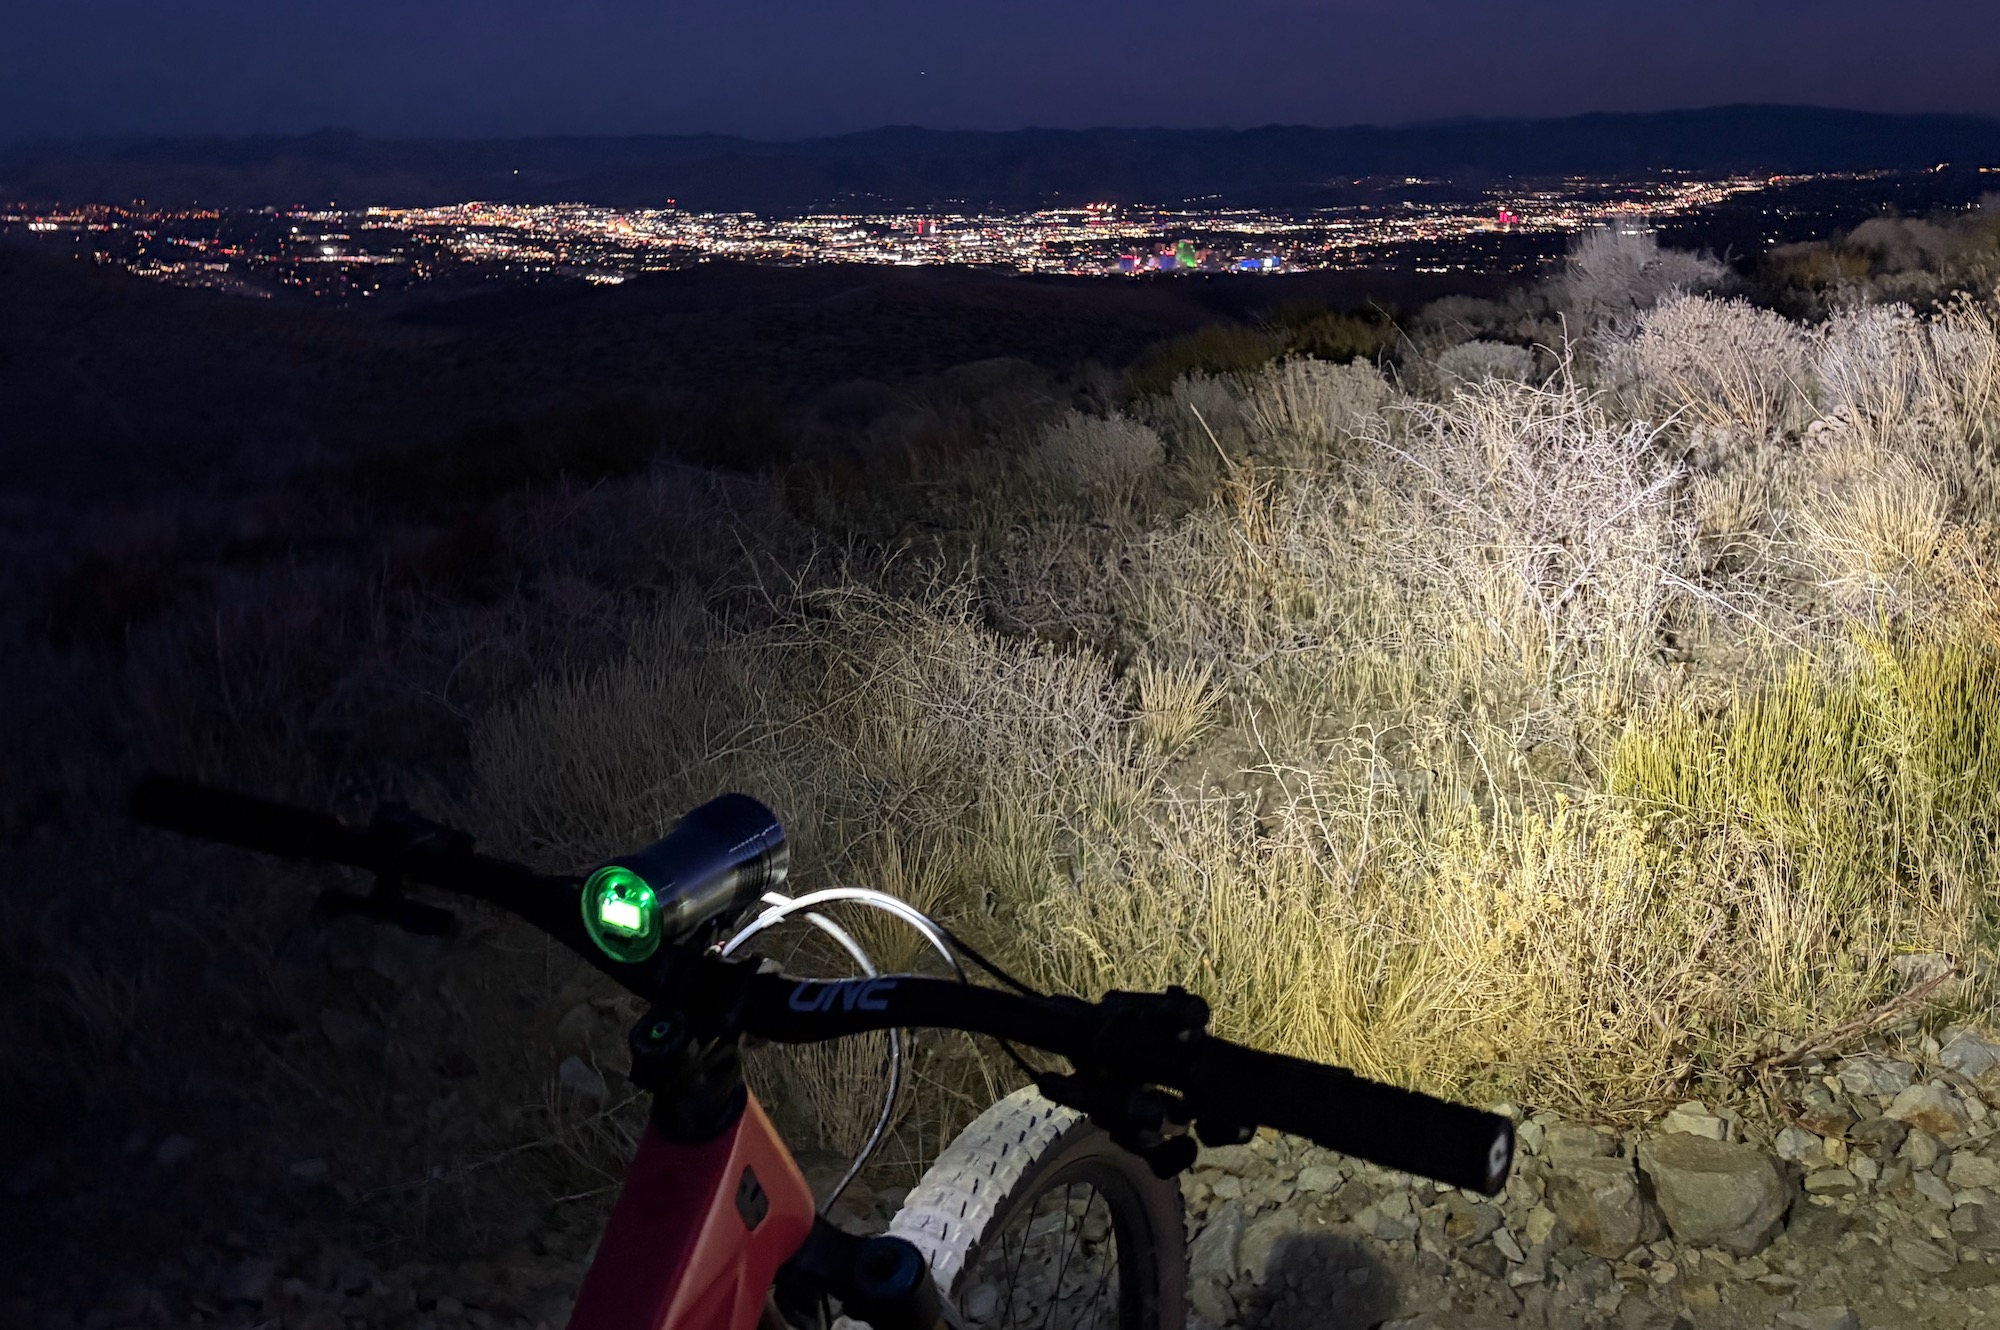
The Six Pack 15 is by far the brightest, most advanced, and most user-friendly mountain bike light that I’ve ever used. This light throws a beam way down the trail and is exceptionally bright, without completely washing out details. The Reflex 2.0 feature works very well, and you can basically just ride without the need to think about the light or make any changes to its brightness. The huge battery lasts a very long time, and the display makes it incredibly easy to know how much juice you’ve got left — not that you really need to worry about it.
With six “White XPL2” LEDs, the Six-Pack 15 easily casts light a couple hundred feet down the trail. It’s as bright as you could ever want, yet the beam is clean and well-balanced with no hot spots or inconsistency. You’d be very hard-pressed to outrun this light on the higher brightness settings. On straight, fast sections, I’ve found that I can comfortably ride the same speed as I would in the daylight. It’s not the widest beam around, but it’s so bright that it essentially doesn’t matter. I’ve had no issues whatsoever seeing details straight ahead and on the periphery of the trail.


I’ve mostly been using programs 1 and 2 with Reflex 2.0 and have been loving it. I’ll say that the max output of 6,000 (program 1) and 4,315 (program 2) lumens is crazy bright and, honestly, probably completely unnecessary most of the time. Realistically, half of those numbers is still adequate, but since it automatically dims and adapts to my speed, pitch, and the roughness of the terrain, it really hasn’t felt like overkill. It works surprisingly well, and I haven’t felt compelled to override it, except for a few longer climbs where I switched it into the low settings. Those who prefer to have more control over the light can easily find it in the non-Reflex programs.
And I haven’t come even close to depleting the battery. I also don’t go for night rides that exceed a couple of hours, so that’s part of it. Even if I did, I could still achieve 12 hours of runtime on Program 3 with Reflex 2.0, topping out at 2,675 lumens. For my needs, I can easily go for numerous shorter rides without even needing to plug it in.

- MSRP: $305
- Type: Helmet, can also be used on handlebar
- Lumens (max): 2,360
- Battery: 6,000 mAh
- Charge time: 2 hrs., 45 min.
- Run time: 1 to 36 hrs.
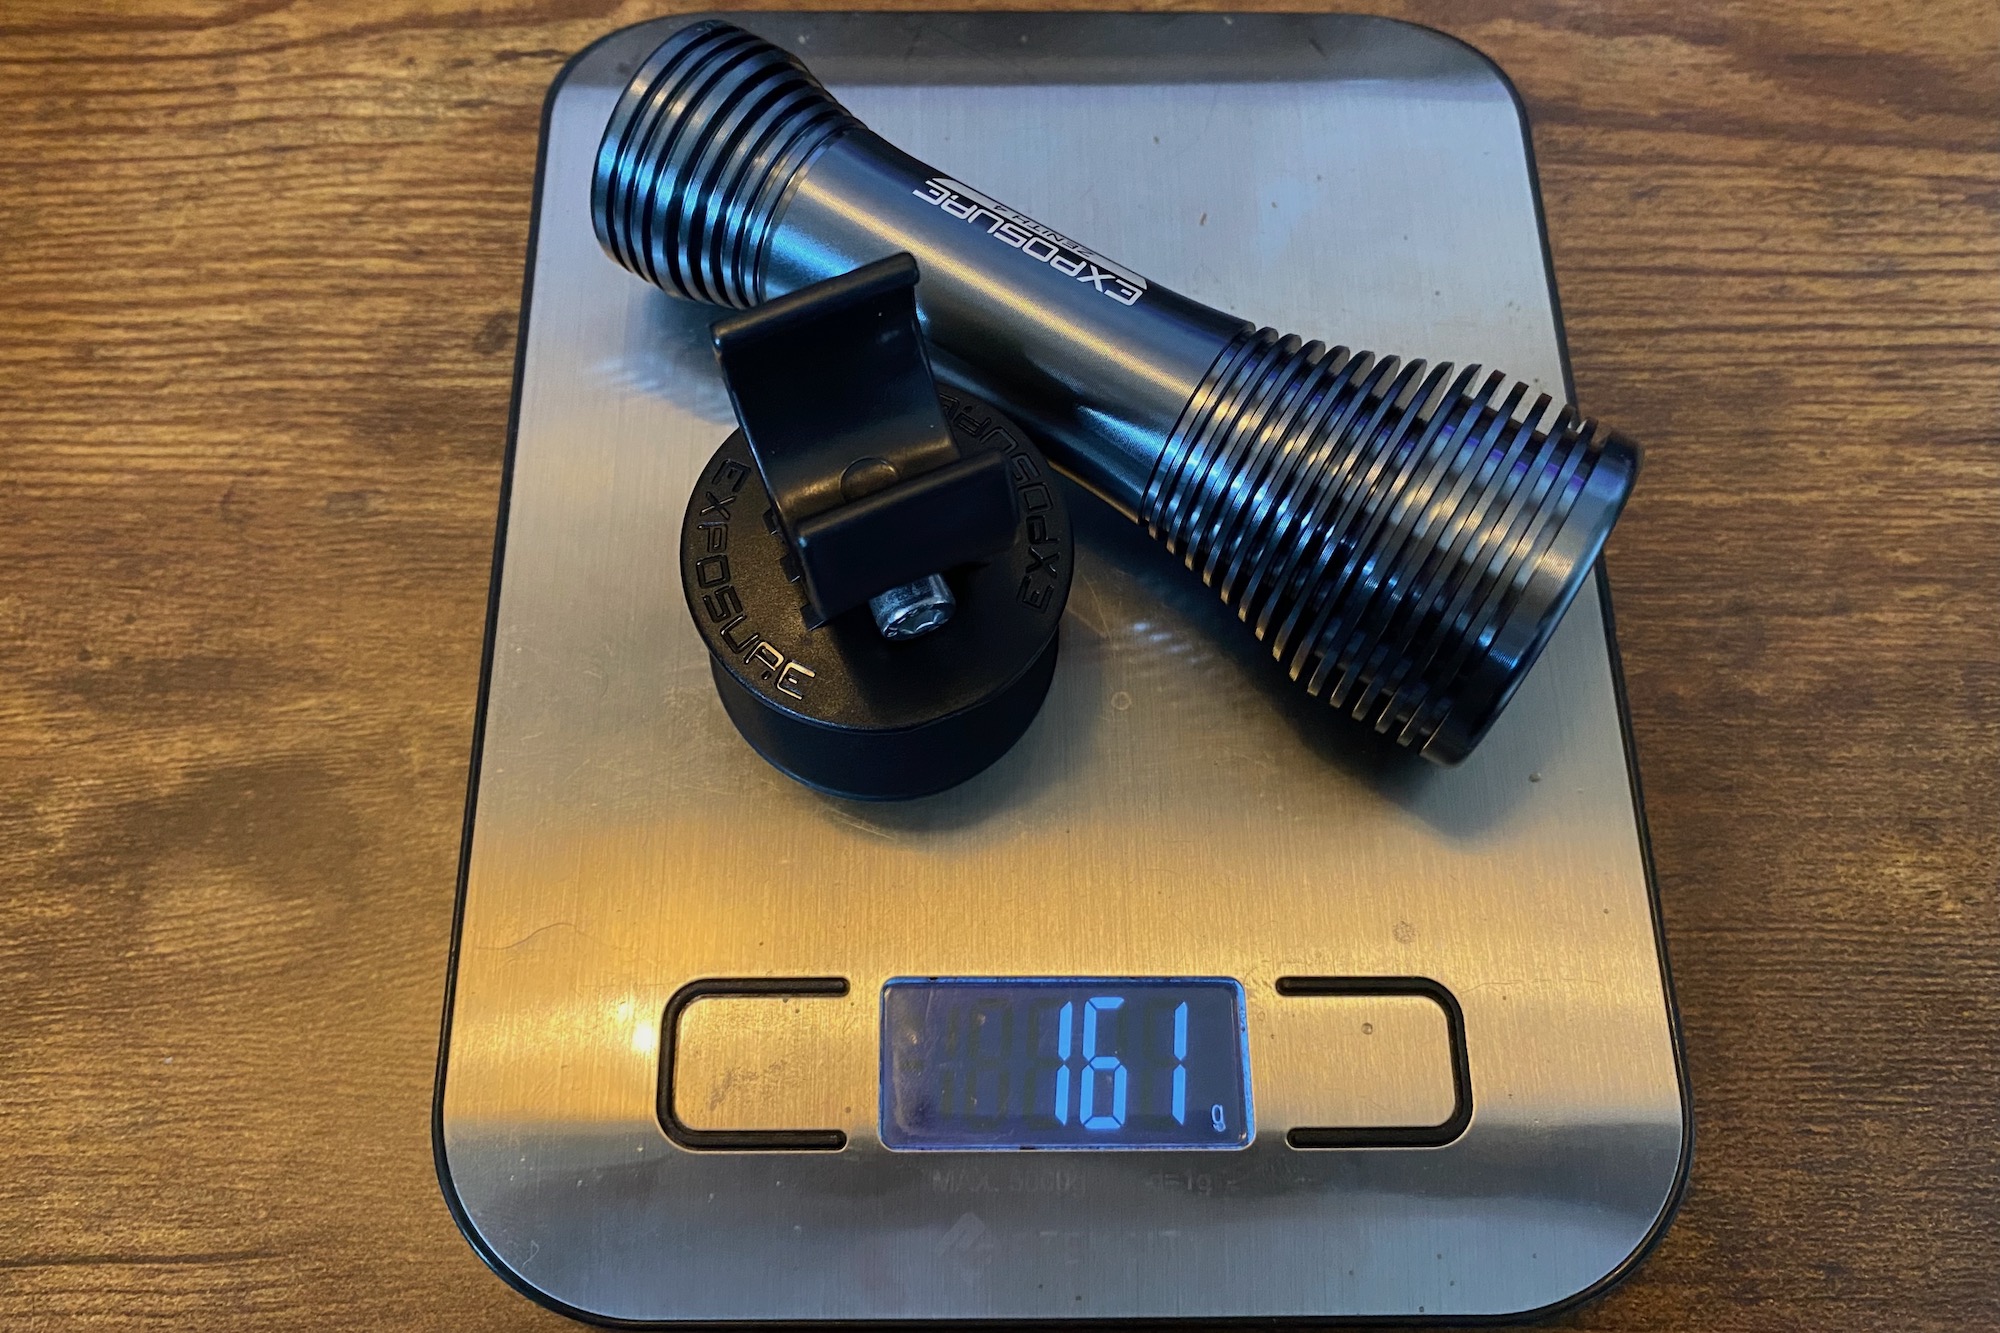
- Weight: 144 g (light only), 161 g (light w/ helmet mount)
- Mounts: Universal helmet mount and universal handlebar mount
Pros
- Very bright
- Excellent quality and finish
- TAP technology works well
- Self-contained
- Reasonable weight
- Nice storage case
Cons
- Expensive
- Fairly short run time on max output
- Universal helmet mount may not work with all helmets
- Another mid-brightness setting option would be nice
The Zenith 4 is Exposure’s top-level helmet light. Like the Six Pack 15, the Zenith was also recently updated, and the 4th iteration boasts upgrades like a slight increase in brightness to 2,360 lumens as well as a 20% increase in battery capacity to 6,000 mAh. Somehow, Exposure managed to do this while keeping the weight the same as the previous version.
Setting up the Zenith 4

Like the Six-Pack, the Zenith 4 also comes in a very nice storage case. It holds the light and protects it from damage while also keeping the helmet mount, bar mount, lanyard, and printed instructions together and organized. This light is an investment, and this case is a nice touch to help protect it.
Before the first use, it is recommended to fully charge it, which is easy using the included USB-C cord. The Bi-Color LED blinks green when charging and turns off when the charge is complete. Without a screen like the Six-Pack, the Bi-Color LED serves as the Zenith’s display, with different colors used to indicate battery life (“Fuel Gauge”) and light modes. It’s fairly simple to understand: green = high, amber = medium, and red = low.
The Zenith 4 has six light programs to choose from. The stock setting is program 4 with a high setting of 2,360 lumens and 435 lumens in low. Changing the program isn’t too challenging, but again, it isn’t the most intuitive. Just follow the directions and you’ll figure it out. I went through the process to check out the other settings, but came back to program 4 — the brightest — for high-speed night riding. I also activated the TAP feature, allowing me to adjust brightness on the fly by tapping the light body.
Attachment

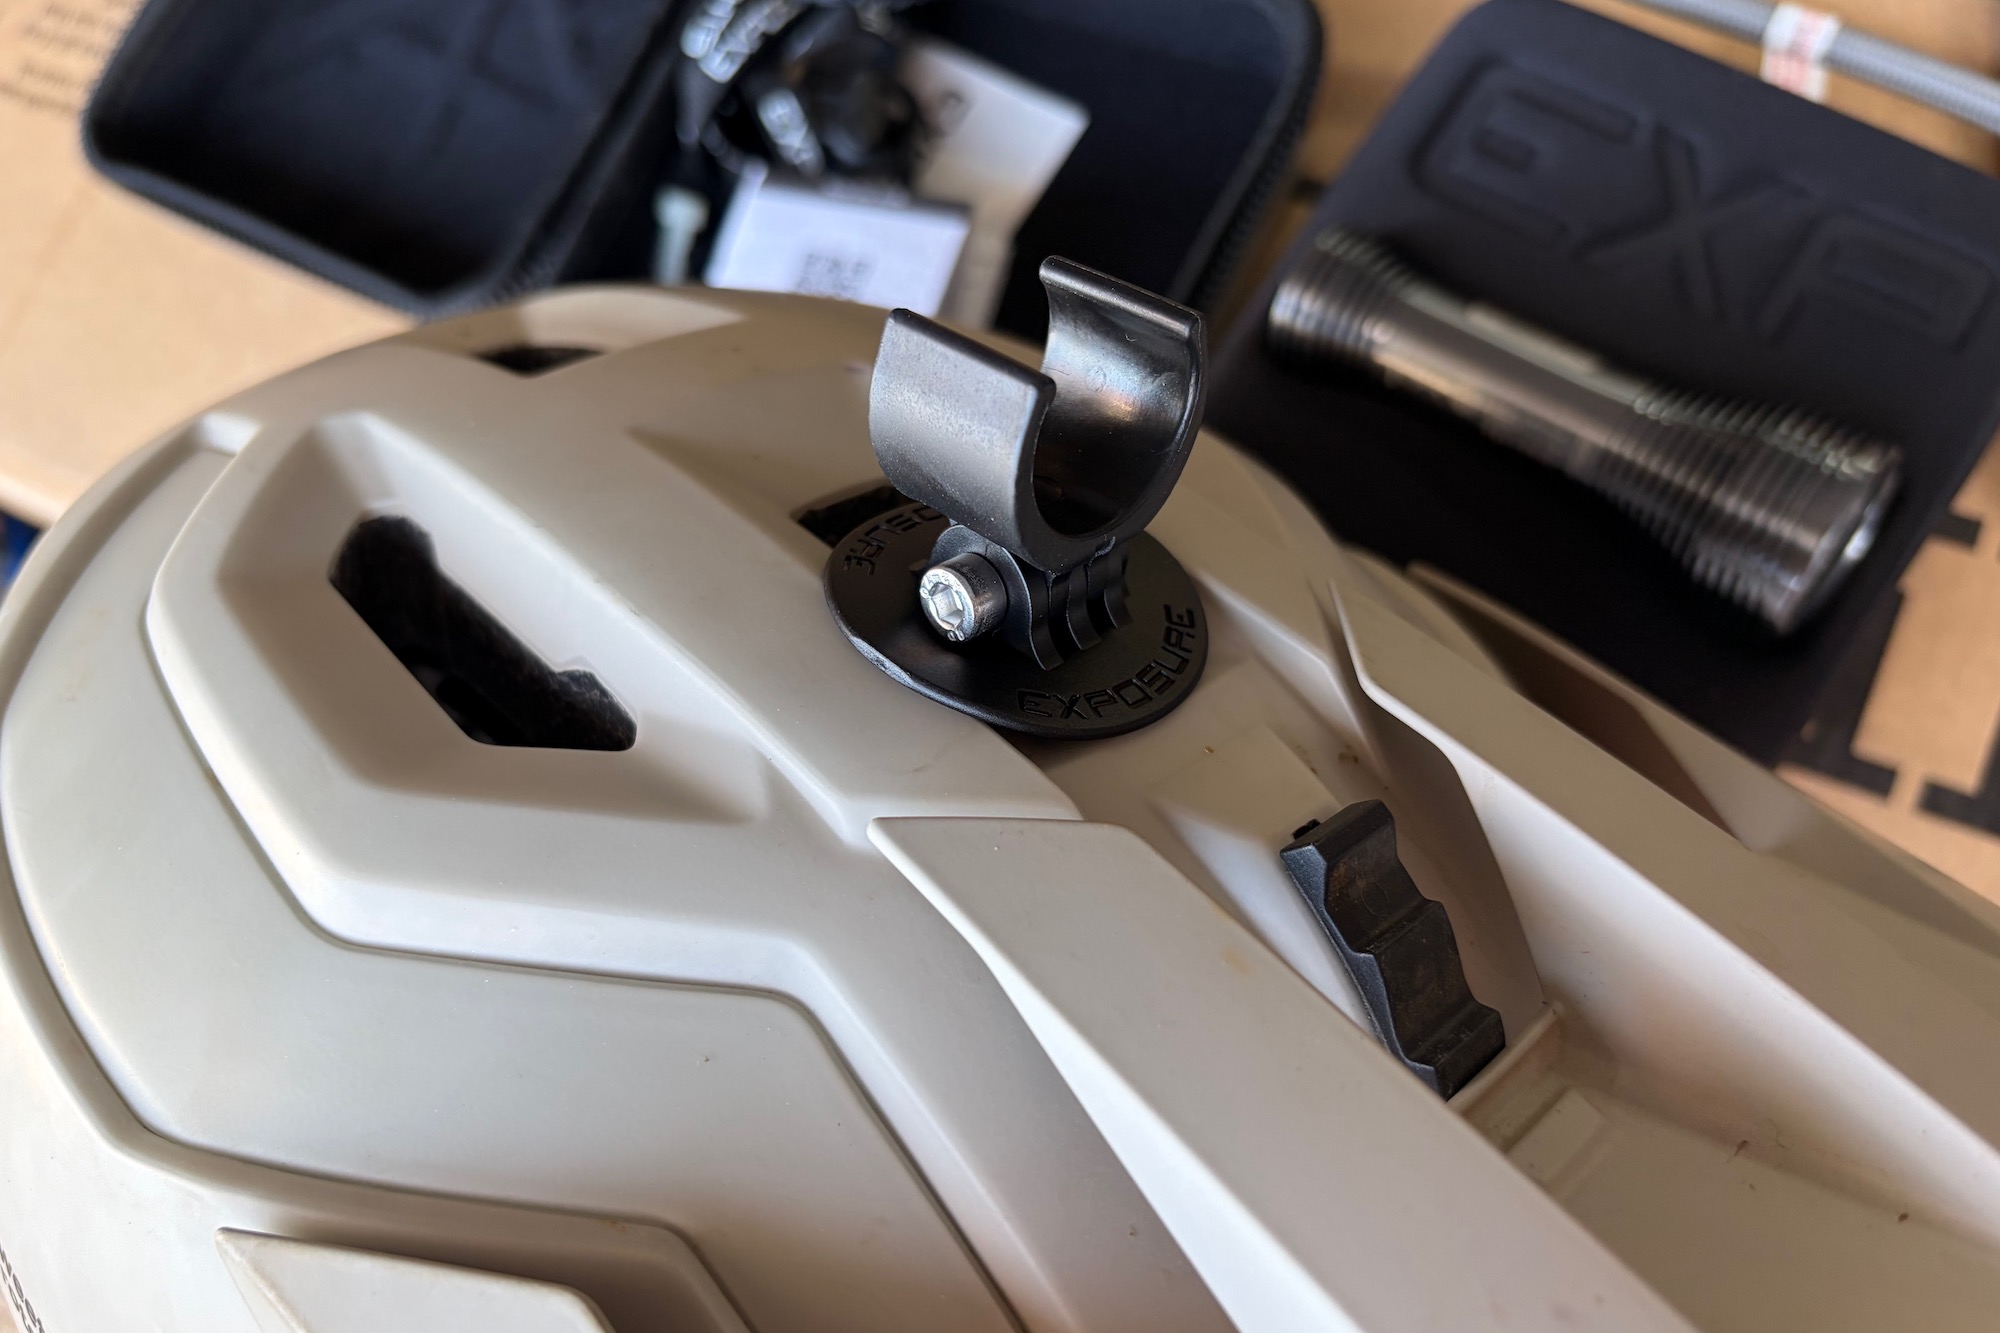
The Zenith 4 comes with a universal helmet mount with upper and lower halves that clamp the helmet shell through a vent. It comes with two lengths of screws to accommodate different shell thicknesses. This mount should work on the majority of mountain bike helmets, but that will depend on the vent layout and the width of the vent opening in question. I had no issue installing it on my Smith Forefront 3 and my Sweet Protection Bushwhacker 2Vi MIPS helmets. Exposure also sells a stick-on action cam-type mount for $25.
The Zenith 4 also comes with a stretchy rubber universal handlebar mount. It should fit most handlebars if you’d rather mount it on the bike. Additionally, Exposure sells a machined, bolt-on handlebar bracket that’s compatible with the Zenith 4. All of the Zenith 4’s mounts use the same type of curved plastic clip that squeezes the light around the thinnest part of the body. The helmet mount seems to have a very secure hold of the light, but it could be knocked off by a low-hanging branch or during a hard crash. So, Exposure also includes a lanyard to connect it to your helmet or handlebar if desired.
Size and Weight
The Zenith 4 is a reasonably sized device. It’s somewhat comparable to a small handheld flashlight, measuring 120 mm in length and 41 mm in diameter at its widest point, the light head. If anything, it’s a little longer than most other helmet lights, so it has a slightly different appearance compared to other models. That said, it doesn’t look excessively large or out of place, but it has a unique shape.
At 161 grams, including the helmet mount, the Zenith 4 is also a pretty reasonable weight. For comparison, it weighs about 50 grams more than the Outbound Lighting Hangover, but it also offers more than double the brightness at maximum output and has 2,500 mAh more battery. The affordable Niterider Lumina Pro 1200 weighs 193 grams. Compared to the Knog Blinder X 1800 (or 2300), the Zenith 4 is roughly the same weight as just the light head and mount at 153 grams. The external battery pack adds an additional 280 grams to those lights for a system weight of 433 grams.
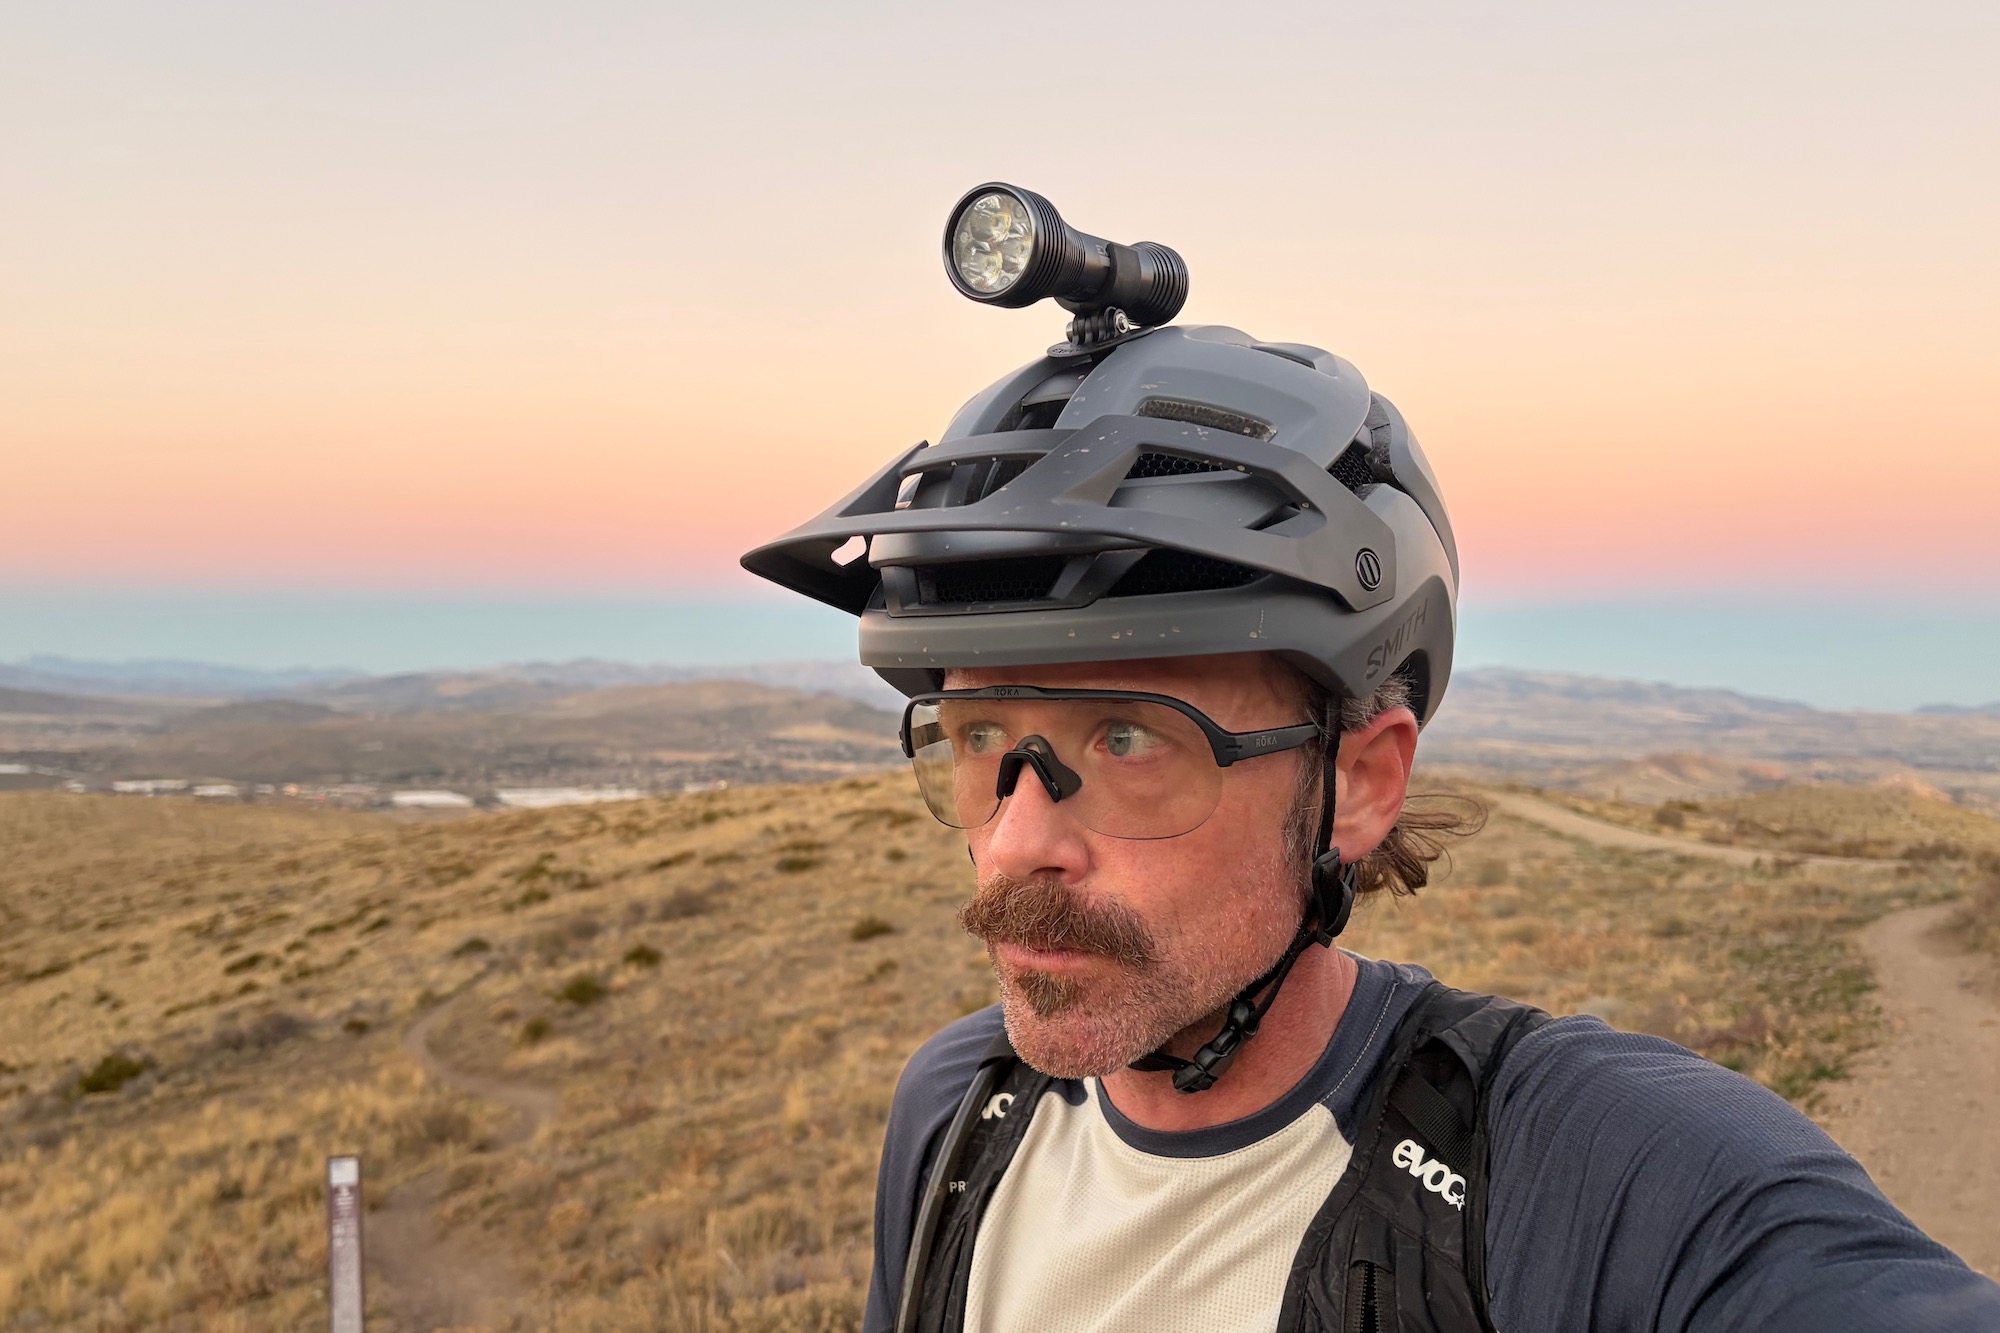
The weight of the Zenith 4 doesn’t go unnoticed on the head, but it isn’t heavy enough that it causes any neck fatigue or my helmet to shift around over rough terrain. Of course, that’s with my helmet’s adjustment system as tight as I could get it, but that’s the norm for me with any helmet-mounted light to prevent unwanted movement.
On the Trail

I paired the Zenith 4 with the Six Pack 15, and this light combo is by far the highest-performing and brightest I’ve ever ridden with. The focused beam of the Zenith complemented the slightly wider beam of the Six Pack while ensuring there was light shining exactly where I was looking. Once set in the desired light program, this light was extremely easy to use, with the TAP feature making it nearly effortless to change light modes on the go.
The 2,360 lumen output of the Zenith 4 is impressive and among the brightest options for a self-contained helmet light. At full blast, you could probably ride without a handlebar light altogether, as this light is bright enough to get the job done on its own. It comes set in program 4 with high mode at 2,360 lumens and low mode at 485 lumens. In this program, I could easily climb and ride slower sections of trail in the low setting while preserving battery. On the descents, the high setting lit the trail remarkably well, casting light impressively far, making it very easy to see and ride as fast as I wanted.

When paired with the Six-Pack 15, it was like riding in the daylight. Light doesn’t shine around corners, obviously, so the only limitations that I felt while riding with this light combo were directly related to line of sight. I’ve never been able to see as well or ride as confidently in the dark as I could with this setup. Don’t take my word for it, check out this video of Brendan Fairclough riding Fort William at night.
On top of that, the TAP feature makes the Zenith 4 the most user-friendly helmet light that I’ve tried. Not that pushing a button to change light modes is all that hard, but being able to just tap the light body is much easier. No need to locate a button, just tap the light with moderate force, and it changes modes. I really enjoyed TAP, but if you don’t want to use it, you can also just keep it off and use the control button.
My test rides were approximately 2 hours in length, starting just before sunset and lasting around 1.5 hours with lights on. Not surprisingly, I never came close to depleting the battery, even when using the light at max output liberally. In program 4, my preferred setting, the claimed run times are 1 hour at 2,360 lumens (high), or 6 hours at 485 lumens (low). Using low for climbs and high for descents, I burned through ~30% of the battery in an hour and a half. The other programs with lower outputs provide much longer run times.
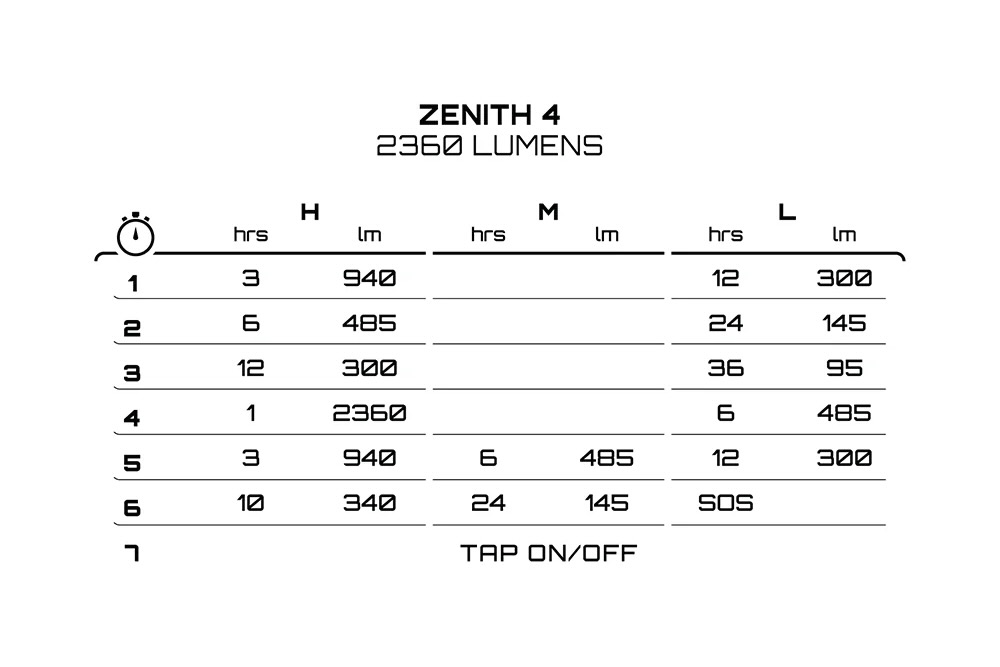
Which brings me to my primary complaint about the Zenith 4. There’s a large jump in brightness between program 4 (max output of 2,360 lumens) and the next brightest programs, 1 and 5 (max output of 940 lumens). That’s a sizable gap, and I think it would be nice to have another option in between with a brightness of around 1,500 lumens or so.
Exposure Lights: My Takeaway

I expected a lot from these lights, and my expectations were exceeded. With the Six Pack 15 and Zenith 4 combo, I could ride at night with virtually no limitations on speed or terrain choice. I’m not sure how many people are trying to ride aggressive terrain at full speed in the dark, but if that sounds like you, these lights are up to the task. Additionally, features like the Six Pack’s auto-adjusting Reflex 2.0 and the Zenith’s TAP technology make them very user-friendly and easy to get along with.
I’d argue that Exposure’s mountain bike lights are the pinnacle of performance, with self-contained designs, beautifully machined, durable aluminum bodies, and lighting performance that surpasses any other lights I’ve used. These lights are also the pinnacle of price, with the Six Pack 15 at $540 and the Zenith 4 going for $305. Surely the cost of these lights will put them out of reach for many would-be buyers, but for serious night riders seeking the best of the best, the expense may be justified. If you’re willing and able to afford them, I think you’ll be hard-pressed to find better lights than these.
To be completely honest, the Zenith 4 and Six Pack 15 are likely brighter than most people need. Realistically, most riders can easily get away with lights that are half as bright and still see well enough while riding at night. So, if these lights seem like overkill, it may be worth looking into some of the brand’s other options that aren’t quite as bright — or expensive — but share the same build quality and features.