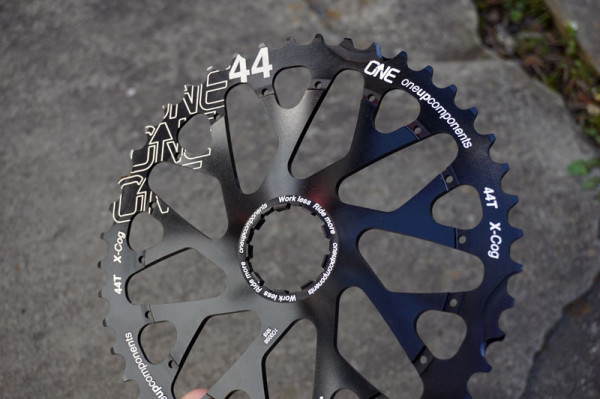
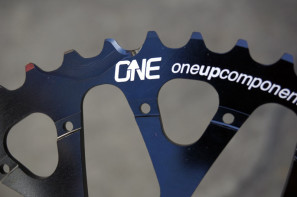
If everyone seems to be jumping on the oversized cogs and wide range hacks for mountain bikes these days, OneUp Components might just have the best solution yet with their new XX1 compatible 44 tooth cog.
Made to replace the 42 tooth cog on XX1 and X01 cassettes, the larger 44 tooth cog simply subs in with no further adjustments needed to most drivetrains, extending the range where it’s needed most with virtually no downside. If we’re being honest, and if we ride where there’s any real climbing to be done, then even with the modern wide range there have been times when we’ve gone to push the shifter just one click easier only to be met with disappointment. OneUp felt that pain, too, and the solution is this new super oversized cog that fits right in with existing drivetrains to add just a bit more range.
We got our hands on an early sample to test, here’s how it went…
Our first question was simply: How? How do you add a larger cog to a one-piece cassette?
Simple, really. The XX1 cassette is put together just like the Red PowerDome cassette that we’ve disassembled. We figured that out because the Red cassette got stuck on a freehub body. Interestingly, our XX1 cassette also got stuck on a DT Swiss XD Driver Body and started pulling apart as we were removing it to install this new OneUp part, making our job a bit easier. (We talked to the guys at OneUp and they said they’d heard of that happening to a few other folks, too)
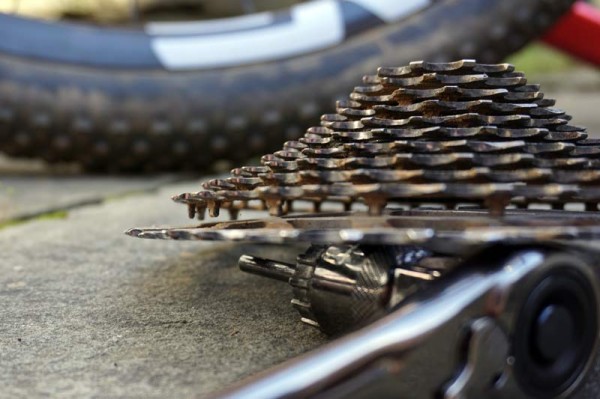
Should your cassette remove freely, you’d simply insert a flat head screwdriver between the two largest cogs and slowly and gently twist it to pry them apart a little bit at a time, working your way around the cassette several times to finish the job. The largest cog is simply pressed into place, with no glue, welds or pins to permanently fix it to the rest of it. That gradual removal process ensures you don’t bend or damage the 42-tooth cog in case you ever want to put it back on.
Shown above, the tabs on the backside of the cassette body simply press into the holes on the largest cog to hold it in place.
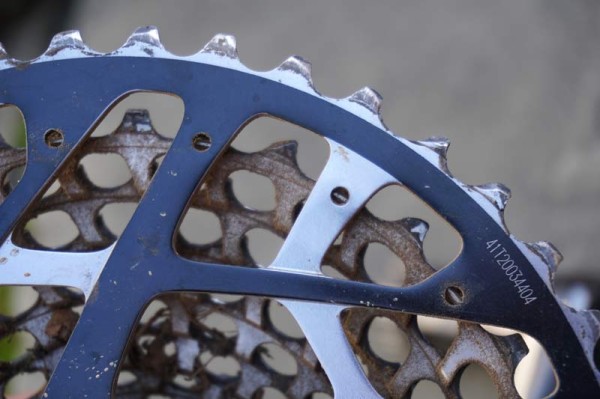
Here’s what the tab and hole system looks like from the back…
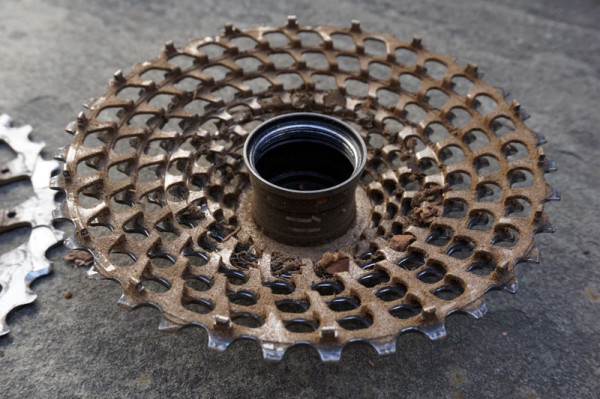
…and here’s what the XX1 cassette looks like from the inside.
It accumulates quite a bit of dust and debris over time, so maybe not a bad idea to pull it apart and clean it out regardless of upgrade intentions.
The OneUp X-C0g is a direct replacement for that 42-tooth stock piece. Once the 42-tooth piece is removed, it’s just a matter of lining up the holes and pressing the new one into place.
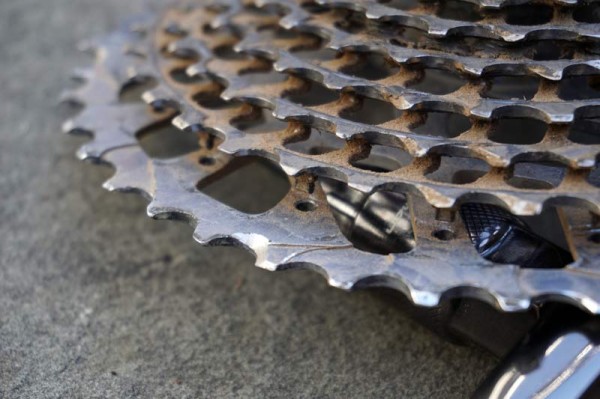
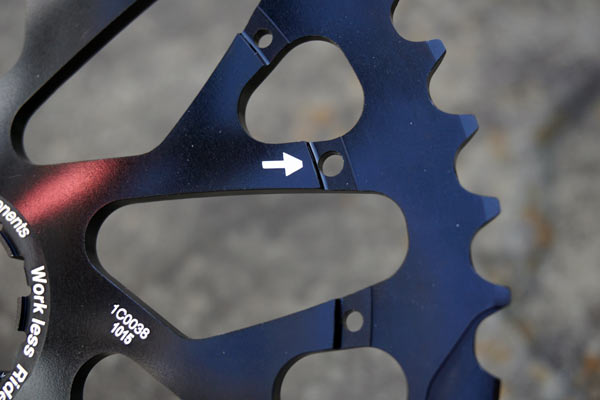
One hole is larger than the others, which mates up to the one tab that’s larger than the others. This ensures that the grooves and ramps built into the 44T X-Cog line up properly with those on the smaller cogs for smooth, quick shifting (as well as to the cassette body splines.)
Closeup look at the ramps and grooves on front and back. Click to enlarge.
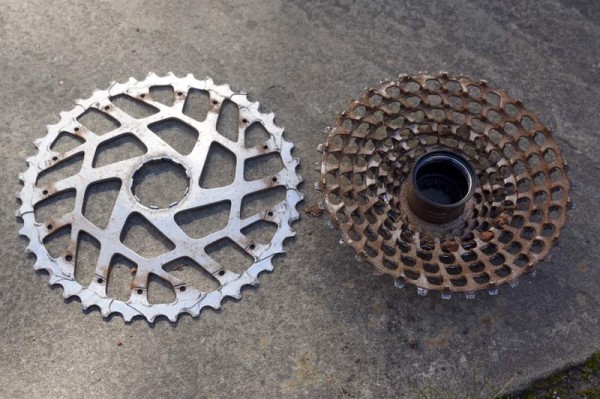
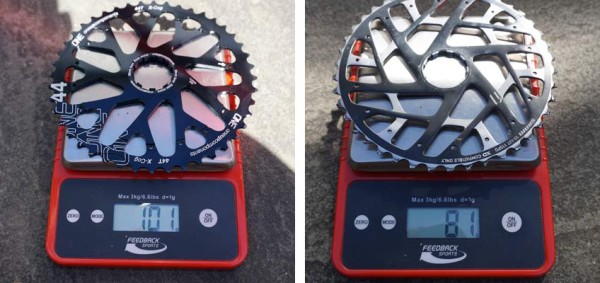
The X-Cog is a bit more substantial than the XX1’s layered machining, so it comes in 20g heavier despite only being two teeth larger. (101g X-Cog on left, 81g XX1 cog on right)
To put it all back together, OneUp recommends putting the X-Cog flat on a piece of wood and tapping a flat head screwdriver against the XX1 cassette body to press it back together. As with removal, they recommend light taps around the cassette to gradually and evenly press things together.
Personally, I use pliers to squeeze it together, going around the cassette four times as it gets gradually closer together. It’s worked for me, but Jon at OneUp advises against that method:
“Pliers can be used but are not recommended. We recommend installing on a flat wooden surface to prevent marking of the X-Cog as well as to prevent any warping upon install of the teeth. As well many customers may not have good set of working pliers that have the correct jaws tips, but they should have a flat head screwdriver.”
Use your own judgement and do what works for you. Pliers are quicker, but use them at your own risk.
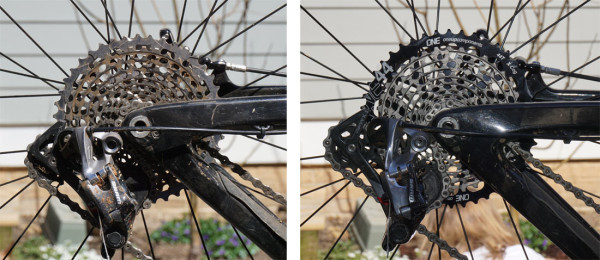
On the bike, you may or may not need to add links to your chain. I swapped in the new cog and changed from SRAM’s direct mount 32-tooth chainring to a OneUp 34-tooth chainring they sent along with the cog and didn’t have to add any links. But, that’s likely because I started out with a 34-tooth SRAM chainring, and during the initial setup of the XX1 drivetrain it allows for swapping up and down one chainring size for the same chain length. So, I’m probably close to the limit, but it works just fine. Jon had this to say:
“If your chain is set up correctly then you should be able to swap the X-Cog in without adding additional length to the chain. That being said you should always check in case your bike was set up on the tight end of things in the first place. The addition of the 2 extra teeth in the rear cog adds an additional 12.5mm to the chain wrap which is 1 extra link.”
The last bit of install requires turning in your B-screw a bit to move the upper pulley wheel away from the cassette until it’s a full turn past any buzzing noise when shifting to the largest cog. On my setup, I had plenty of B-screw left even after adjusting mine to work quietly and smoothly – by no means does it require burying the screw into the derailleur.
With regards to improving your gear range, here’s what it looks like from a pure numbers standpoint:
Standard XX1 group with 32-tooth chainring:
32/10 = 3.2
32/42 = 0.76
Range = 420%X-Cog with 34-tooth chainring:
34/10 = 3.4
34/44 = 0.77
Range = 440%
As mentioned, my original set up was using SRAM’s 32T chainring with the stock 11-42 cassette. I swapped in the 44T cog and switched to a 34T chainring. At first glance, this might be seen as negating the benefits of a larger cog, but it’s just one way to increase the system’s range.
In this case, the 34T chainring gives me more top end without diminishing the low end for climbing. This was one of the issues I ran into at the TS Epic a couple years ago on the downhills when running a 30T chainring. I was maxed out with plenty of legs left in me to hammer the straight aways and fire road descents, but the cadence required to make any more speed was simply too high. But, on the climbs, it was perfect. The flip side is that you could keep the same chainring and add more top end. Here’s how that would look:
X-Cog with with 32-tooth chainring:
32/10 = 3.2
32/44 = 0.72
Range = 440%
You still have the same 300% range, but with a lower gear ratio for easier climbing.
On my initial test rides, everything worked flawlessly. Shifting from the stock 36-tooth cog up to the 44 was about a smooth as to the stock 42. The added jump wasn’t very noticeable, either. In fact, at the point where you need a 42-tooth cog to maintain cadence and keep effort in the not-blowing-you-up range, my hunch is a 44-tooth cog would be even more welcome. While Shimano boasts of their “rhythm and flow” gear ratios, the upper end of the cassette is less about keeping cadence in the proper zone and more about saving yourself on a climb. And for that, this little hack works brilliantly. Installation took less than 15 minutes even with photo and weigh-in time accounted for, and then it just performed.
Available now, the X-Cog retails for $90 and could save an otherwise good cassette that’s just seen a worn out alloy large cog. That said, if you’re spending most of your climbing time in the stock 42, OneUp recommends you first swap out your chainring (preferably for one of theirs, which goes as small as 28T) to bring your pedaling back into the main steel cluster. But, if you’ve already worn out your 42 or just want a bit more range, here’s your answer.
Specs:
- Material: 7075-T6 Aluminum
- Weight: 100g
- Compatibility: Sram XX1 and X01 (Not compatible with X1 or GX fully pinned cassettes)
- Colors: Black, Green
- 8 optimized upshift points
- Press fit design ensure ease of assembly (no loose spacers)
- Full spline width prevents gouging damage to freehub
UPDATE: It’s worth mentioning that SRAM sent us a short note to say that they do not condone modifications to their equipment, commenting that without proper testing they can’t be sure any 3rd party parts or modifications are safe. Modifying their components in any way (including this) voids any factory warranty on the SRAM parts affected. As with all hacks and mods, use or perform them at your own risk.

