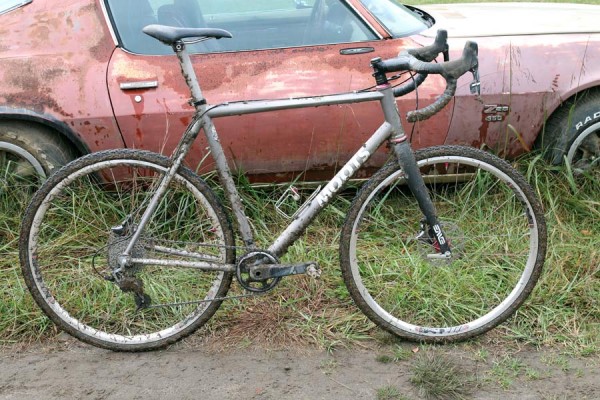
After weighing and installing the SRAM Force CX1 group, I put it through a couple “get to know ya” rides before heading to Asheville for the final race in the AVLCX series at Pisgah Brewing.
With a good bit of rain the day before and a little sprinkling during the race, the course went from a little damp to downright slip-n-slide like during our 45 minute race. Fortunately, the CX1 group held up to the mud, grass and a few slips and spills with zero problems. The bike even sat outside, unwashed and unloved for a few days after the race before getting a bath, but things still worked just fine.
UPDATED: Additional notes on bleed procedure added below.
Here’s how things worked out during my first race week with CX1 and the Force Hydro-RD disc brakes…
For the first two rides after install, all that was required was a few turns of the adjustment bezel on the rear mech to take up the usual cable stretch. Everything else worked great from the start and continues to do so.
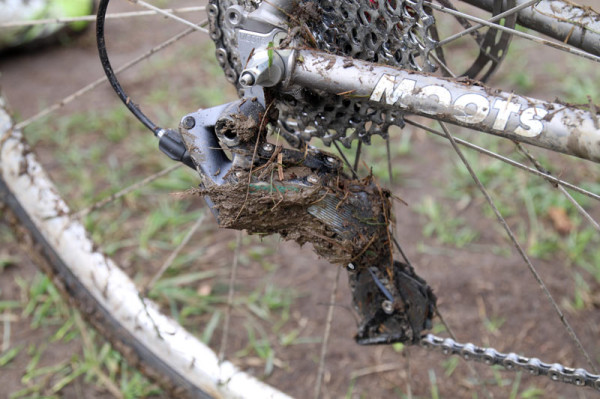
After the race, the group was covered in mud…
…inside and out. Thanks to a last lap spin out while trying to sprint out of a corner, me and the Moots went down on the drive side and slid about 12 feet before stopping. That managed to pack the rear derailleur full of mud. So much mud that it took quite a bit of hose pressure and brush work to get it all out. Yet, the shifting remained flawless for the last bit of the race and my cool down ride. And, despite landing and sliding on the rear derailleur, there’s hardly a scratch on it and it (obviously) didn’t break off. Thankfully, my derailleur hanger is still straight, too!
The pulley wheels were also wrapped and clogged with grass and mud, which also took a fair amount of pulling and scrubbing to remove, but they didn’t seem bogged down while racing. So, bonus points for working well when completely caked and crammed full of crud.
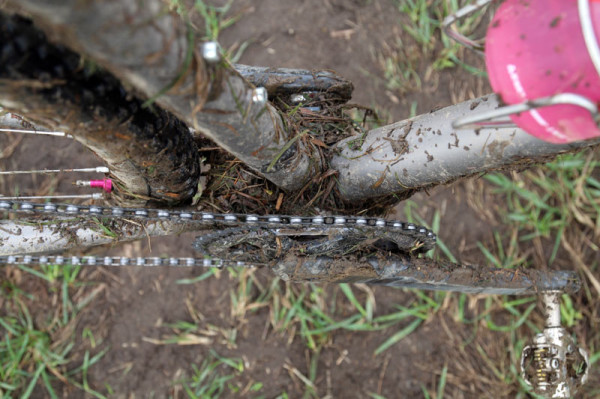
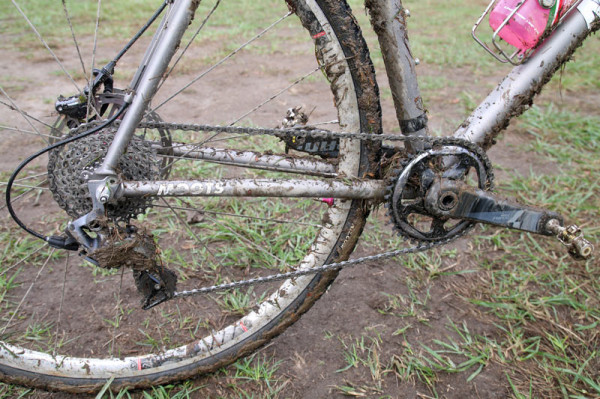
Considering the amount of grass clippings and mud that accumulated around the bottom bracket…
…it’s surprising that virtually none was stuck in the cassette. Whether it’s the holes in the cogs or just dumb luck, they stayed clean and shifted well throughout the entire race.
The chainring had a bit of grass and crud stuck around the teeth, too, but chain retention remained flawless.
Up top, the mud that accumulated on my gloves from sliding out quickly embedded into the textured hood covers. While they remained grippy enough once I wiped the mud from my palms, the Zipp bar tape was dangerously slick. That surprised me because when dry or even in a drizzle, Zipp’s Service Course bar tape has always been plenty tacky. So, I just kept my hands on the hoods most of the time. Even after washing though, the hoods have a dirty look…might need to take a toothbrush to them to get ’em back to black.
While the drivetrain’s performance remained flawless, the shifter did have a tendency to catch a bit when pushing it all the way inward. It feels like it’s catching on the brake lever when trying to return to starting position, so I’ll be adjusting the reach to limit it’s ability to slide forward of the brake lever’s edge when extending inward and hoping that’ll fix the problem. It doesn’t happen every time, but often enough to be annoying by creating a hesitation to return until flicked loose. Honestly, this is my only complaint so far.
As a system, the shifting seems crisper and faster than their Red 22 road group. I suspect it’s because the X-Horizon derailleur’s stronger than their road derailleurs. It’s quite nice, and it achieves this without additional force required at the shift lever.
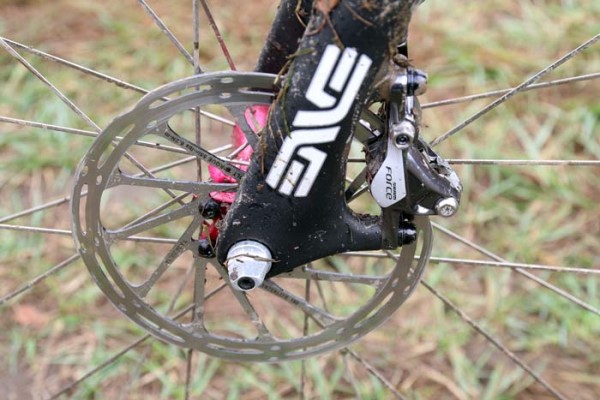
Initial pad break-in took only about 15 low speed stops before feeling fully adequate, and then power continued to improve throughout the first ride. From then on the braking was perfect, as expected. There was no shudder and no squeal, even when things got wet and dirty. If you’ve not yet tried hydraulic brakes, you’re missing out.
The nice thing about SRAM’s hydraulic brakes is it’s fairly easy to adjust the lever feel with a little bleed procedure. SRAM doesn’t list this procedure, it’s just something I’ve figured out after bleeding and rebleeding (and rebleeding and…) Avid’s older XX brakes, but it works: If you want firmer brakes, put the syringe with brake fluid into the top cap on the lever’s master cylinder and push a tiny (TINY!!!) bit more fluid in. Want a bit softer lever feel? Just dab a tiny bit of fluid from the top cap. I’ve got my Red road group’s levers set up a bit firmer this way and the CX1 group a little smoother. It’s kinda sorta like having a pad contact adjust. Sorta.
UPDATE: SRAM responded with this statement: “(Overfilling the reservoir) is not something consumers should do. We only recommend performing bleeds as described in our service manuals. Forcing additional fluid into the system collapses the bladder, thereby reducing negative volume. Negative volume is critical for the proper operation of the brake.”
So, let me clarify my tip: Following the SRAM bleed video’s instructions exactly still leaves room for varying amounts of fluid to be in the system. Near the end of the procedure, you’re asked to lightly push fluid into the lever, then remove the syringe and close the system. They warn against pushing too hard, which would collapse the system as mentioned. So, depending on how much you push into the system before closing it off will dictate how firm the levers feel. If you close it and they feel too firm, you can remove the top cap and dab a bit of fluid out or even pull the lever slightly to push a drop or two out. That’s all that should be needed to soften the levers up and provide enough free stroke to make them feel right. By contrast, if your levers feel too soft and/or you’re not getting enough braking force, you probably just need to push a bit more fluid into the system. This has worked for me on several installs and bleeds of SRAM/Avid brakes over the years. As always, if you’re not comfortable doing this, take it to your favorite bike shop.
There was a bit of squeal after washing the bike, but about six complete stops later it was quiet and smooth again.
As a whole, the CX1 group is off to a rock solid start. If you’re not looking to piecemeal your own 1x system together, it’s worth a look. SRAM’s made it easier than ever by making their existing 10- and 11-speed drivetrain parts easily accept the derailleur and chainring, so you’ll only need to upgrade a couple things to make the leap. This CX1 group will be on the bike for the remainder of this season, look for the long term review in the spring.
