Last fall, Rotor UNO was unveiled as the first complete hydraulic drivetrain group, offering everything from shifters to derailleurs, cranks to cassette, and even brakes. And it offered a unique, single line system that was able to handle up and down shifts by moving fluid in a single direction.
The differences go beyond liquid connections between components – all of the moving mechanical shift parts are at the derailleurs, not the shifters. That, coupled with lossless hydraulic lines, means crisp, instantaneous action with a familiar mechanical feel.
Now, finally, the group is near production and we have all the tech details, weights and first rides. We also learned how the group came to be, what’s changed, and why Rotor thinks you’ll like it…
UNO is an evolution. Rotor started with chainrings, which turned into cranks, which turned into power meters. This is the next step. While they may not have known it at the time, all those years of developing oval chainrings that would shift with other peoples’ derailleurs and chains meant they learned a whole lot about how to make things shift.
They started athlete testing on UNO in November 2015, and in the few months since, they learned, and made more changes to the system in those months than in the entire year prior.
If you could take all the positives of both electronic and mechanical groups, Rotor believes you’ll find them in UNO. It’s lightweight – lighter than any of the other groups with hydraulic disc brakes. And you get most of the firm, direct feel of a mechanical system. And it’s modular like electronic, meaning you’ll be able to add or change shifter types with minimal fuss by simply splicing the hydraulic line. Yes, that is a nod to future development (think TT, triathlon or even mountain bike).
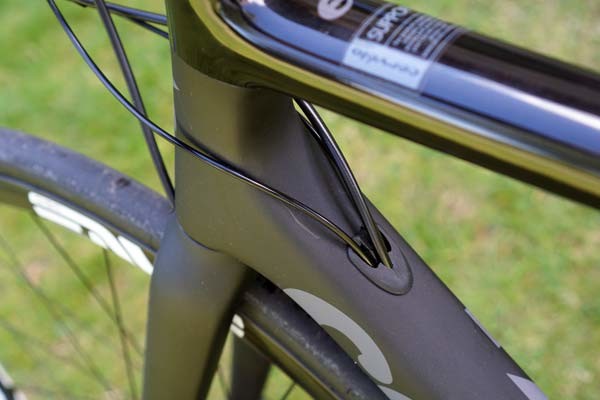
They call that combo HySTEP, and the first part stands for Hydraulic Smart routing, referring to the thin, flexible lines that’ll easily fit into aero frames and small tubes.
Hydraulic’s key benefits include smooth activation of every shift with no friction. And because they don’t need to worry about heat expansion, it’s a closed system that will remain in perfect sync forever with virtually no maintenance. No batteries to charge, no cables to clean or replace. It’s also future compatible with additional hydraulic systems.
SHIFTING
This video shows:
- Closeup of the ratcheting mechanism’s dual stops. As the top one pushes it one way, the bottom one catches and holds it. To shift the other direction, the bottom one pushes and the top one catches. Which one does what depends entirely on how far you push the shifter.
- The front derailleur uses a three step clocking. Two small ones for trim settings on each chainring, and one big one to shift between gears.
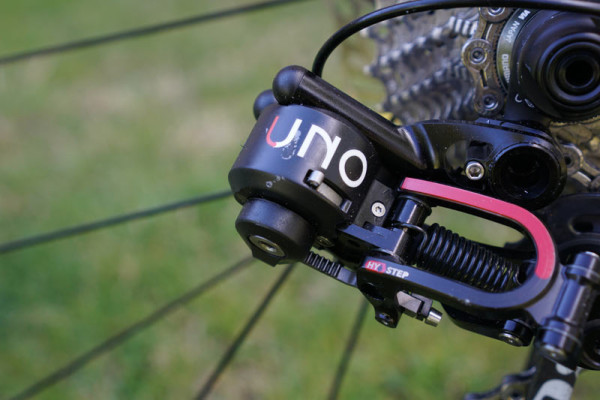
- The rear derailleur has 11 steps. As the clock gears turn, they move the rack you can see on the outside bottom. That rack is linked to the parallelogram that actually moves the derailleur.
- UNO can downshift (easier) up to four gears at a time, and a single upshift (harder) at a time. On the stand and on the bike, it moved quickly and quietly, at least as good as any other top level group I’ve ridden.
The shifting system uses a 30% glycol solution, which is stable from -15º to 88º C (5º to 190ºF), rather than mineral oil or DOT fluid. It runs through 3mm flexible shift hose that makes internal routing easy, even with tight bends.
REAR DERAILLEUR
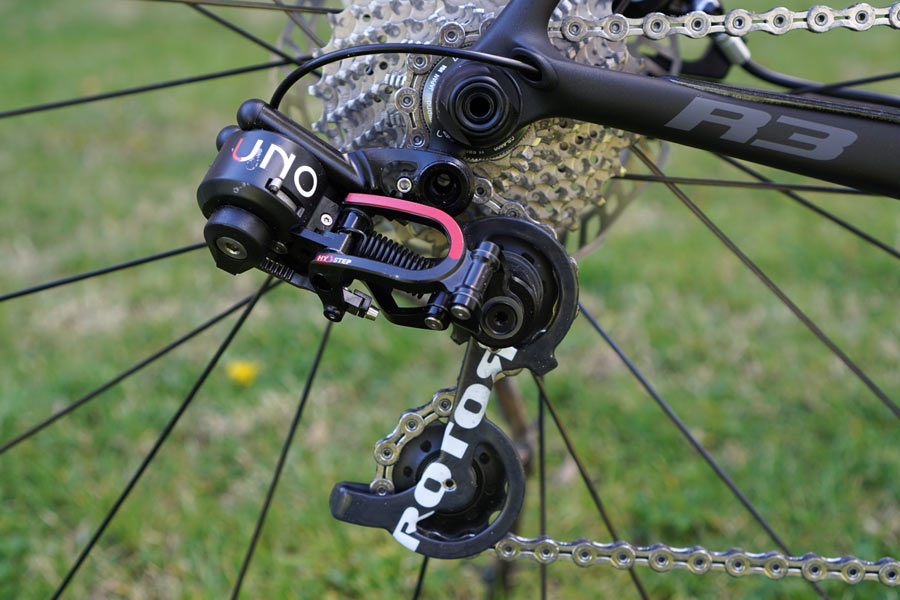
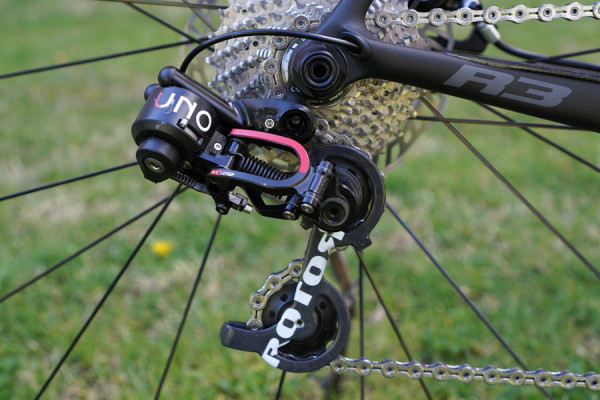
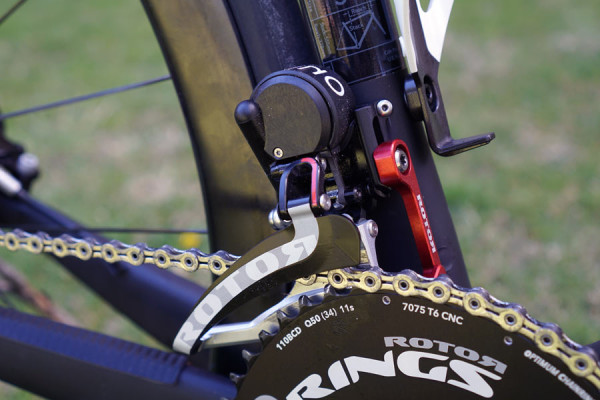
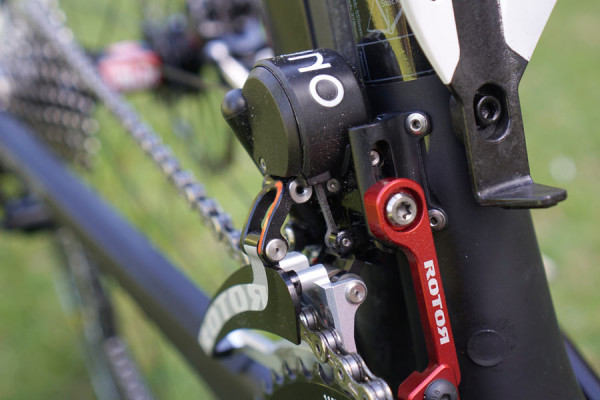
All of the clocking and mechanical gears are housed in the two tubes and that round part at the back end of the rear derailleur.
The clocking mechanism’s design and location on the derailleur rather than the shifter body is that it has absolute precision. The steps on the ratchet are aligned perfectly with the cog spacing, so once it’s set, it’ll repeat perfect shifts every time with no degradation from cable stretch, temperature, etc. You can adjust the alignment during initial set up with a single screw plus an upper limit screw…
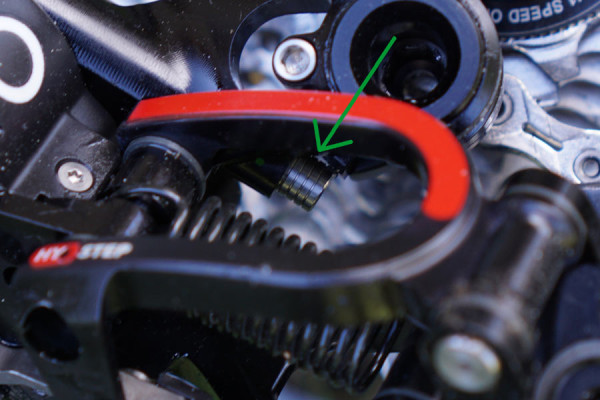
…and then you can set the number of downshifts that the lever is able to push from 1 to 4. However many lines you see on that barrel (green arrow) is how many shifts per push you can get out of it. It’s not all or nothing…you can still shift just one gear at a time, or two, or three, up to four. They put this adjustment in because some of their sprinters wanted to be able to hit the lever hard during the final sprint and know exactly what it would do, one shift at a time. For others who want to be able to dump a lot of gears at once, you can set it to your preference.
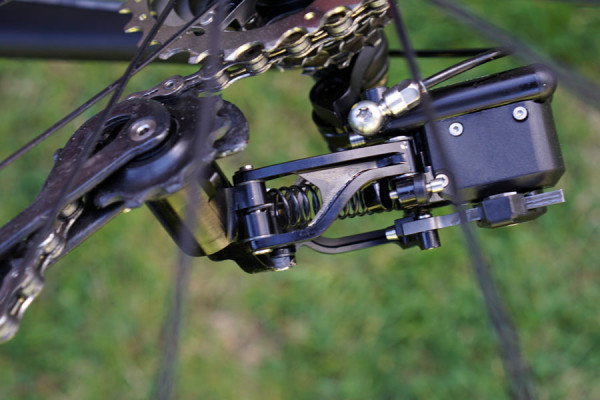
Return to Origin is among the most fascinating features. In the unlikely event you damage the hydraulic lines, you can flip that gray lever forward to release the clocking mechanism and the derailleur will drop down to the smallest cog. Close the lever and you can then physically push it up to the cog you want. So, you could push it into an easy gear for climbing, then put it into a harder one for descents. The more practical application of this is making wheel changes quicker and easier, and protecting the derailleur from damage during transportation.
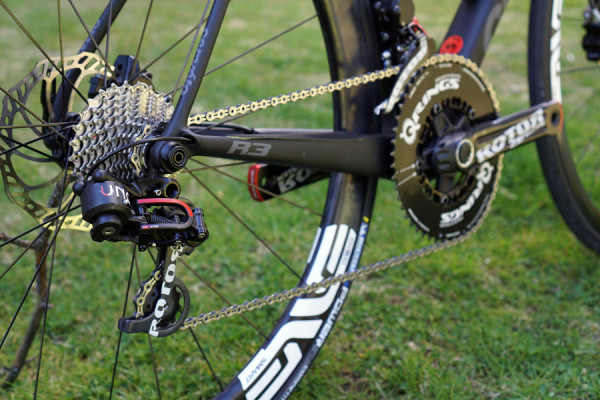
One thing worth mentioning is that the entire group, save for things like the return spring and hoses, is designed, manufacturers and assembled at Rotor’s factory in Madrid. The metal parts are all machined or forged there, so they share the same aesthetic as their cranks and chainrings, giving the complete group a unified, top tier appearance.
From the bottom you can see the upper limit screw, rack and gear alignment adjustment screw and the hose banjo. The bleed port is on the side, which you should only need to use once for initial installation. The group includes a roll of hose and bottle of fluid.
FRONT DERAILLEUR
The front derailleur has a single bolt set up for quick, easy adjustment. There are no limit bolts on the front because the clocking mechanism creates fixed shifting positions – once its position is set, there’s no need to set limits.
The clock gears move a rack here, too, which is connected to the inside of the parallelograms and pushes the arms out to the big ring. A return spring lets it fall back onto the small ring.
SHIFTER & BRAKE LEVER
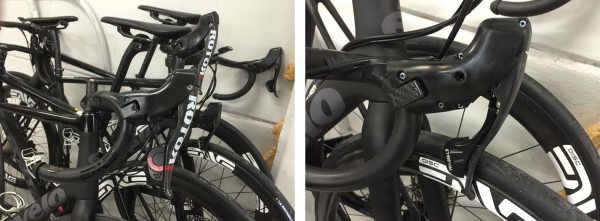
One of the biggest changes between pre-production and final versions are that two separate shifter lever bodies will be offered, one for rim brakes and one for discs. With disc brakes, it’s an open system to accommodate heat build up and uses a traditional master cylinder reservoir to handle expansion. For rim brakes, heat build up is negligible, so it uses a closed system, which means virtually no maintenance throughout its life.
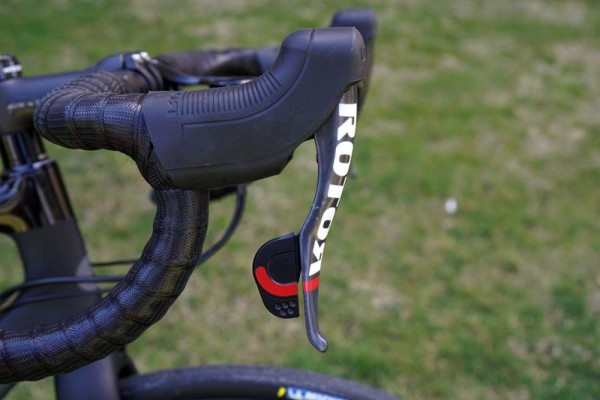
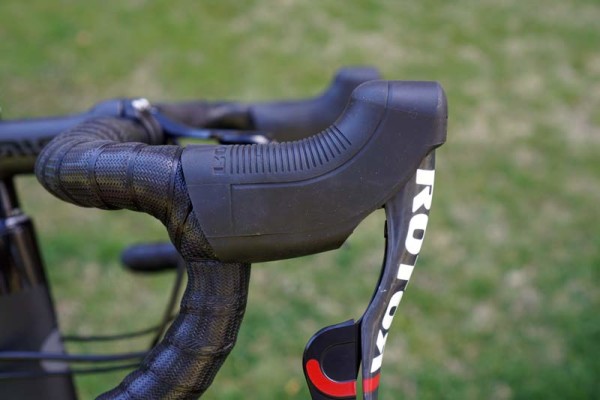
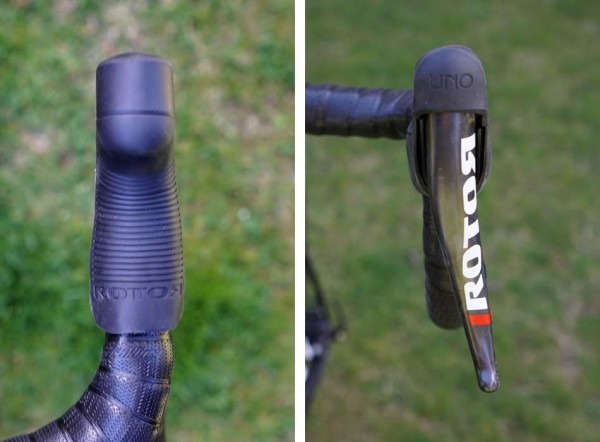
The actual internals are very small, but their research showed that riders preferred a slightly larger hood. However, they will offer smaller hoods in the future. The hump at the front is intentionally large, too, which provides a more secure feel.
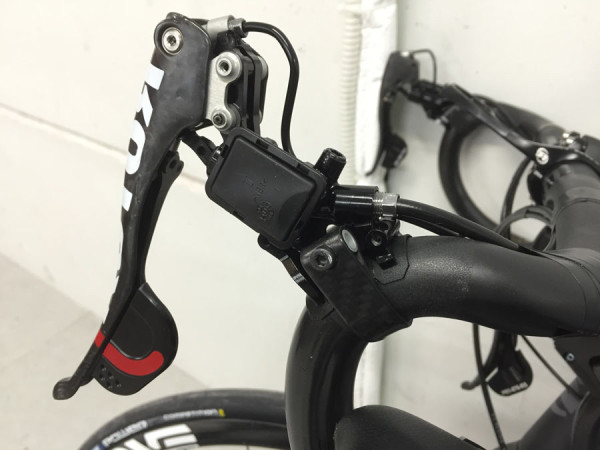
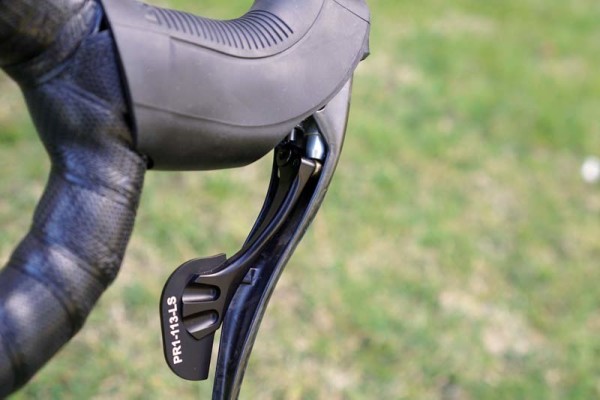
The brake lever is carbon and has a tooled reach adjust is accessible from under the top of the hood. The shift lever is alloy and is attached to the brake lever, so it has no additional reach or position adjustments. As the shift lever pivots, it pushes a piston (silver bit in pic above) to move fluid toward the derailleurs.
A short push releases the derailleur for an upshift, and a longer push makes 1, 2, 3 or 4 downshifts (easier) depending on how you have your RD set. The dual ratchet system inside the rear derailleur means it’ll catch and hold itself if you push halfway into a shift but don’t complete it.
BRAKES
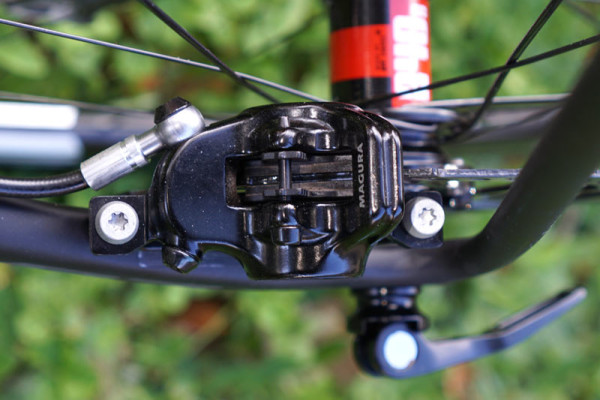
The brakes, both rim and disc, use reinforced 5mm Magura housing with that brand’s Royal Blood mineral oil. That’s not only more environmentally friendly than DOT fluids, it’s also non-hydrostatic, meaning it won’t attract and absorb moisture over time.
Rotor partnered with Magura because they were already experts in hydraulic systems with more than 100 years making brakes and more for both bicycles and motorcycles. They already had service centers in place globally and had all necessary safety testing in place.
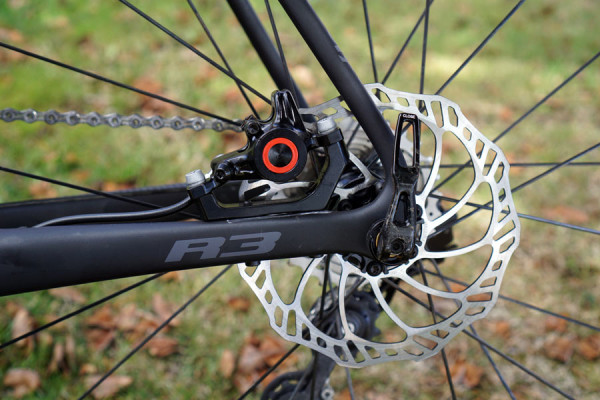
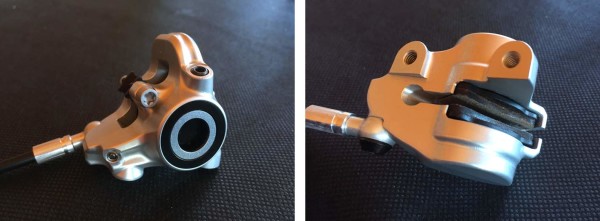
Here, they’re using MT8 NXT calipers. Rotor said they’re the lightest and safest system for road disc brakes. The caliper body is slightly larger than some competing units, which helps dissipate heat better. They always spec 160mm steel rotors, so there’s no rider weight limits. It’ll be available in both ISO and…
…all-new flat mount designs.
The bike shown here used Magura’s Storm SL rotors, but production groups will ship with the standard Storm rotors, which have fewer and smaller round holes on the braking surface rather than the slotted design shown here.
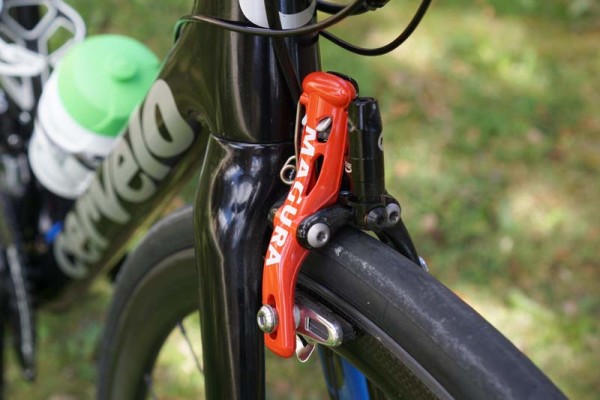
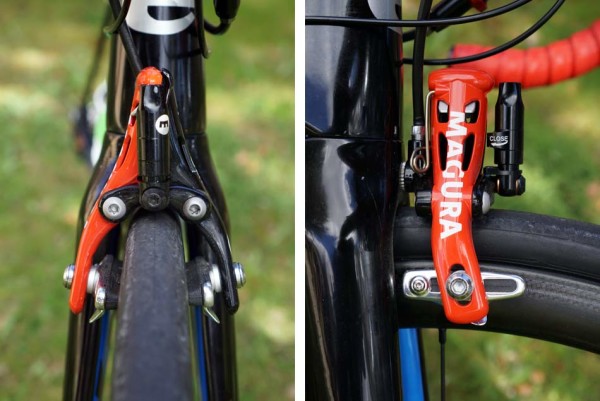
The Rim brakes are modified versions of the Magura RT6/8 rim calipers, which are a very slim, aero design that doesn’t protrude to the side of the frame or fork like a mechanical caliper can. The rim brake lever and calipers are designed to give them a massive 14mm throw (at the pad, 7mm per side). Combined with the two new adjustments shown below, it allows them to fit a wide range of rim widths.
Since it’s a closed system, Rotor added two adjustment methods. On the caliper itself, there’s a new adjustment knob that functions as a quick release – push it down and twist to open up the caliper 6.5mm.
Then, an inline barrel adjuster adds 8.5mm of adjustment, which is important in a race environment where a team might be riding a wider rim but need to use a narrower wheel from neutral support and not have to worry about adjusting too many things. Once on the bike, the rider can easily reach the barrel and adjust pad contact en route.
CASSETTE
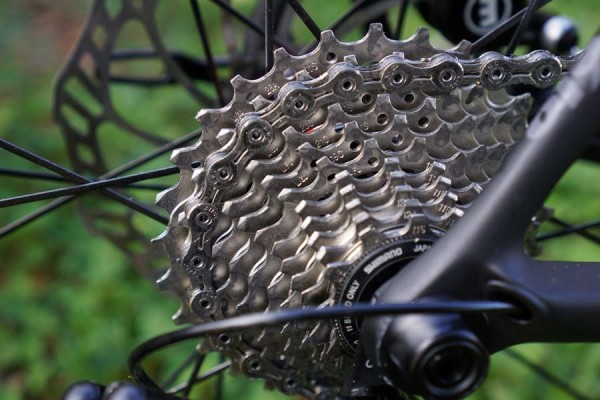
Like the other parts, Rotor is machining the cassette in house, too. It’s a three-piece unit that’s bolted together, and each part is interchangeable. The lower two segments are steel, and upper is alloy and contains just the two largest cogs.
It’ll only be offered in an 11-28 to start, but will have additional sizes in the future. Claimed weight is under 150g. The cassette is designed for a SRAM/Shimano freehub body. Those with a Campy freehub body will need to run a Campagnolo cassette for now. Which is fine, because they say their cassette will work with other 11-speed drivetrains, and other brand cassettes will work fine with their system.
Not shown, the complete group will ship with a KMC X11-SL DLC chain that uses their quick link connection, hollow pins and X-Bridge plate design. It’ll have a custom DLC coating that’s all black with red pins.
ACTUAL WEIGHTS
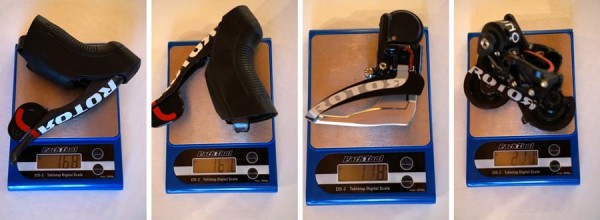
Dry parts on our scale measured out at:
- Right shifter – 168g
- Left shifter – 167g
- Front derailleur – 118g
- Rear derailleur – 211g
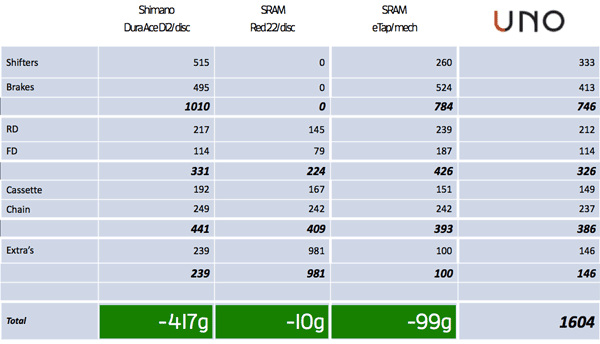
The hoses will weigh virtually nothing, and the cassette was not available to weigh. Here’s how Rotor shows their system stacking up against currently available product:
NOTE: SRAM hydro brakes show lever-and-brake combined weight as “Extras” since they’re sold as a set.
CRANKS, PRICING & AVAILABILITY
Groups will be available in July in limited quantities with standard rim or disc brakes. Pricing is €2,499 for the complete group with disc or rim brakes, sans crankset. Ships with bleed kit, Royal Blood and glycol solution.
Since Rotor makes so many different cranks and chainrings, the complete group will not include them. This lets you add on which ever one you like. They showed it with the new 2INpower cranks, which combine separate left-and-right leg power measurement. And they might be a good choice, Rotor says last year they sold ~12,000 power meters with only seven returned for product defects. That’s impressive, but it’s a key a reason they make and assemble so much in house…total control. We’ll dive deeper into 2INpower’s tech features on a separate post.
Everything is designed, manufactured and assembled in Madrid. For production models, the brakes will be factory filled, bled and sealed at Magura. Meaning, the shifter lever assembly will be built at Rotor, then shipped to Magura to have the brake hoses and calipers installed, bled and checked, then the entire unit will return to Rotor for final assembly, quality check and packaging.
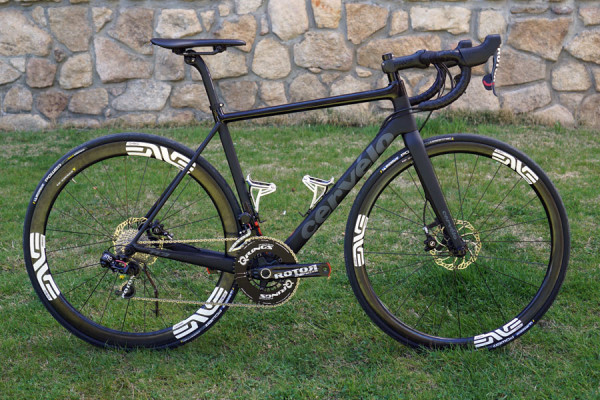
Look for it to get OEM spec on Cervelo initially, largely thanks to their strong pro team ties for Bigla and Dimension Data.
Full ride review coming soon…
