Home > Bike Types > Mountain Bike

Suspension Tech: What’s the adjustment ring do on coil shocks?

8 Comments
Support us! Bikerumor may earn a small commission from affiliate links in this article. Learn More

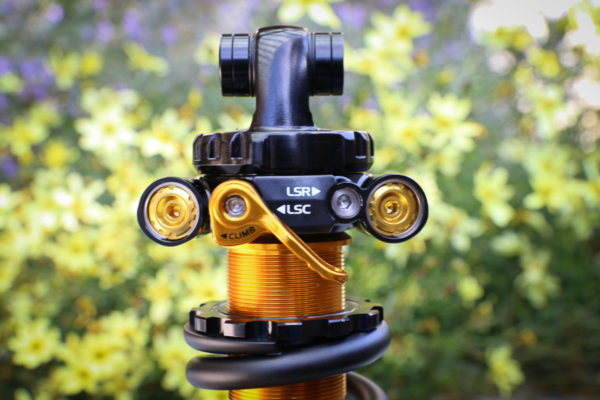
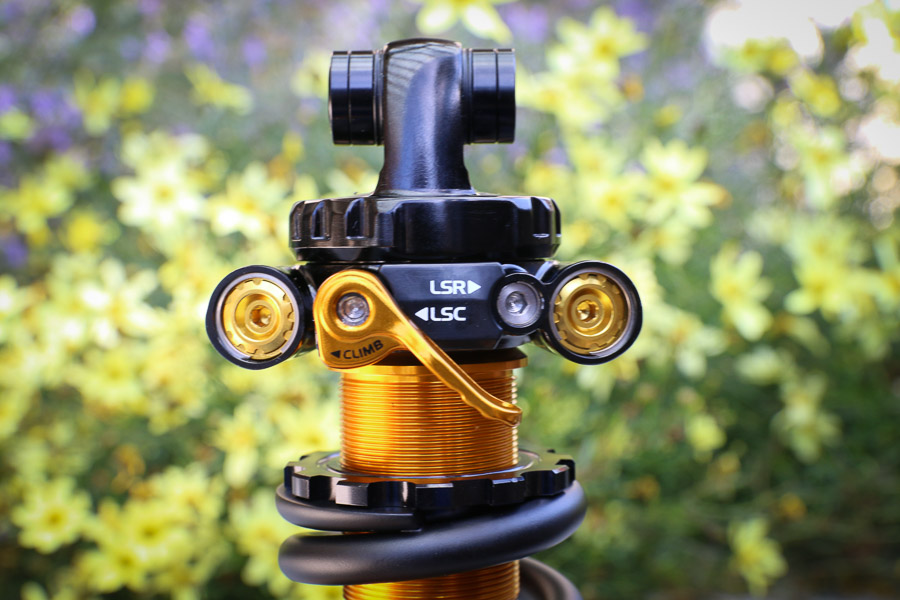
The adjuster ring on a coil shock seems like a simple thing. But as you’re about to learn, it’s not meant for making major adjustments.

The ring threads onto a coil shock’s shaft and acts a preload adjuster, changing how much force is applied on the spring before it’s compressed. It’s used to adjust sag, explains Ben Robchaud, a tech at mountain bike suspension tuning company Vorsprung, “but you don’t want to use too much preload. So you want to start with the right spring rate for your rider weight. Basically, you want to just get the preload ring tight enough to prevent the coil from being loose (you’ll hear it rattling), and then make maybe five or six turns at the most. And that’s at the absolute most, ideally you’ll only need up to two turns to get sag where you want it to be, which is about 23-30% sag for most riders.”

Robchaud continues: “The more you twist it in, the harder it will be to start compression the coil at the beginning of travel. Because the coil will already be compressed some, pressing harder against compression. Imagine you have a 400lb spring and you’ve compressed by about 1/8 inch (usually about three complete turns). Now it’s pushing back with 50lbs of force, approximating what a 450lb spring would feel like at sag. Which is another reason you want to have the right coil strength to begin with.”

Simple, right? We figured this would be a welcome break from the more technical internal looks we’ve posted the past few weeks. It’s worth noting that the actual amount of additional force created by preloading a coil shock will vary with shock length and other factors, so the numbers used here are purely to illustrate the concept. (NOTE: minor updates have been made to this post for clarification)


The fun never ends. Stay tuned for a new post each week that explores one small suspension tech, tuning or product topic. Check out past posts here. Got a question you want answered? Email us. Want your brand or product featured? We can do that, too.
Subscribe
Notify of
guest

This site uses Akismet to reduce spam. Learn how your comment data is processed.

8 Comments
Oldest
Newest Most Voted
Inline Feedbacks
View all comments
Seraph
Seraph
7 years ago

This article is for young people, right? Am I the only one who remembers when coil shocks were the only option for more aggressive riding?

JBikes
JBikes
7 years ago

Unless already planned, I think it would be good to highlight the difference between increasing preload to meet static sag levels versus increasing spring rate. For example, one can preload a 400# spring and hit sag numbers. It will perform very differently from a 500# spring that hits sag with minimal preload. A spring rate graph is good to visualize this and it is what Vorspung is referencing in their preload comment.

Chase
Chase
7 years ago

I cannot tell you how many riders in MTB and Moto don’t get this. Then bitch when their shock reacts horribly. But it has correct sag! Wrong. You need typically 2-3 springs before finding the correct rate in my experience. Which is a chunk of cash if you run the light ones.

Penn Teller
Penn Teller
7 years ago

Um…the shock length has nothing to do with how much preload you create per turn. For a 400 lb/in spring, 1/8 inch of additional preload always adds 50 lbs of preload. That’s the thing about coil springs: they’re linear. Maybe Tyler is applying what he learned about air spring volume vs. rates, but that doesn’t apply to coil springs.

Penn Teller
Penn Teller
7 years ago
Reply to  Penn Teller

To clarify, for a 400 lb/in spring, your first 1/8″ adds 50 lbs of preload. The second 1/8″ adds another 50 lbs of preload, for a total of 100 lbs of preload for 1/4″ of displacement.

JBikes
JBikes
7 years ago

The second to last paragraph needs clarification.

For a given weight and desired sag, one needs “x” amount of force. One can get that with higher preload or a higher spring rate.

Going the higher preload route results in higher spring force during extension of suspension above sag, and a lower force into compression compared to a higher spring rate. This is due to a flatter spring “curve” which has just been shifted over to the left, by the preload amount, on a travel vs force graph.

Going with the higher spring rate reduces spring force during extension of suspension above sag, while increasing spring force into compression past sag (i.e. the spring “curve” is steeper), comparatively.

If one graphed the two spring rate “curves” together, the lines would cross where the static sag is set.

In my experience, and counter intuitive to what many would expect, the higher spring rate tends to result in a more supple feel and better control, while ramping up to prevent bottoming on bigger hits. The reason why is visible in the graph, if one chooses to draw one. Finally, all this assumes that the shock damping is also tuned correctly to the spring rate change.

Tyler
7 years ago

All, thanks for the comments. We’ll explore the differences in preloading and shock rate later, trying to keep each of these posts focused on one simple topic at a time. Use the link at bottom of post to send in any questions you have!

Dennis
7 years ago

There’s another reason to not want too much preload. On some of the tightly wound coils (mostly the heavy steel ones), the spring could compress so much that the actual coils touch each other. When this happens, a rigid structure is formed and when the shock isn’t bottomed out when that happens, will damage your frame. But to be fair, this would need some serious preloads on most shocks.

Subscribe Now

Sign up to receive BikeRumor content direct to your inbox.