Whoever came up with N+1 as the ideal number of bikes, where N is the number of bikes you currently have, clearly didn’t ever have to store them. Bicycles are amazing, but it can be difficult to store them in a way that keeps them out of the way in everyday life, while still keeping them easily accessible. That last part is key. I’ve seen it again and again. When people store their bikes in a way that makes them difficult to access, they become less likely to actually get that bike out and go for a ride. Only have 15 minutes to spend riding with the kids around the neighborhood? You’re probably not going to do it if it will take you 5 minutes to get the bikes out and another 5 to put them away.
No, what you need is something like the CycleSlide from ‘Store Your.’ Formerly known as Store Your Board, and now shortened to just ‘Store Your,’ the company has dropped that last part of their name to make it clear that they have storage options for all kinds of things – especially bikes.
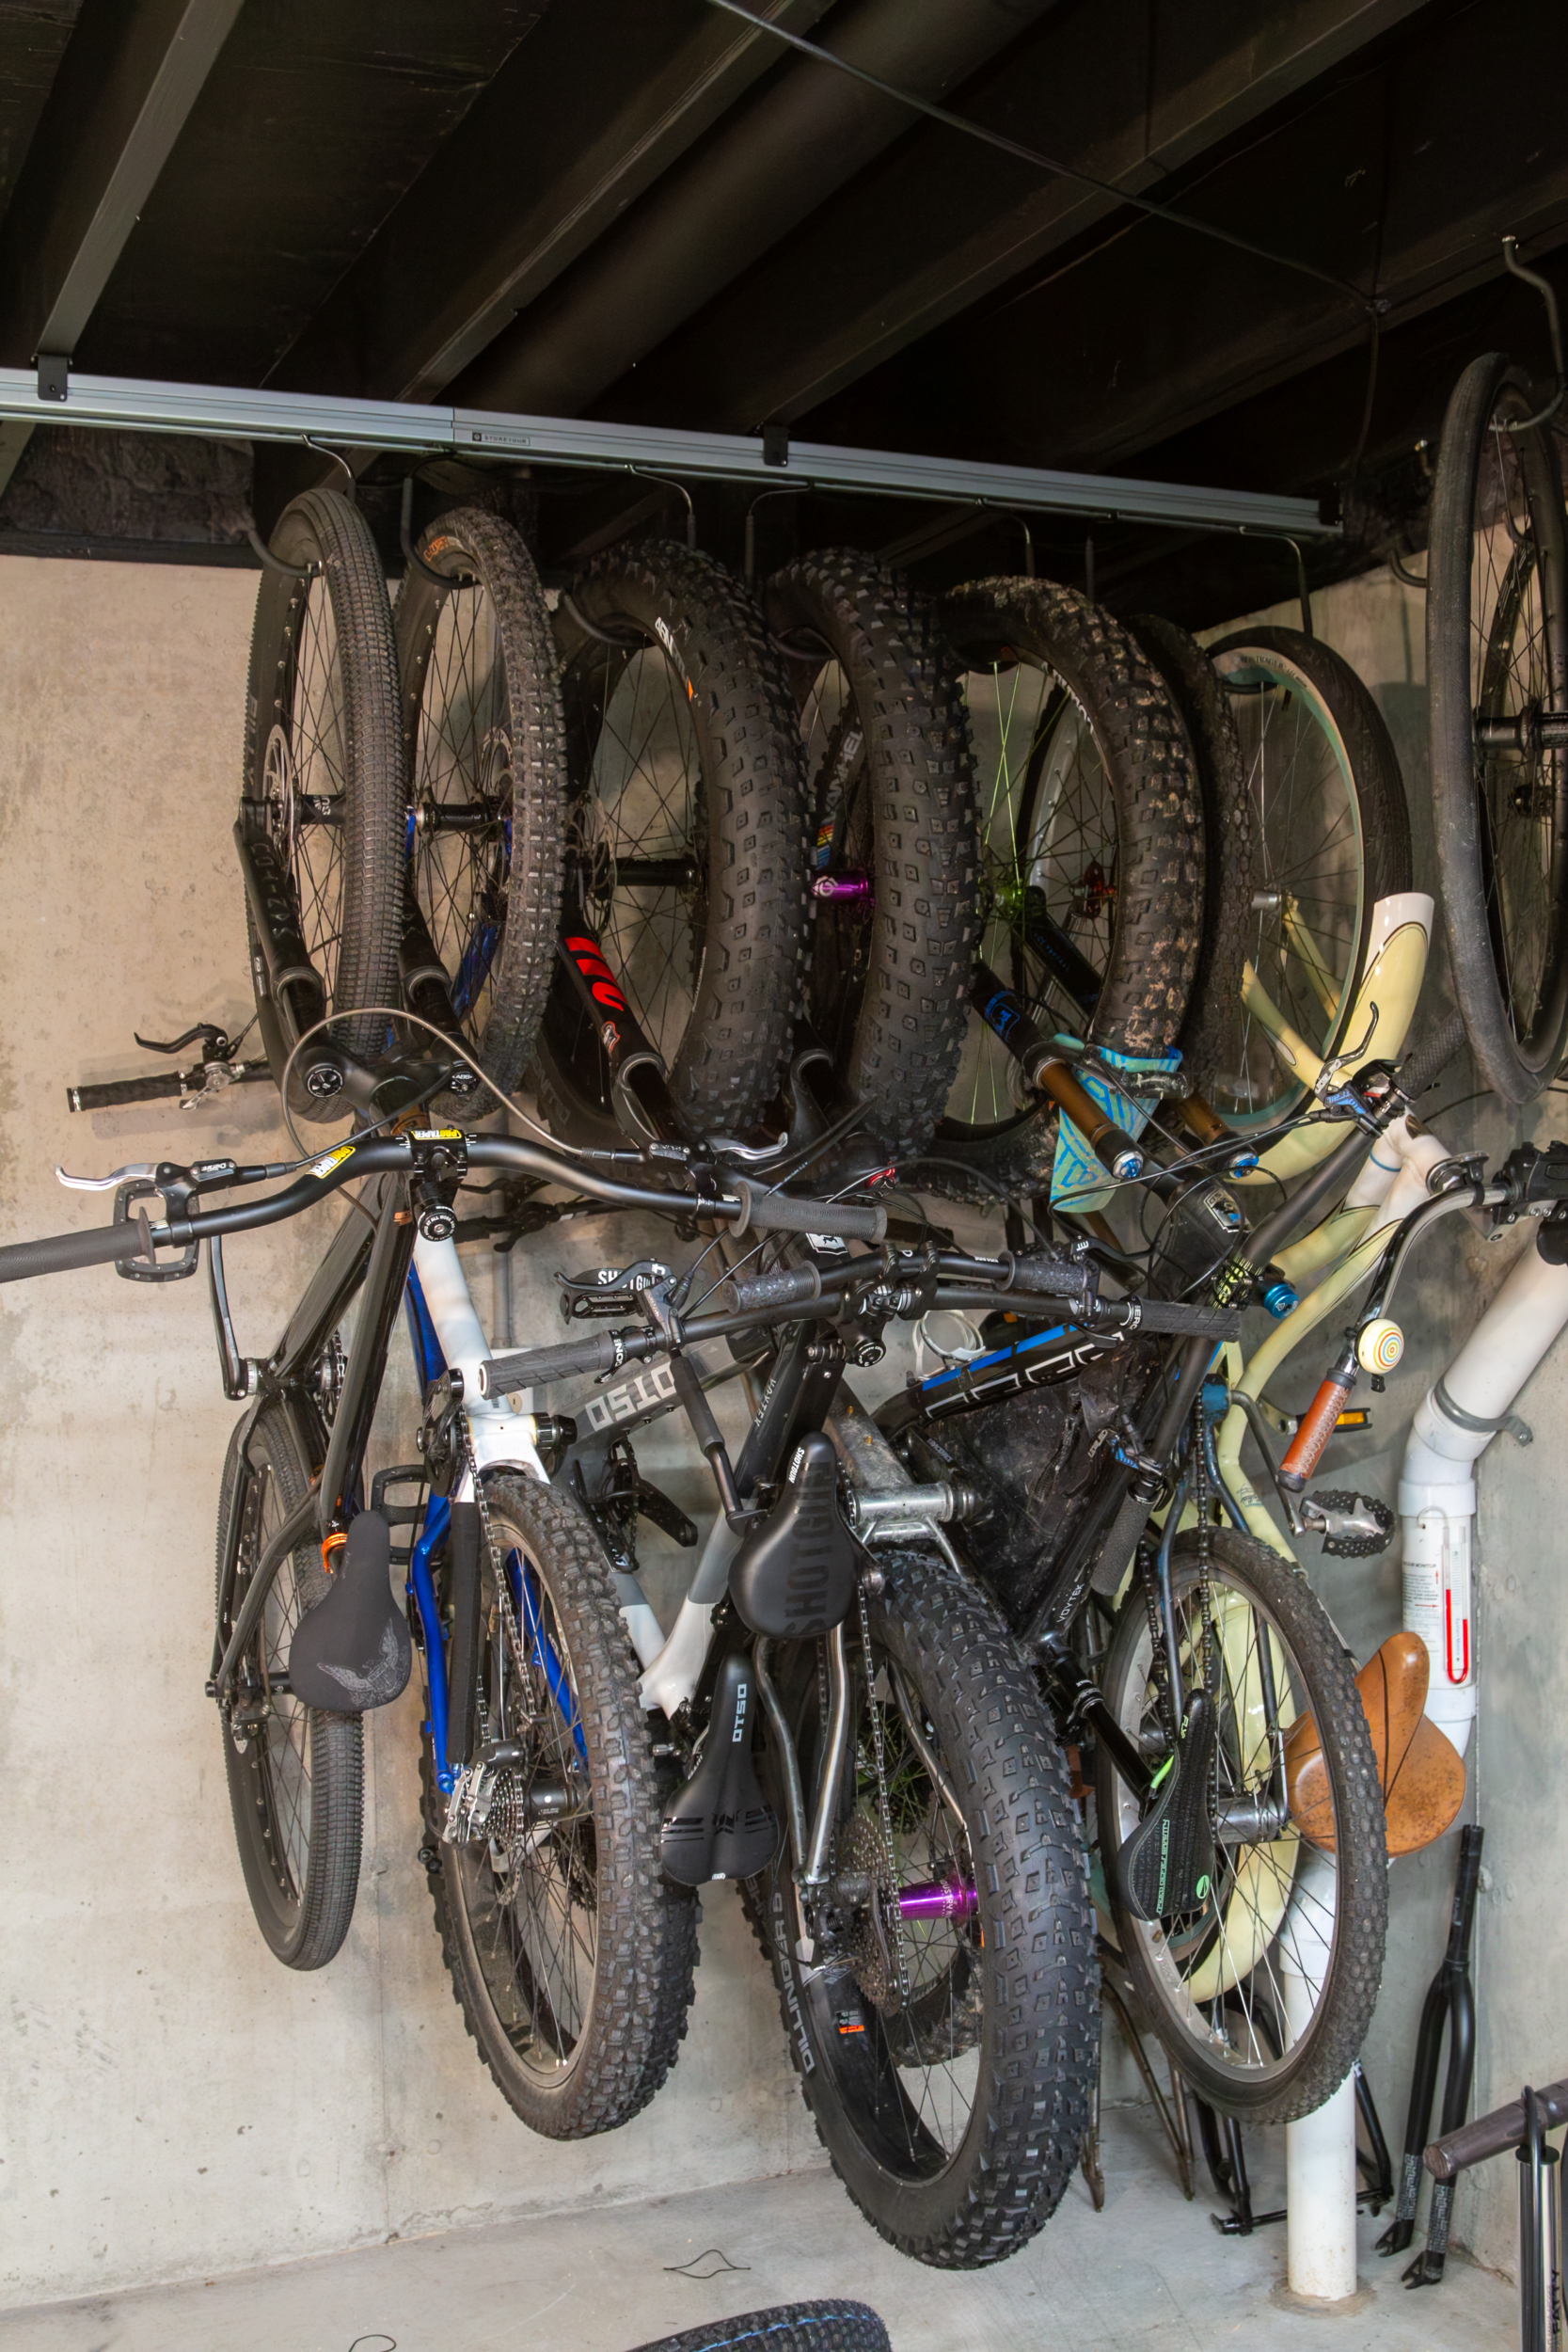
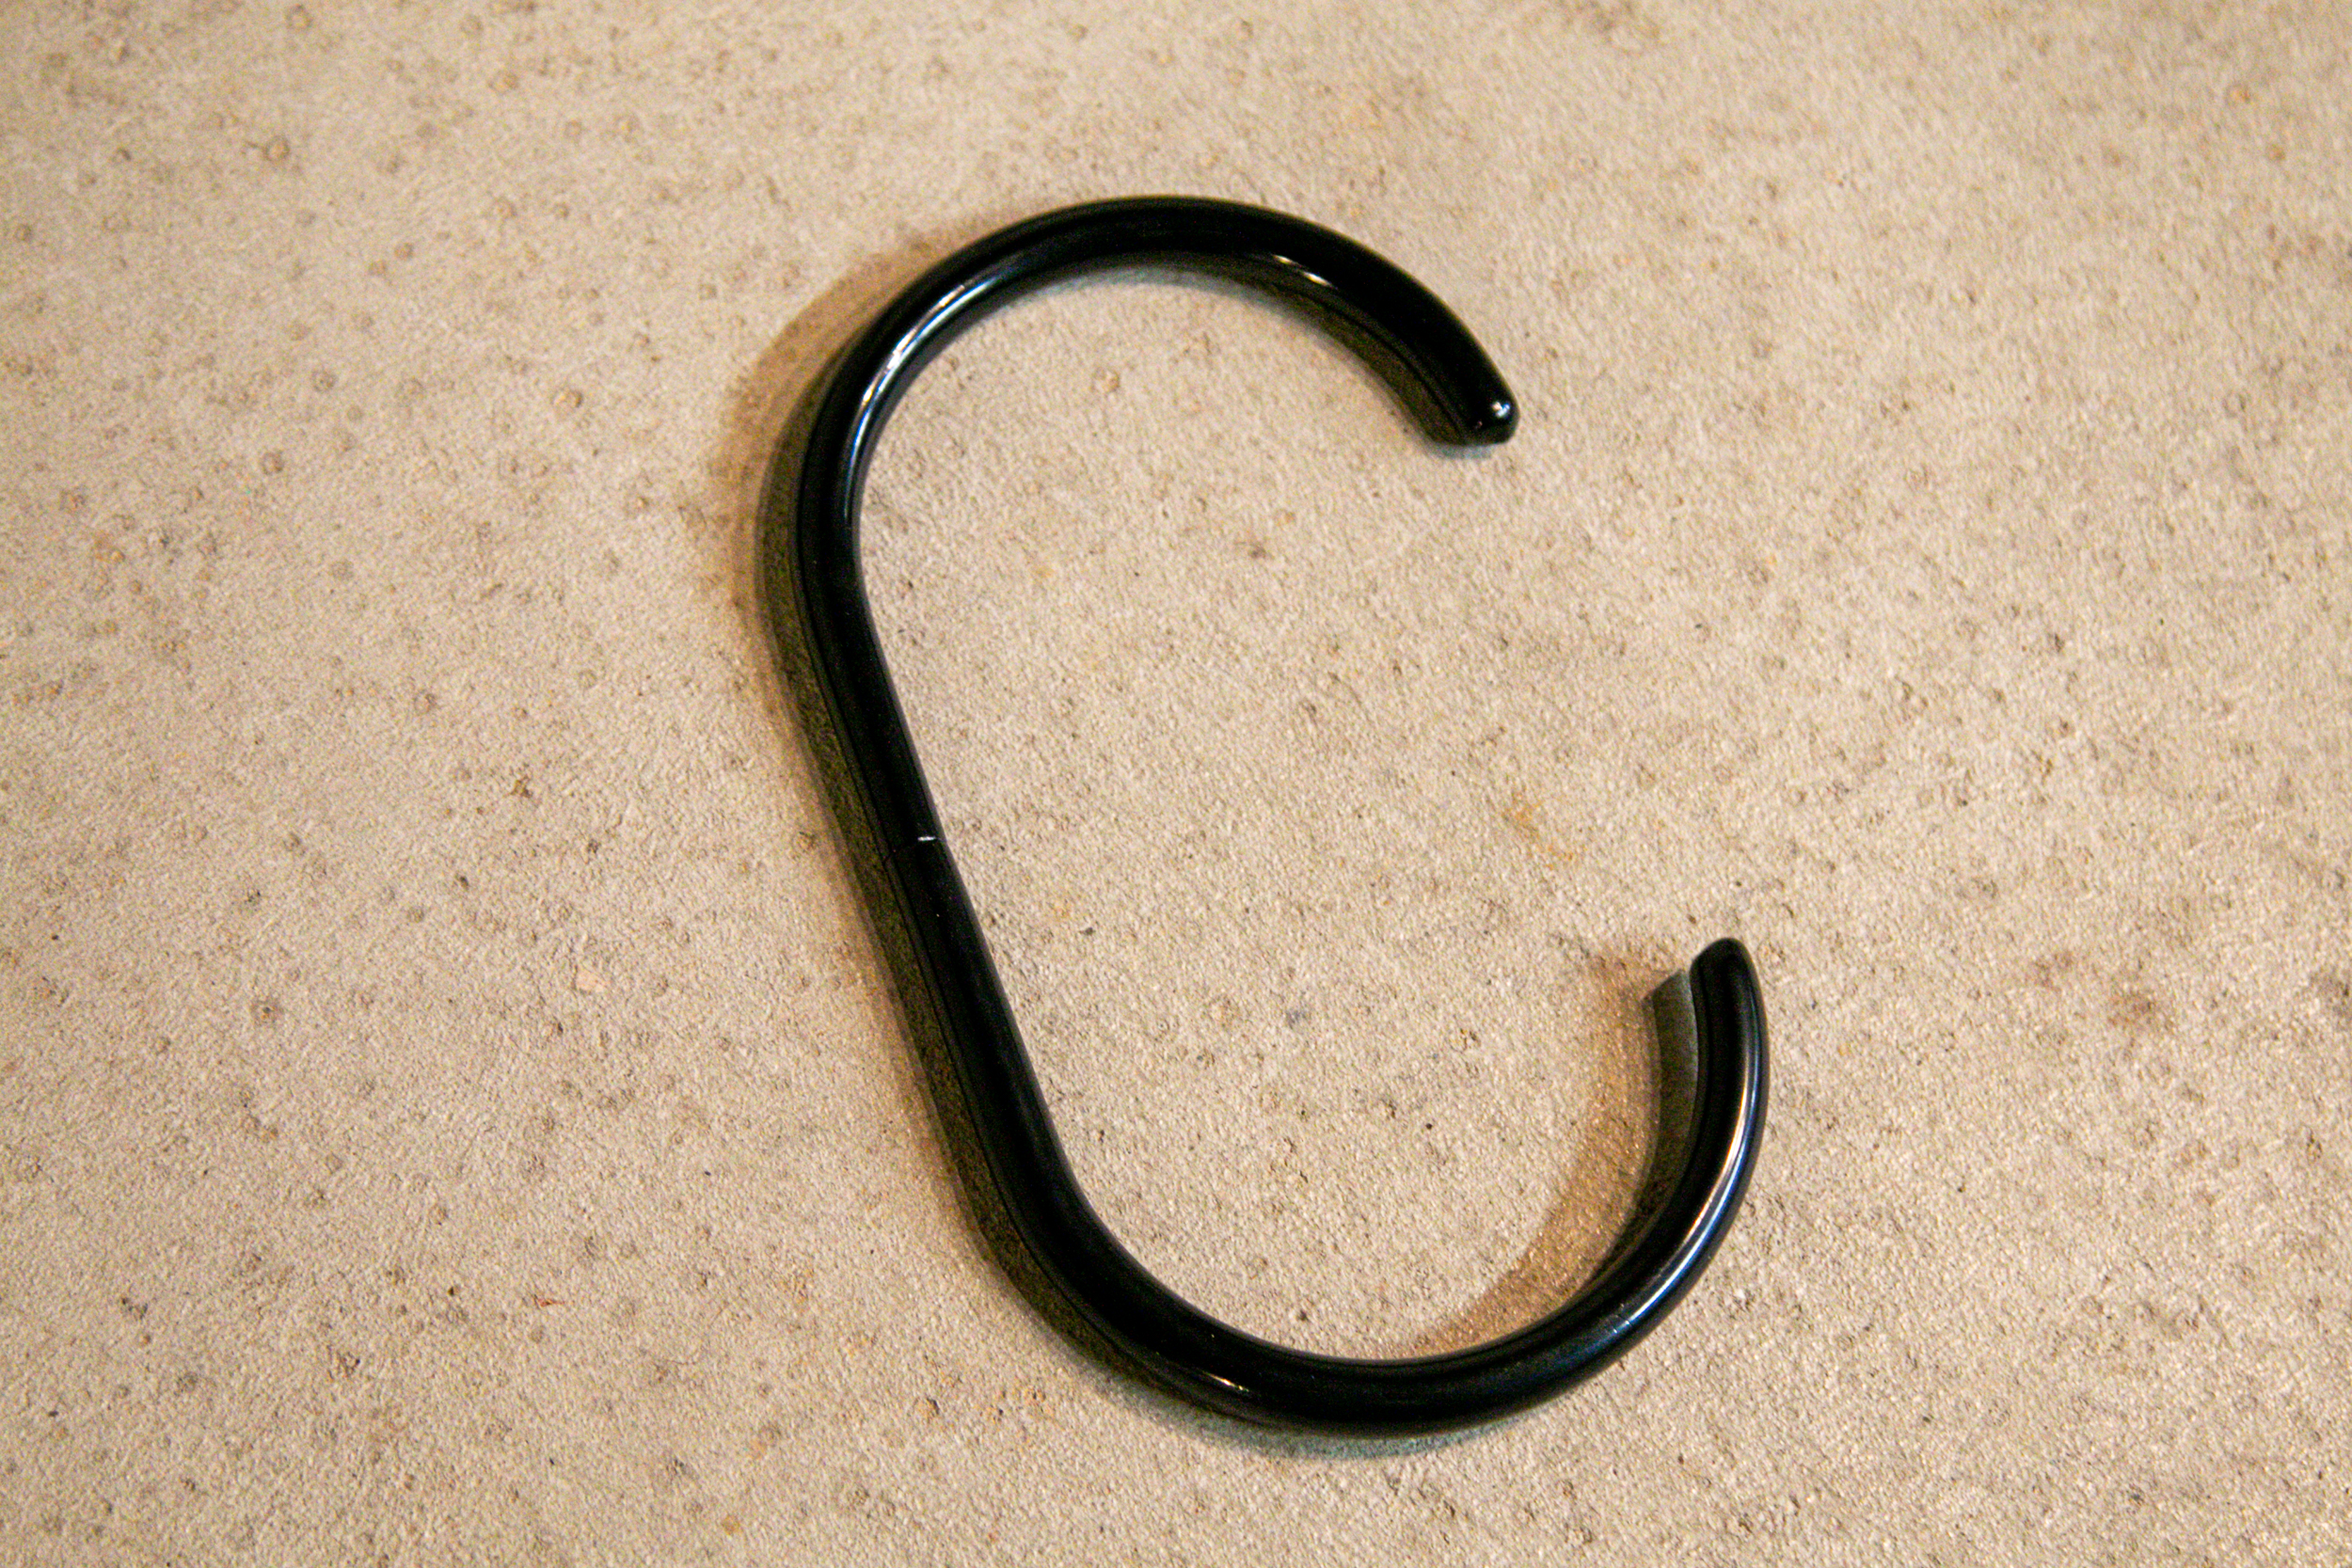
I approached Store Your with a clear goal: I needed more bike storage, but in a footprint that took up less room than the current setup using the classic bicycle storage hook. With one hook per ceiling joist, the bikes in my shop were already as close together as physically possible. But on paper at least, it seemed like the CycleSlide would allow for more bike hooks in less space and keep them easily accessible. All this while staying less expensive than other sliding hook systems on the market.
It sounds too good to be true, but it isn’t.
Now you may be thinking I only have one bike. Or 2, or 4. Is this rack for me? Absolutely. One of the best features of the CycleSlide is that it’s modular, meaning you can buy as few or as many tracks as you need. Even if you only have one bike, the Cycleslide would still be a great option that would allow you to easily place it on the rack and then slide it into a corner, for example, taking up less room in your garage, basement, house, apartment, shed, etc (and you can hang more than bikes from it).
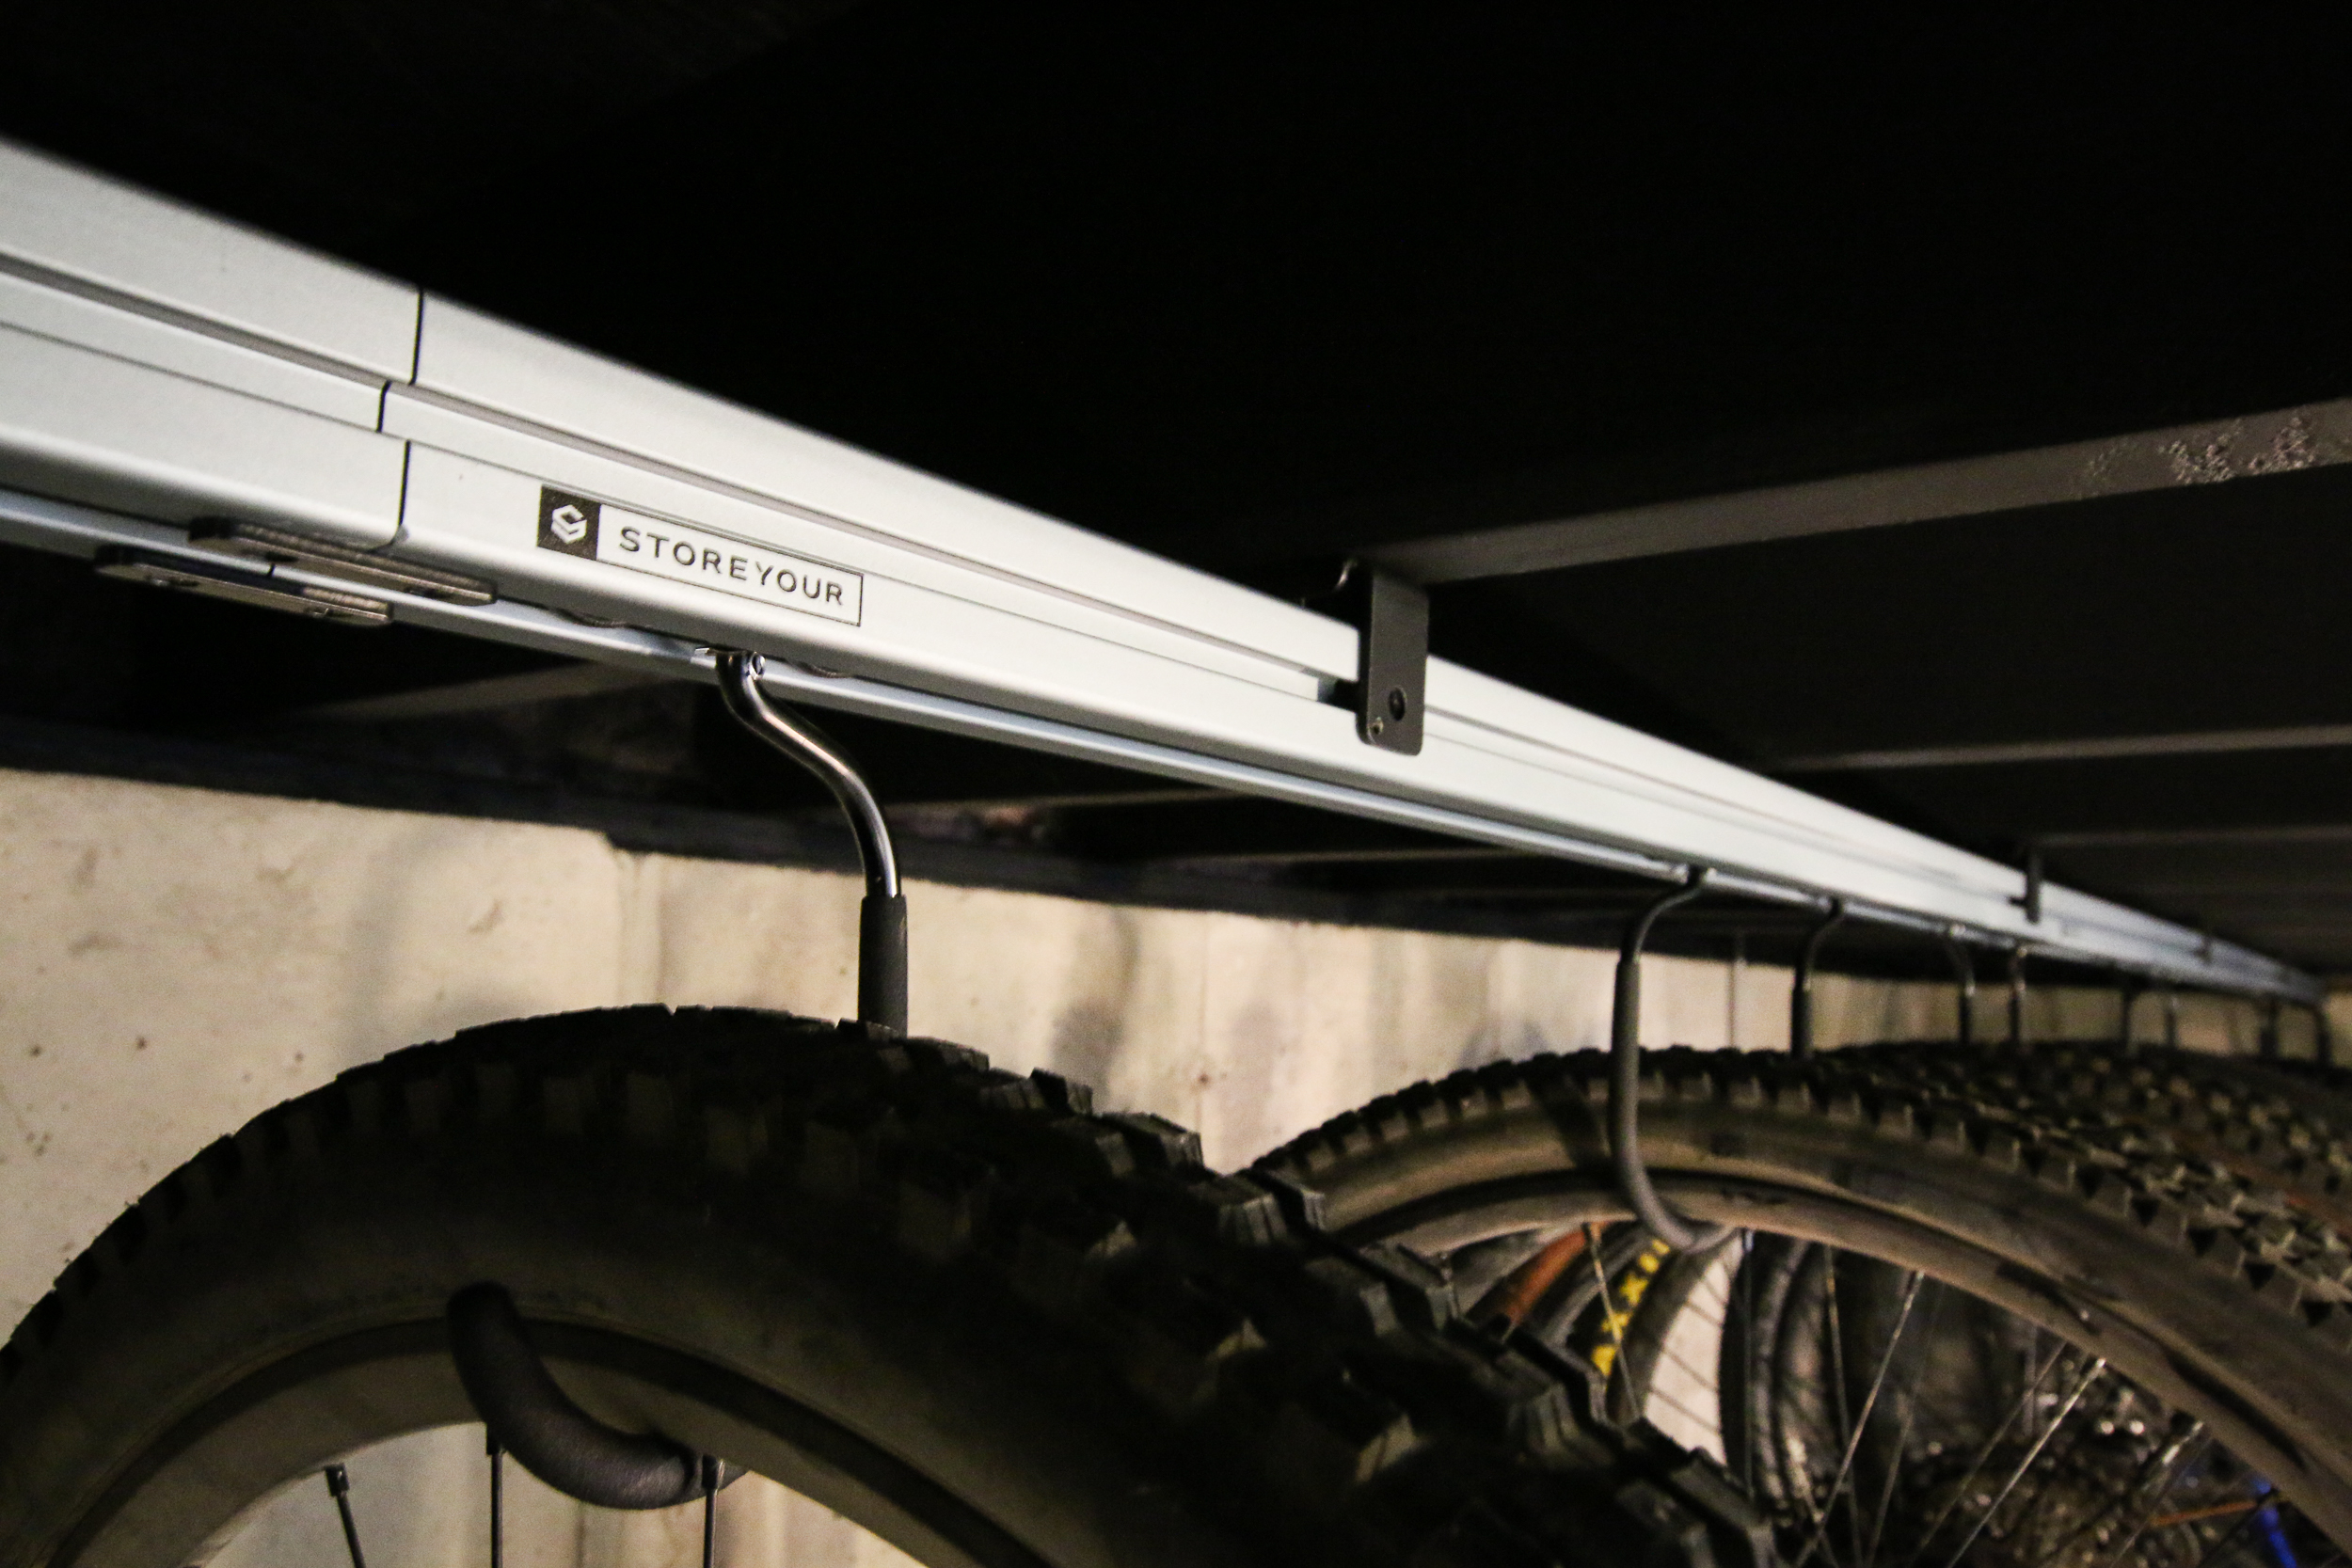
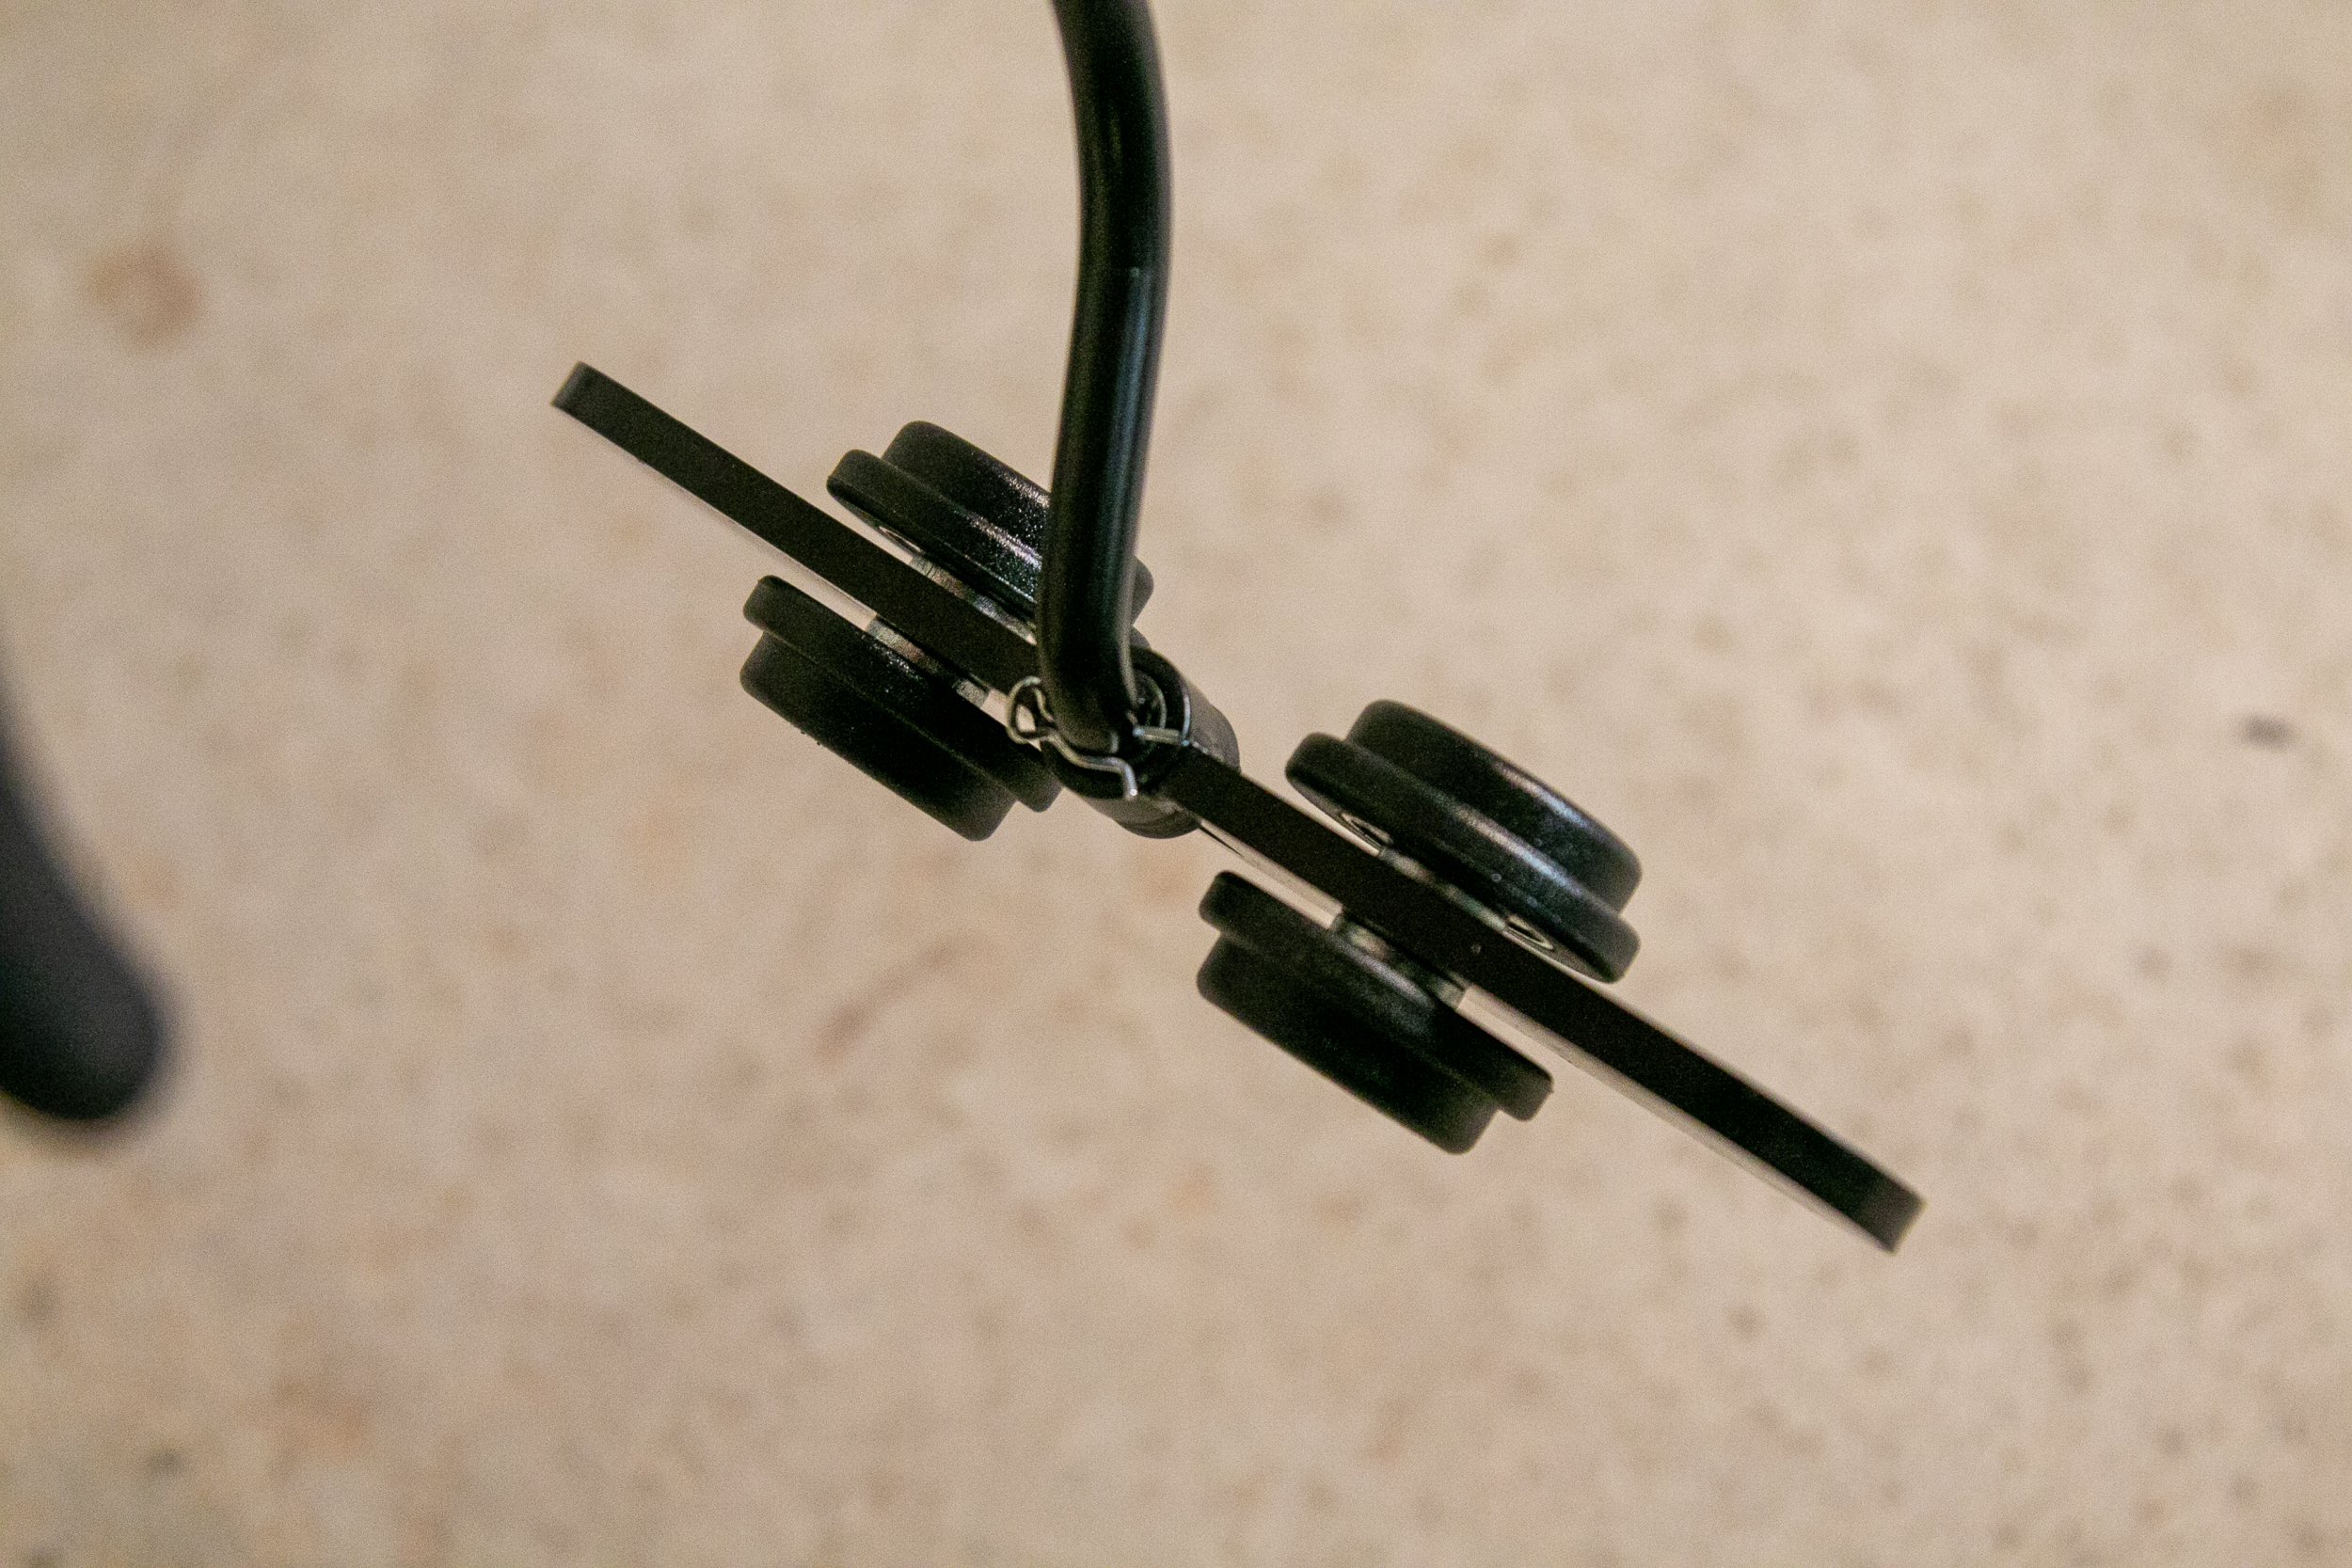
CycleSlide gets even better when you start adding more bikes. Each bike is placed on a hook that rides in its own carrier. The hook can spin within the carrier, and the carrier itself rides in the track on wheels mounted to cartridge bearings. This allows you to effortlessly move and position the bikes, coordinating your own bicycle storage ballet.
The movement of these hooks and carriers is what allows you to store more bikes in less space. Once the bikes are in the hooks, you can slide them extremely close together. Basically, to the point that they’re touching. You wouldn’t be able to set up a traditional bike hook this way, because you’d never be able to get the bikes in and out of storage without a ton of hassle at best, or damage to the bikes at worst.
The same lateral and rotational movement that allows you to store the bikes so close together is the same movement that allows for easy access when it’s time to ride. Pick your bike and simply slide the other bikes to the side like you would clothes hanging in a closet. This provides ample room around the bike you’ve chosen, to get it down and put it back when you’re done without touching any of the other bikes. This movement can also allow you to store bikes in an area you wouldn’t be able to otherwise – say, behind something, or in an area that isn’t easily accessible. As long as you can reach the bikes to pull them out to an area where they are accessible, you have more options for their storage.
The Track
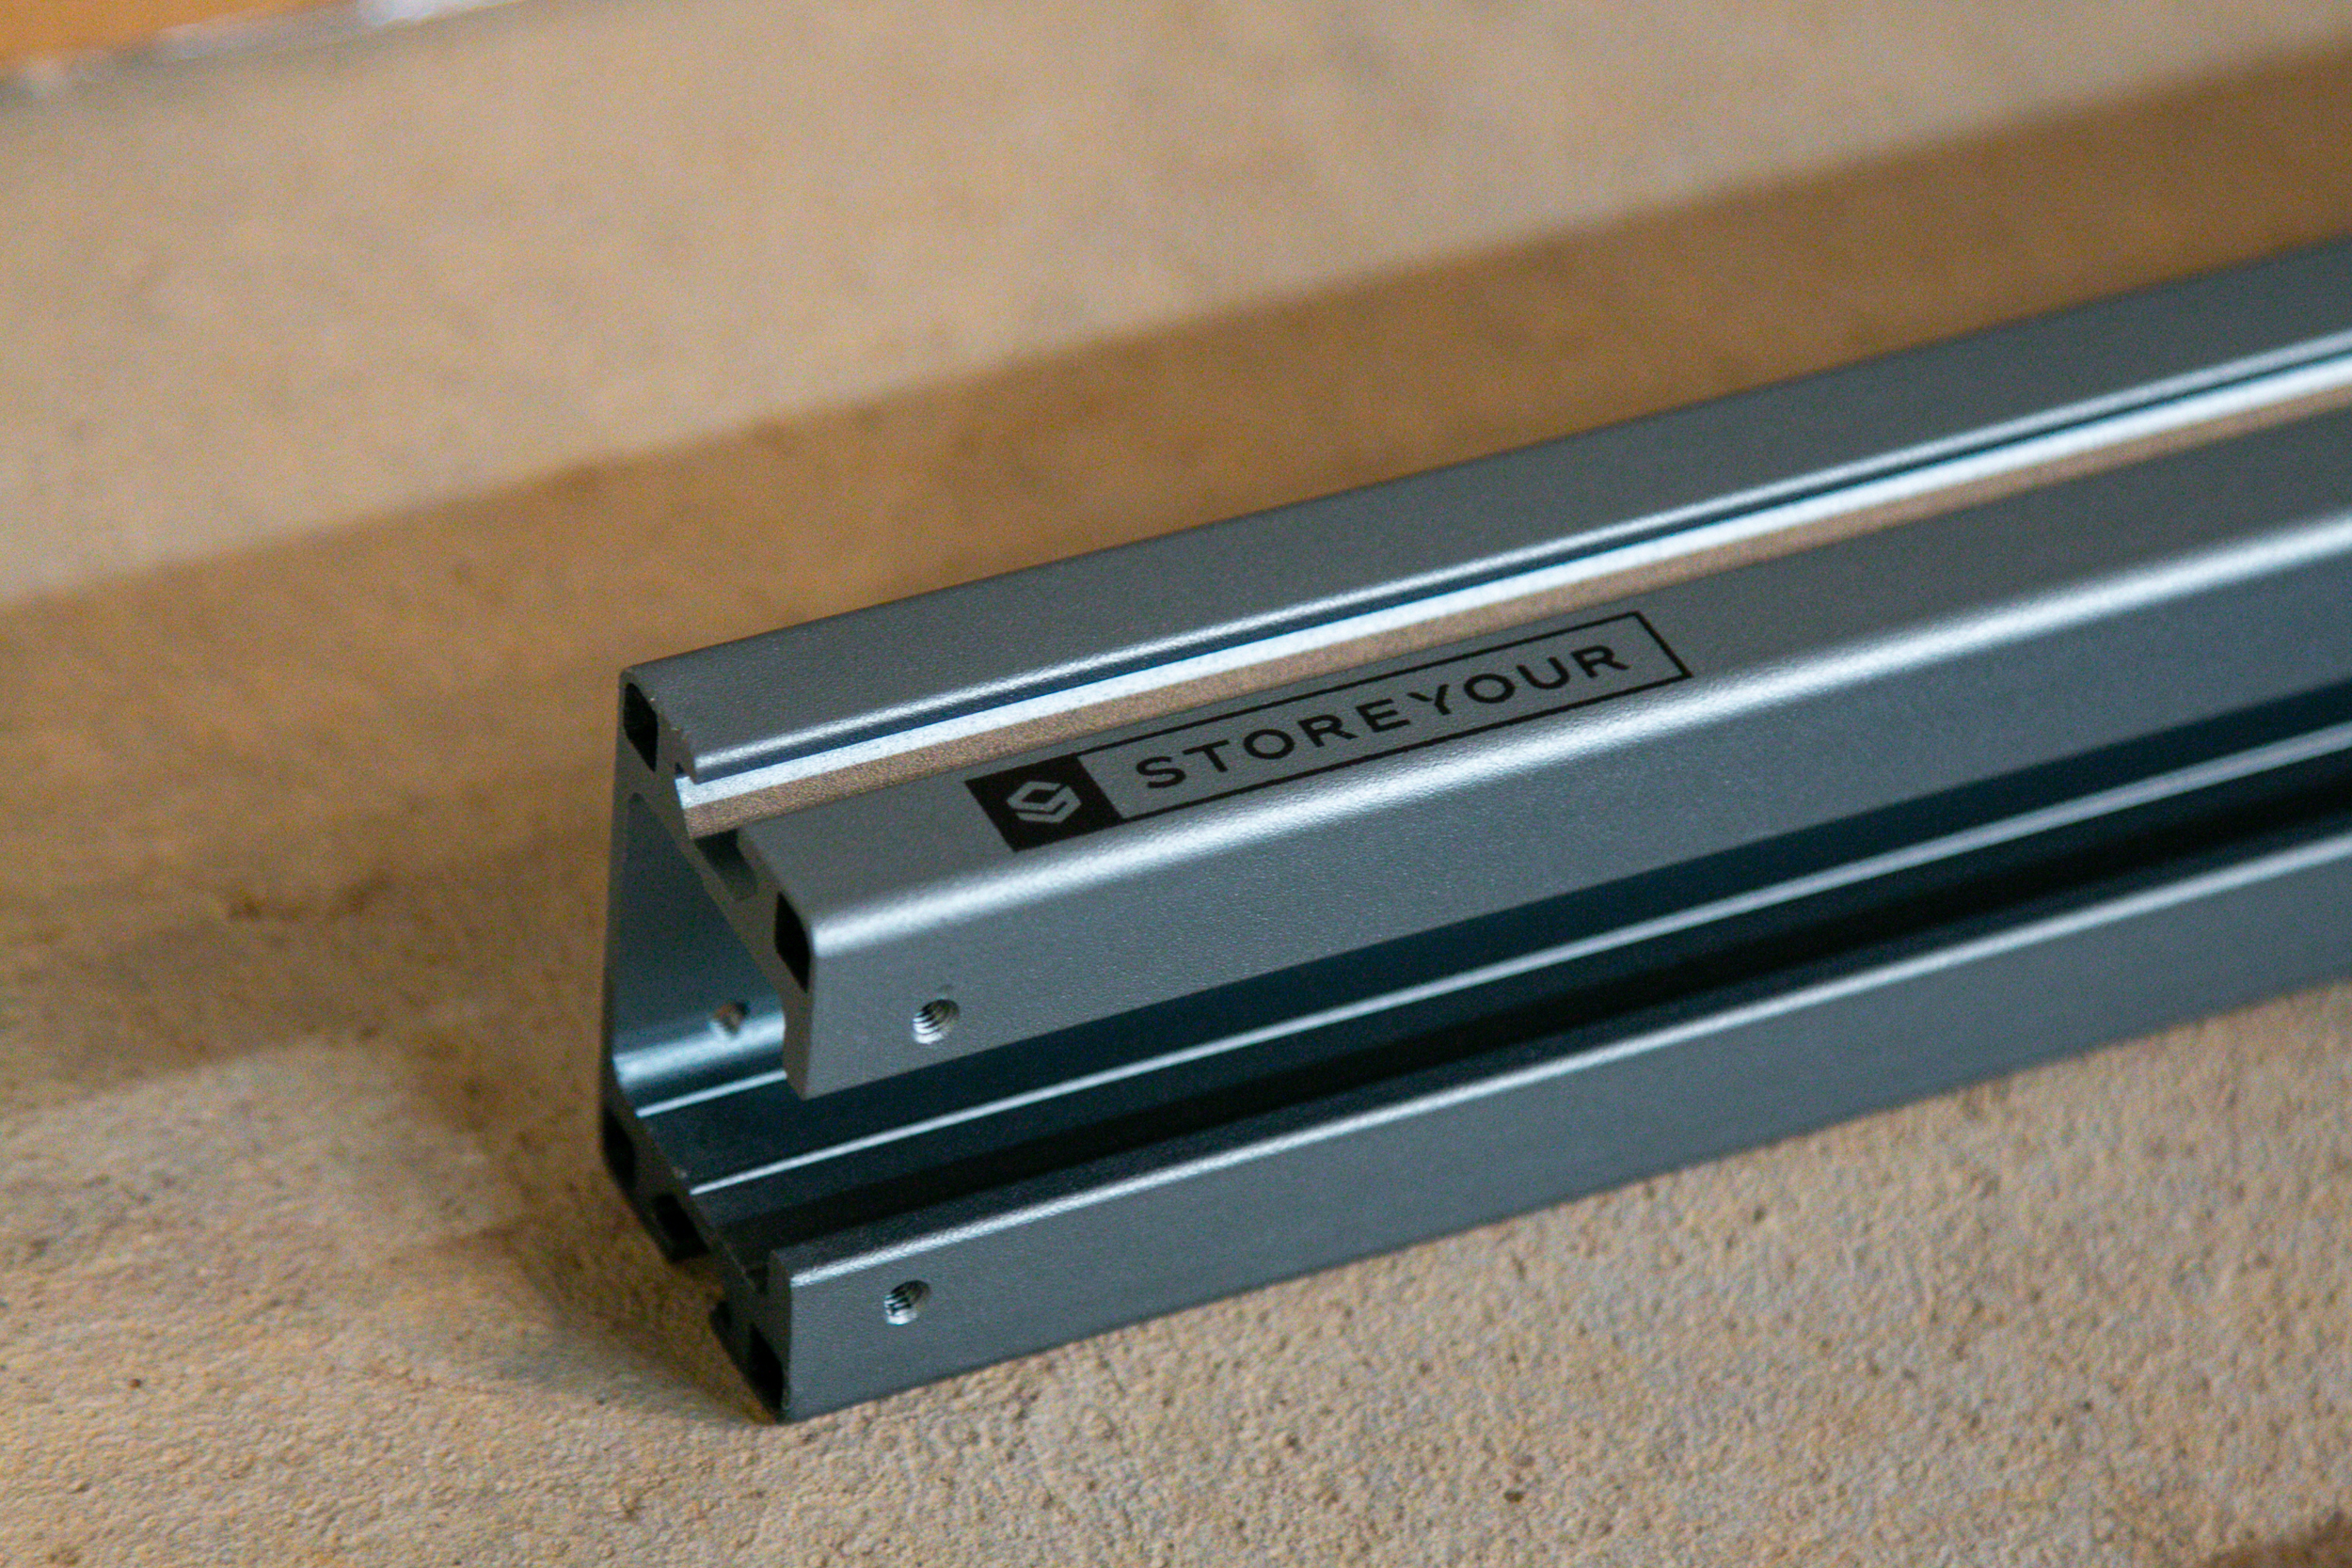
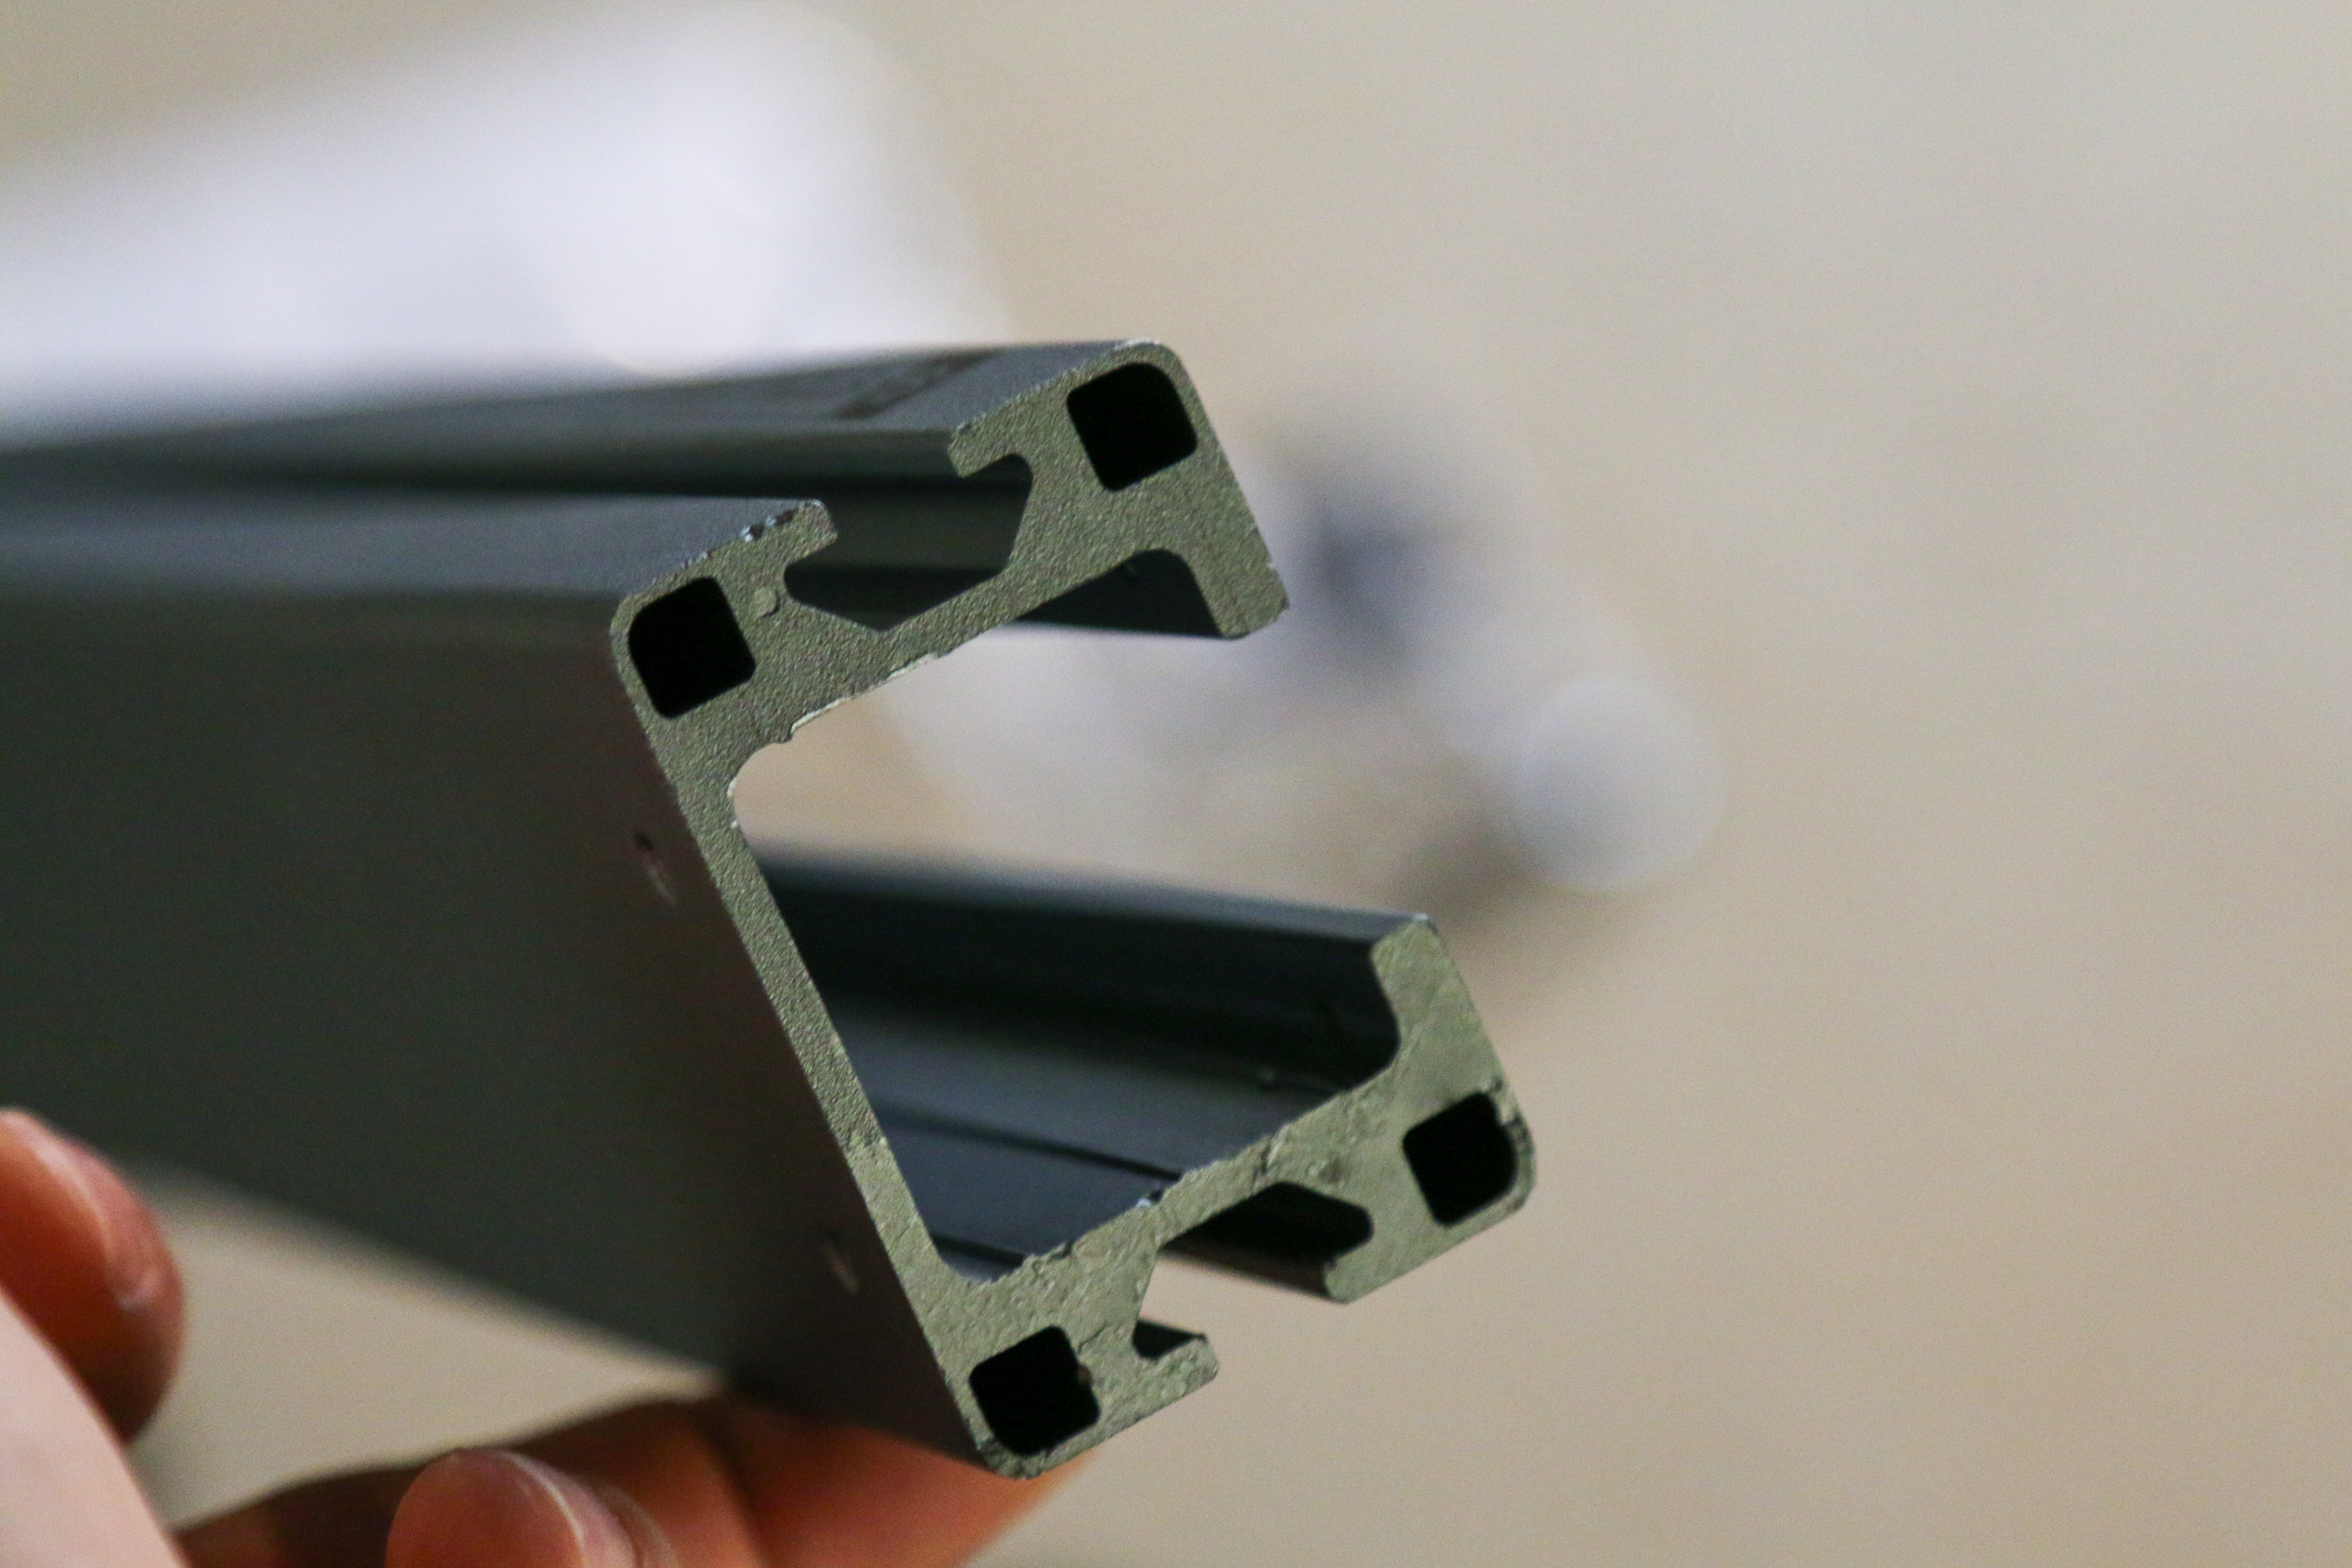
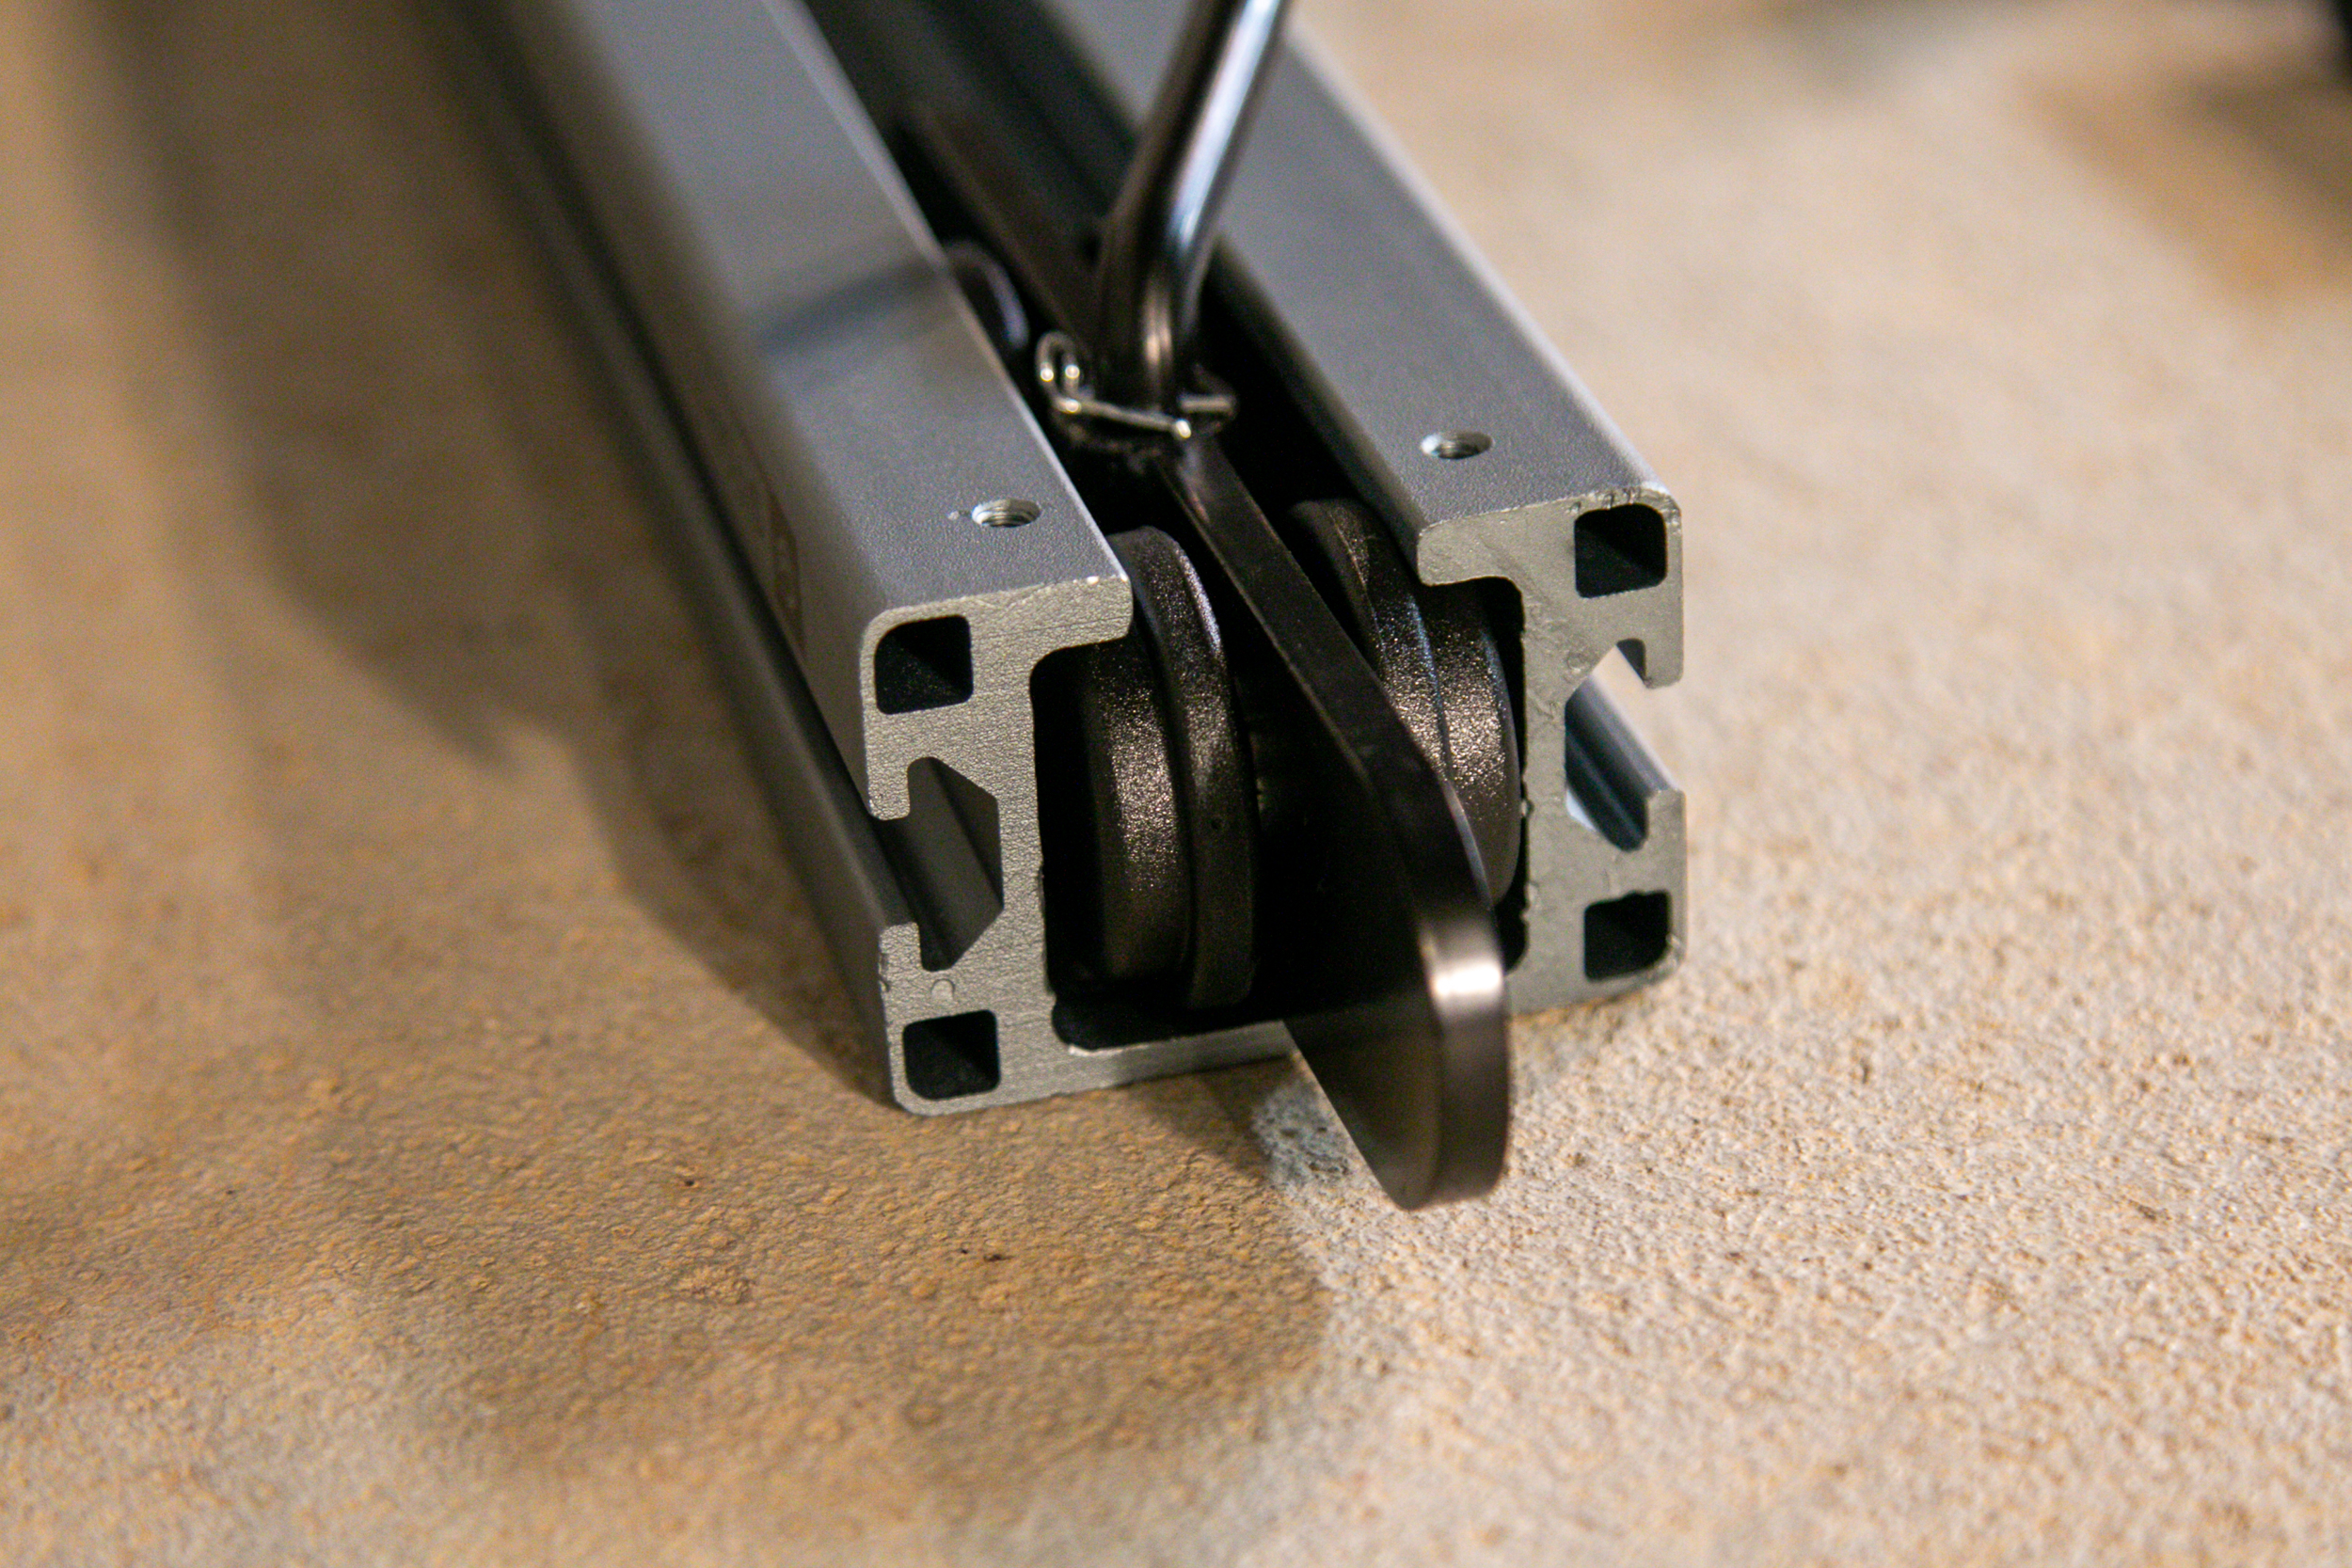
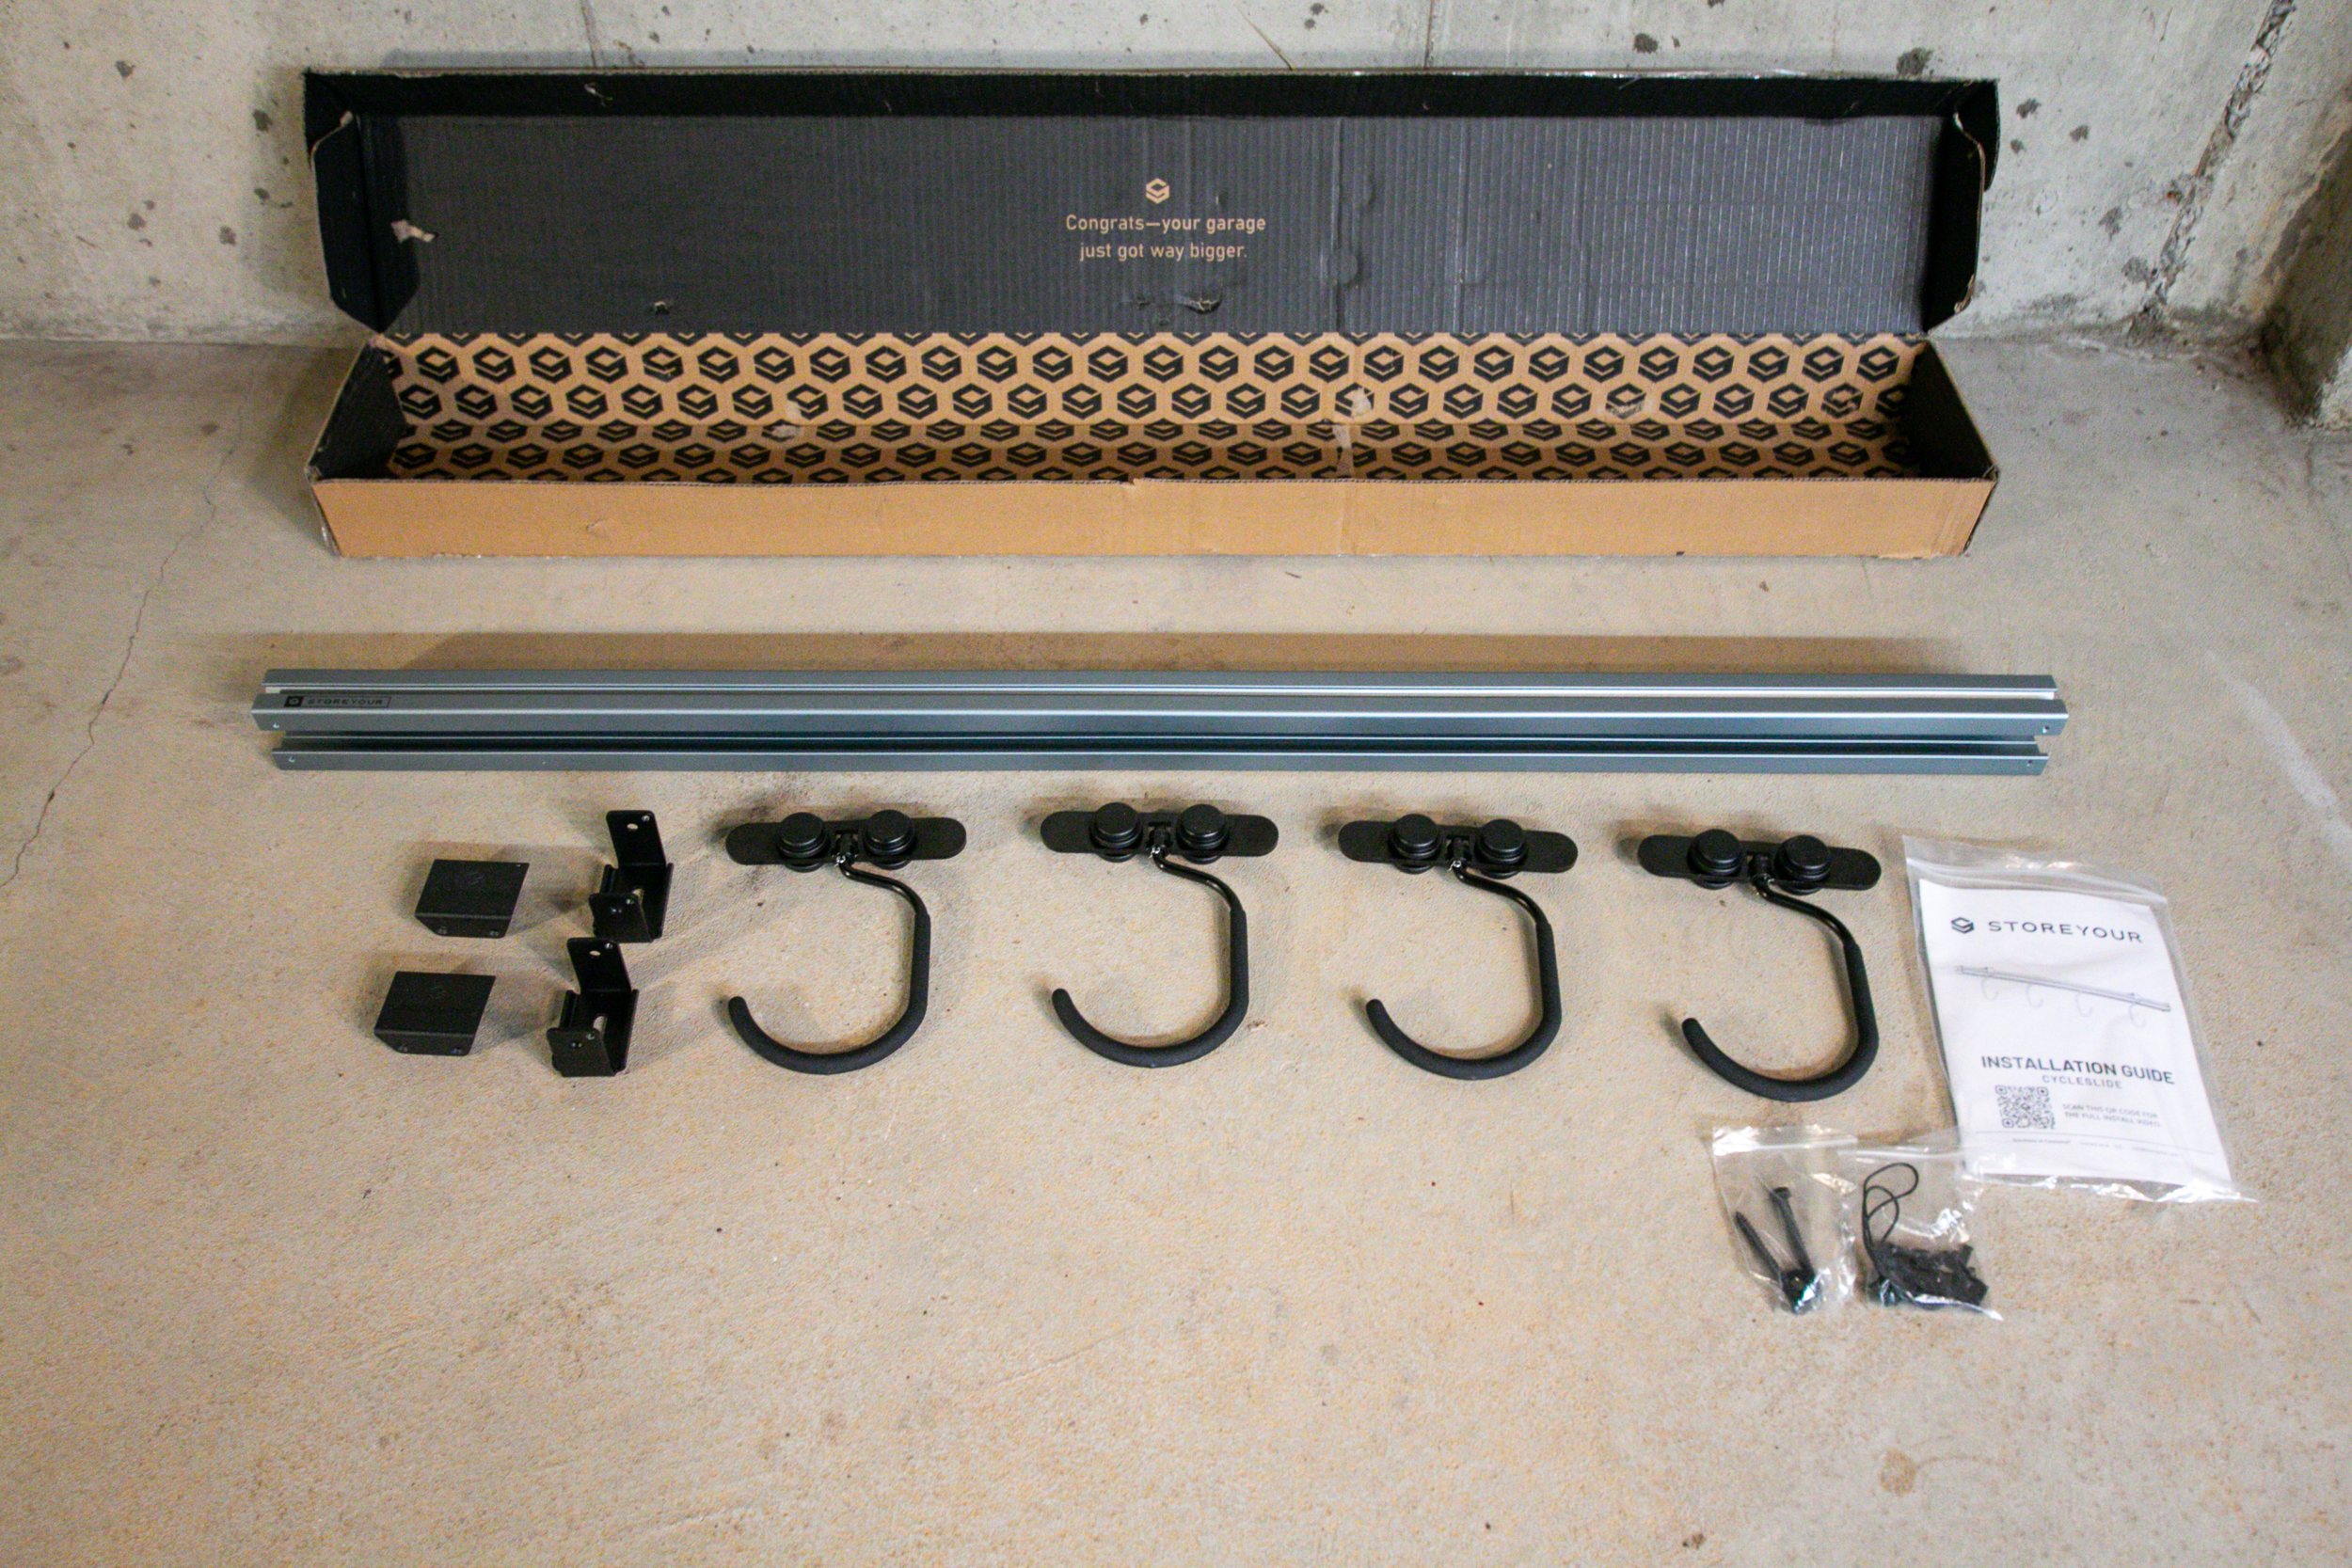
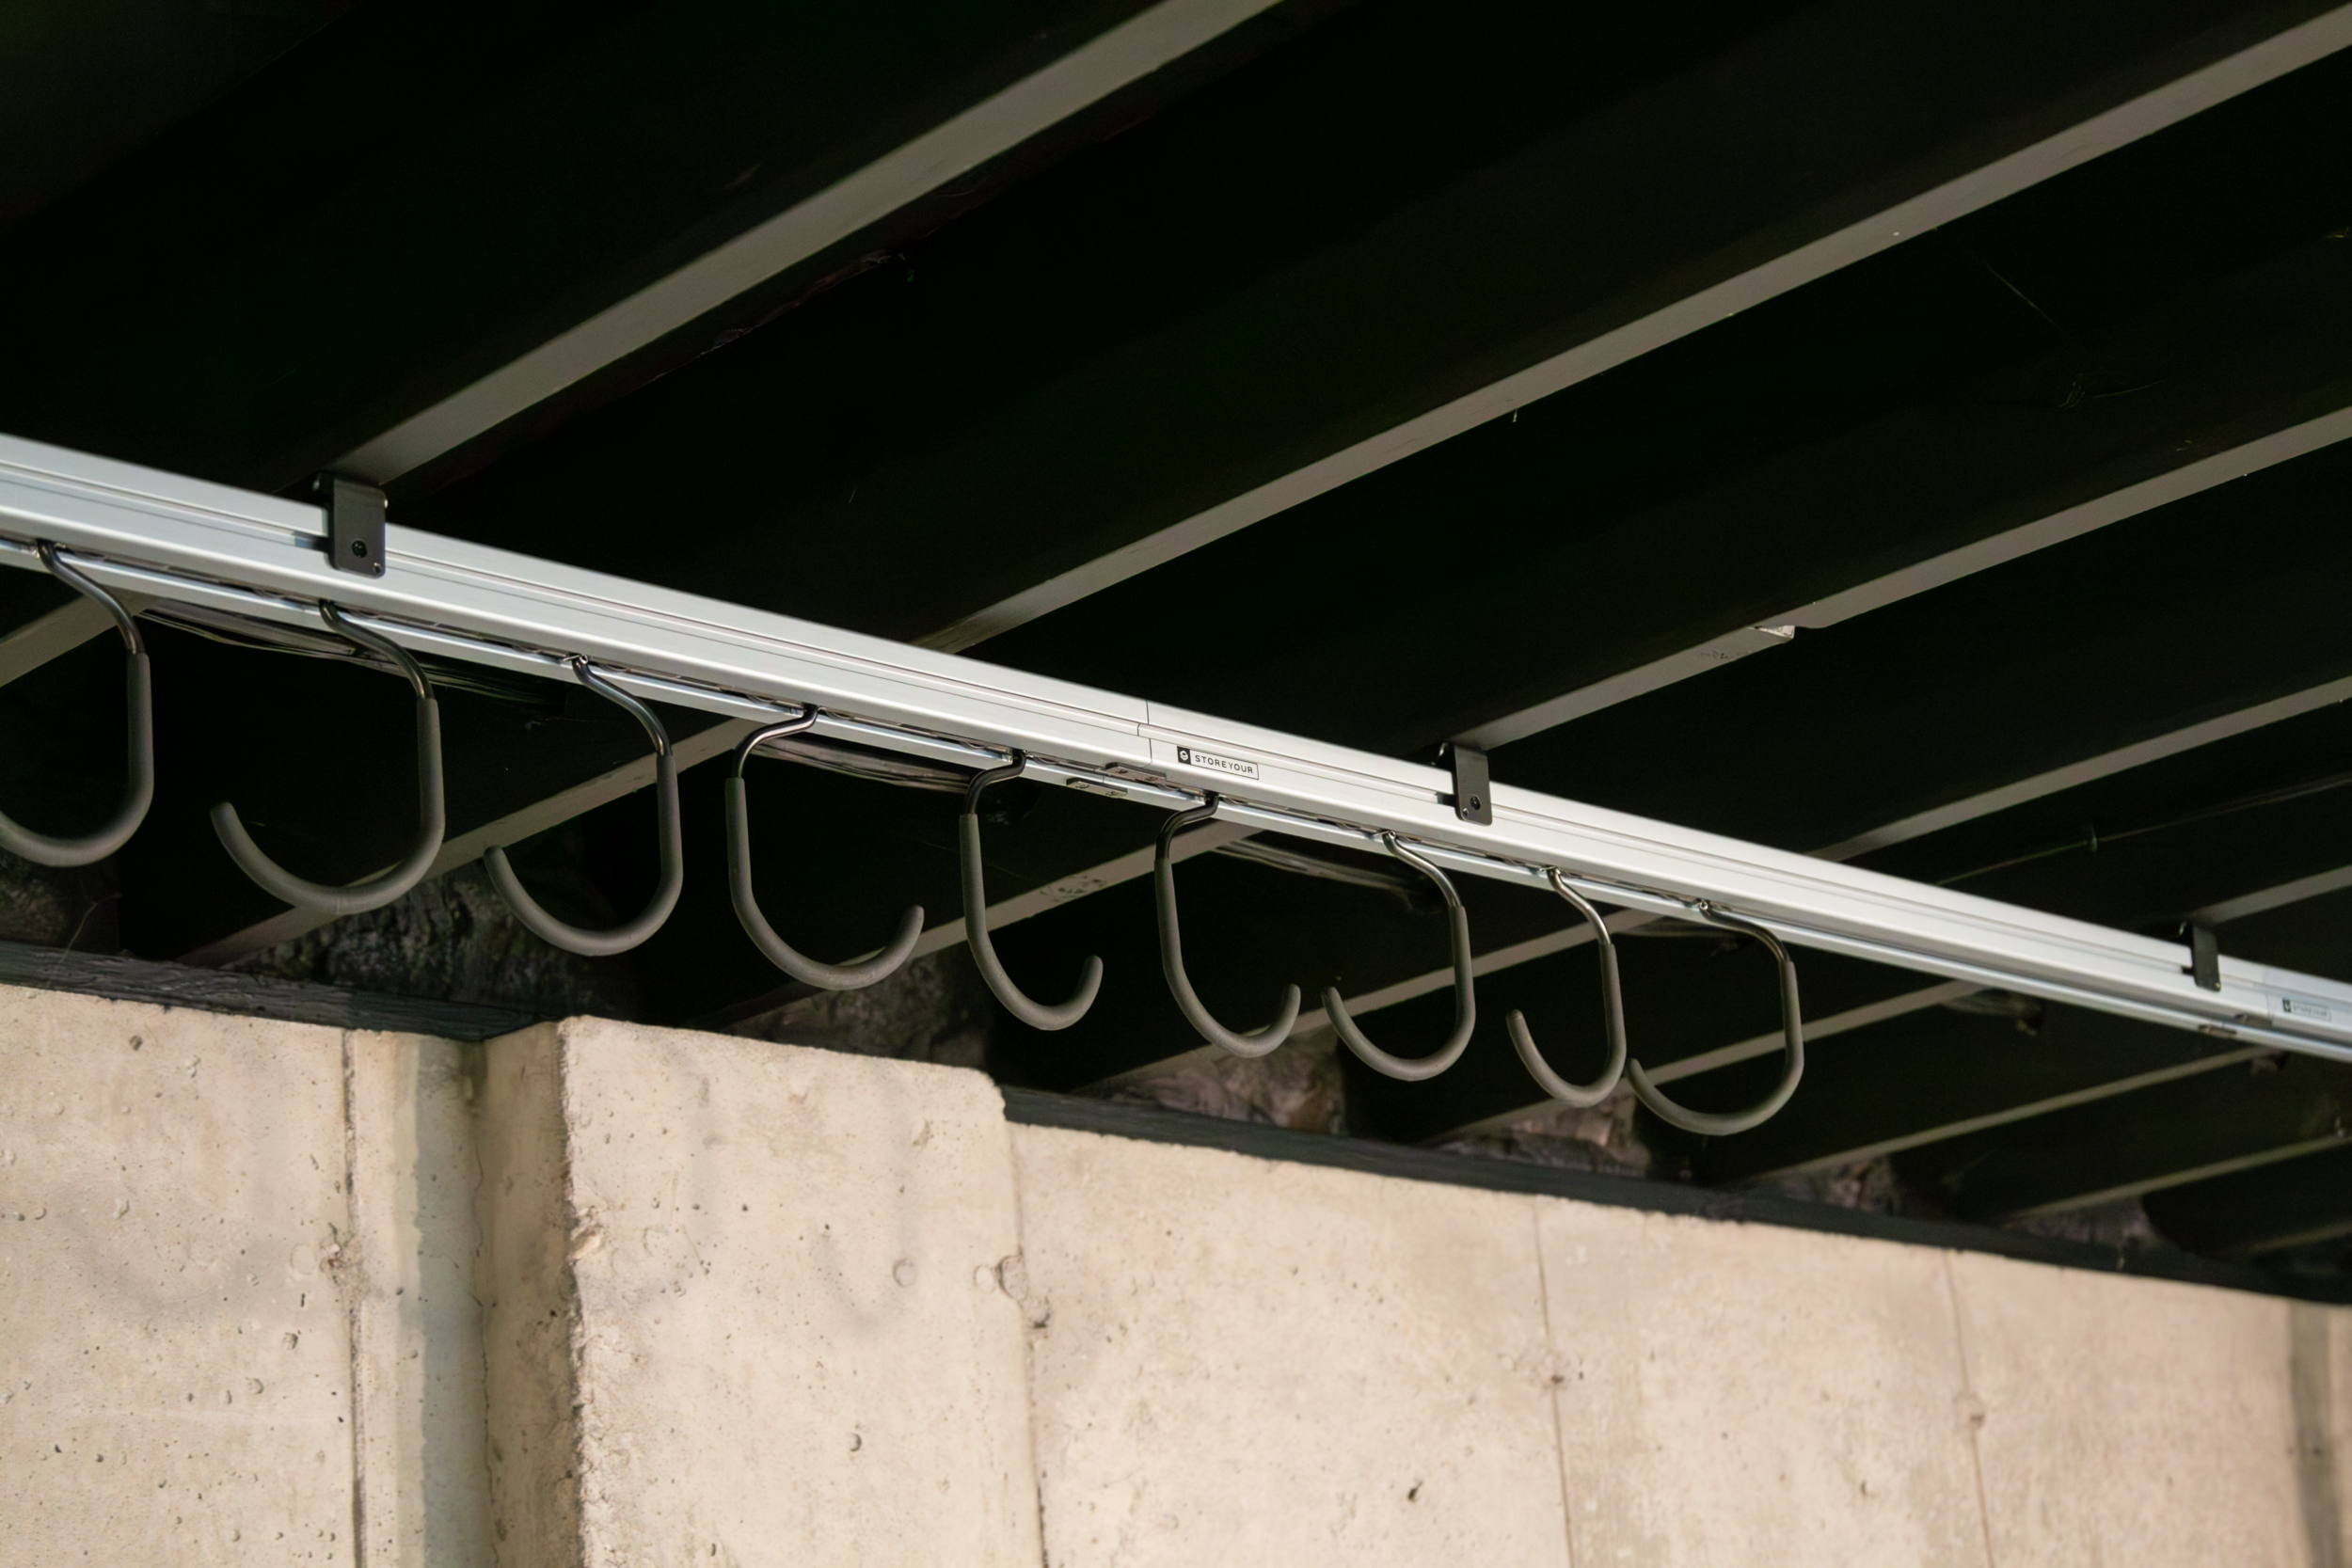
CycleSlides are sold in 4’ sections of track, which are generally classified as 1-4 bikes per 4’ section (we’ll get into this more below). The track itself is an aluminum extruded rail, but Store Your gives it a premium look with an anodized finish and subtle graphic in one corner. The track is mounted either to the ceiling or wall (you have to choose one of two different kits), the carriers are loaded inside the track, and then end caps are installed to keep the carriers (and bikes) from falling out either end. If you need storage for more than four bikes, track sections can be connected together to form one continuous line of track.
According to Store Your, this might be the first time that they’ve had someone connect 6 sections of track for a 24’ run of bike storage, but it worked just as well as if it were a single section of track. The obvious benefit here is that if you start with a 1-4 bike rack and take N+1 to heart, then you can easily add a section at a later date and give yourself more storage.
Another smart detail of the CycleSlide design is that the tracks can be mounted to any stud or joist spacing for your walls or ceiling. More on that in the installation section.
The Hooks
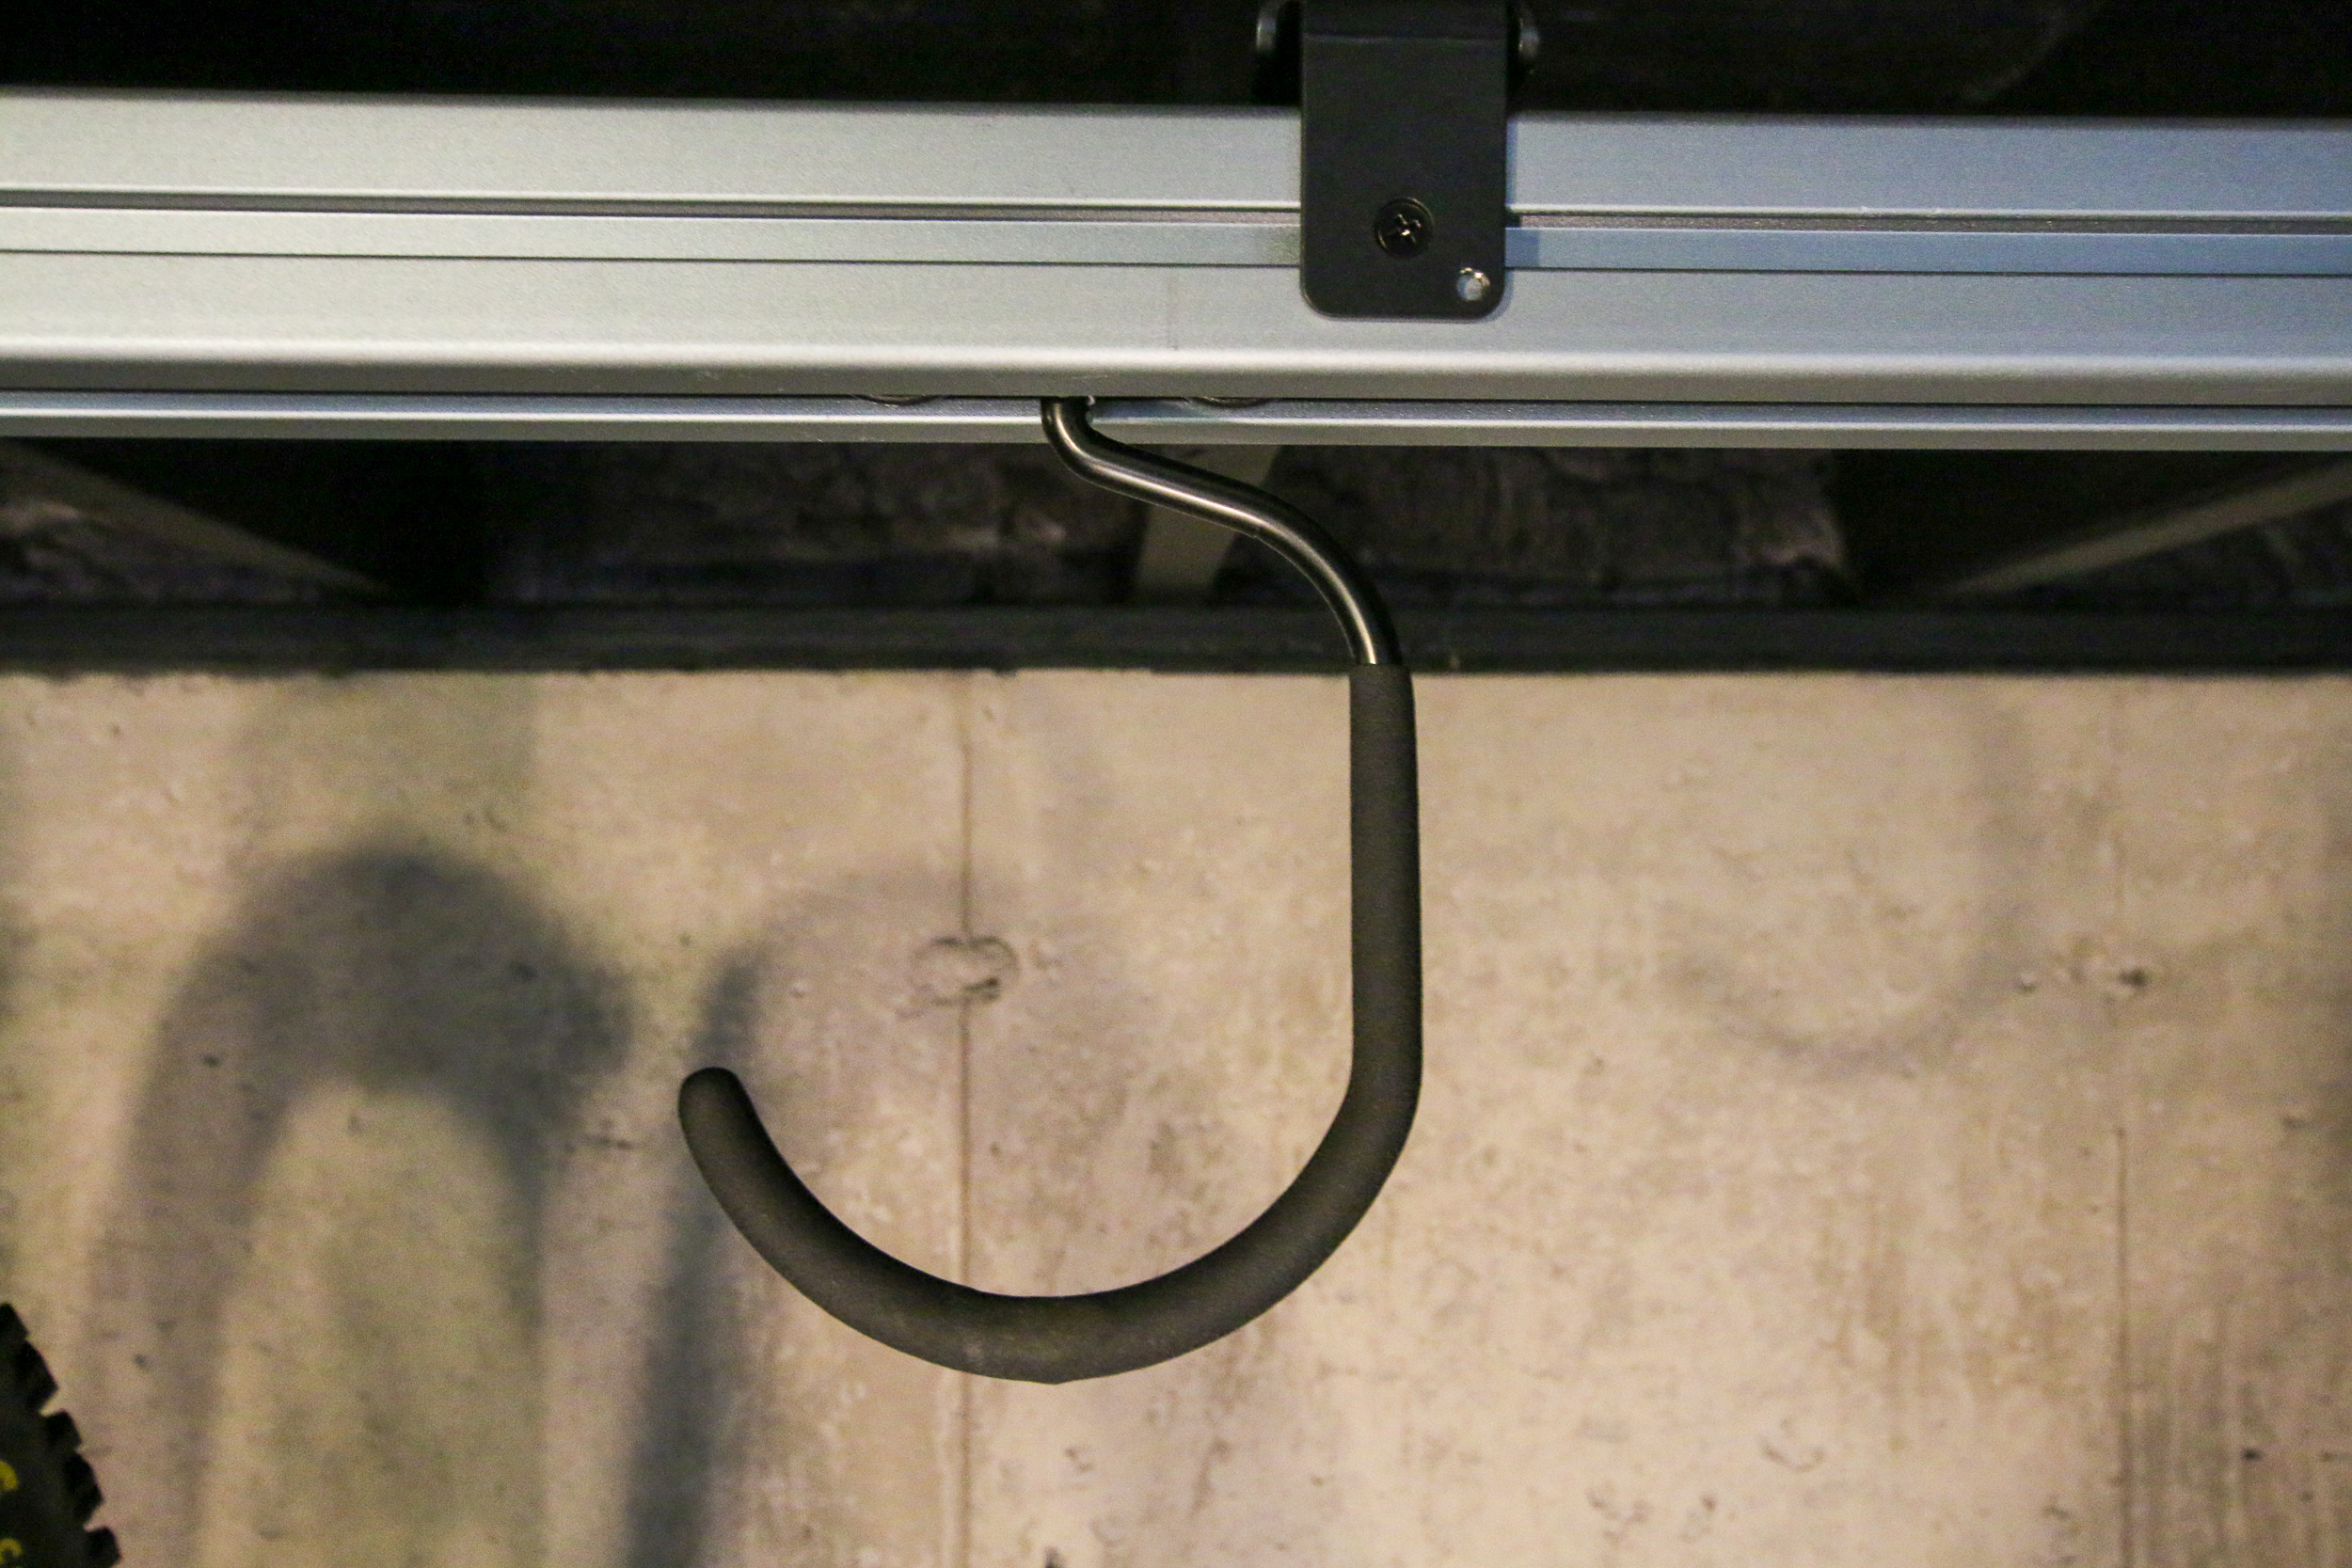
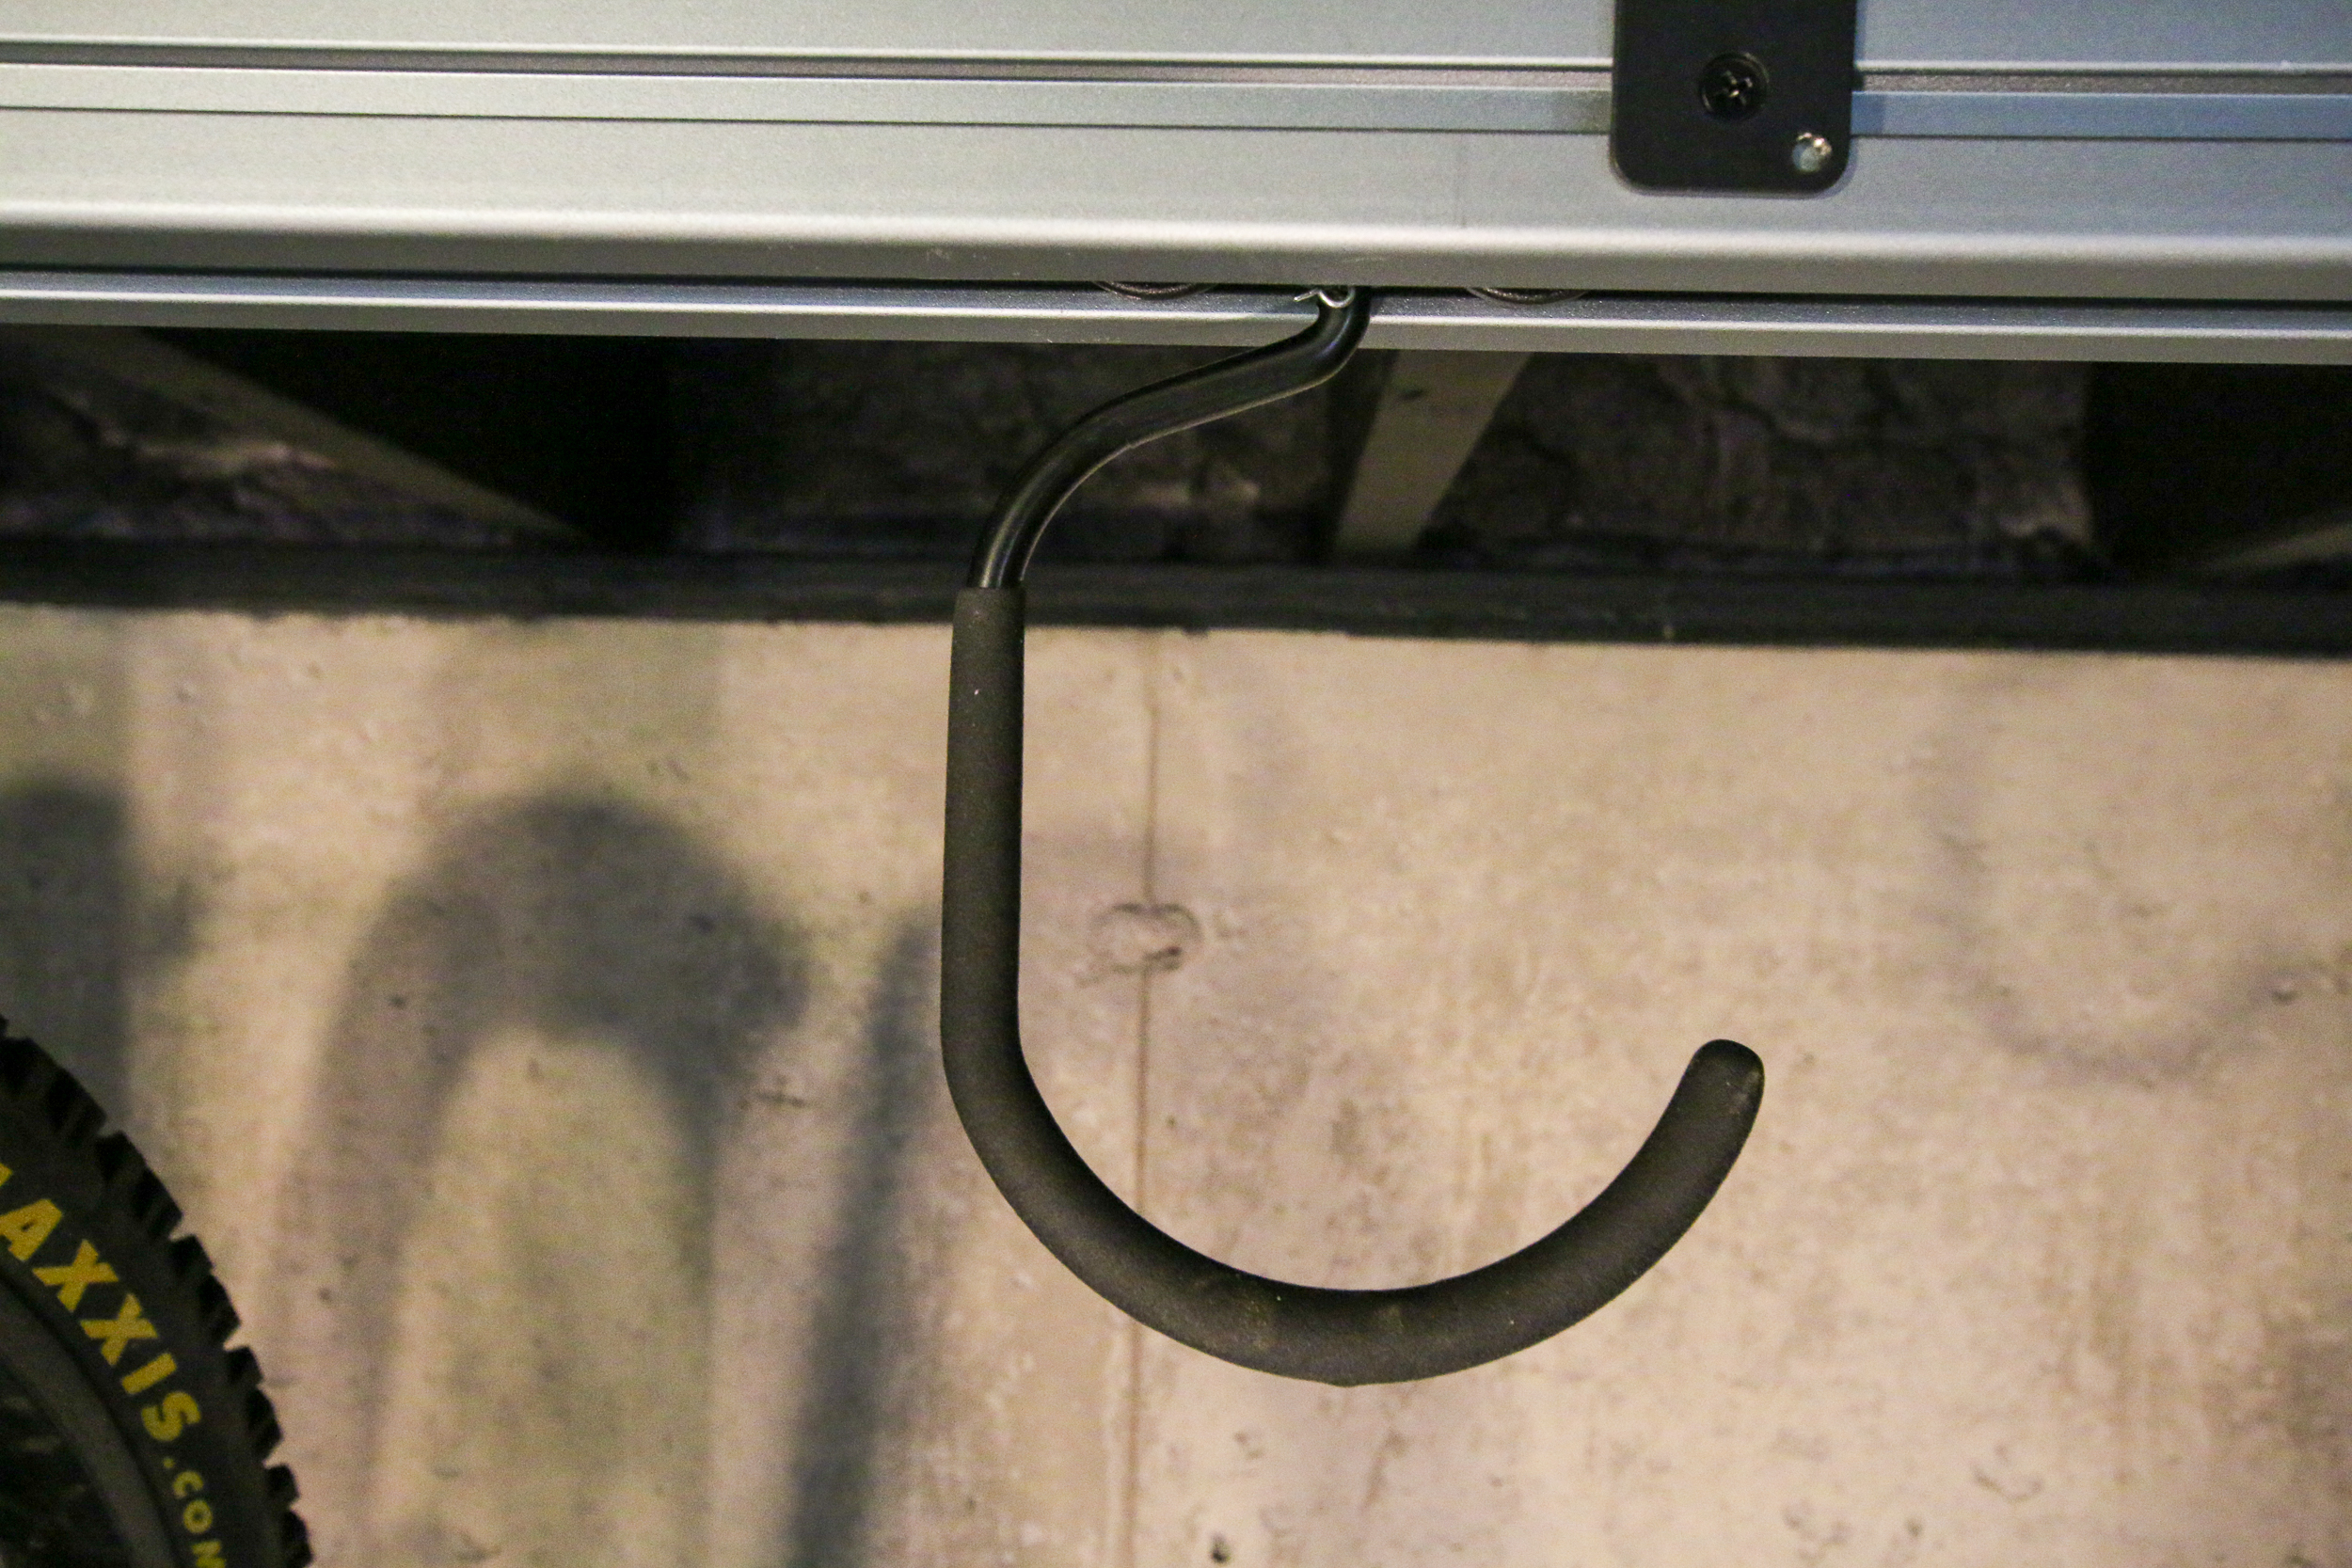
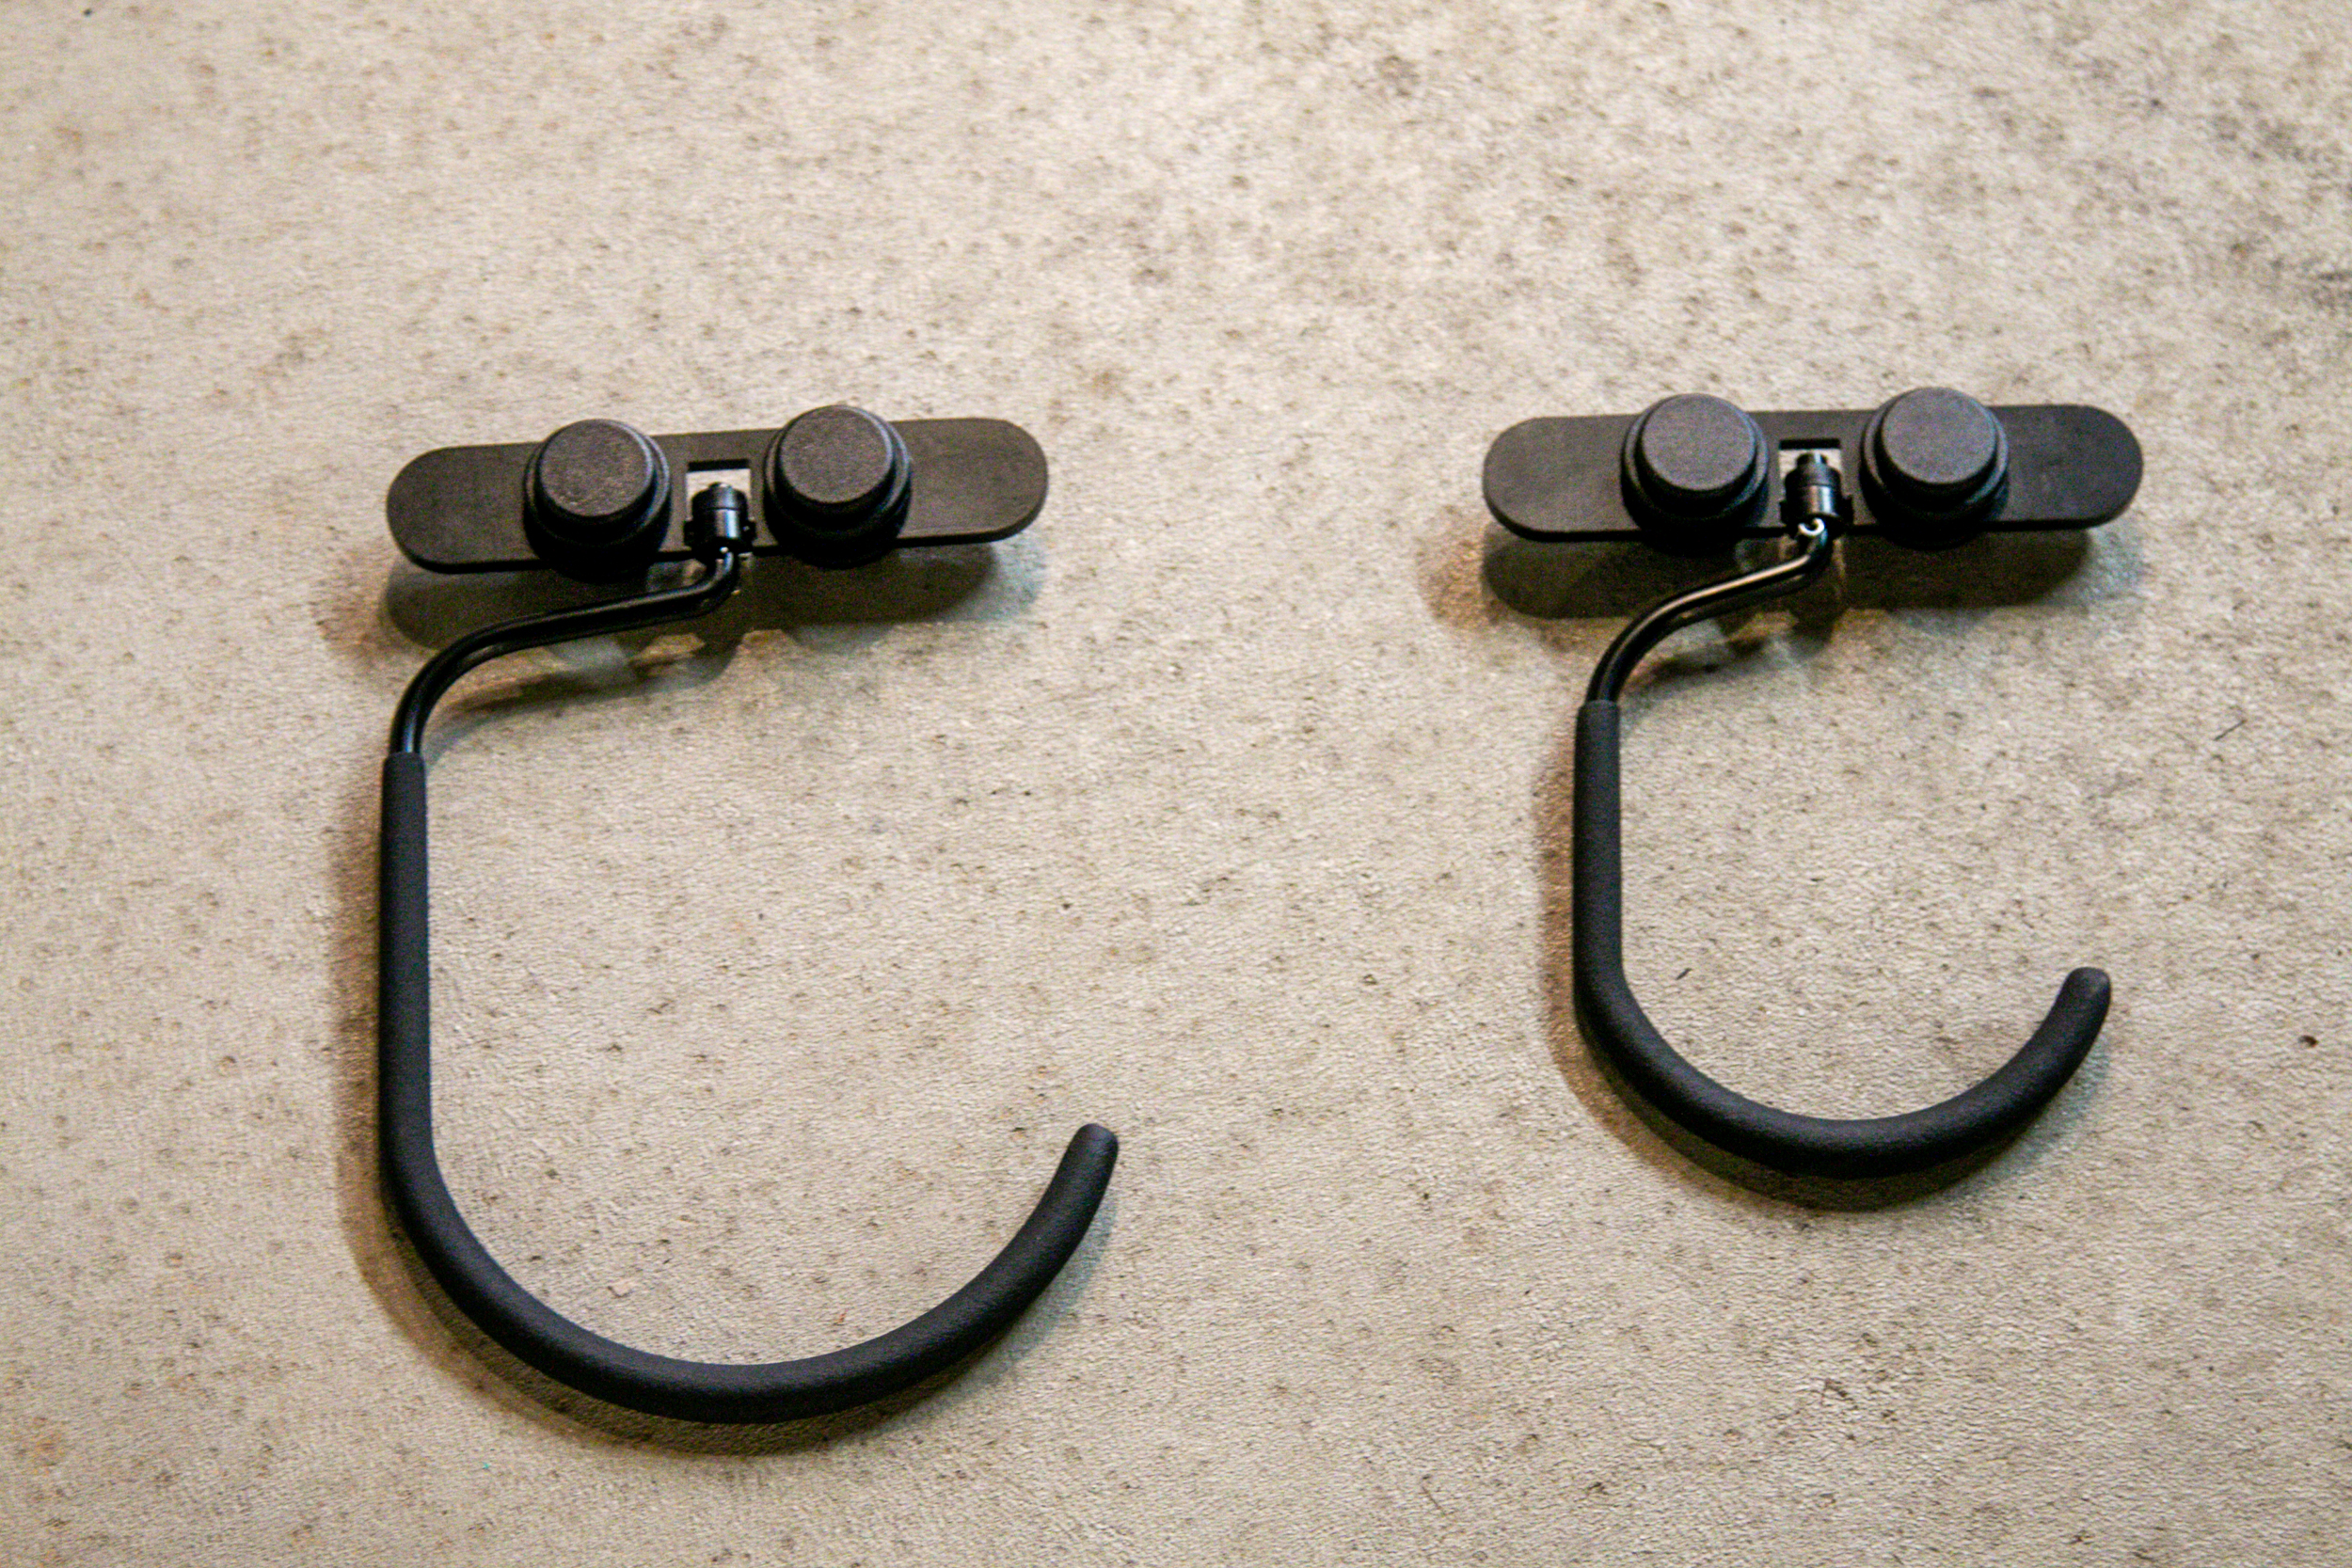
Each 4’ section of track includes four sliding and rotating hooks. These hooks are big enough to fit almost every bike that’s not a fat bike, even with plus-size tires. For those fat bikes (or deeper aero wheels with 50mm+ gravel or mountain bike tires), Store Your offers a larger “fat bike” hook that will fit the largest tires and rims out there (OK, maybe not the new Surly Moonlander). I put fat bike in quotes, because this hook is also preferred for deep aero rims as mentioned – especially if you’re running big gravel tires (50mm+). The issue here isn’t the width of the hook, but the height of the opening. In order to use a standard hook with a deep section gravel wheel, you have to kind of angle it in, which makes it more difficult. It’s definitely easier if you use the larger hook.
The hooks are all PVC-coated to prevent damage to the wheels and are completely replaceable should you ever have an issue.
Store Your also mentions that if you need a rack with fat bike/deep rim gravel hooks, they can pre-configure a rack with any combination of hooks you want, so you don’t have to buy additional hooks afterwards.
Each hook can support up to 100lbs while each rail can hold up to 300lbs (so two rails could support 600lbs, etc.). And yes, the hooks are e-bike compatible. As long as you can lift it (and it’s not over the per-hook weight limit), the CycleSlide can store it.
Installation
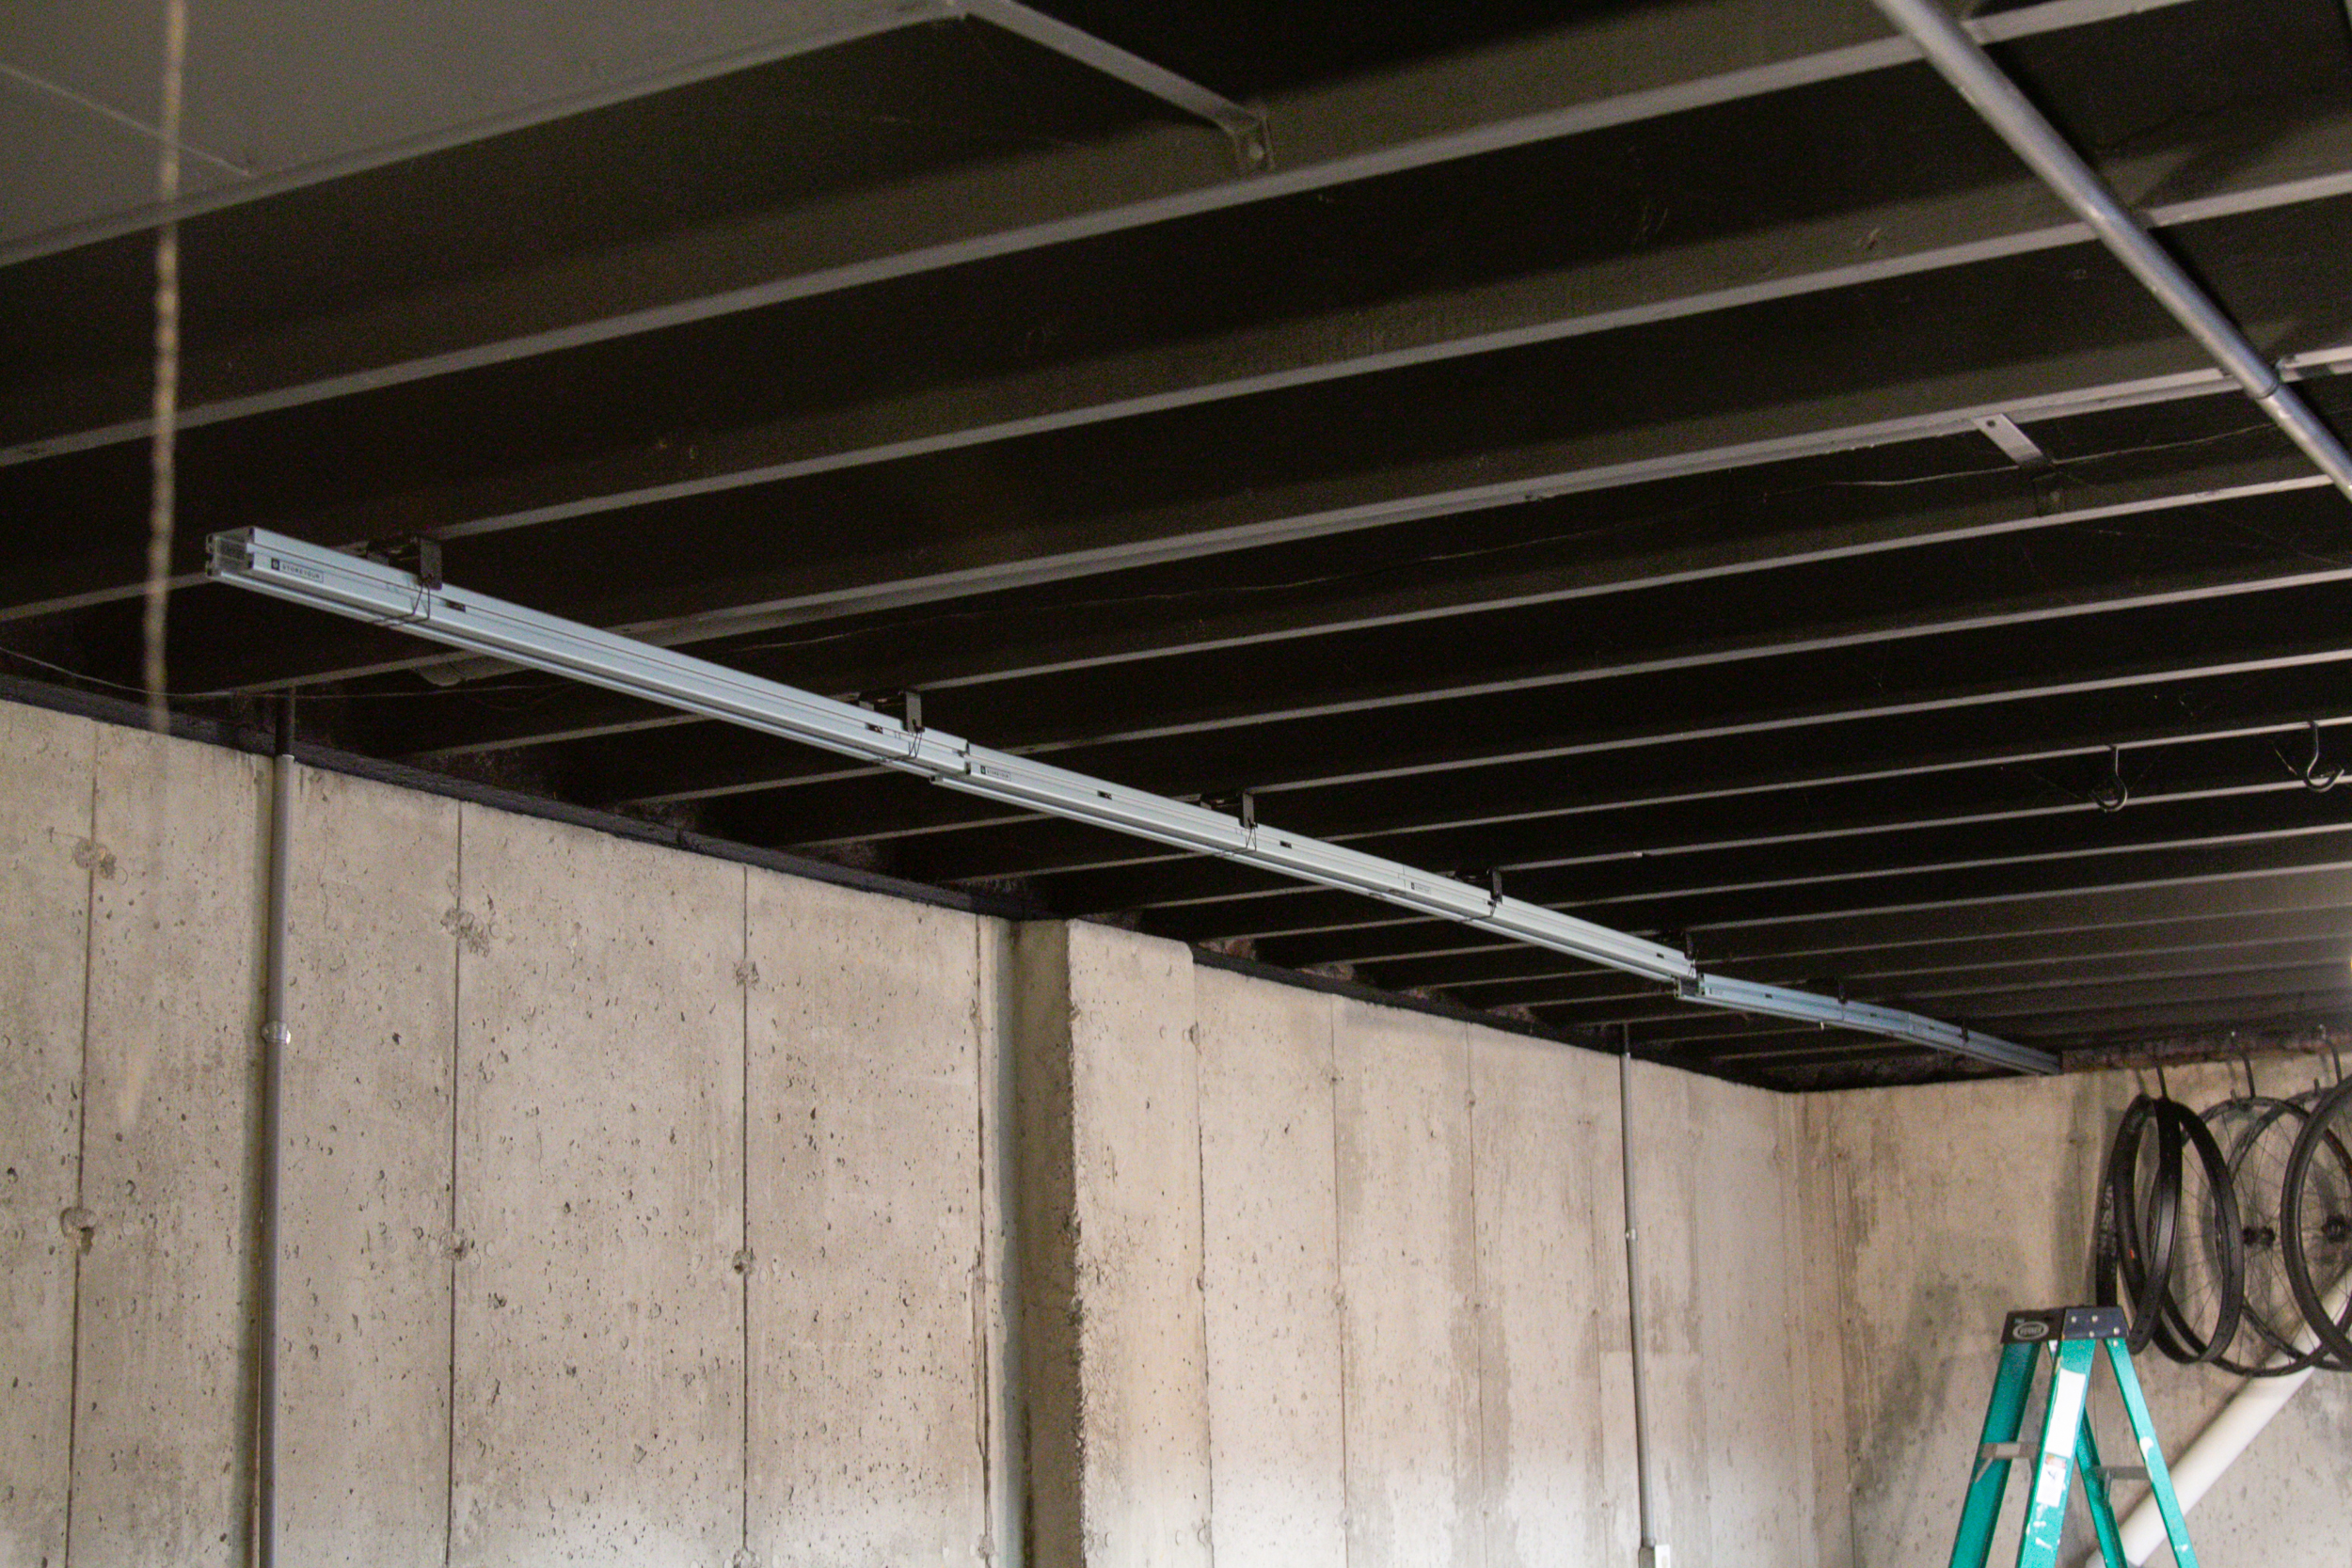
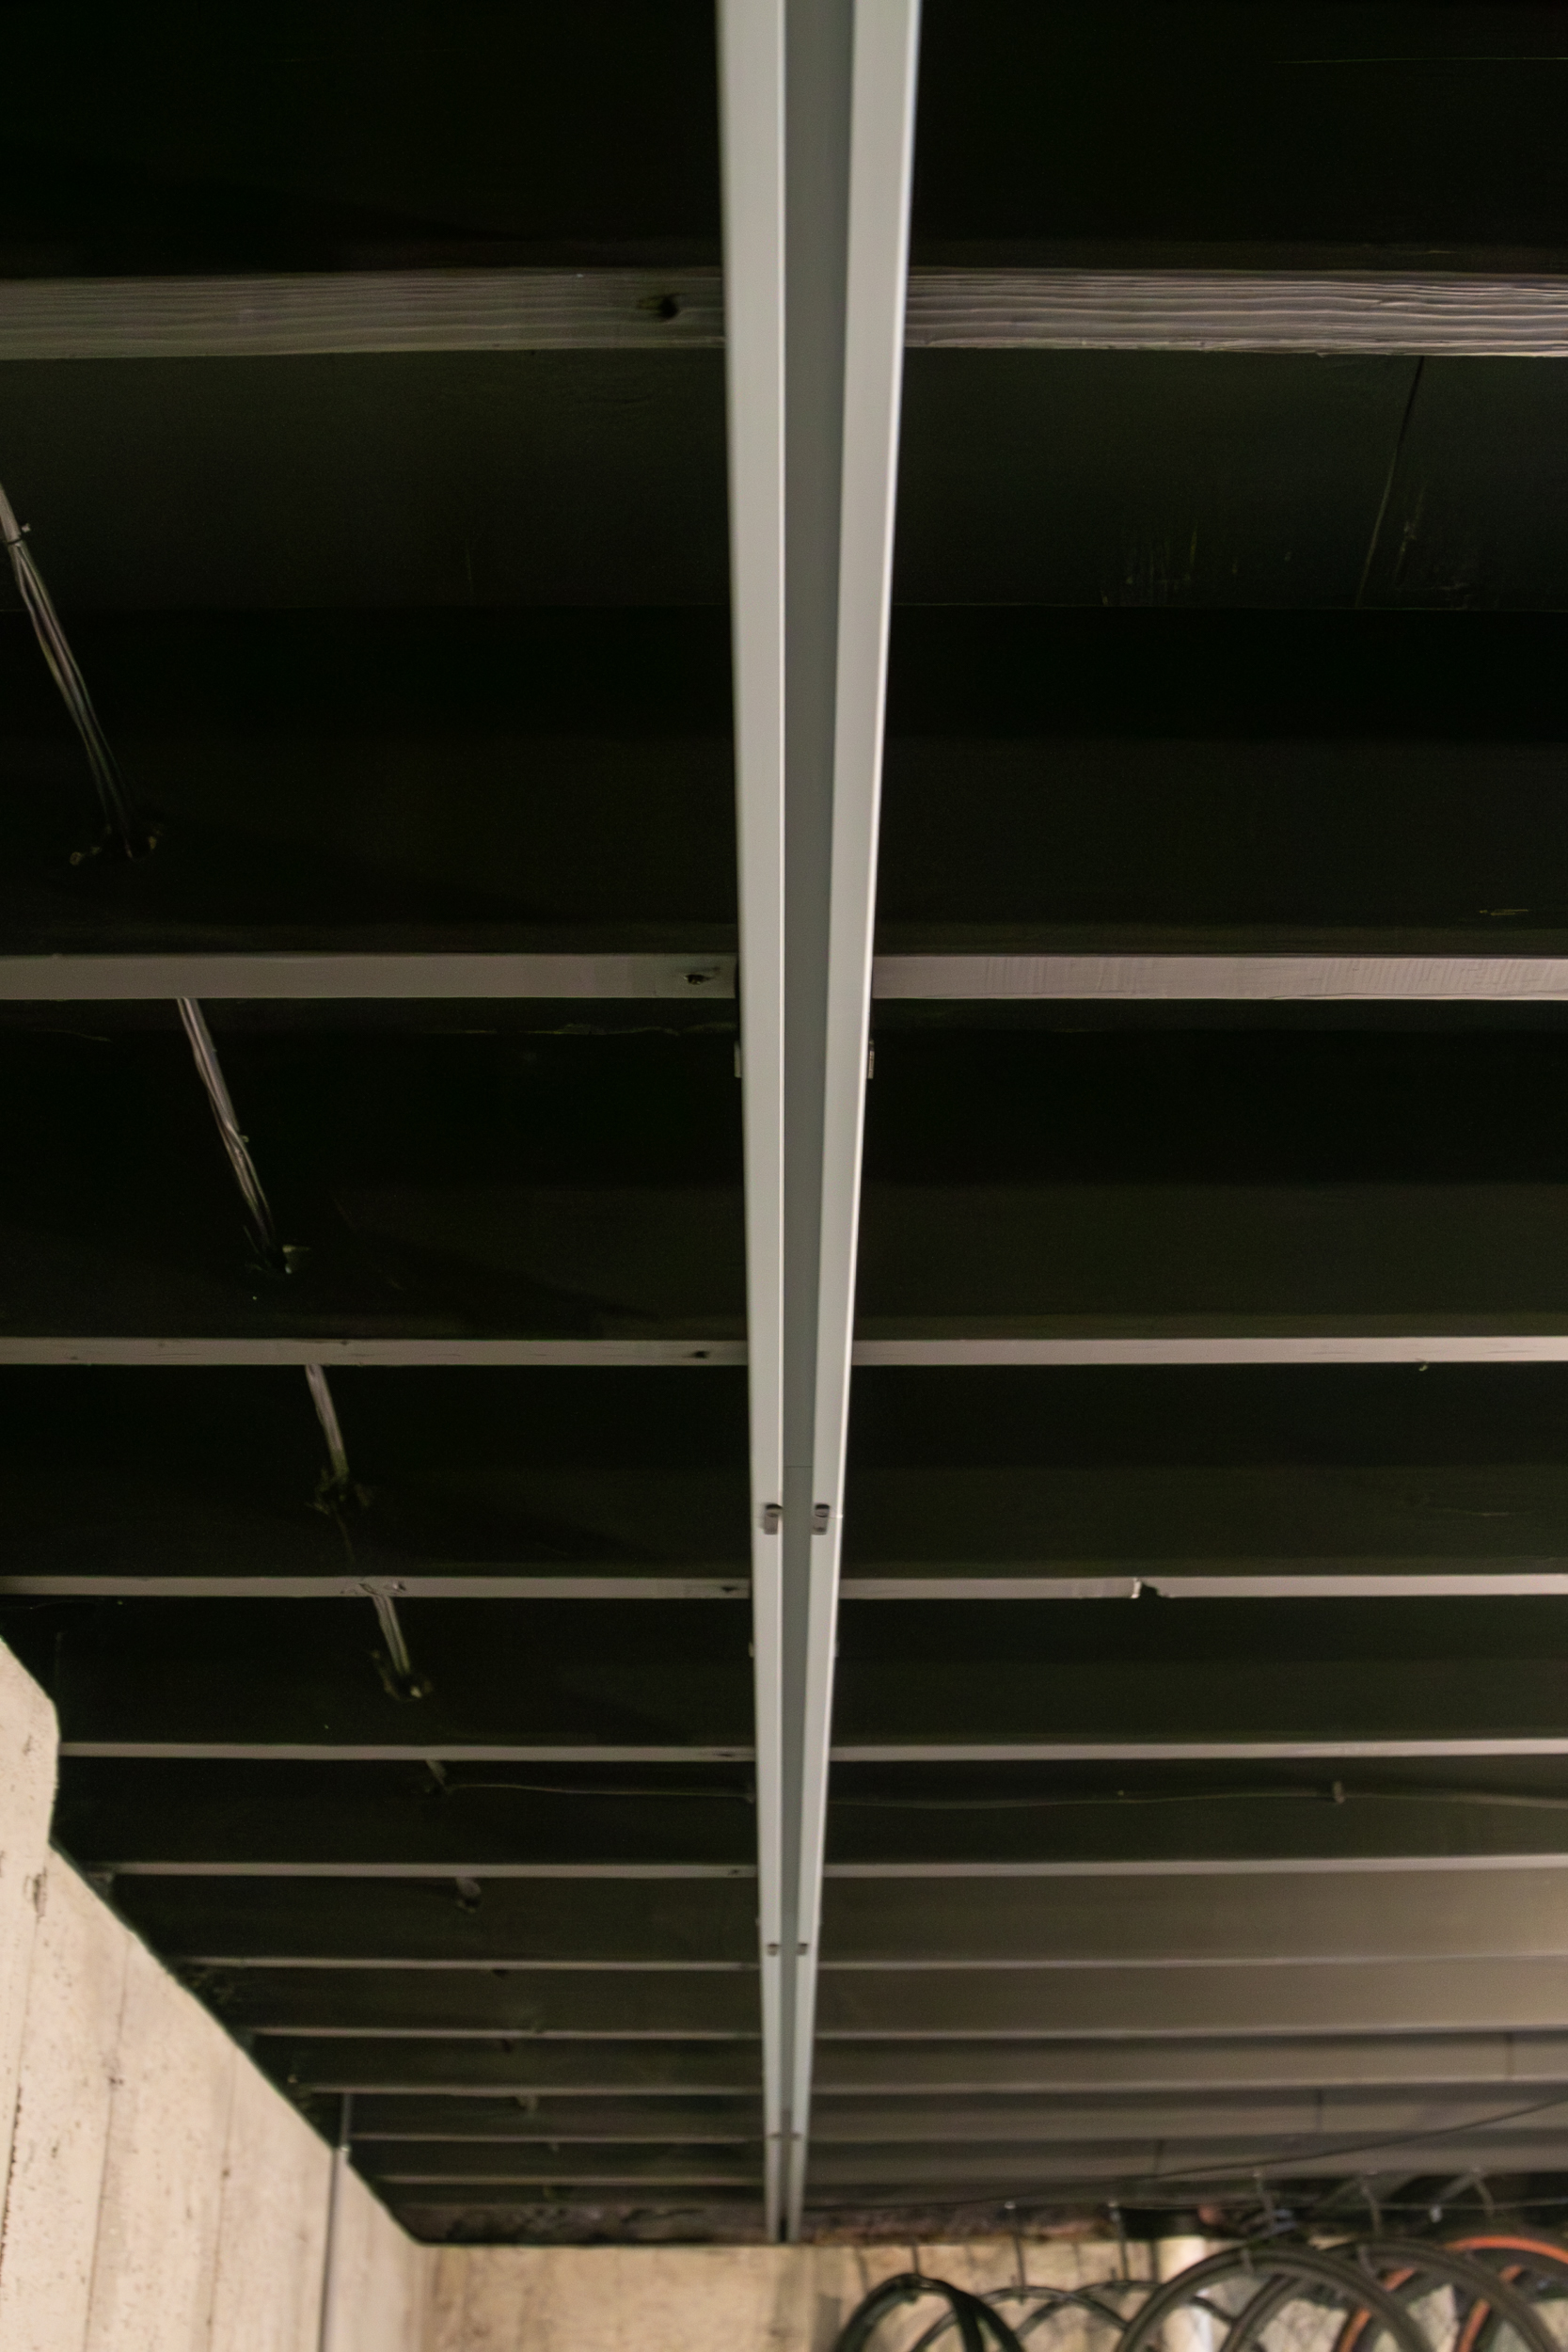
There are a couple of options when it comes to installing the CycleSlide, but they all have to be mounted directly to studs or joists. Ceiling mount places the track directly on the ceiling, while the wall mount version uses brackets that stand the track off from the wall. I’ll be focusing on the ceiling mount since it’s what I am reviewing here. The area I installed the CycleSlide has exposed ceiling joists, which makes for the easiest install. But for ceilings or walls where you can’t see the framing, Store Your has excellent how-to videos, but you should be comfortable using a stud finder. No idea what a stud finder is or how to use one? Store Your also offers installation services through Angi on their website for $105.
The first step of installation is to plan out your layout. Store Your helped me out with a schematic of mine due to the number of track sections, but for 1 or 2, it’s pretty straightforward. You need two brackets per track section, and those should be located so that track connections happen between joists.
Once you figure out where each bracket needs to be relative to the joist or stud spacing, you need to decide on the offset from the wall. Basically, the farther out from the wall you mount it, the longer the wheelbase the rack can accommodate without tires touching the wall. Mounting the track further out also gives you more room to rotate the bikes, which is crucial if you want to store them back-to-front instead of up-to-down (more on this below). Store Your recommended installing the track 28” from the wall, which is how I installed it, and it’s just about perfect. Just to be clear, you don’t need to install your CycleSlide next to a wall at all. You could place this in the middle of a giant room if it made sense for your space.
If you’re only installing one section of rail, just measuring 28” from the wall and making a mark with a pencil for the location will suffice. But if you’re installing multiple track sections, I’d recommend using a chalk line to snap a straight line between all the joists to get a nice straight mount to drill all the 3/16” pilot holes. The chalk line is not totally necessary since each bracket has a large adjustment slot built in, but for me, that made it much easier in the end. I just mounted all the brackets to the chalk line, and then pushed each bracket to one extreme of the adjustment slot to easily get them all in place. From here, Store Your recommends checking that the brackets are in line by holding up a track section in the brackets, then you can tighten them down.
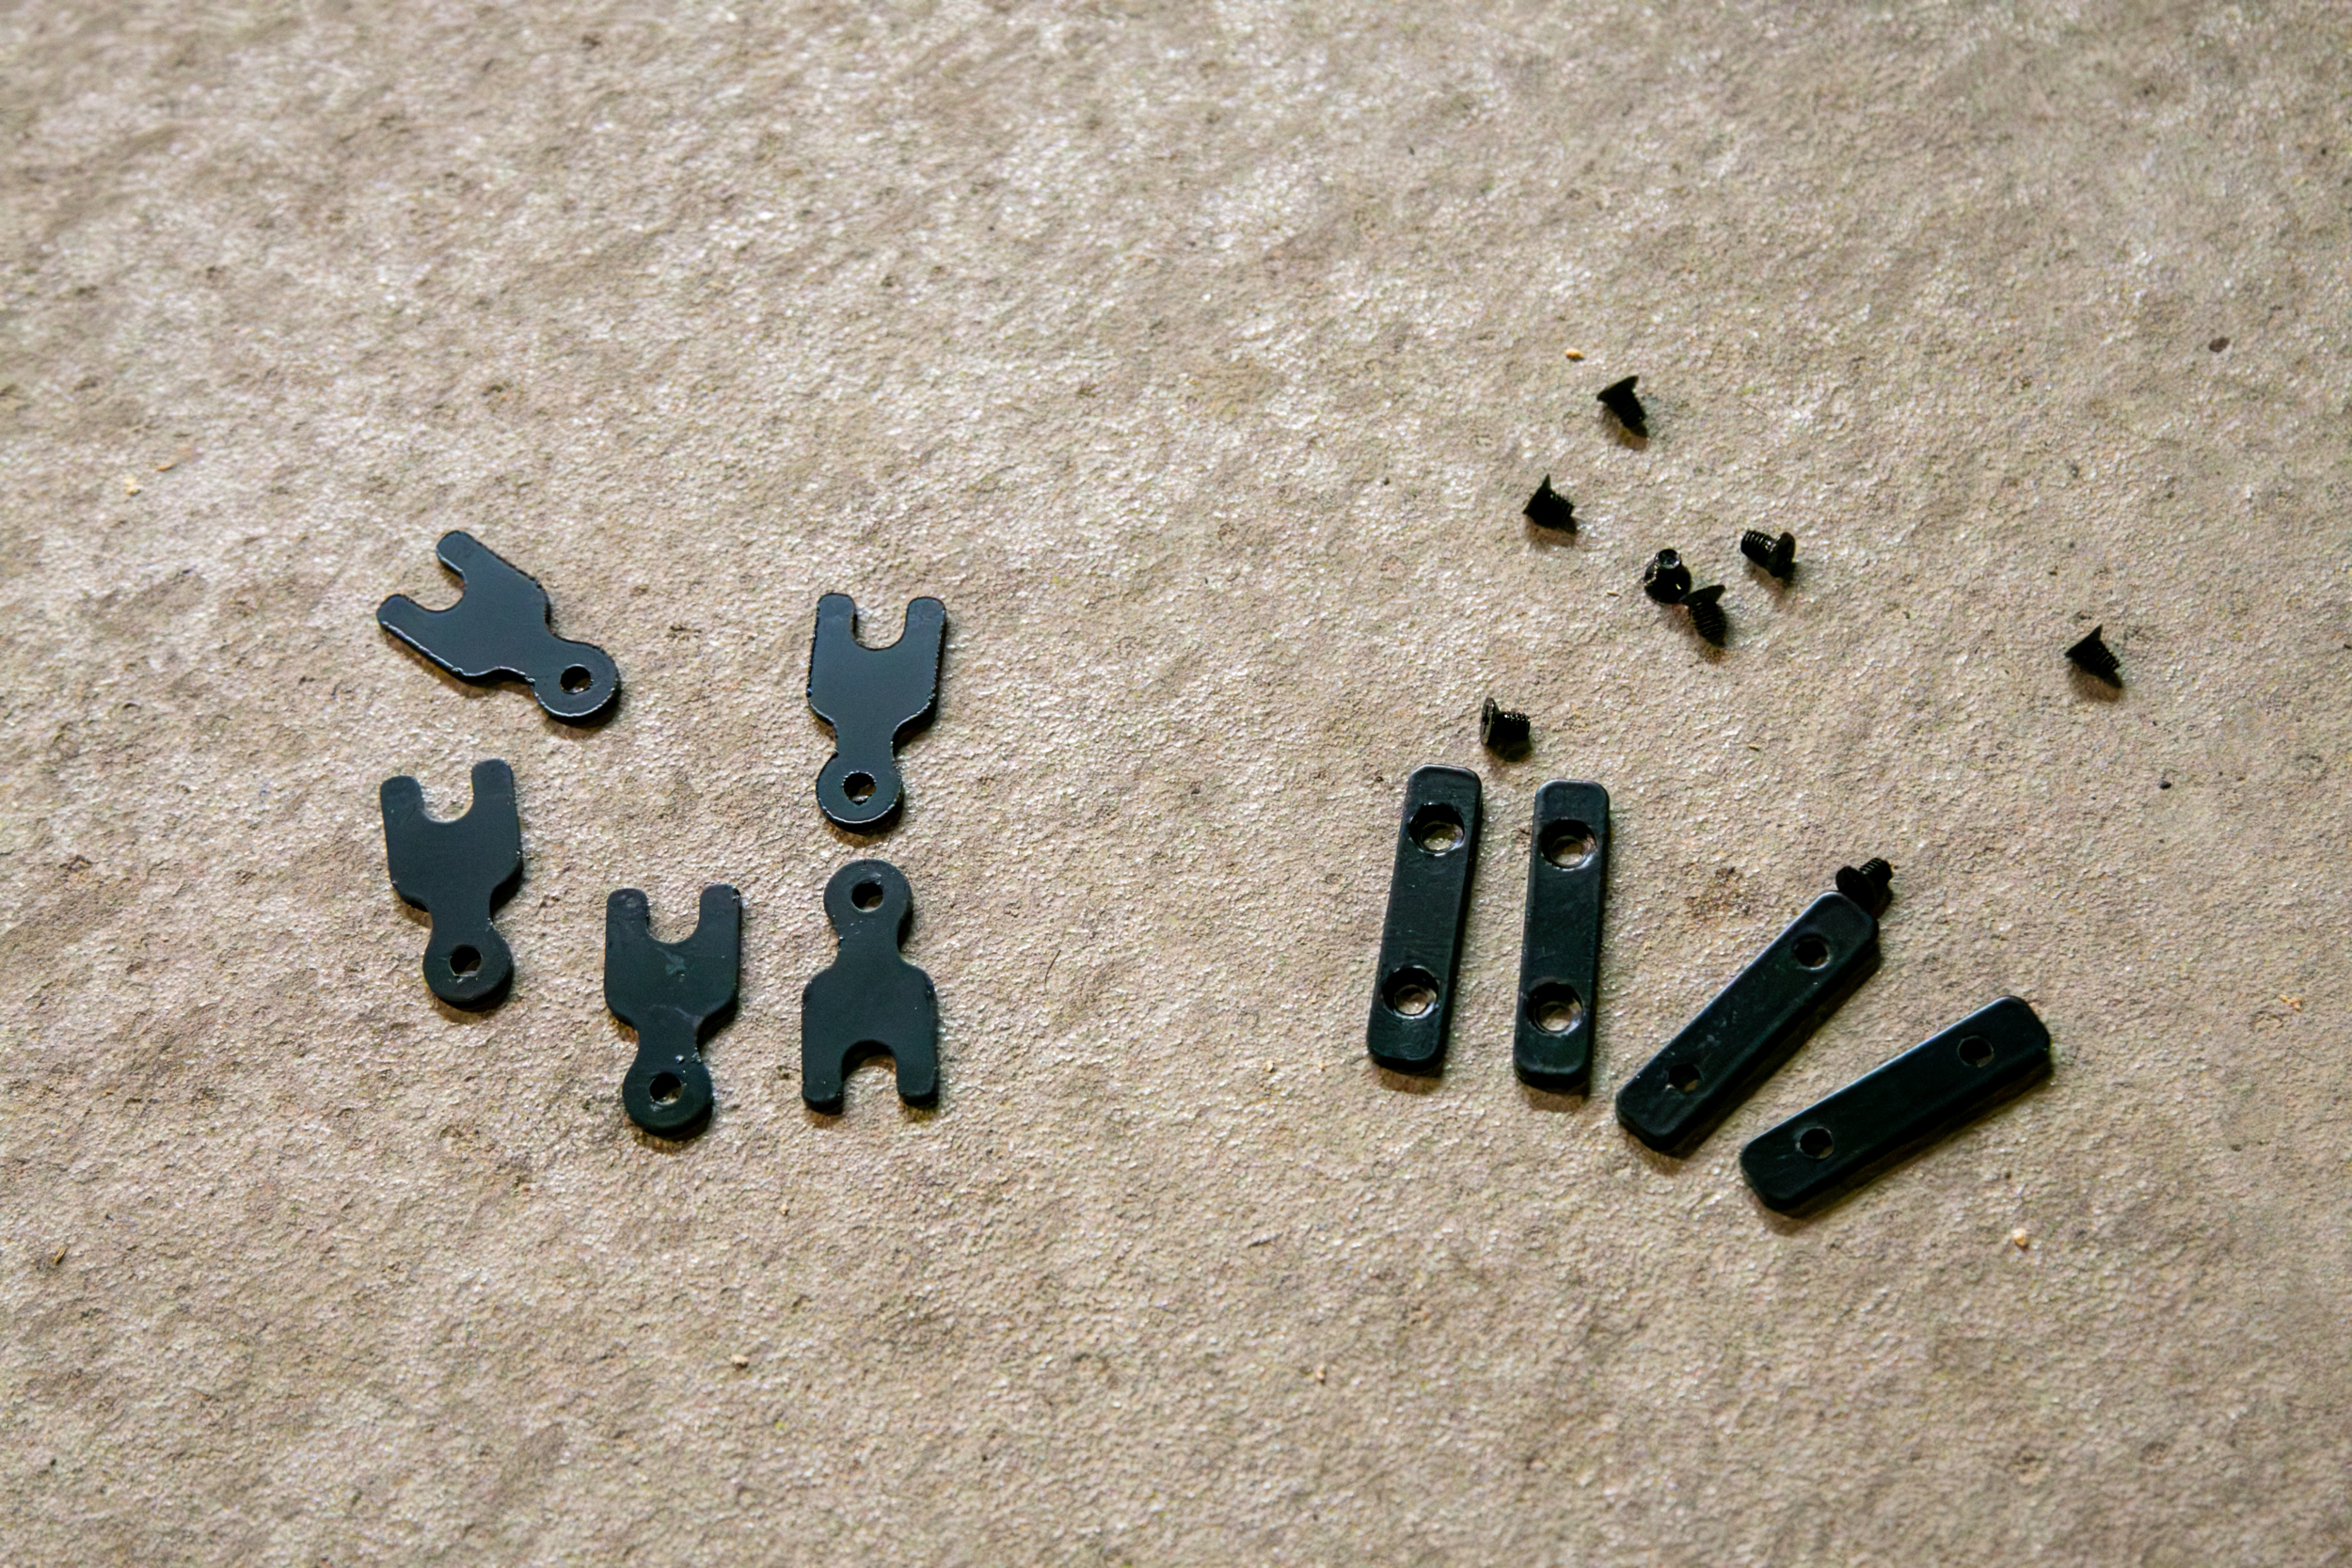
Curious what those little tuning fork-looking things are in the install kit? Those are shims to help compensate for uneven joists. To decide if I needed to use them, I used a section of track as a straight edge and held it up to 3 joists at a time. This allowed me to see if there were any joists that didn’t touch the rail (there were two), and it also allowed me to guess at the shims needed (hold the rail up to the joist and see how many shims you can fit between the joist and the rail). Once the track is up, it will be a pain to go back and add or adjust the shims, so it’s helpful if you do this first.
Once you know the brackets are aligned and you have the proper shims in place, you can tighten down the brackets with the included lag screws. An impact gun with a 7/16” hex driver bit will be very helpful here.
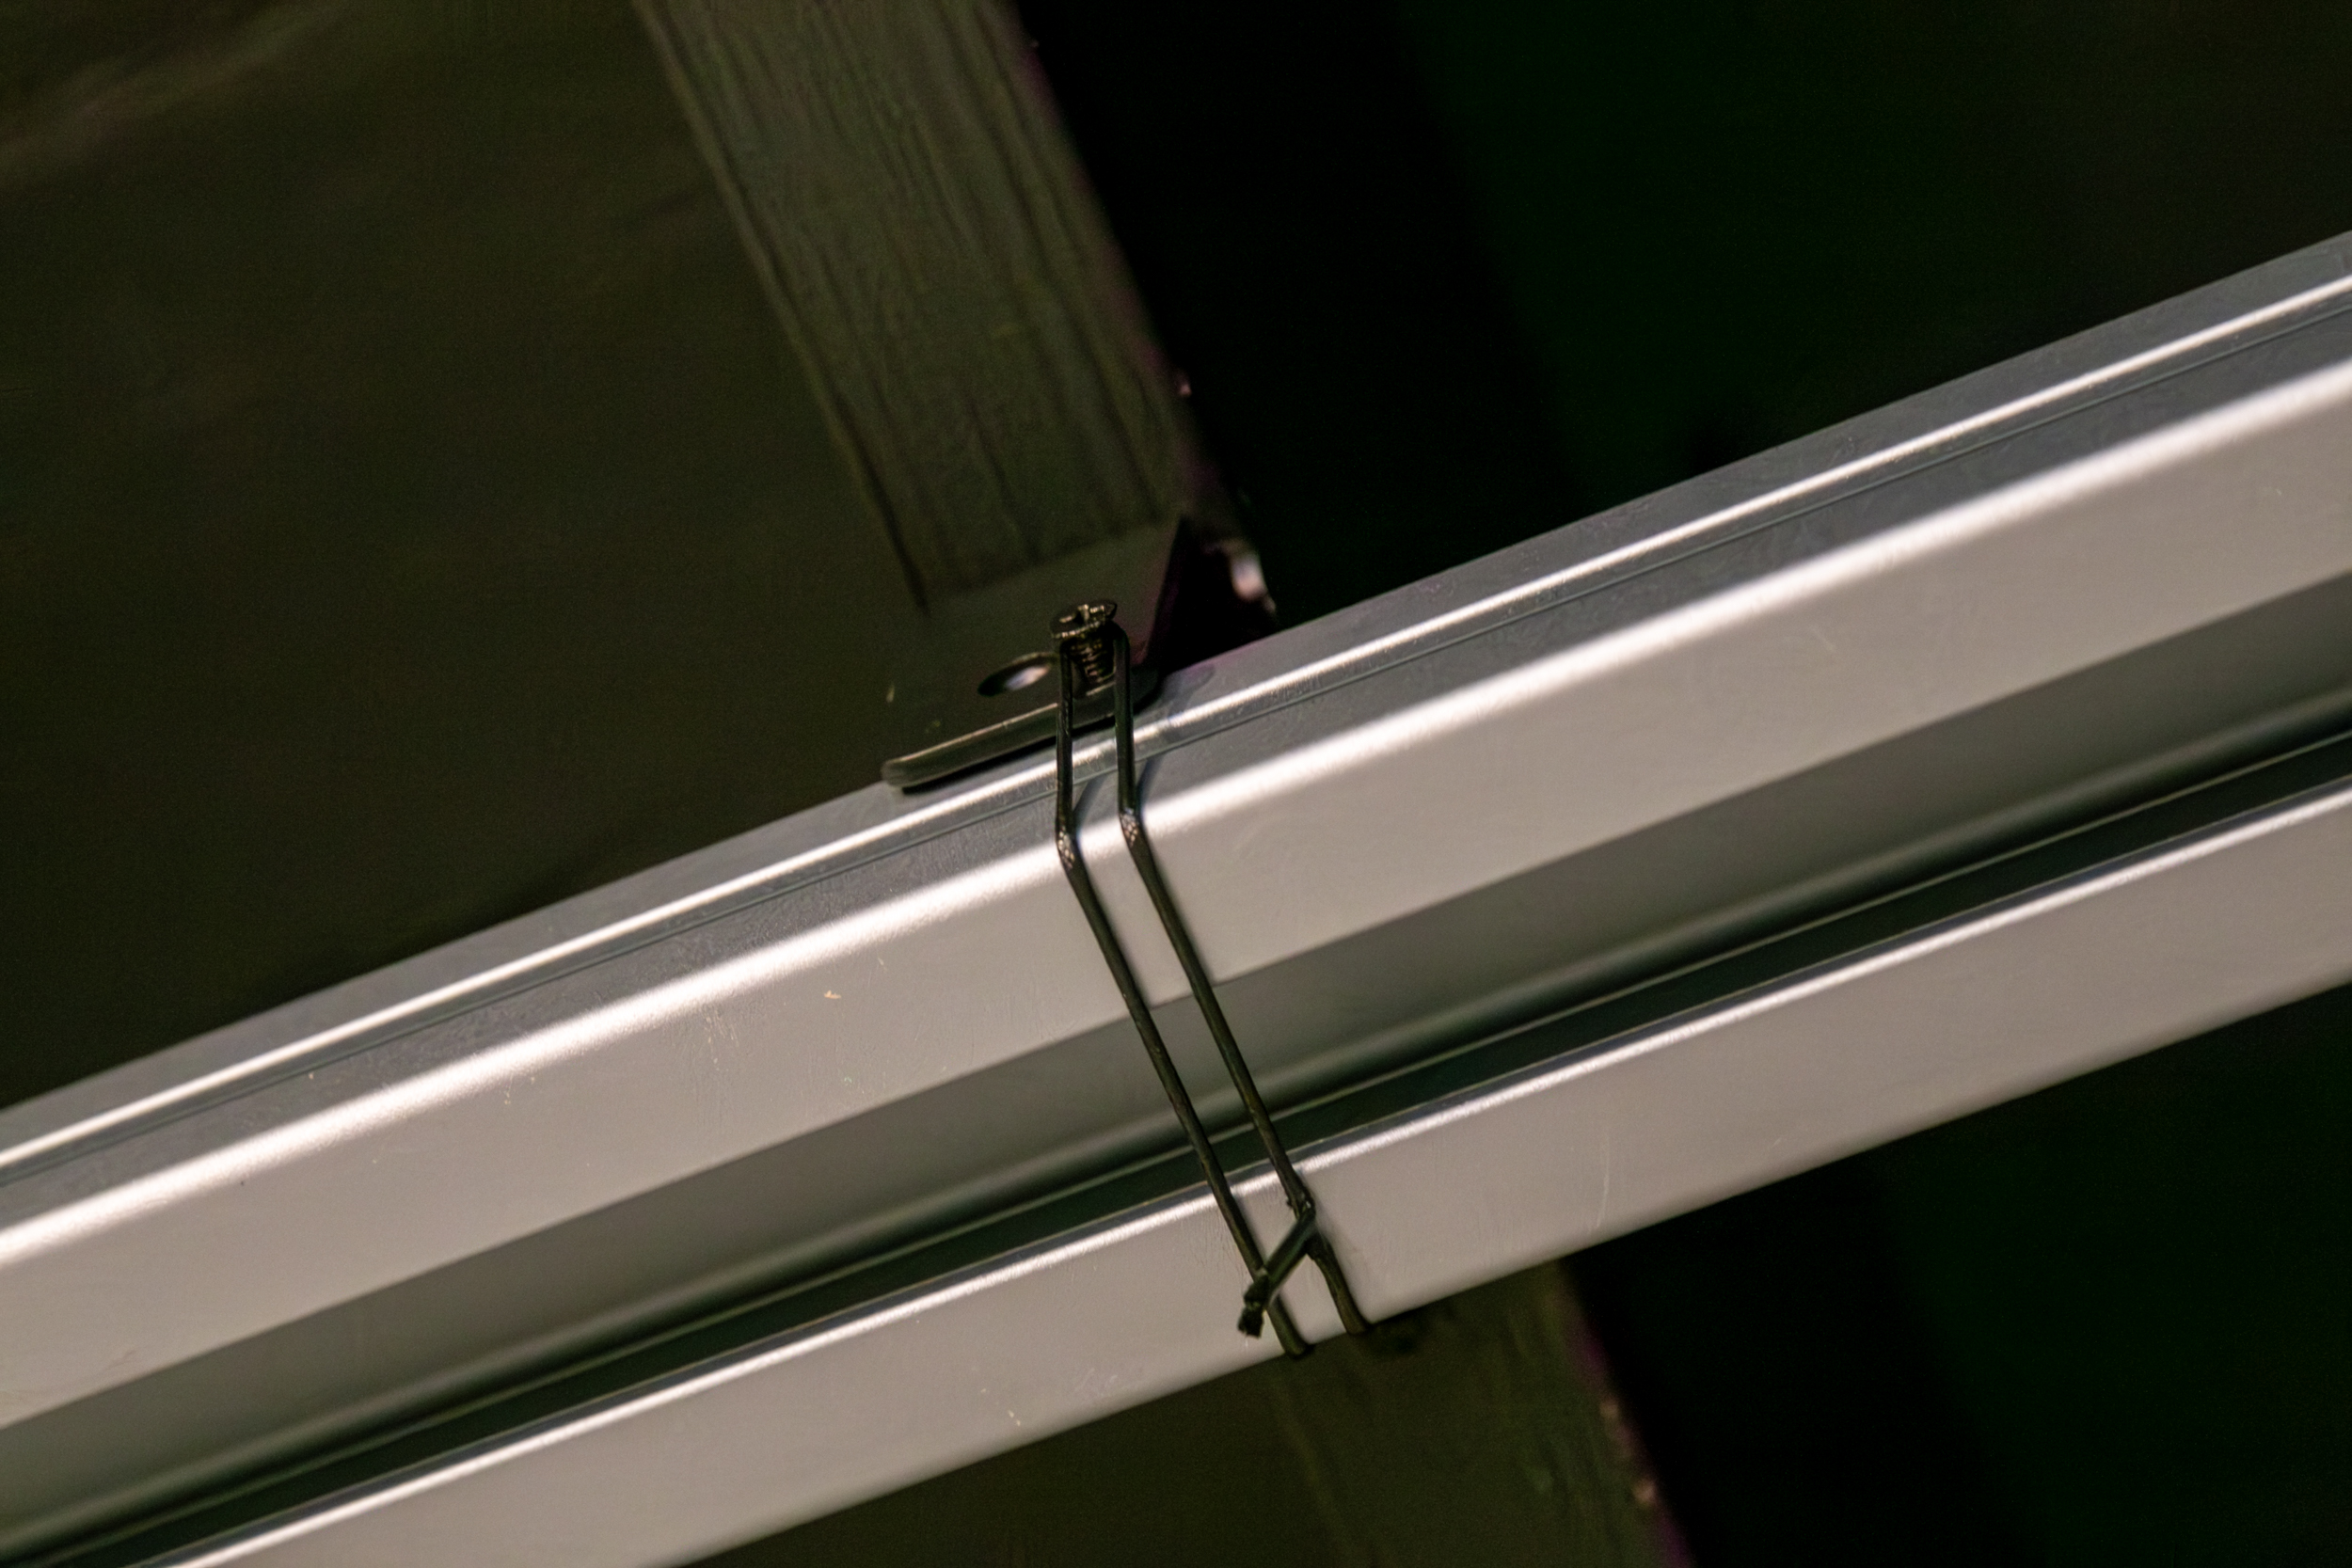
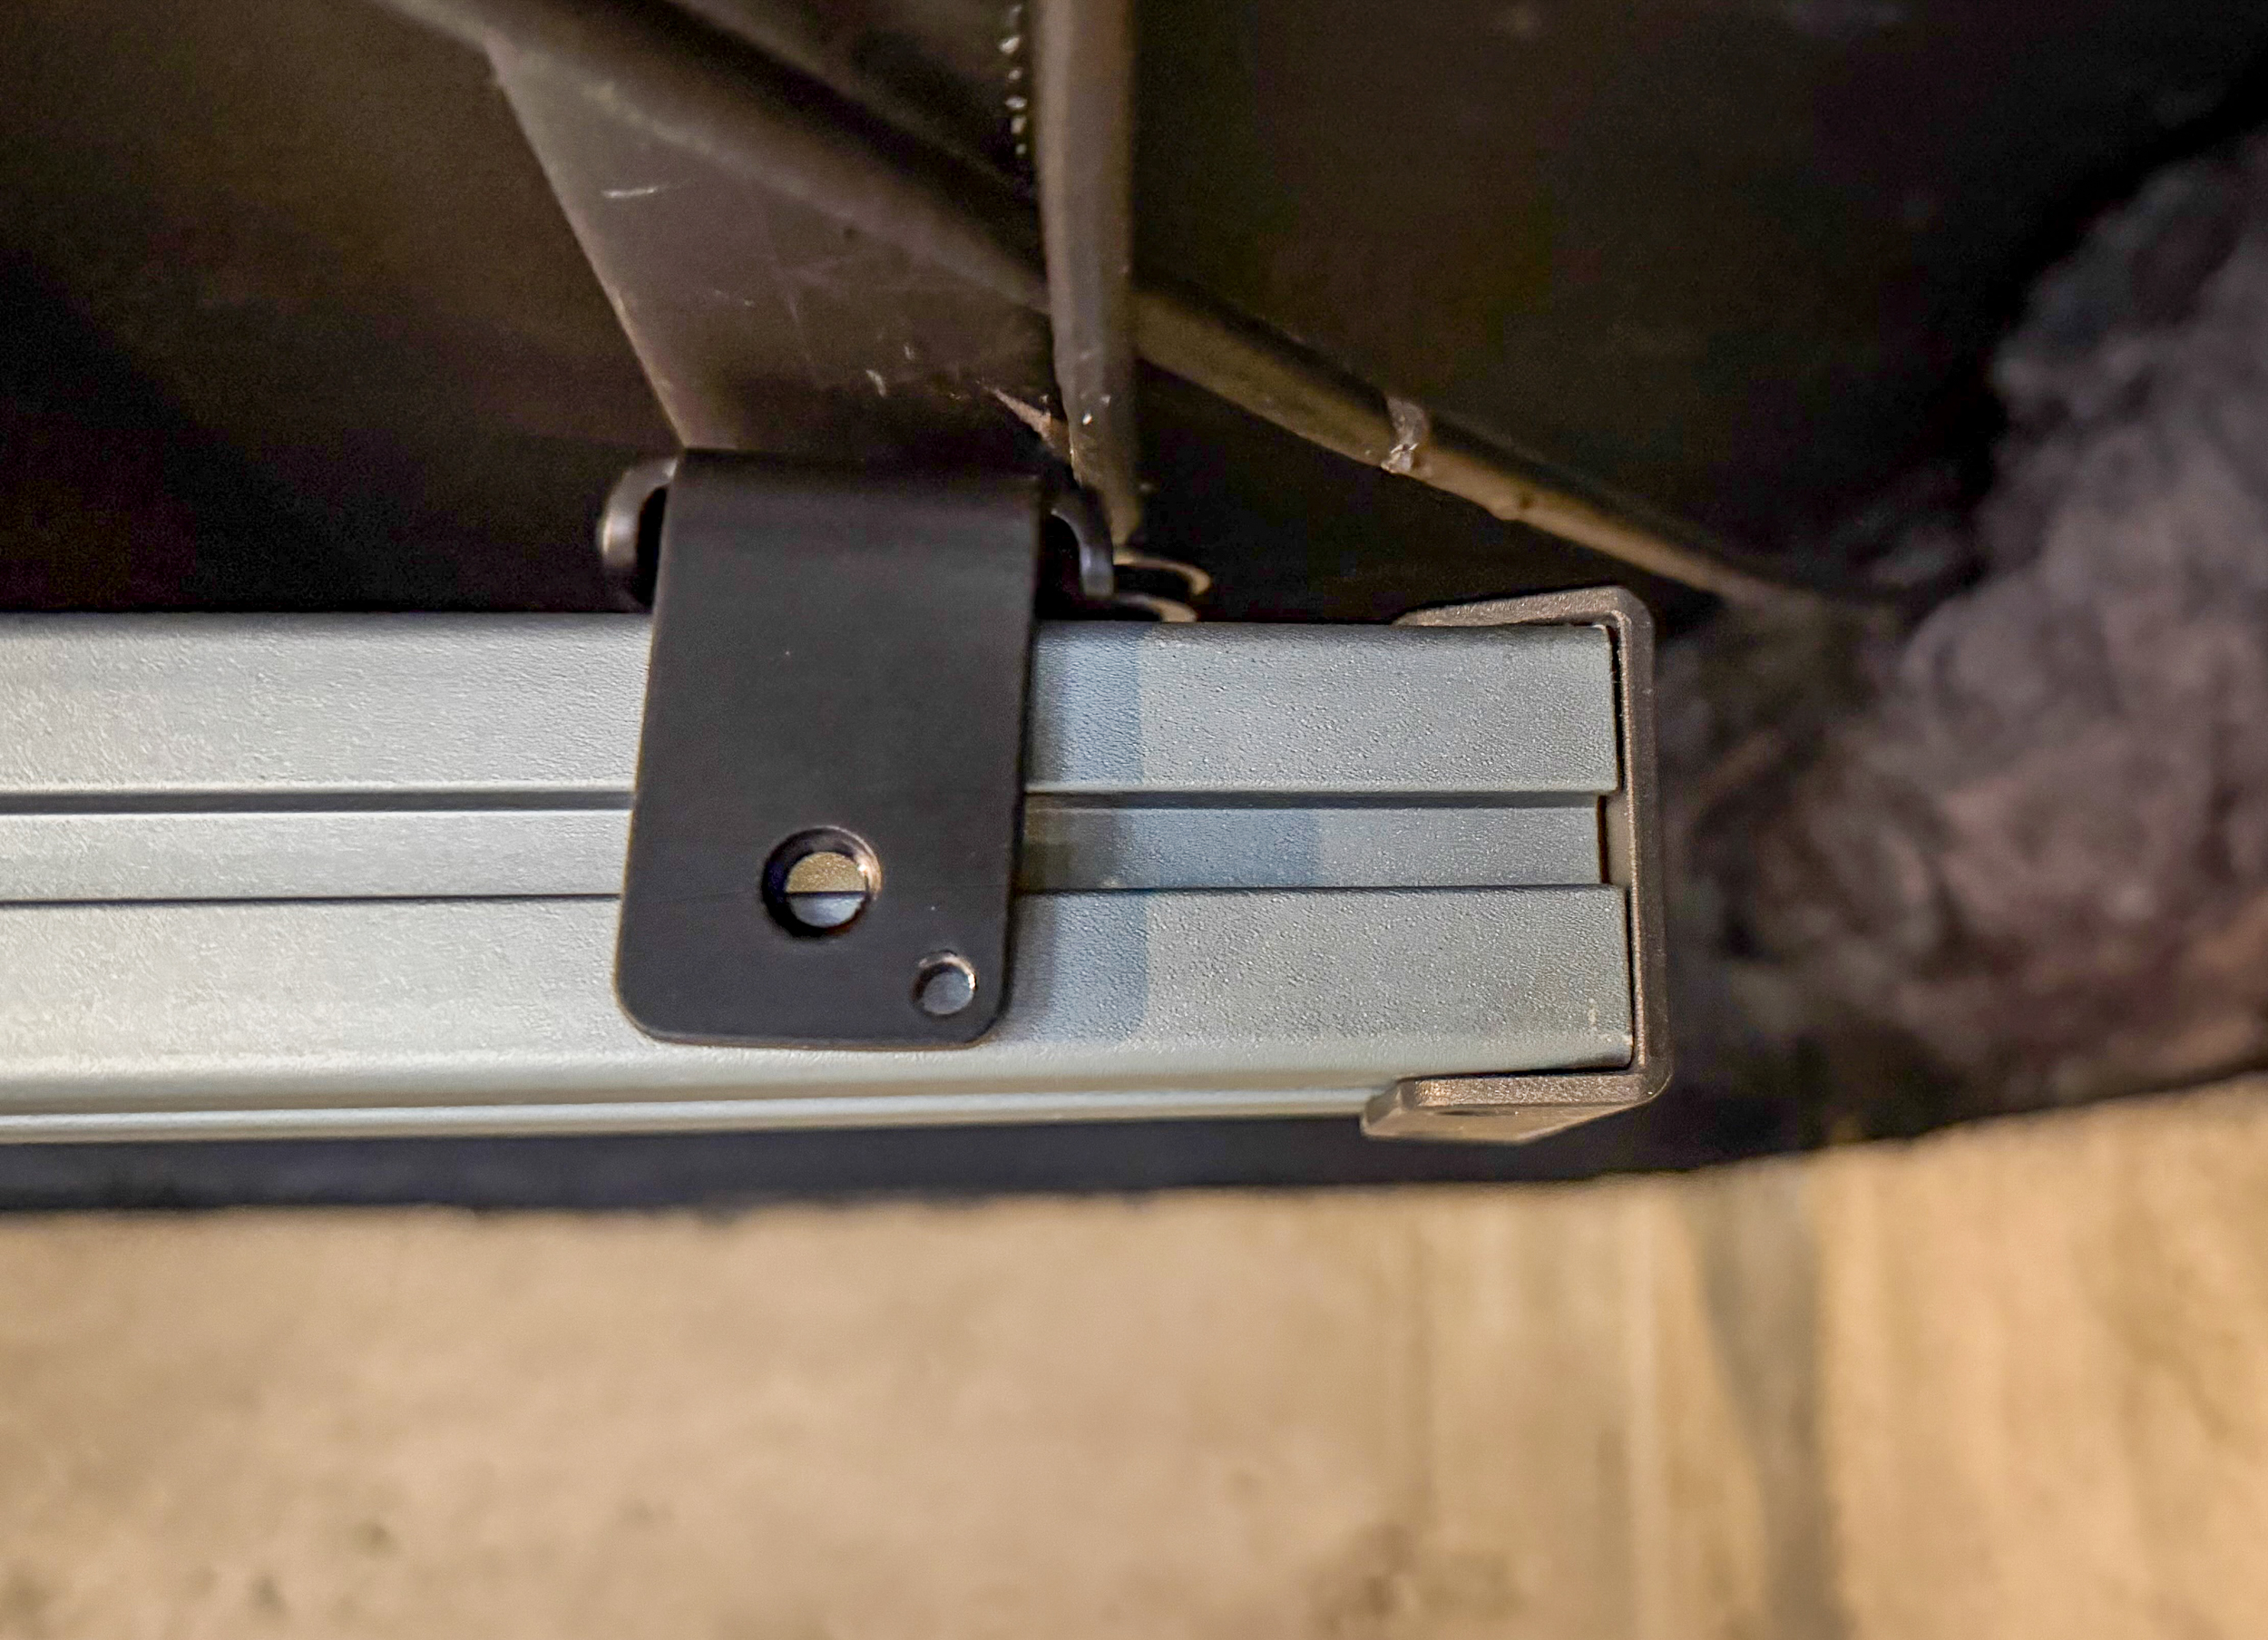
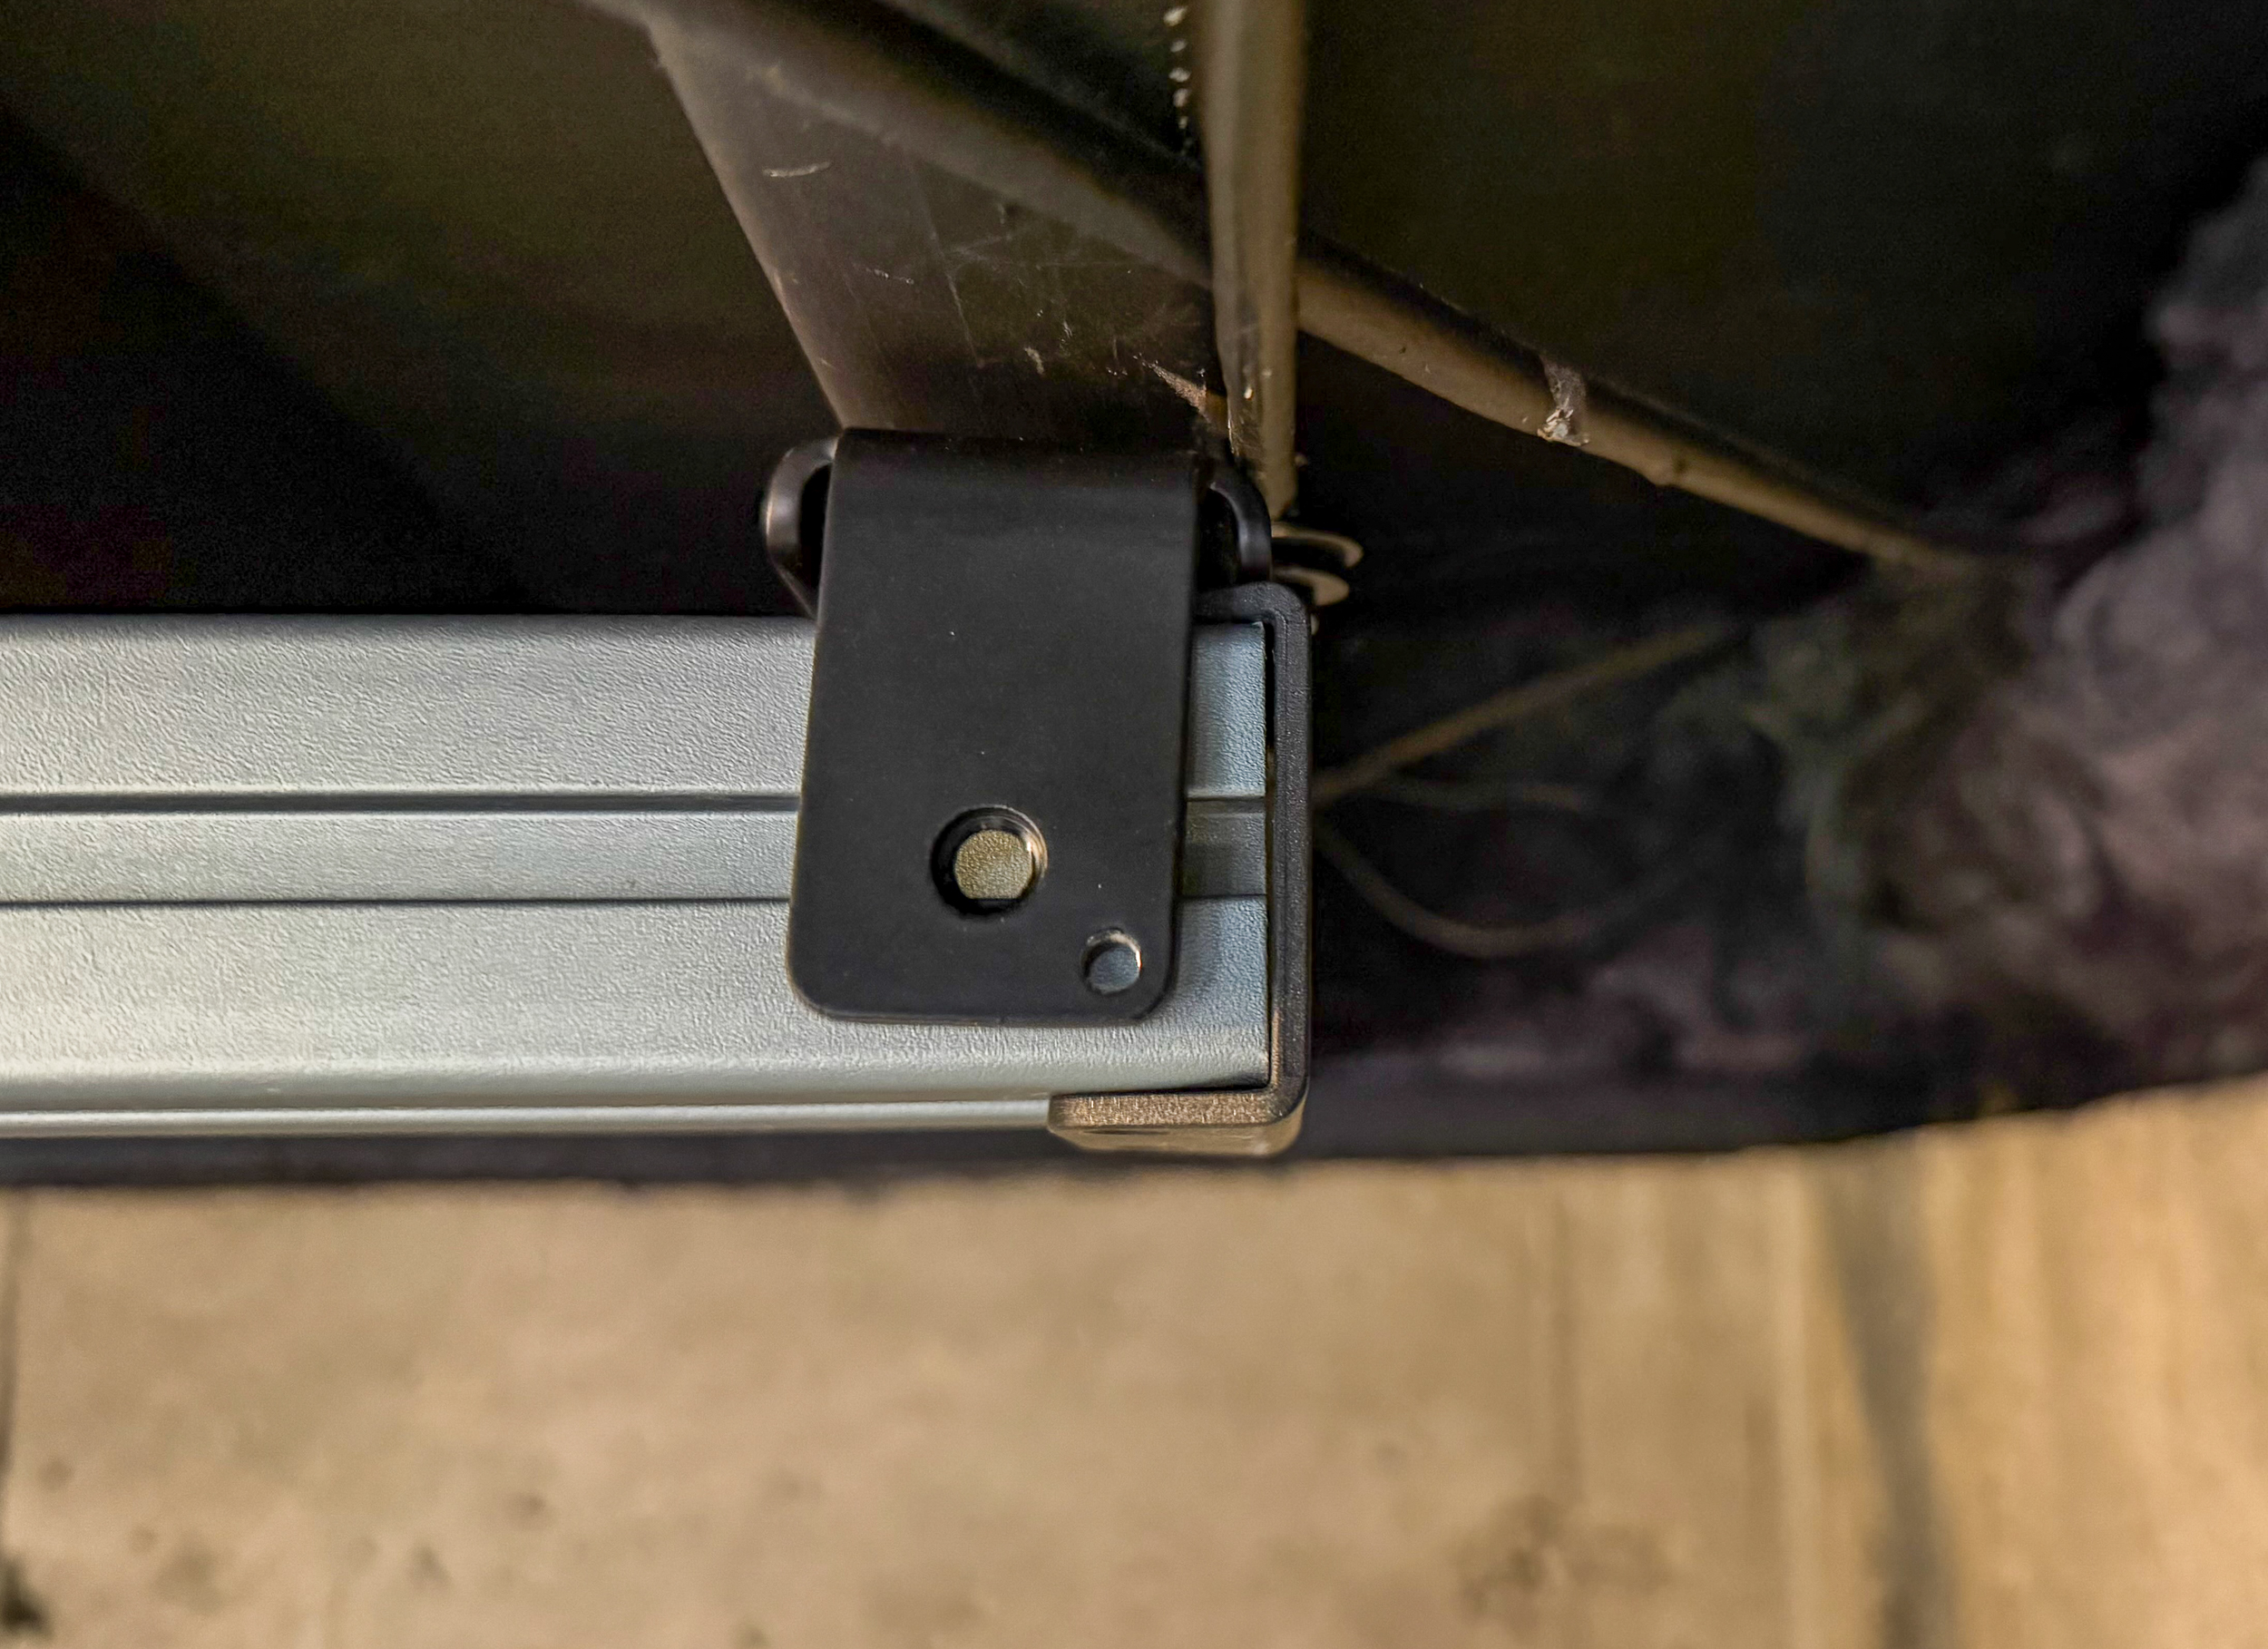
After the brackets are in place, it’s time for the smartest part of the whole installation design. Instead of requiring multiple people to hold the rails in place while you fumble with screws, Store Your came up with an ingenious solution: string. OK, not just any string, but strong string loops that you attach to temporary screws on the side of the brackets. This allows you to put the track into the bracket slot, then loop the string around the track and secure it to the other screw. Let go of the track, et voila! A third hand to hold it in place. Repeat on the other bracket ( I placed my ladder in the middle of the two so I could reach both without moving it), and the track is perfectly supported, so you can go to work securing it.
At some point in the process, you will install threaded inserts into the side slots of the track, which is what the brackets will bolt to. While the track is suspended, you will slide those inserts to where the brackets are, align them, and then install the mounting screws. Pro tip: grab a longer screw, like a drywall or wood screw, or something long and thin that will help you slide the insert into place and get the hole lined up.
If you’re installing a single track section, you’ll add one end cap, load up the hooks, and finish it with the final end cap. Time to store some bikes.
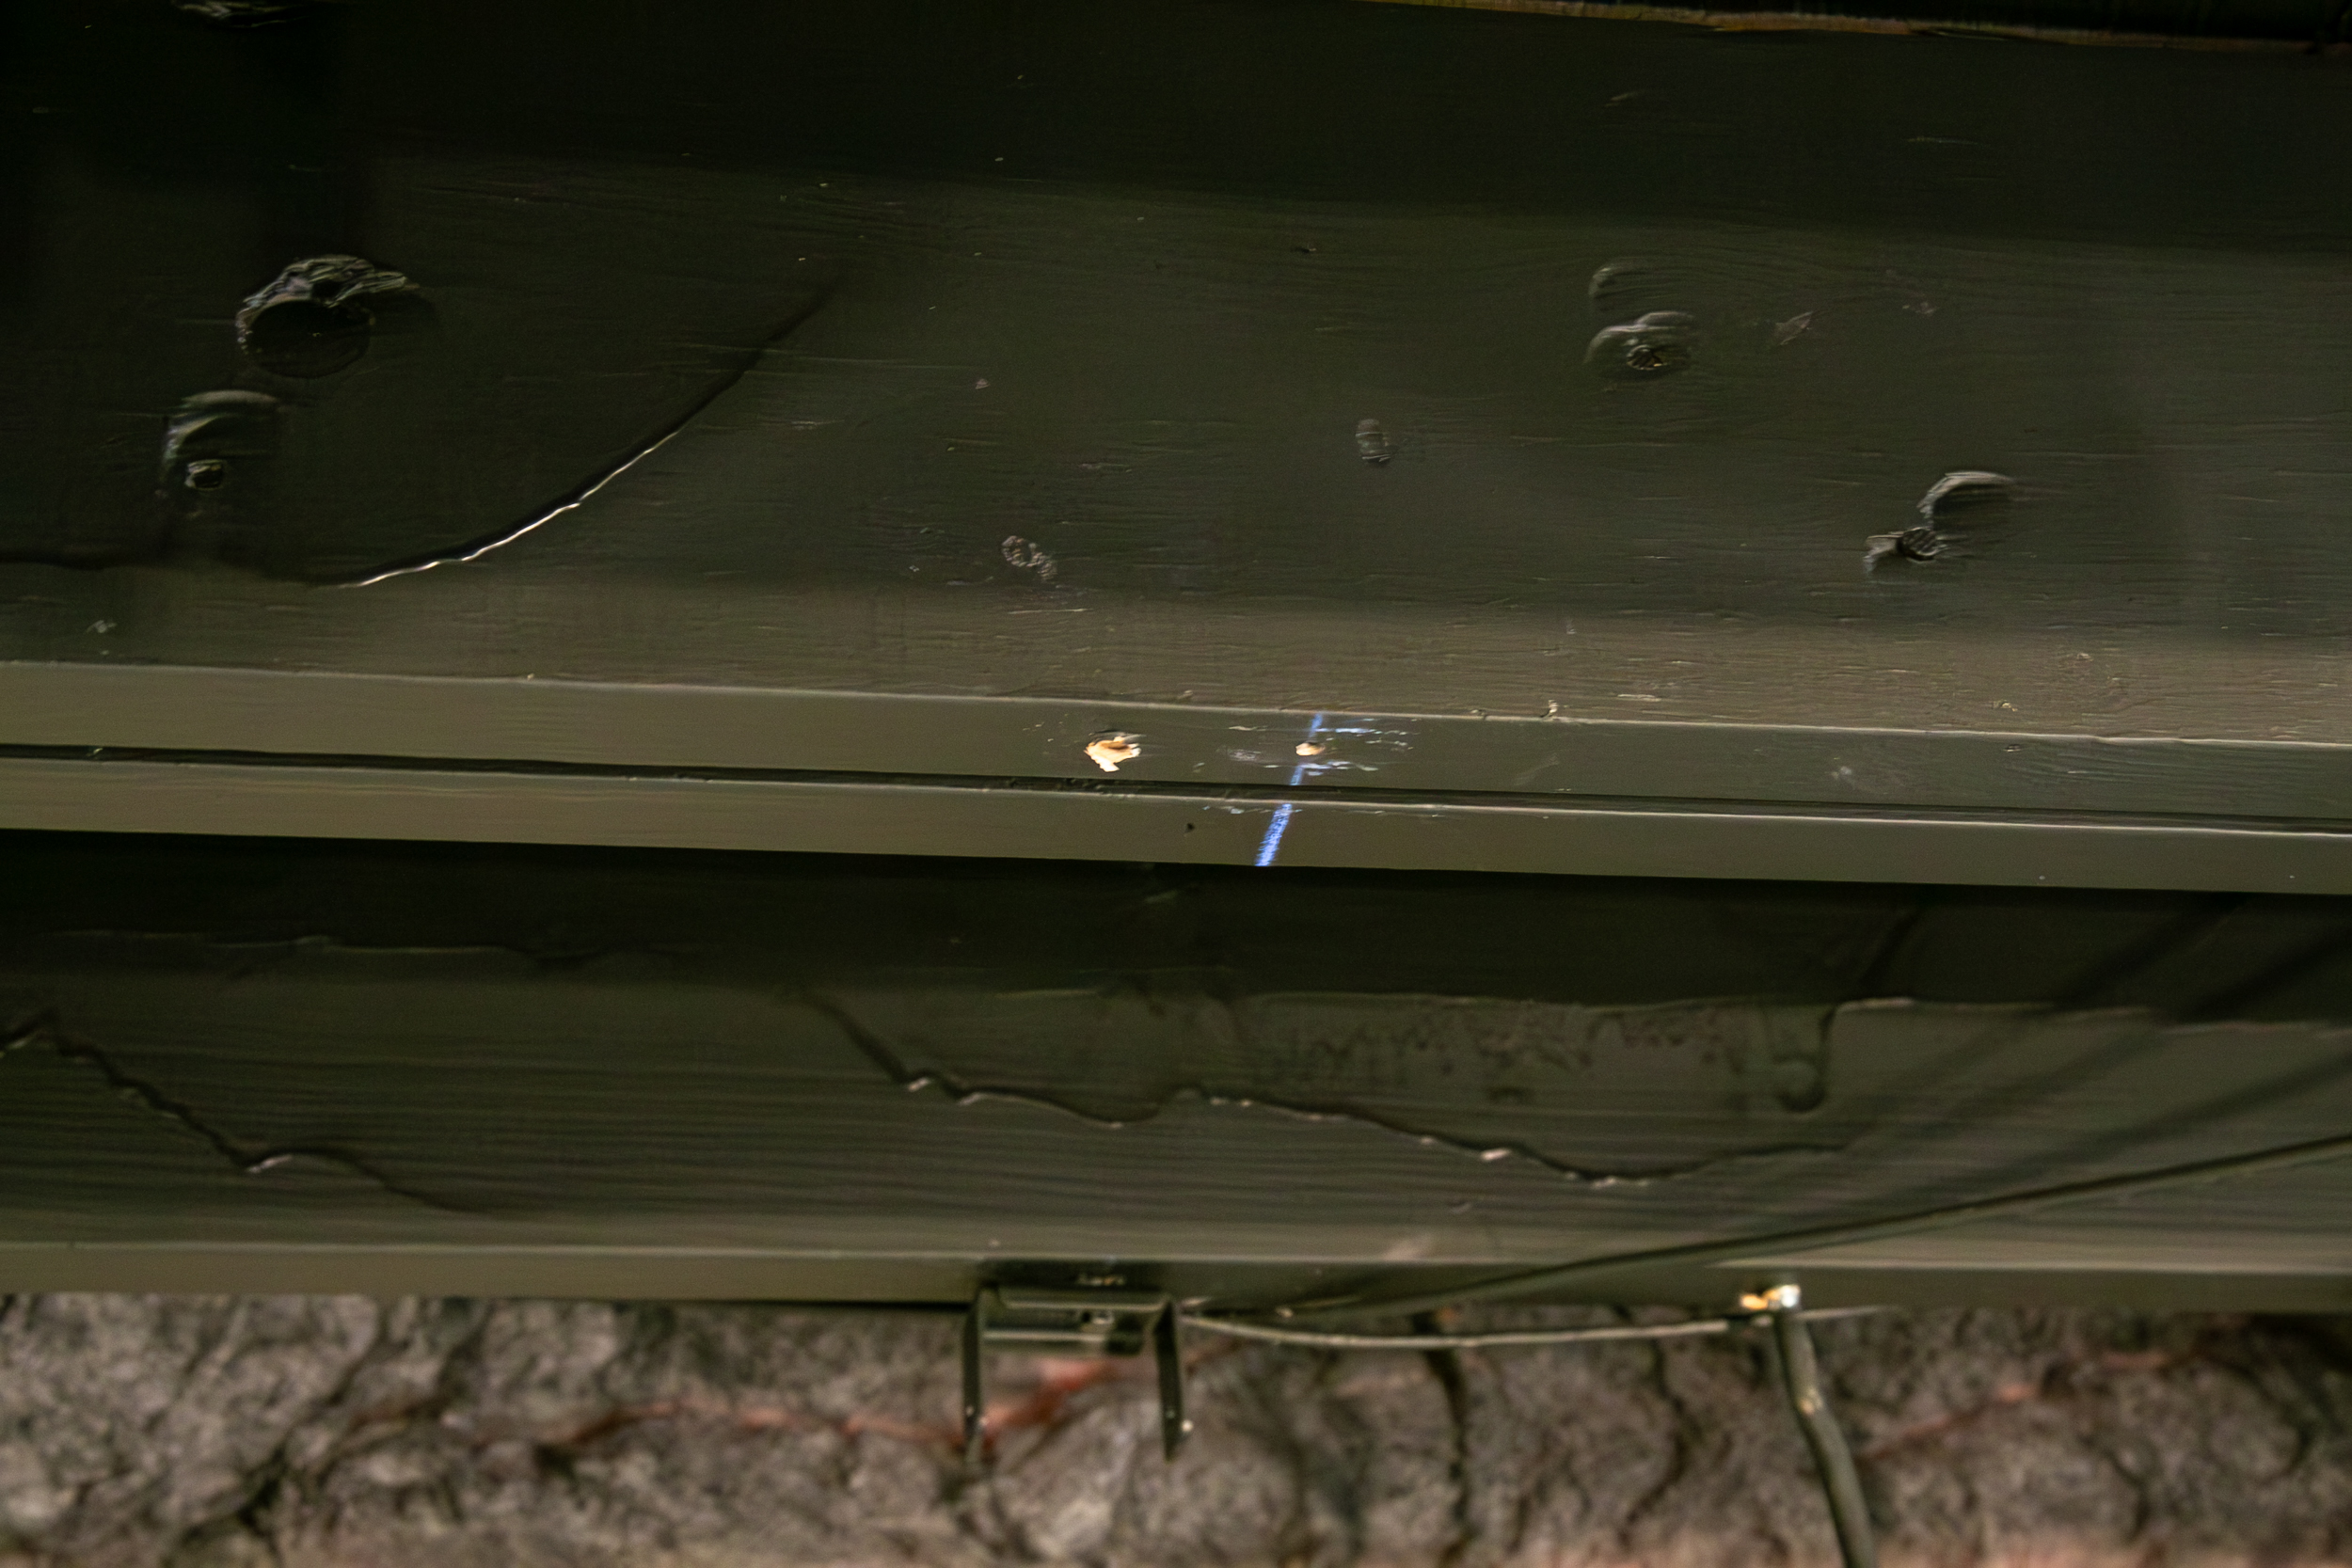
If you’re installing multiple track sections, there are a few more steps. For two sections, it’s recommended to connect the two sections before you raise the rail to the ceiling. Each section is connected with two plates on the top and bottom of the rail, with two screws for each plate. It’s ok if these plates aren’t perfectly parallel with the track. Mine seemed a bit off, but the track itself was mostly straight (keep reading). If you’re connecting three or more sections of track, your options vary. Since I had open joists for my setup, I could easily access the top of the rail to connect track sections after they were hung in the brackets. But if you don’t have an exposed ceiling, you’ll probably need to connect all the sections on the ground and get someone to help you get it into the brackets.
For multiple track sections, you may notice that once everything is installed, there are still slight bends at the junctions, so the track isn’t perfectly straight. That’s what I ran into, but the fix is pretty easy – just get a deadblow hammer with a soft face ( or a regular hammer with something soft to deaden the blow and not mar the surface of the rail) and give it a little tap at the junction.
I used the soft side of a Park Tool HMR 4 to tap right at the junction between two rails. If the junction looked like ‘>’, I tapped on the right side, and if the junction looked like ‘<‘, I tapped on the left until they were perfectly straight. It really took only one or two taps, but make them good ones since the brackets should be tight. As a result, I have 6 track sections lined up with arrow-straight precision. Note that this only works if the rails are slightly off. If they are off by more, you may need to readjust the brackets themselves.
Bike Storage
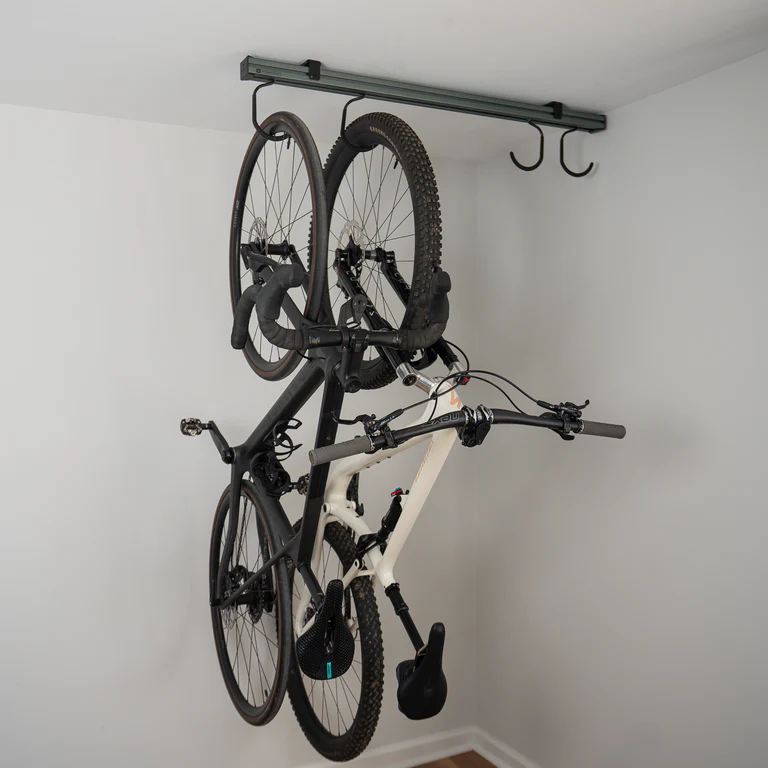
Ideally, bikes with disc brakes should be stored with the levers facing up – at least for long-term storage. I can tell you from personal experience that I need to rebleed a number of bikes that have been stored long-term with the levers facing down. That’s one of the great features of the CycleSlide since it allows you to store all your bikes with the levers facing up, while also making it extremely easy to store the bikes. You can lift the bike by the handlebars, mount it in the hook facing you, then simply spin it around to alternate back-to-front bike storage. This is the easiest way to mount bikes since it gives you more control over the bike, and you’re not fighting the front wheel and bar flopping around.
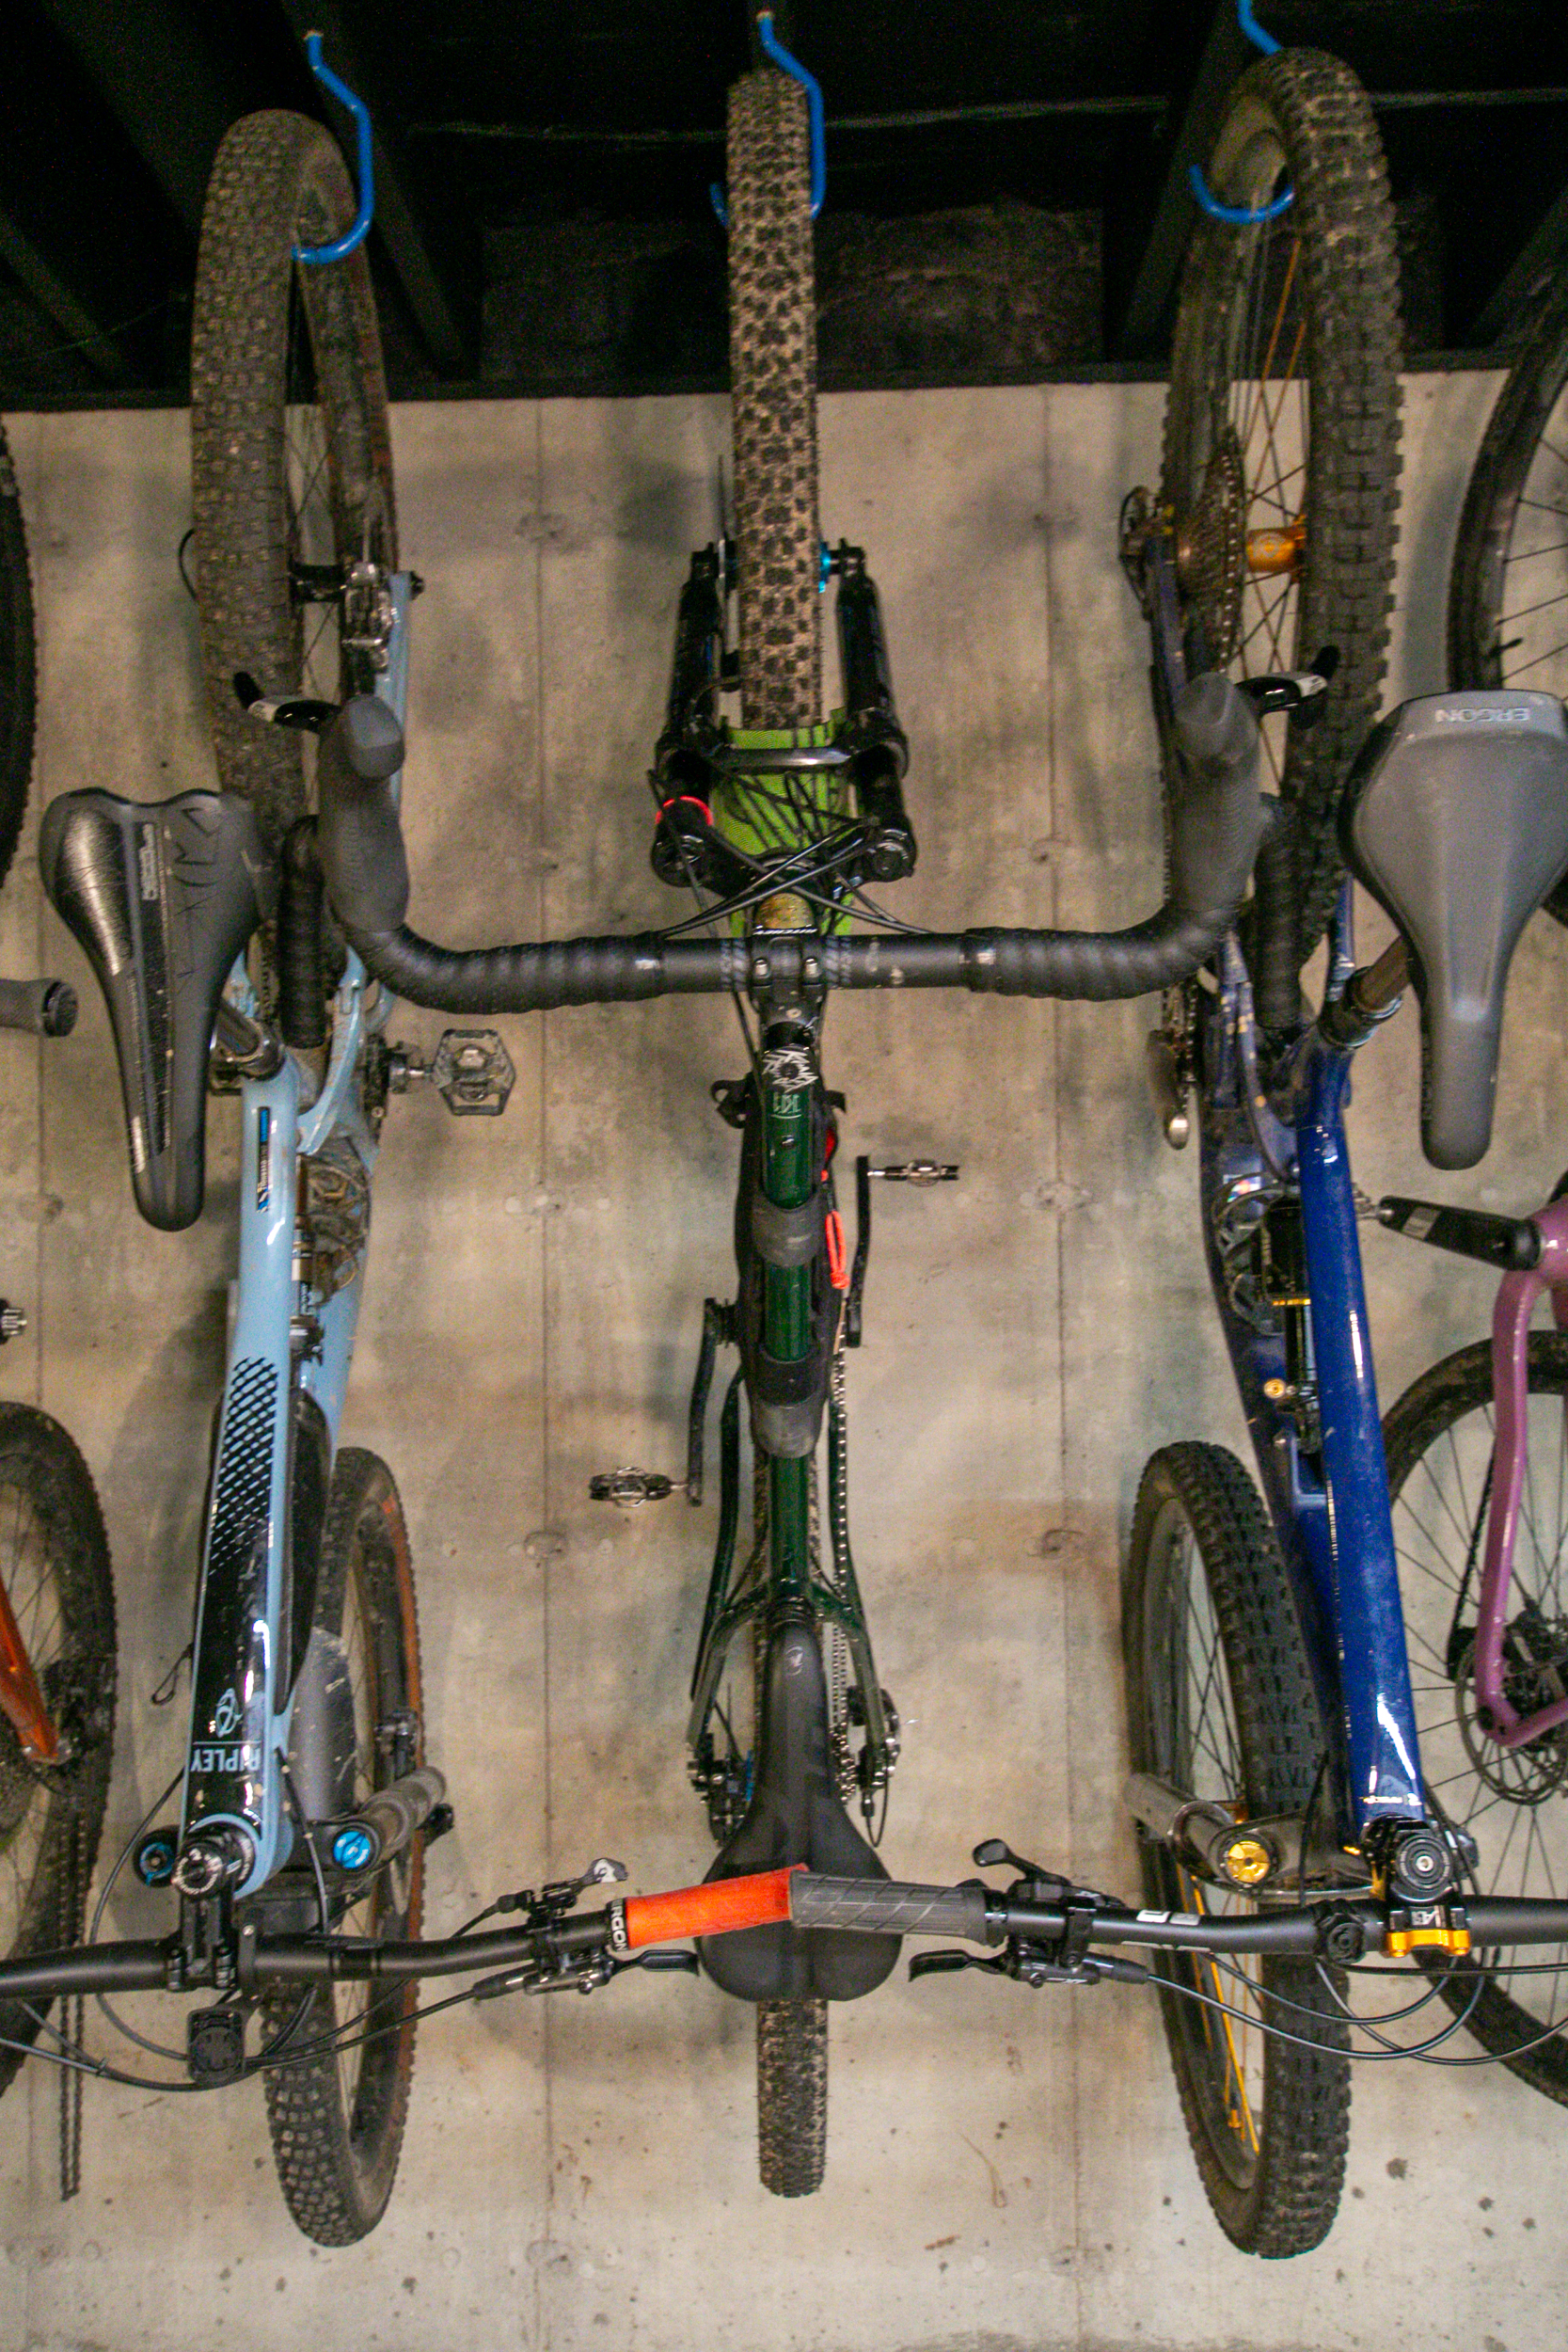
The only catch to this method is that it requires more room to be able to spin the bike. On normal setups with four bikes on a 4’ rail section, there is plenty of room to do this. But on my setup with six rails and 29 hooks, I realized that up-to-down storage is still required to provide enough room to get bikes in and out. I added 5 fat bike hooks to the 24 standard hooks that were included in the six rail sections (it seems like adding at least one extra hook per 4’ section is totally doable), so the room that would allow for spinning bikes is taken up with extra bike storage. This is definitely an option if you want the maximum amount of bike storage. Just know that for long-term cold storage, you may need to bleed some brakes when you dust them off.
Note that up-to-down storage also gives you more room inside your space at the bottom of the rack, since the wheels all hang towards the wall, rather than alternating in and out.
Pedals are another concern, specifically flat pedals with gnarly pins. Most of my bikes with flat pedals are seasonal (fat bikes, beach cruisers, etc.), so for the bikes I don’t use for long stretches at a time, I took the pedals off so the pins don’t scratch the other bikes. If you have bikes with aggressive flat pedals that you ride regularly, you may want to consider something like the Granite Designs Pita Pedal cover to protect the other bikes if you want to prevent any scratches.
In my experience, clipless pedals aren’t much of a concern, as you can easily position the cranks so the pedals don’t touch the bike next door.
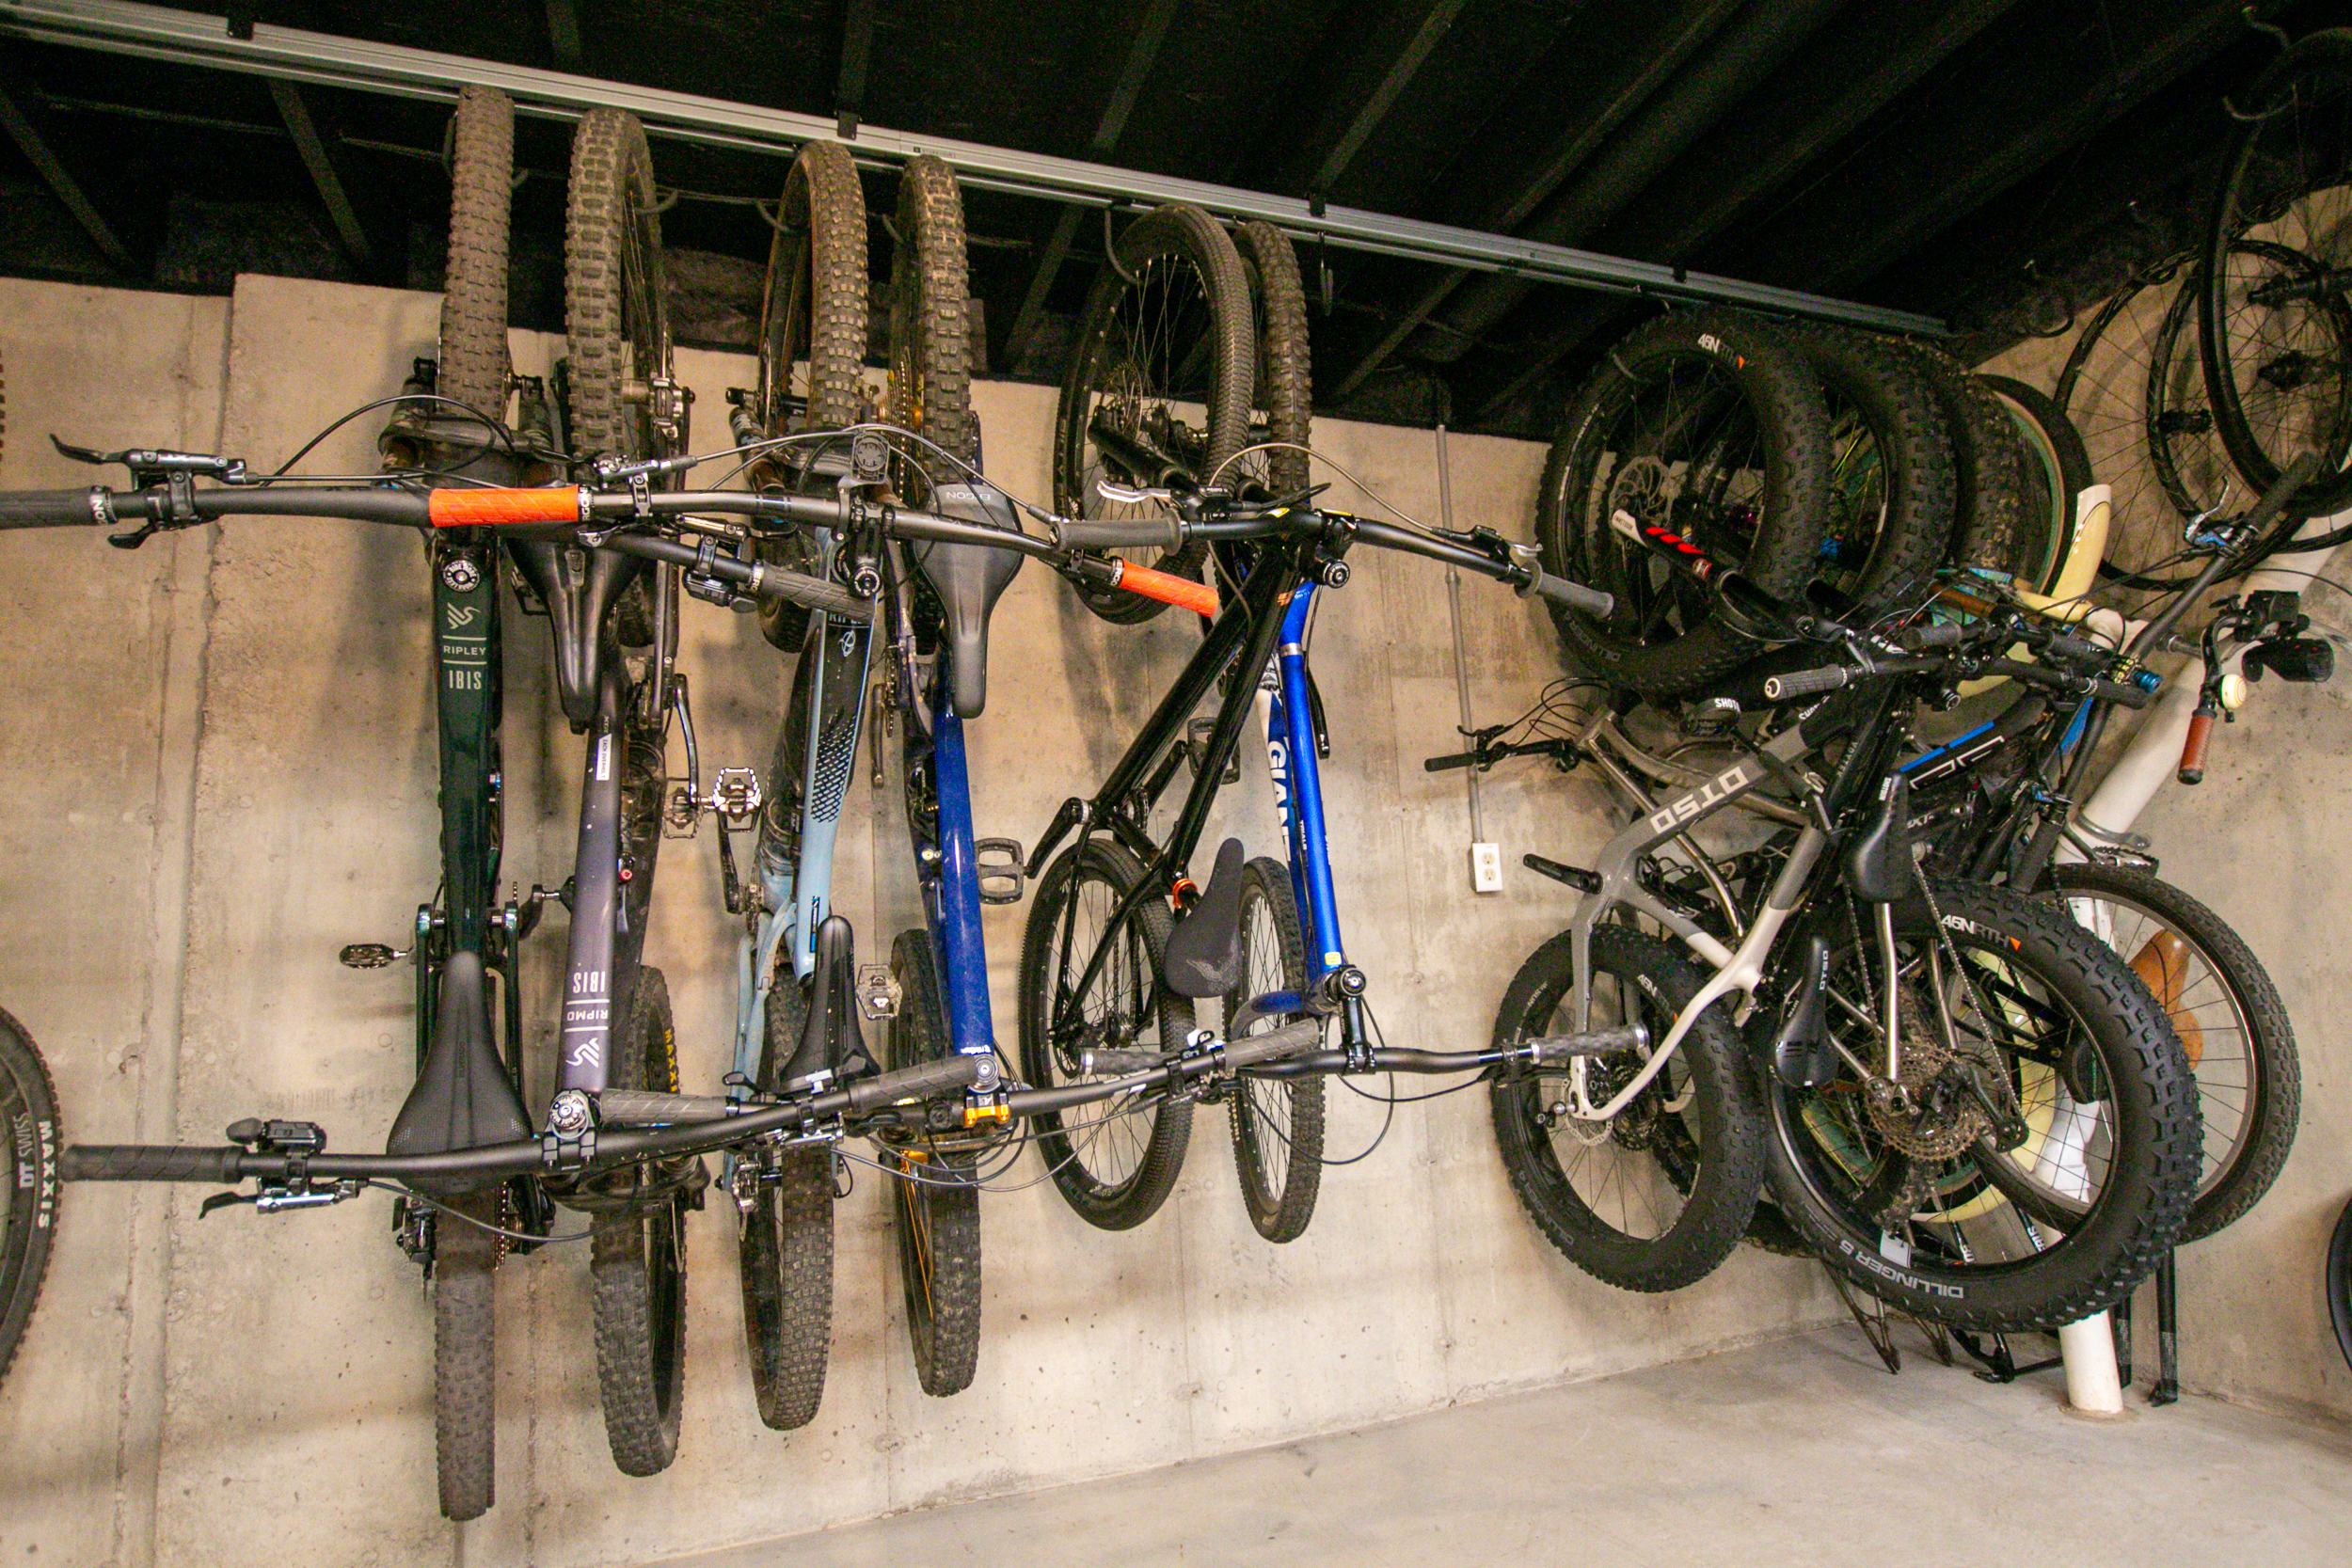
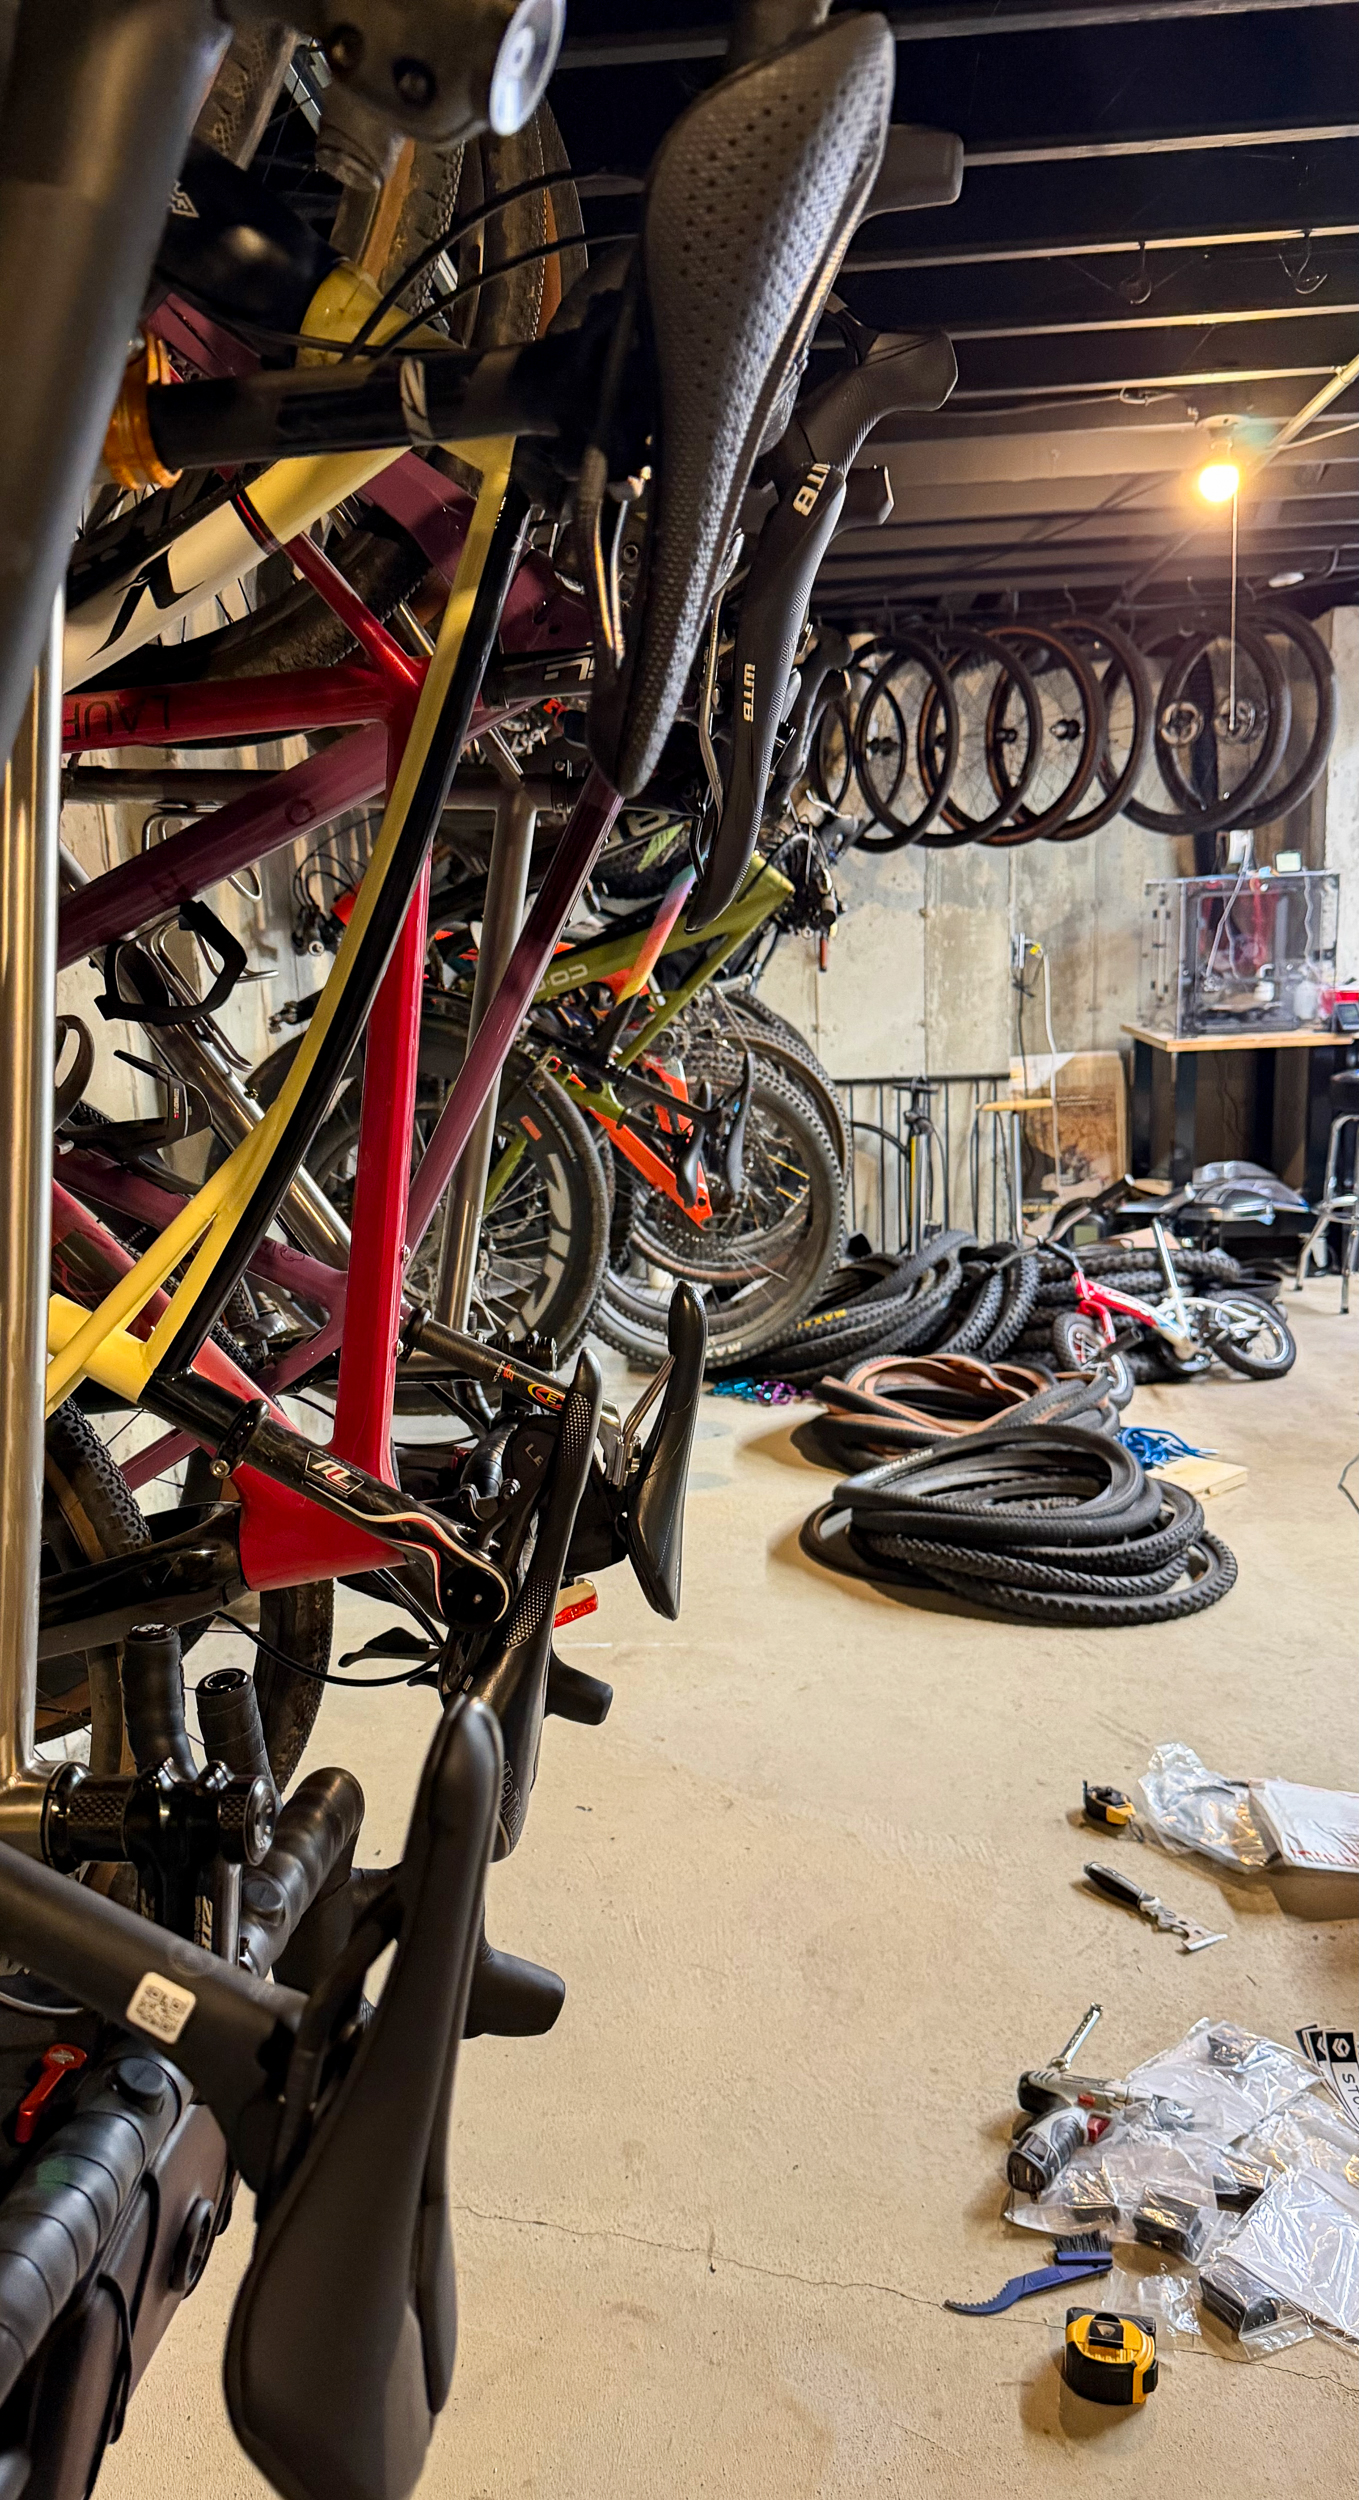
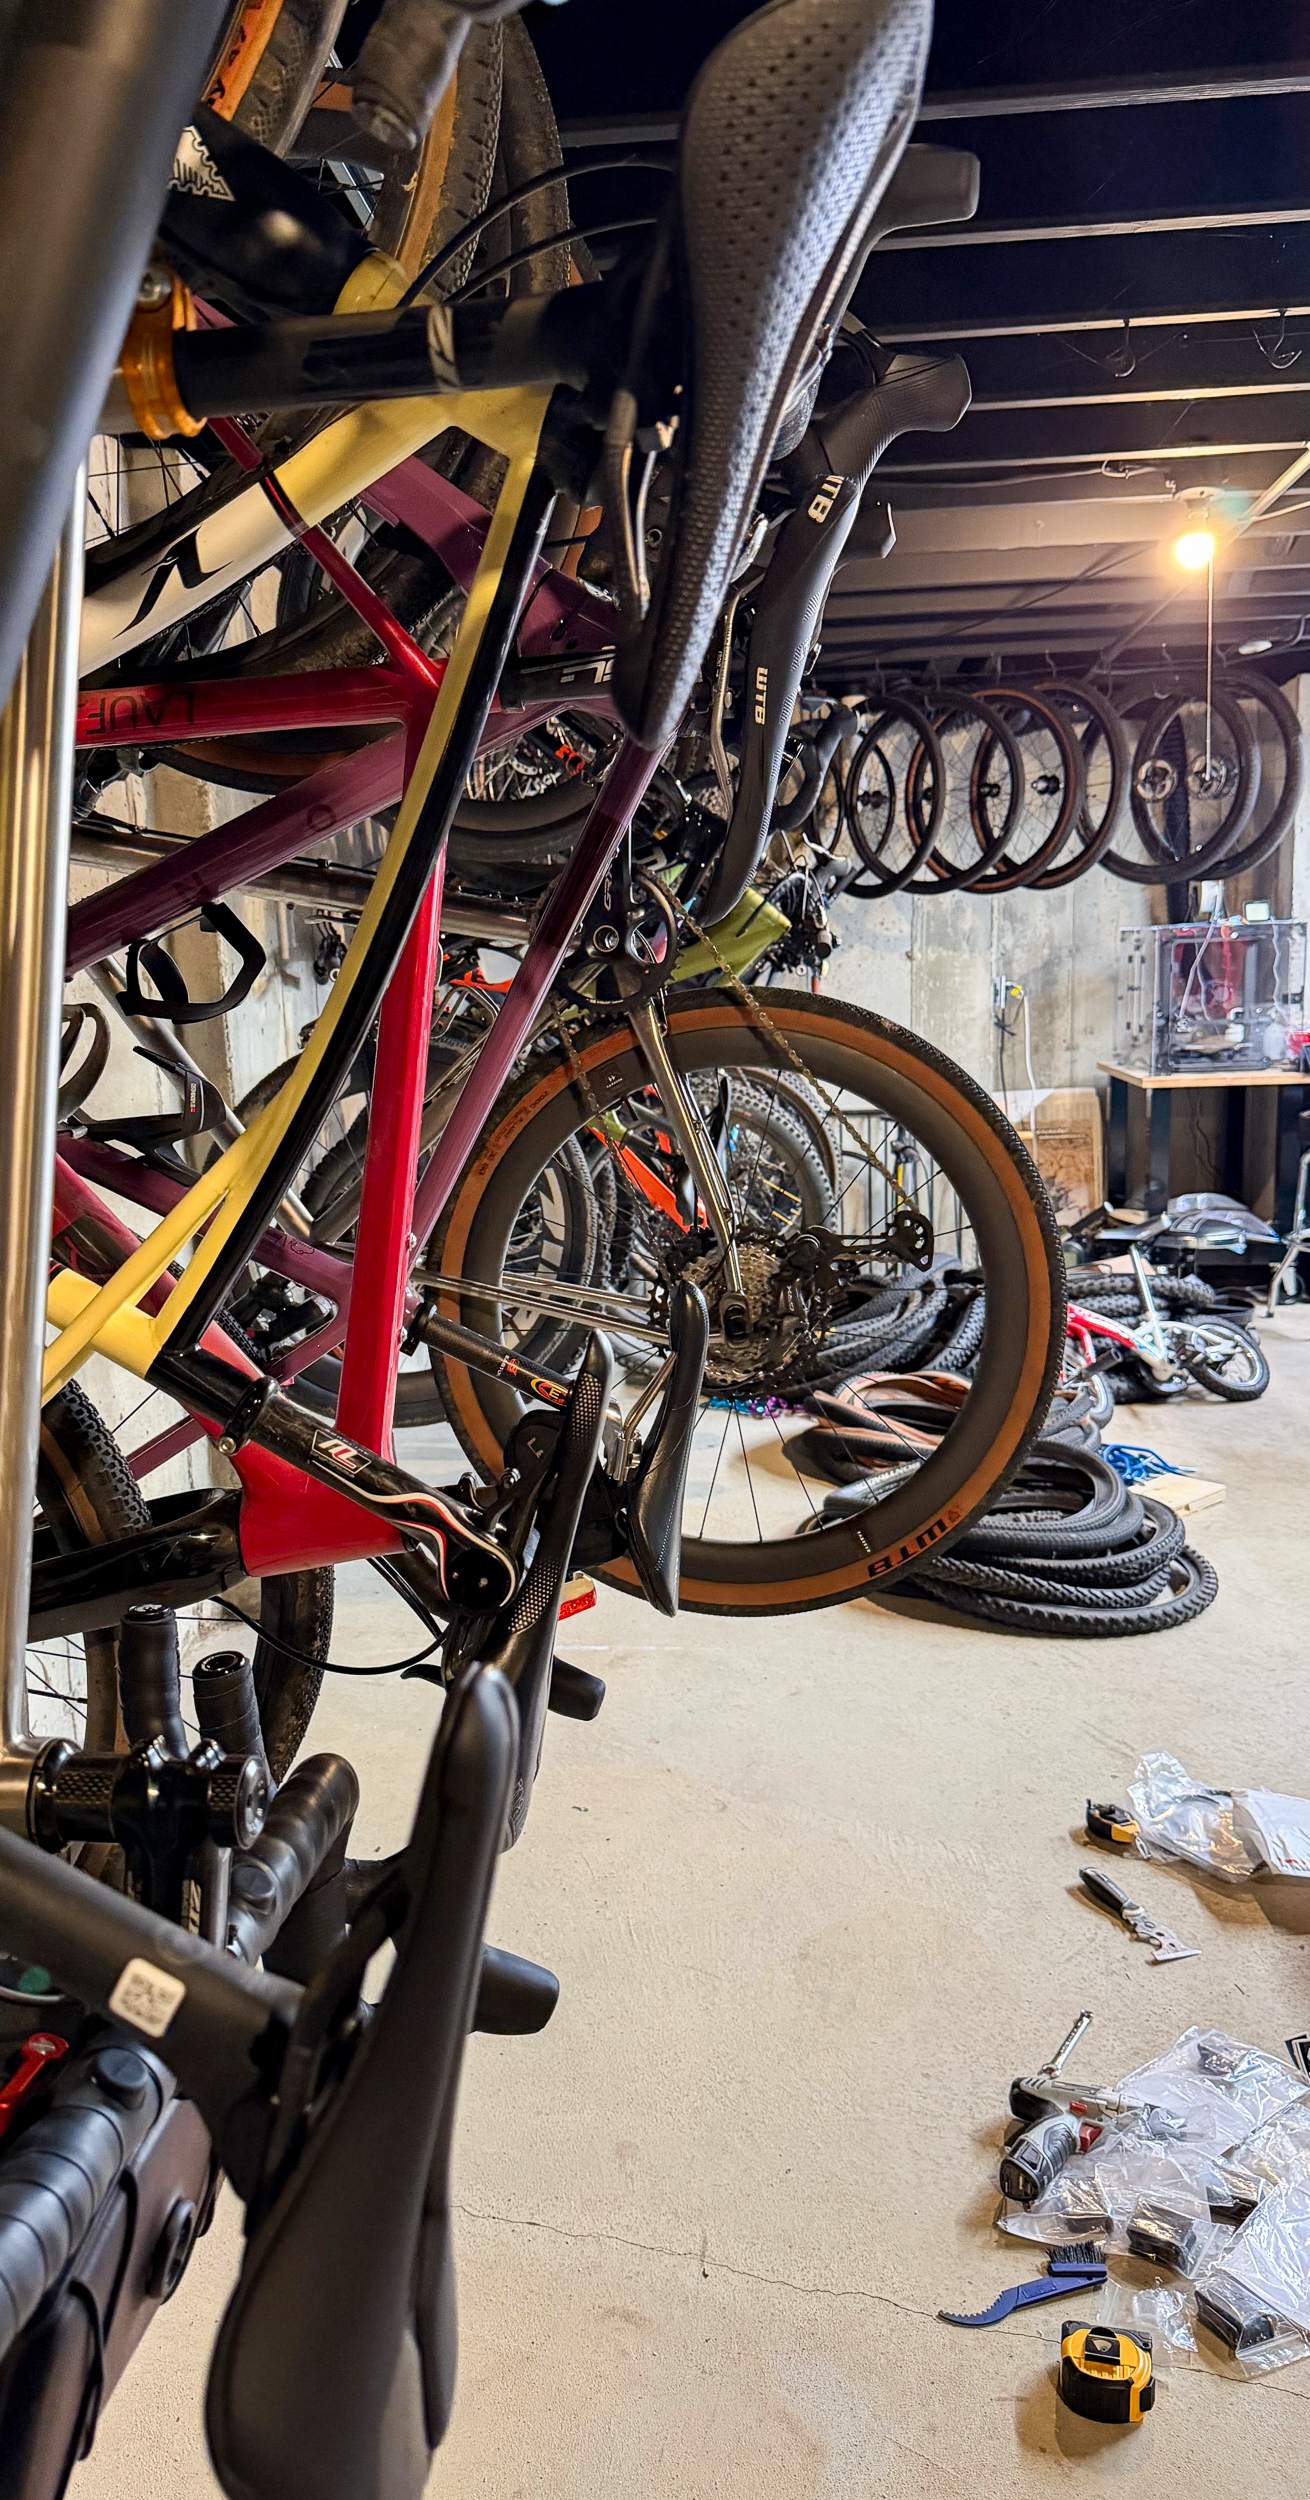
Even with a full rack of bikes, it doesn’t seem like it causes any damage at all if you gently push the bikes to the side. You don’t want to force it, obviously, but the hook carriers move so easily that it doesn’t take much force at all to slide eight bikes at once. I ended up arranging my bikes in pods – road, gravel, MTB, etc. Between each pod is a gap, which allows me to quickly and easily get to any bike without having to move every bike on the rack. I was a little unsure of how easily it would be to access bikes with them so close together, but after a few weeks of use, I’m kicking myself for not having done this sooner.
Not only does the CycleSlide allow me to store more bikes in the same amount of space, but it’s actually easier to get the bikes in and out. Even though my bikes had more space between the hooks previously, the handlebars would still catch on cables and tires and make it difficult to get the bikes up or down, especially with wider handlebars. With the CycleSlide, you simply push the other bikes out of the way, giving yourself all the free space you need to have access to the bike you need unimpeded.
Double Hook Doubled Kid’s Bike & Wheel Storage
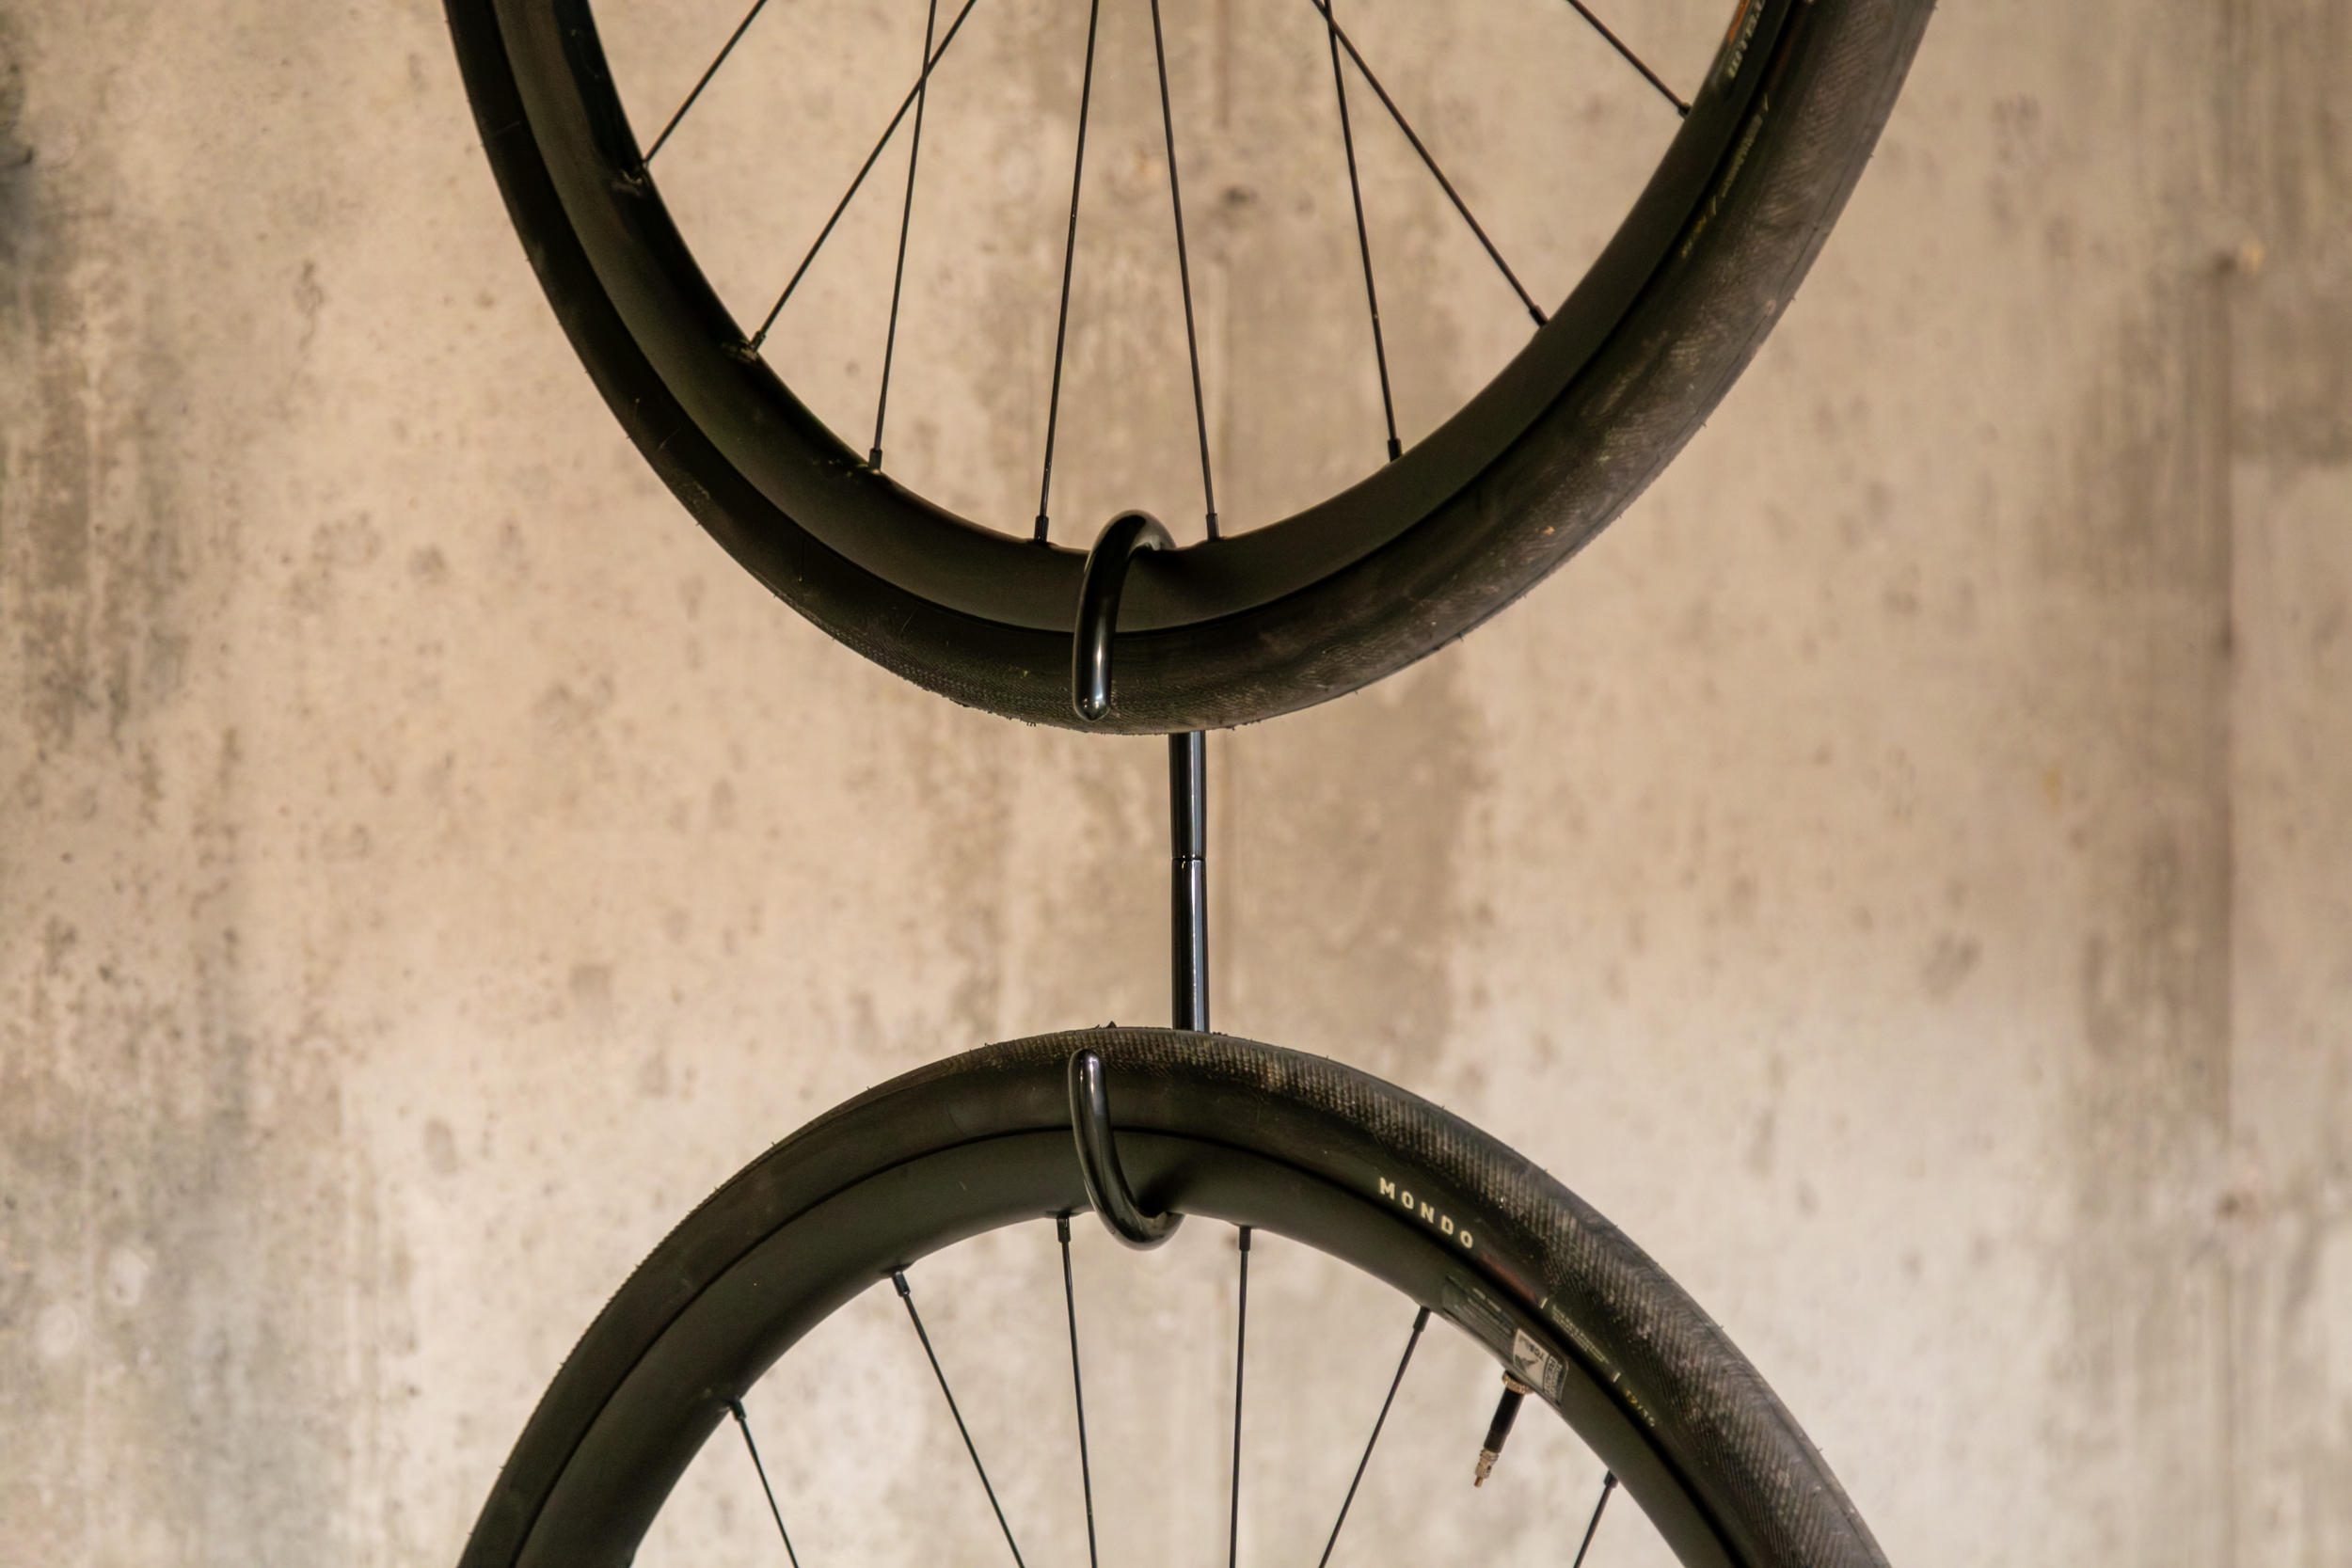
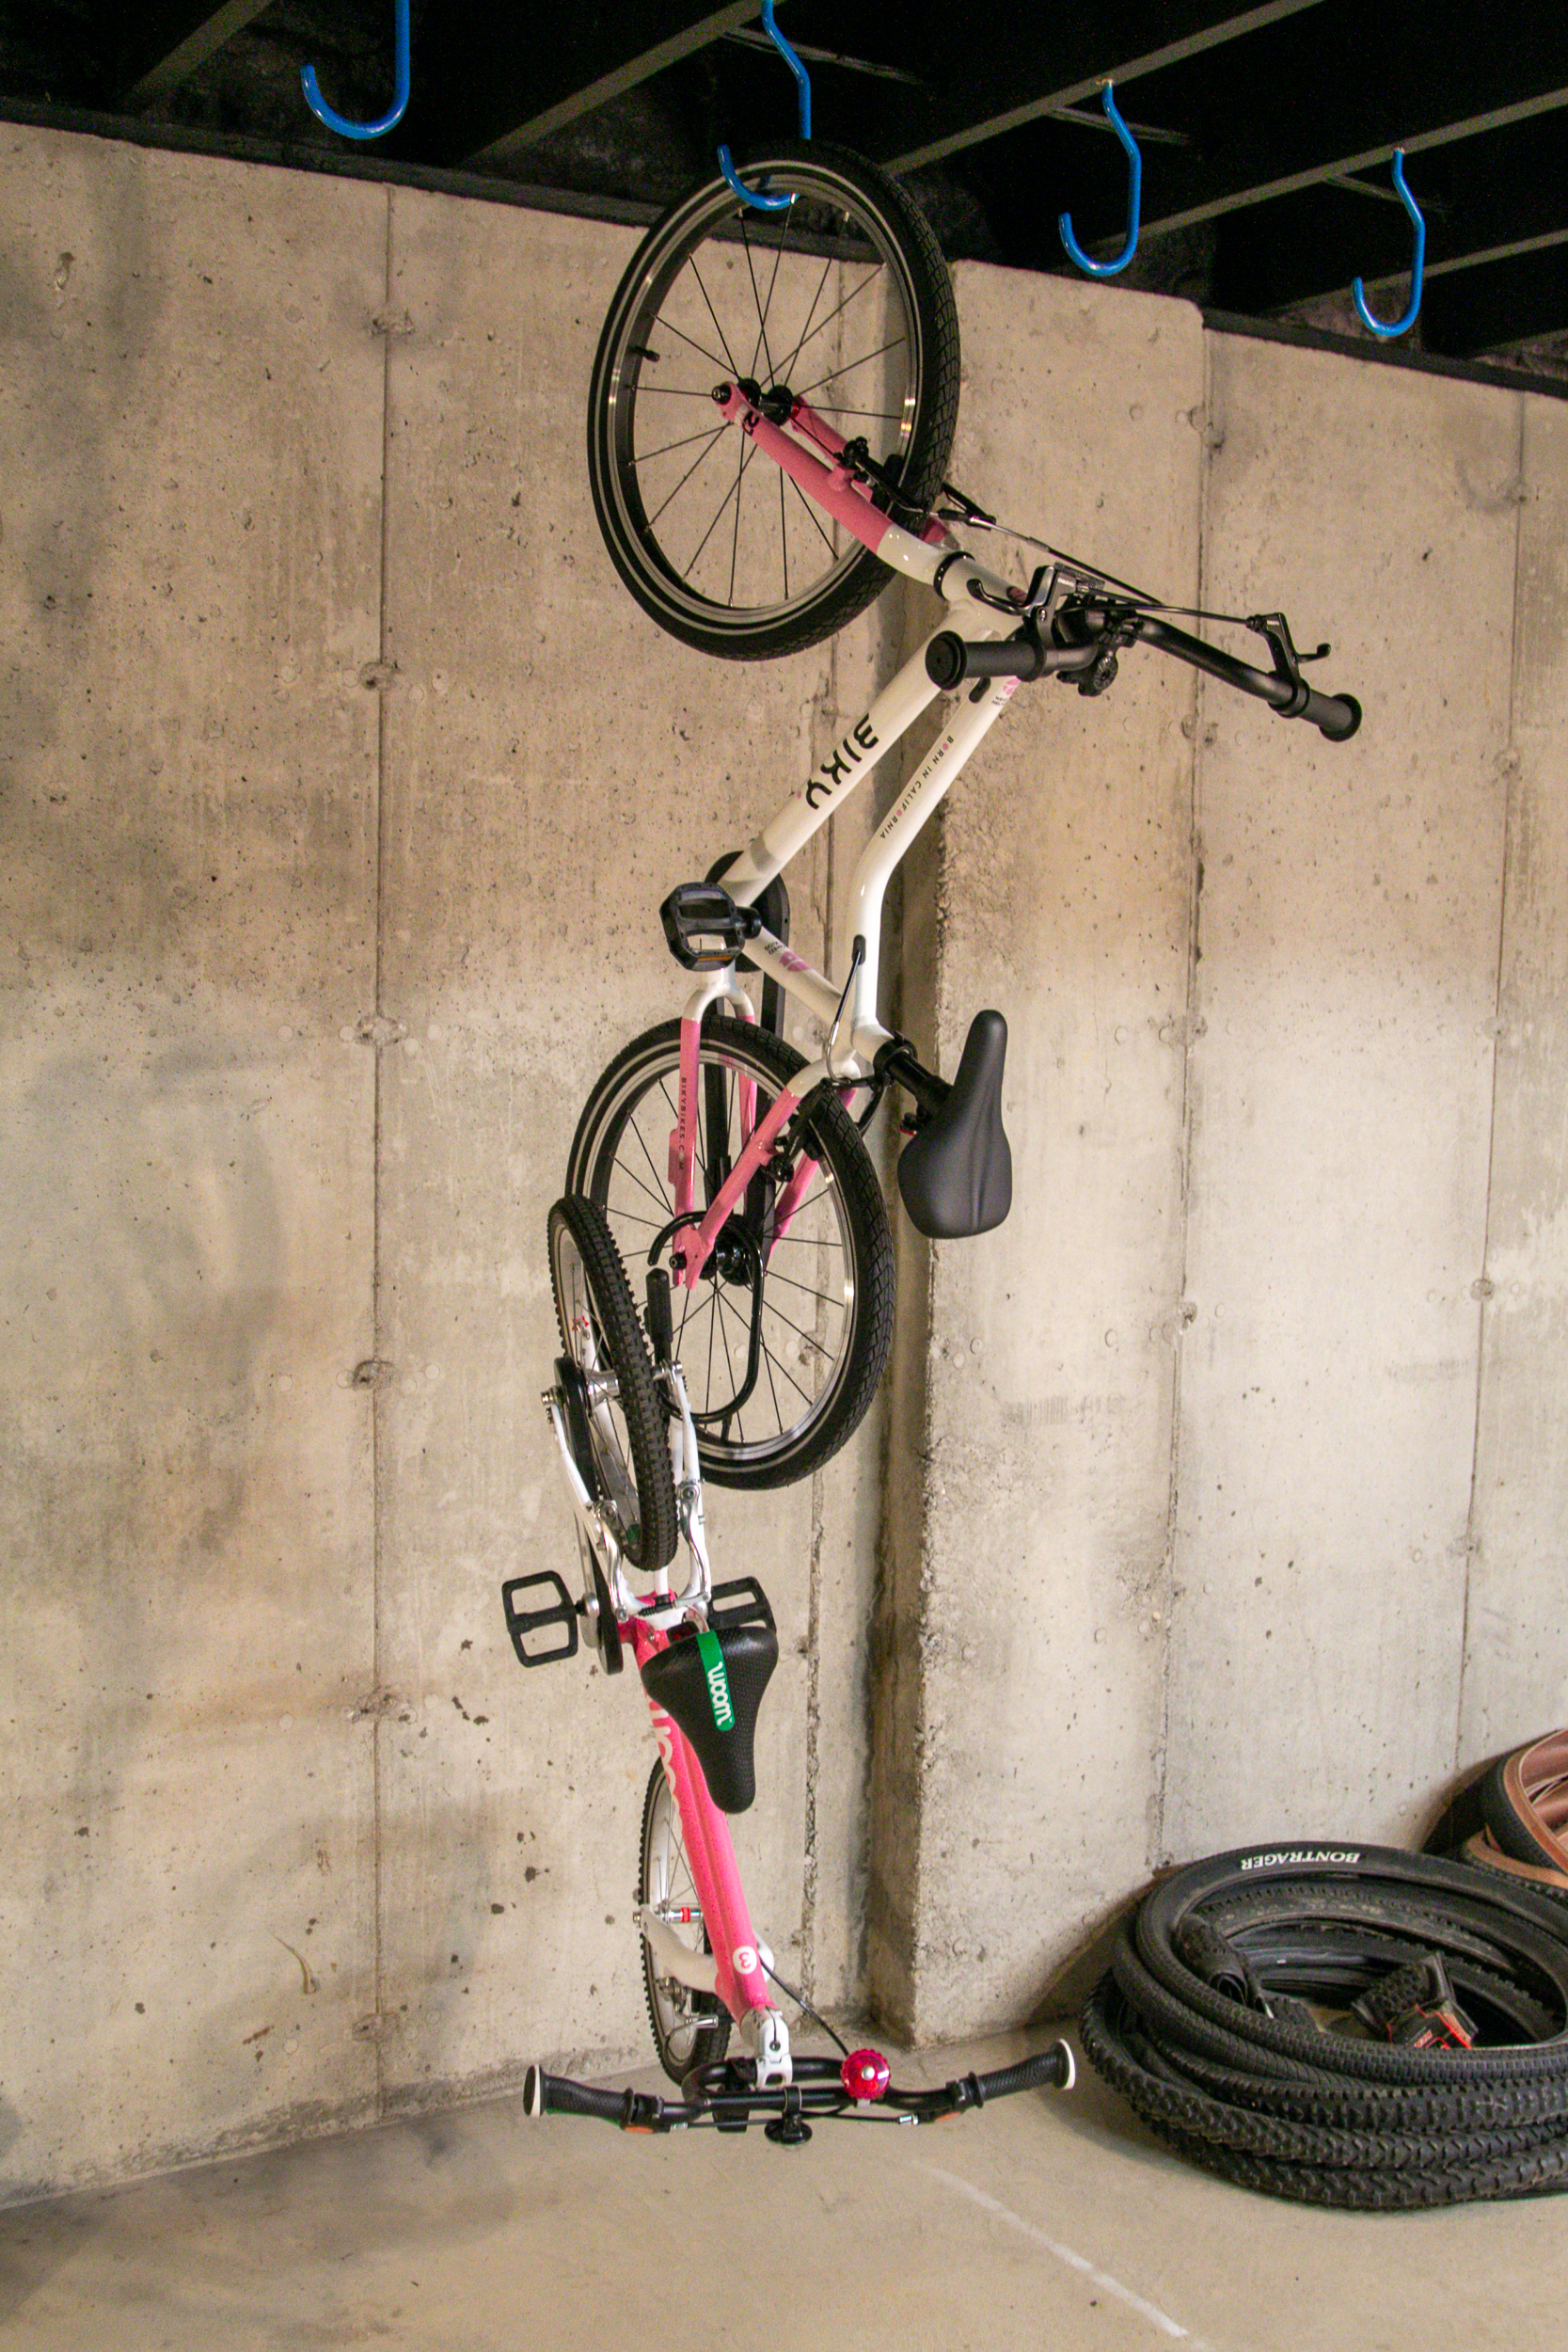
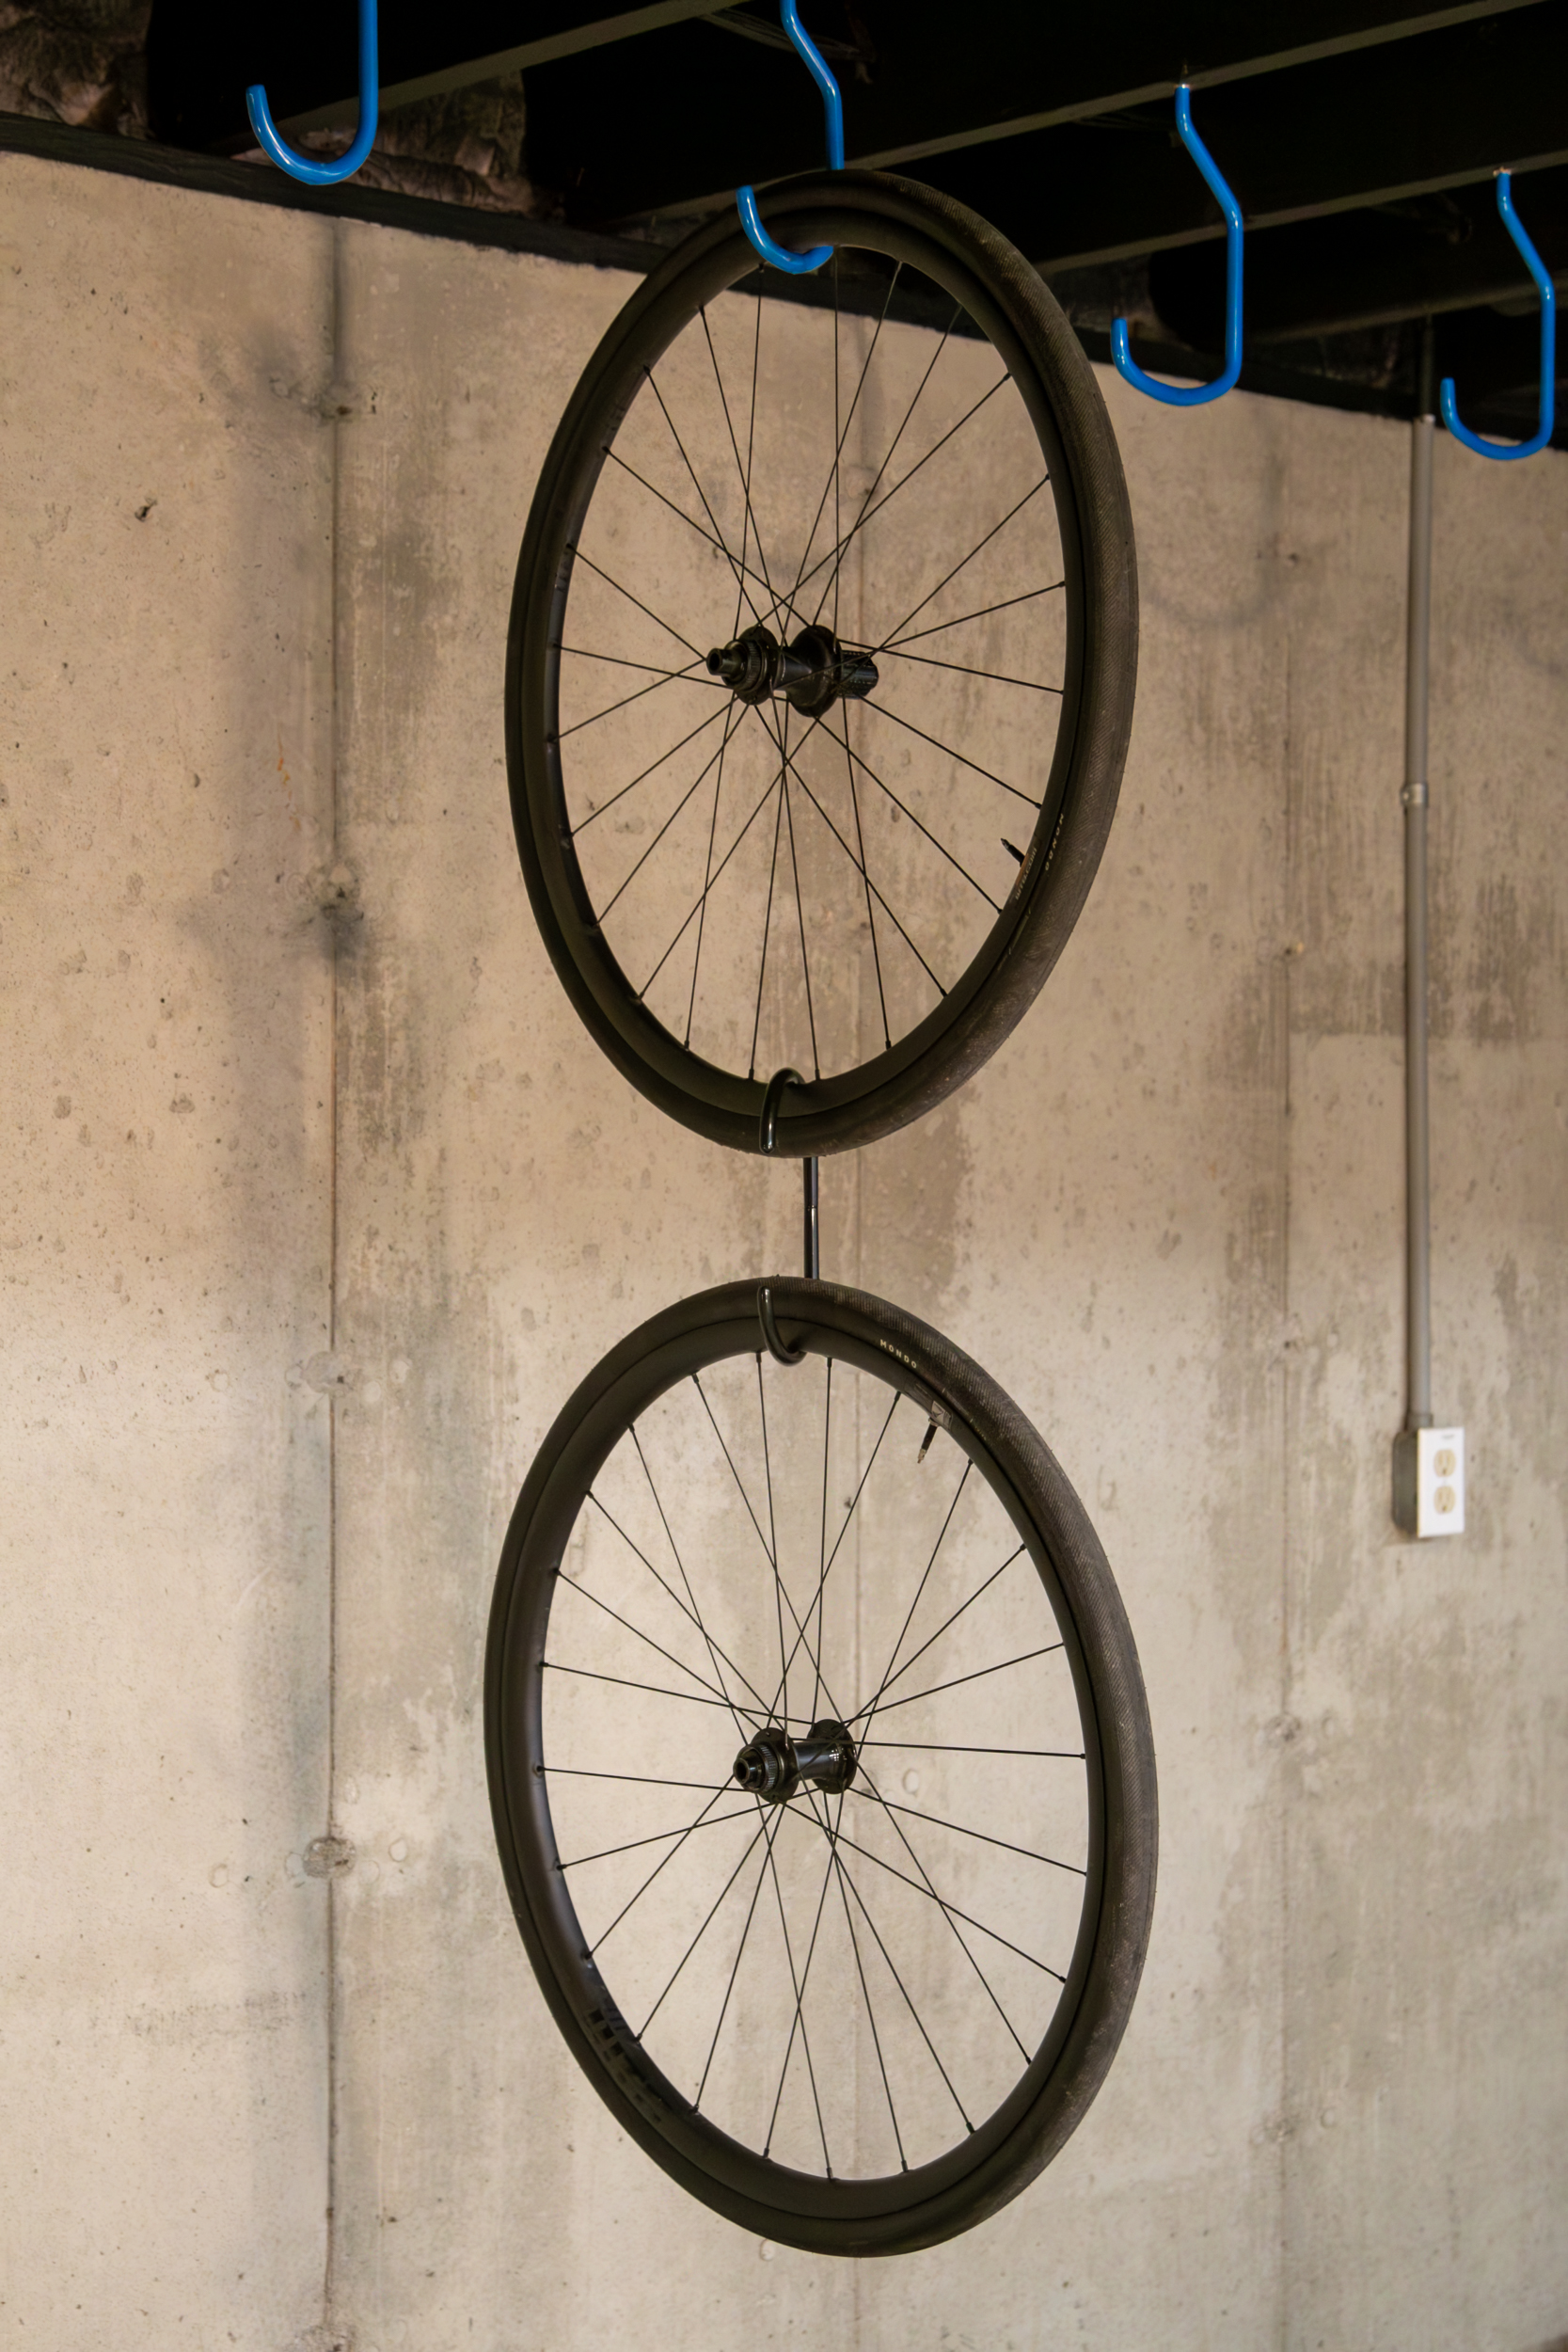
Got a bunch of kids’ bikes or spare wheels lying around? Store Your offers a convenient accessory to make the most out of your CycleSlide storage (or anything else for that matter). Their extension double hook allows you to hang one bike off another, assuming they’re small enough. It also allows for wheelset storage on one hook – realistically, you could probably load up more than two wheels per hook here.
I’m showing it here on standard bike hooks since this isn’t a CycleSlide specific accessory – just a low key way to increase your storage space for any hanging setup.
More Bike Storage with the Same Space
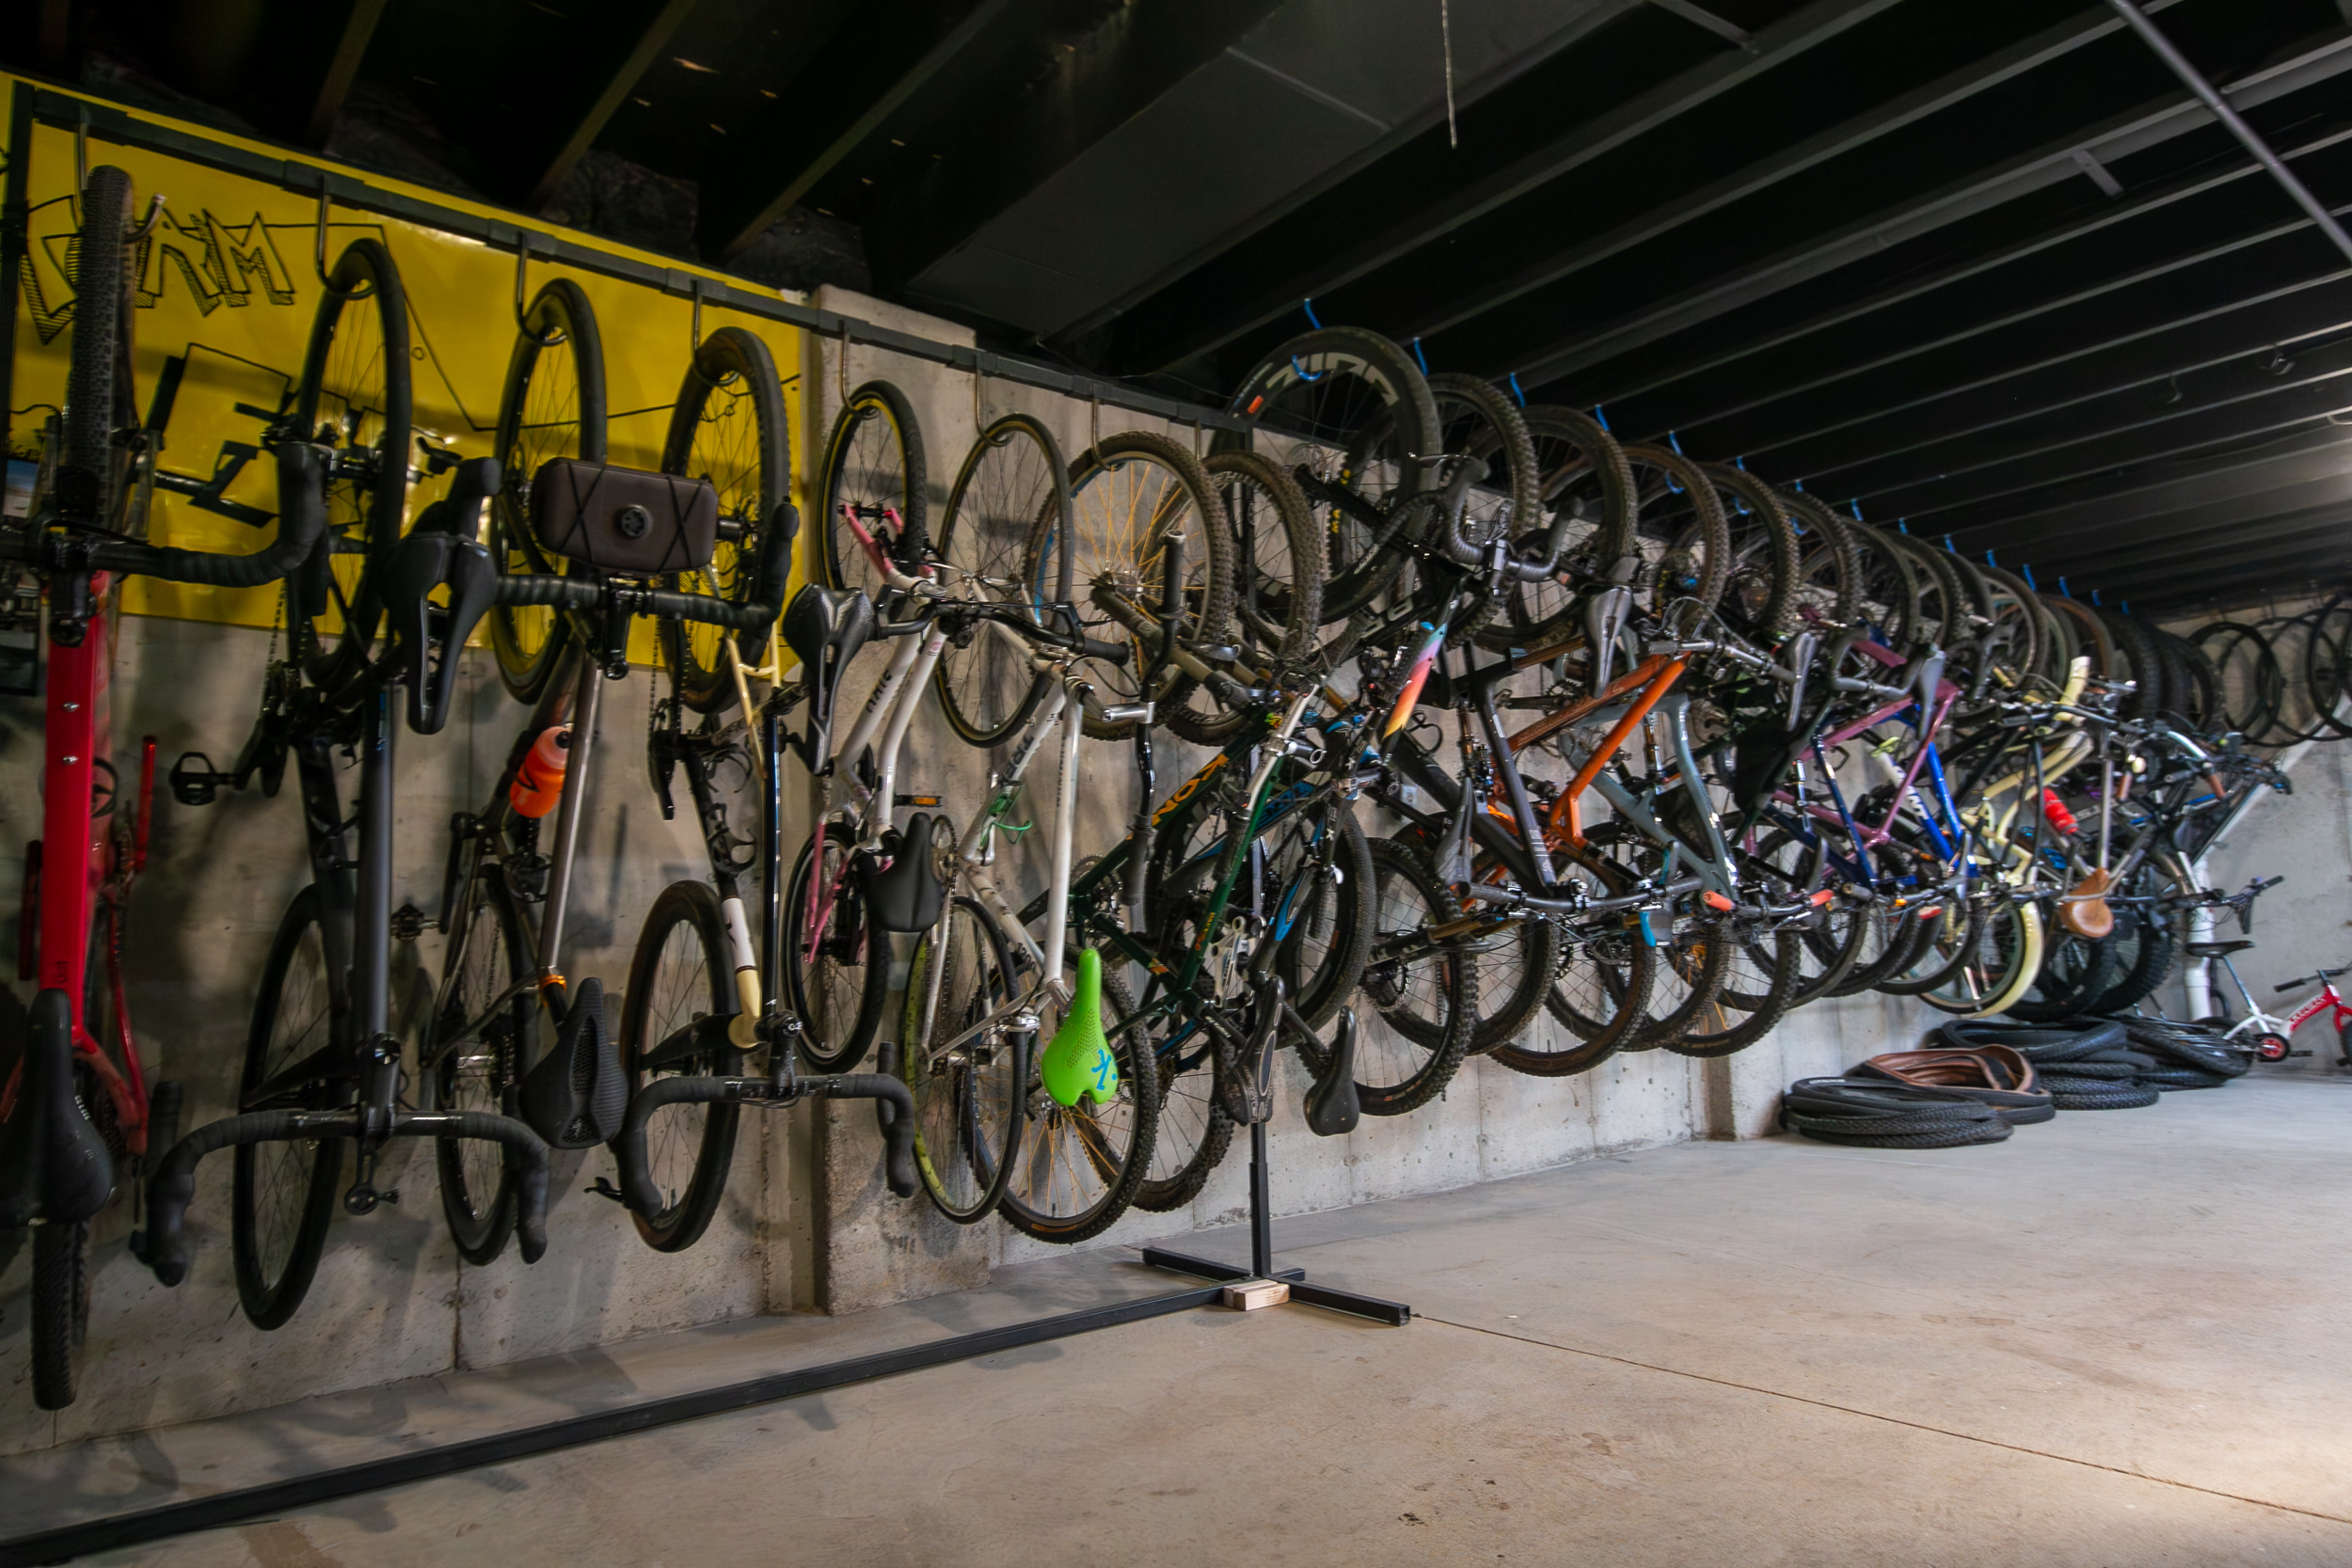
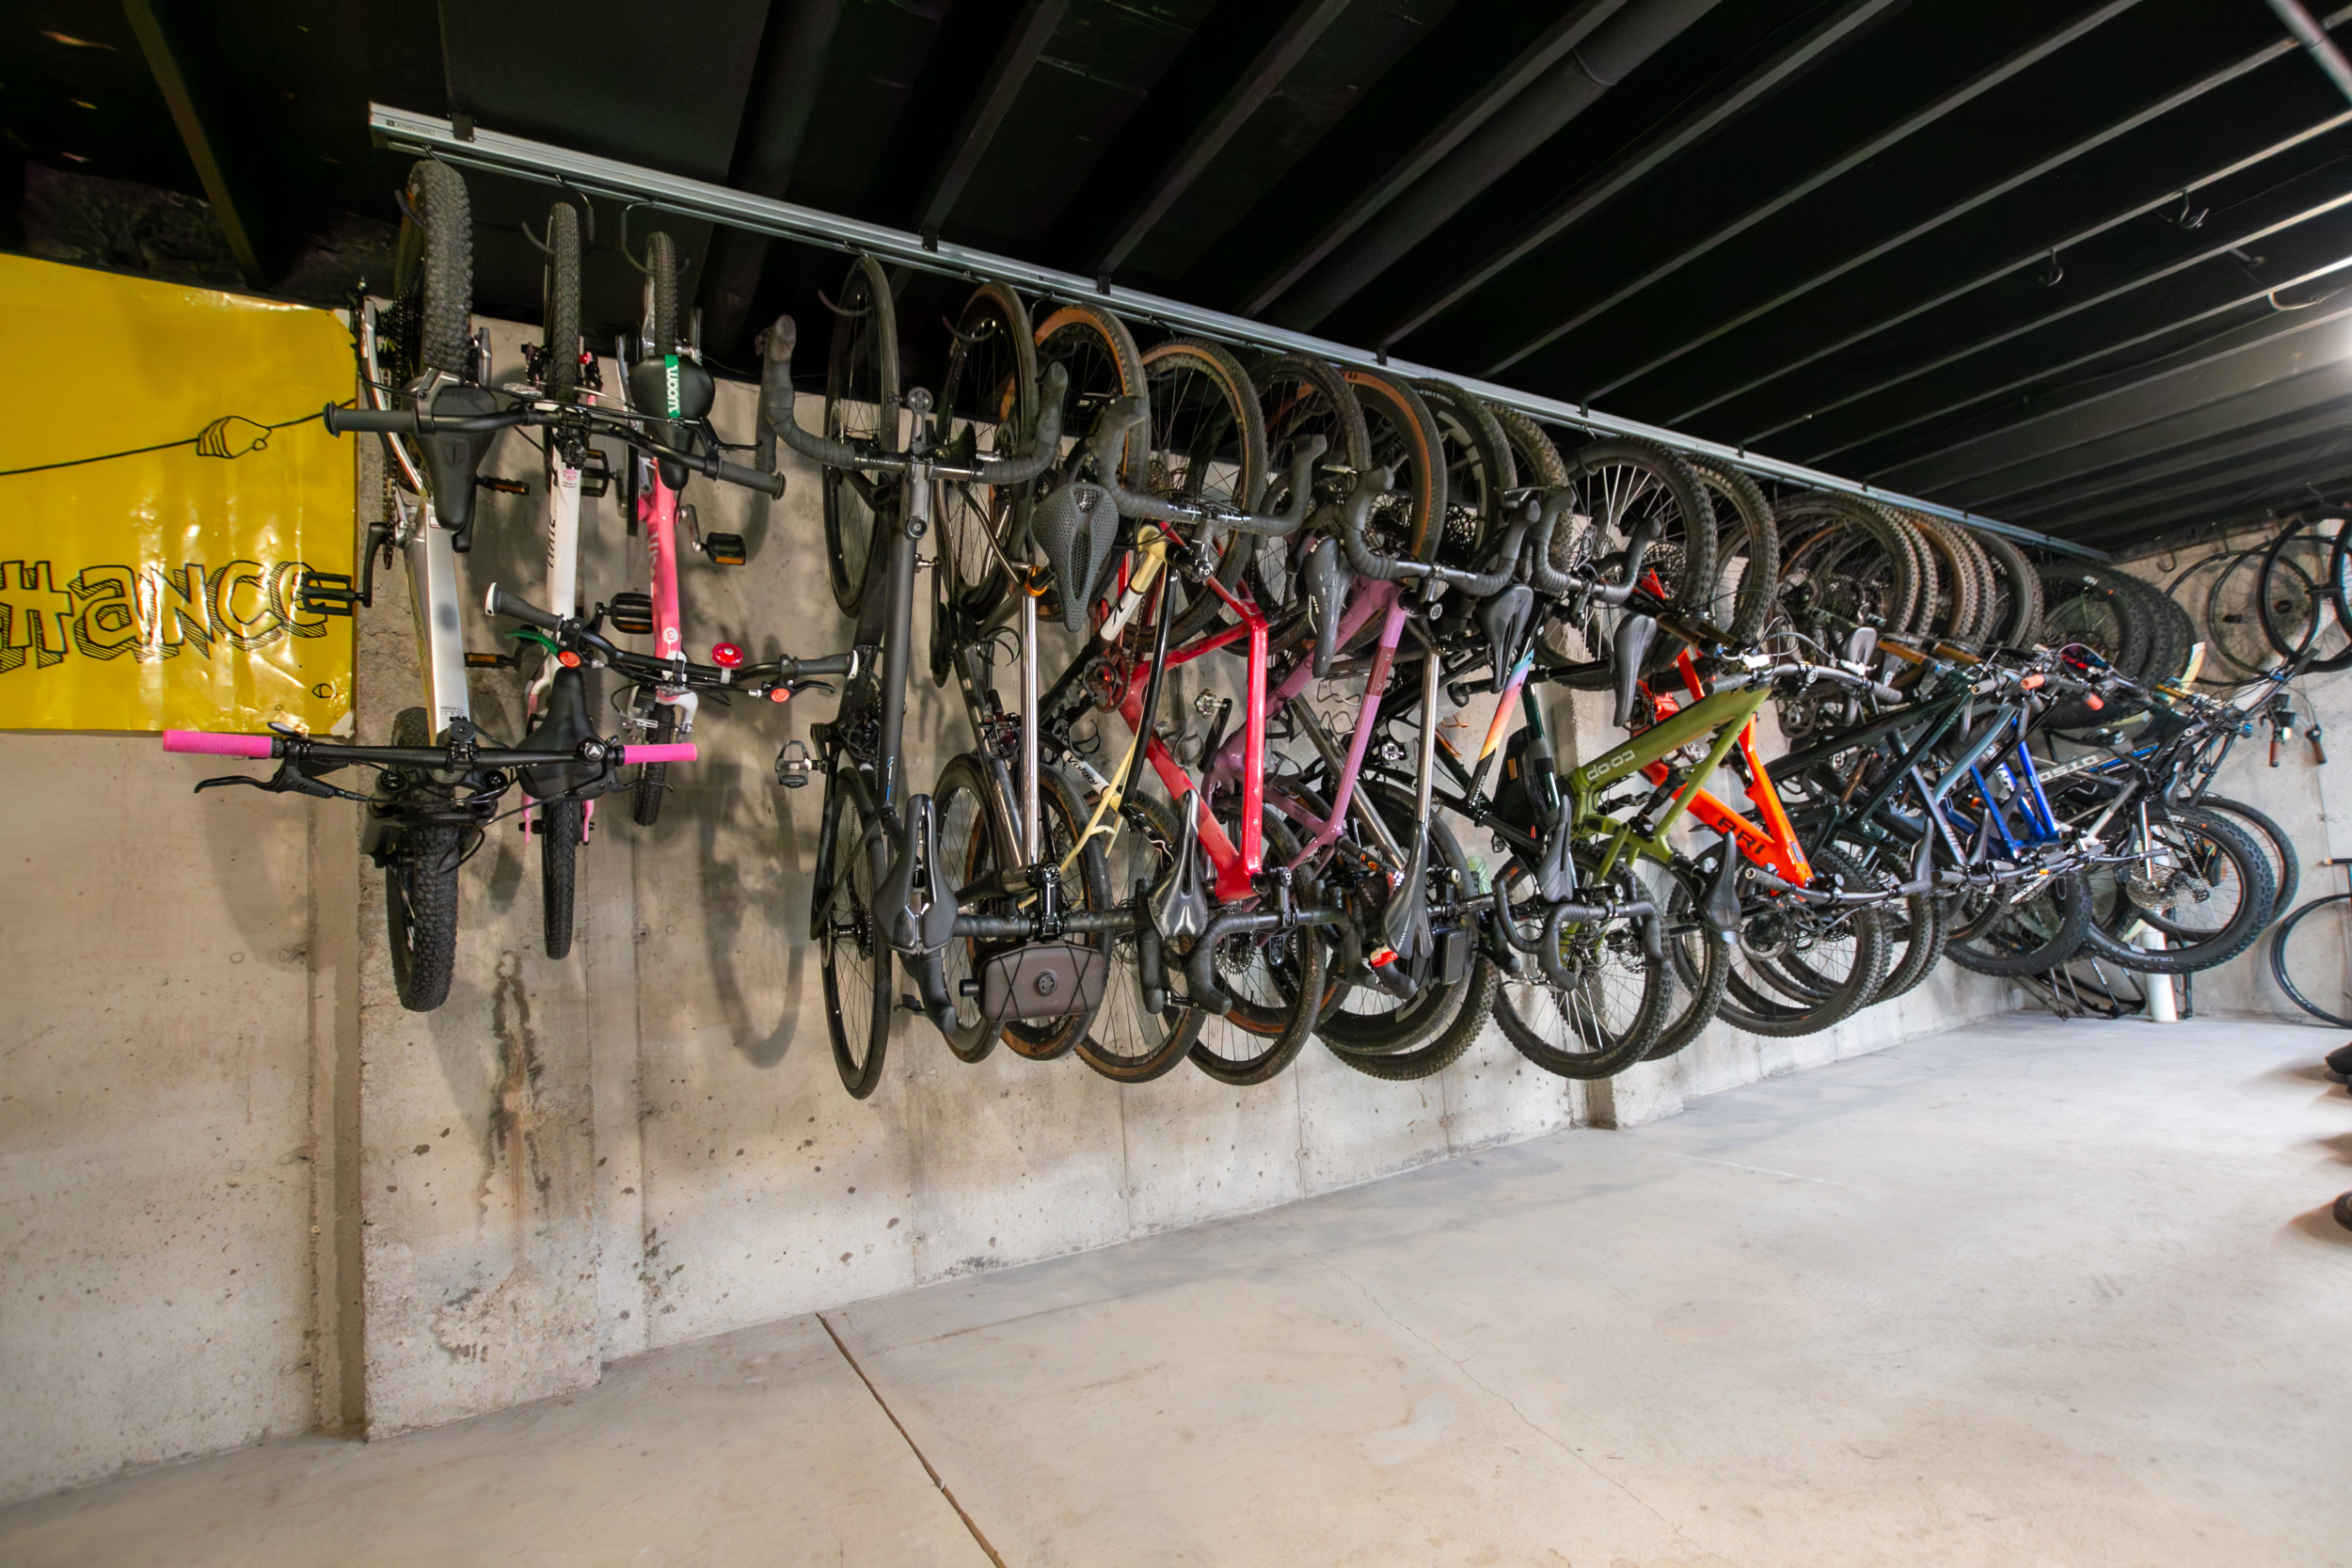
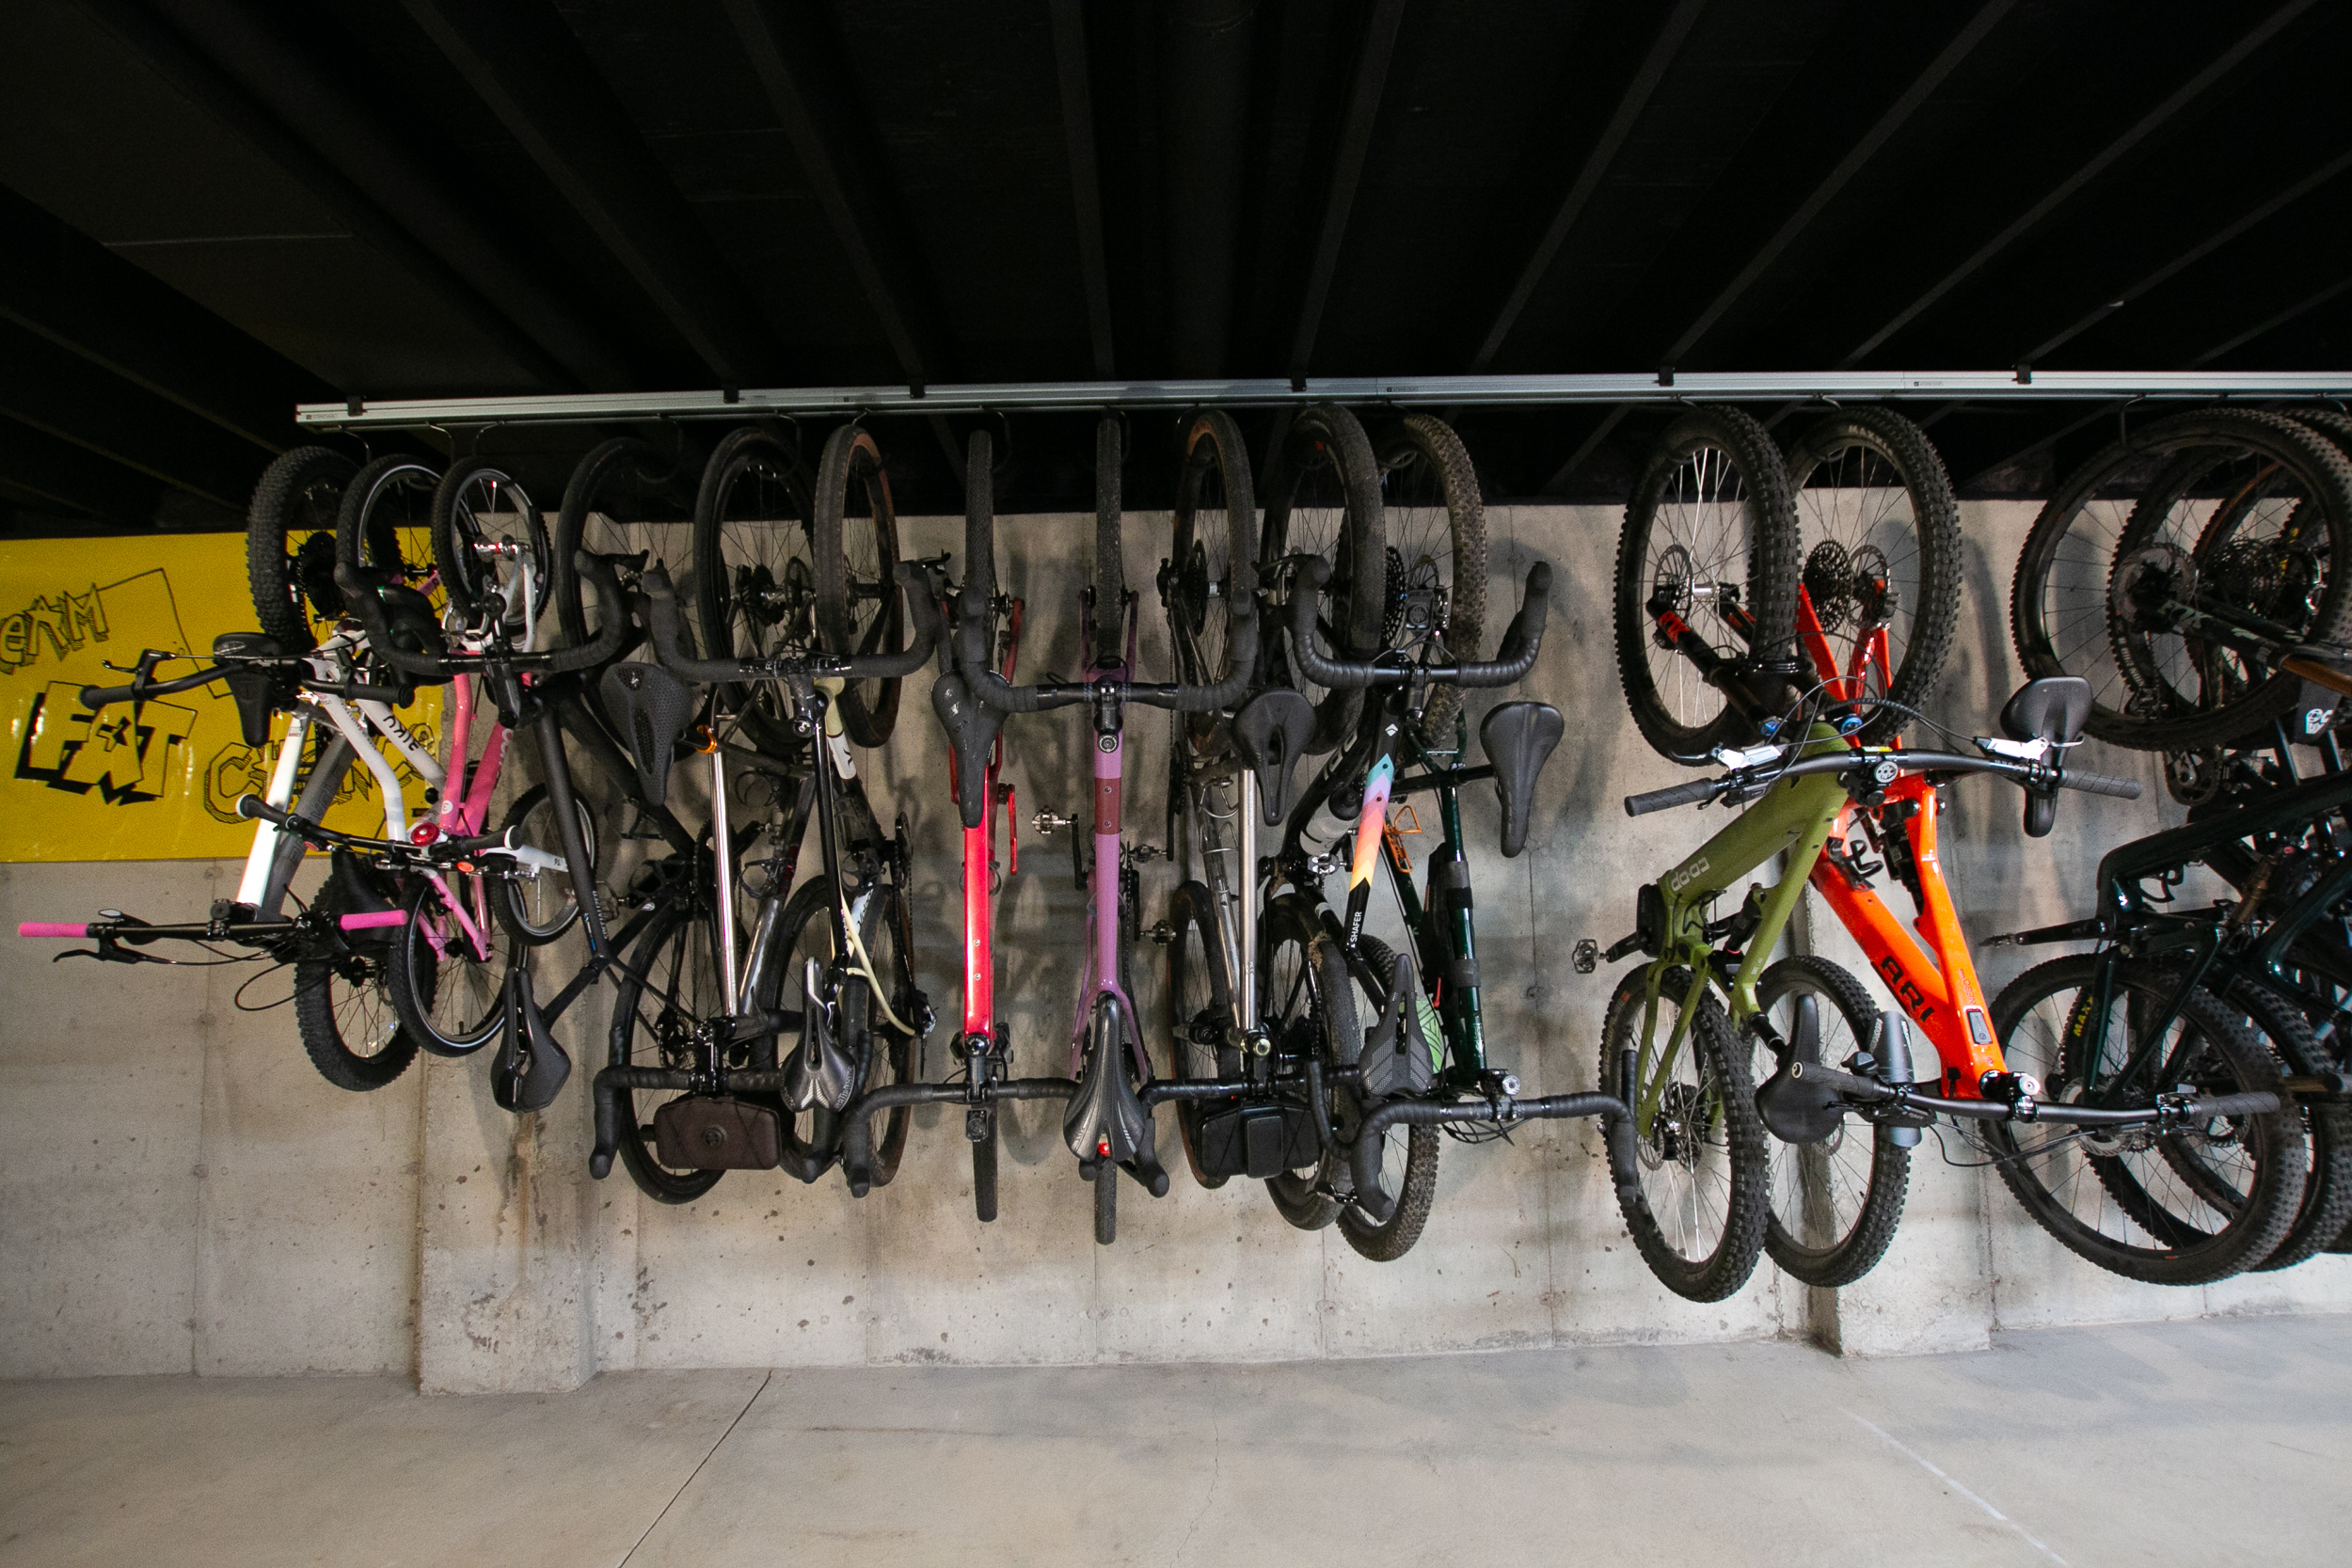
As mentioned, one of the biggest parts of this project for me was to be able to store more bikes in the same amount of space. We have a lot of review bikes that come in and need to be stored until sent back. I have my personal bikes, my family’s bikes, etc. It’s a lot of bikes. I can say the CycleSlide delivered on that challenge, offering the space to store 10 more bikes for the previous 20’ of storage space. I went even deeper with 24’ of total track and 29 bike hooks. This is also the first time I’ve stored ebikes on the hooks. Previously, it was just too difficult to wiggle a heavy ebike between other fixed hooks. With the CycleSlide, it’s so easy, it’s no longer an issue, and the hooks still glide smoothly with the added weight.
Pricing
To be clear, Store Your is not the first brand to come up with a sliding/spinning bike hook system. Brands like Stashed have offered high-end solutions for a while, and there are also a number of DIY solutions for building similar setups. For me, Store Your gets it right with the level of quality, finish, and function without gouging on price. At $249 for a 1-4 bike rack, or $399 for a 5-8 bike rack, the pricing seems downright reasonable (wall-mounted version is a bit more at $299/$449). There’s also an option for new customers to sign up for their mailing list and get 10% off. Yes, this is a lot more expensive than 4-8 bike hooks. But the end result is so much nicer and easier to work with, I’m pretty sure you’ll feel that it’s money well spent.