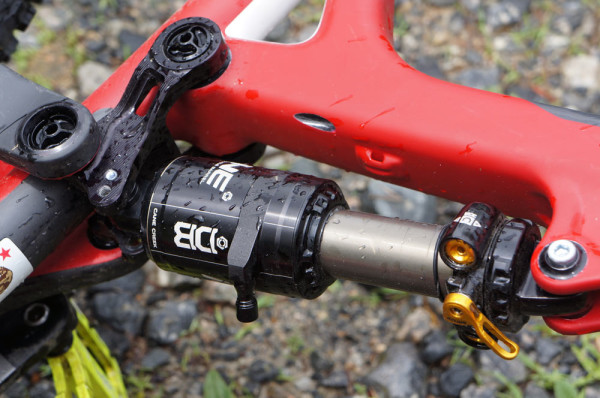
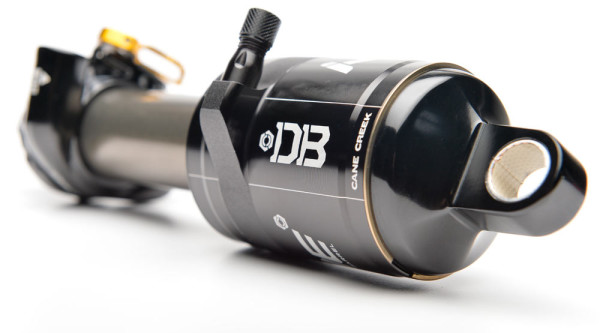
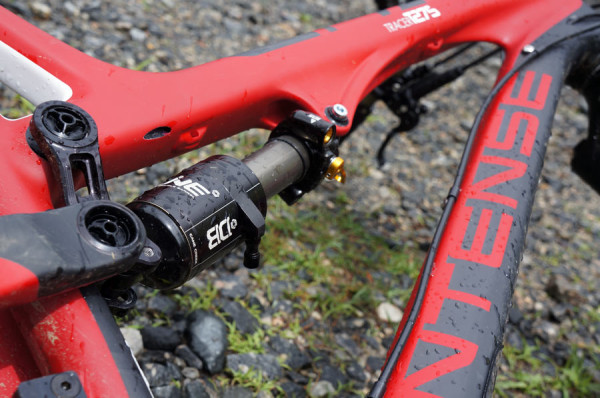
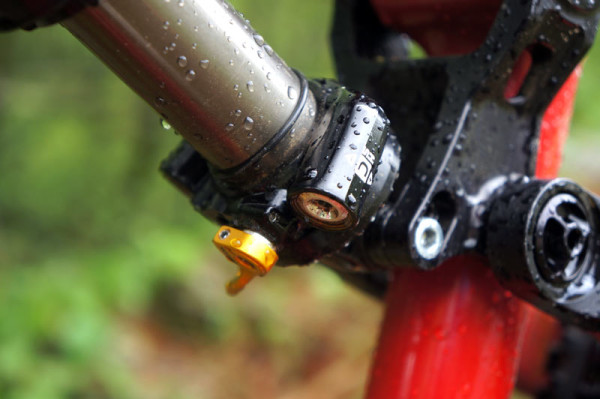
Cane Creek’s Double Barrel shocks, available in coil and air versions, have until now been only available for long travel bikes, finding few homes outside of very aggressive freeride and downhill bikes. As a market segment, that’s fairly small, leaving the vast majority of XC, trail, enduro and all mountain riders without the incredible versatility offered by separate, externally adjustable high and low speed compression and rebound damping or the excellent Climb Switch.
Now, all that’s changed.
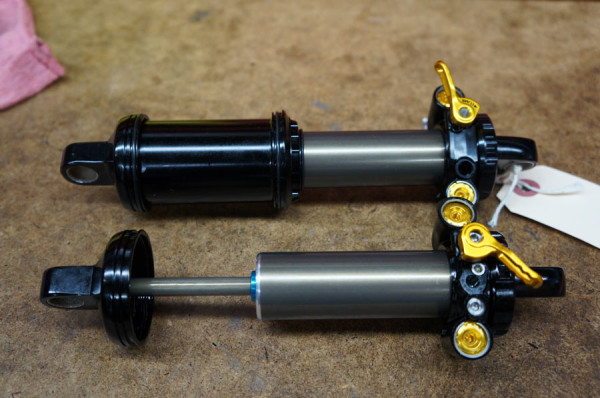
The new DB Inline takes all (ALL!!!) of the DB Air’s tech and packages it into a shock for 120mm to 150mm travel mountain bikes. And, really, those numbers are just suggestions, it’ll fit bikes outside that range, opening it up to virtually all modern bikes for anyone from XC racers to Enduro slayers.
It was no small feat condensing the dual flow, multiple adjustment technology into a smaller package without the external reservoir and control stack. Here’s how they did it…
DOUBLE BARREL INLINE TECH & FEATURES
A little history: Cane Creek and Ohlins, which are practically neighbors in Henderson County, North Carolina, both use twin tube technology in their shocks. And the technology has been around in motorsports far longer than for bicycles. The original DB Coil was developed using a consulting agreement with Ohlins, then finished in house at Cane Creek. All DB shocks since then have been completely developed in house. Each company has their own patents to draw from, and Cane Creek’s tends to carry the user friendly tuning features further.
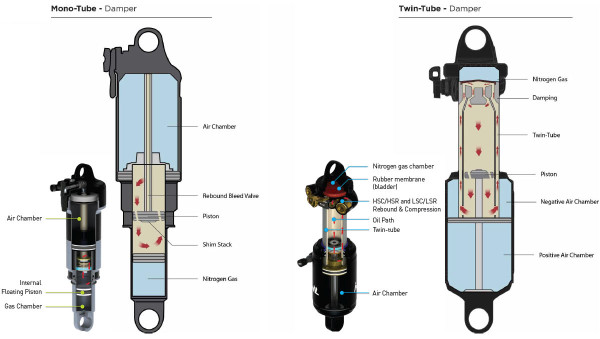
Twin Tube Damping is the damping circuit architecture for all of their DB shocks, from the original coil version to the DB Air to this new Inline model. It means the inner shaft has two tubes, one inside the other, creating a completely circular path for the oil The benefits of this are multiple. First, it lets them direct the oil through the four distinct damping circuits. Second, because the oil’s flowing along the outside edge of the shaft, it’s continually cooled by dumping heat through the metal body, which then transfers it to the outside air. So, performance is more consistent on long downhill sections.
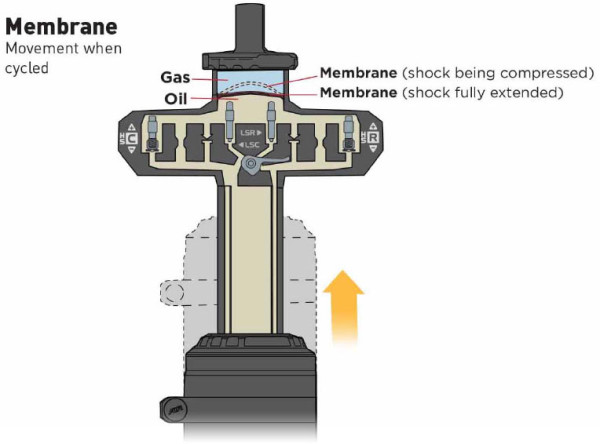
Since there’s no external reservoir, DB Inline design requires a different approach to maintaining oil pressure. Rather than an IFP (Internal Floating Piston) with a nitrogen charge pushing back against the oil, the Inline uses a bladder above the controls with the nitrogen charge behind it. The benefit of this over a traditional mono-tube shock is that it keeps pressure on the system in both directions of oil flow, which prevents cavitation (i.e. air bubbles forming in the fluid). We’ll see more on this in a bit…
The Climb Switch was added to the DB Air in 2013. In hindsight, it may have foretold a shock for shorter travel bikes. Not only does it make far more sense for the 120mm to 150mm travel bikes the Inline is aimed at, but it works fantastically well. It controls pedal bob by simultaneously closing the low speed compression and rebound circuits. That dual function is what separates it from any other “climb” mode on competing shocks that only affect compression damping. And in the true spirit of ultimate tunability, the Climb Switch is non-indexed, letting you slide it anywhere in its range to quickly add the amount of top end damping you want.
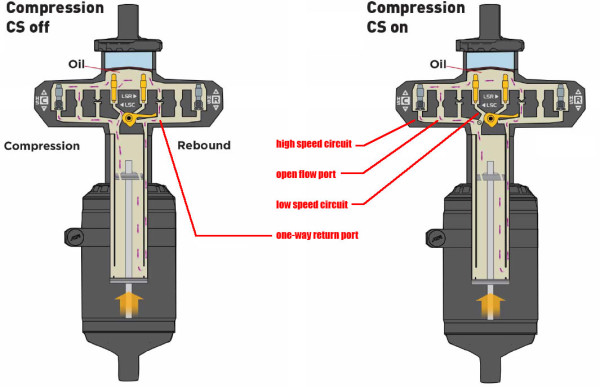
It works by using two separate flow ports, one each for compression and rebound. With CS off, low speed circuits are fully open. With CS on, they’re fully closed, which effectively reduces the number of ports that oil can flow through, thus slowing down movement in both directions. Put the switch anywhere between on and off and the ports are degrees of open or closed, which is what lets you fine tune the feel to your liking.
The lever rotates around (but is separate from) the low speed compression adjustment, but internal valving brings the low speed rebound damping through the switch, too. High speed damping in both directions is unaffected, so big hits won’t hurt the shock at all. In fact, head of engineering Josh Coaplen says you could run it with the CS on all the time if you wanted.
It’s worth noting that the internal orifice for the Climb Switch is chosen from four sizes ranging from 0.5 to 1.2 millimeters for OEM placements (or custom, if need be, or with different diameters for rebound versus compression). This tunes the climbing performance for a particular model. For aftermarket units, they split the difference with a 0.8mm port. This provides a good balance for all frames and is the only part of it that’s not user tunable. Josh says it’ll still be very good, but maybe just not 100% optimal. But, remember, you can place the switch anywhere in it’s range, so you actually do still have some control over how it works.
The Air Spring Curve is also adjustable with simple spacers placed inside the air chamber, making the shock more progressive toward the end of the stroke as you add spacers. For OEM placements, the shocks will come with spacers preinstalled if the manufacturer spec’d them to get the ride quality they wanted. For aftermarket units, they’ll come with two large spacers in the accessories bag. The size of the spacers is dependent on the stroke length of the shock. Oh, and you can install them yourself with the shock still on the bike! The spacers even have lines on them, so you can trim them down to really customize the progressivity of the shock.
As if all that wasn’t enough, you can even rotate the air can body to orient the air valve wherever it’s most convenient for you to fill it.
Lost count? Here’s quick recap of user adjustable features:
- high speed compression damping
- low speed compression damping
- high speed rebound damping
- low speed rebound damping
- climb mode damping
- air volume
- air valve position
MORE INTERNAL TECH
We’ll start back at the top, revisiting the high nitrile content custom molded membrane that separates the nitrogen charge from the oil. Unlike an IFP (Internal Floating Piston) that has to slide along the inside of the tube, this creates no internal stiction for smoother performance.
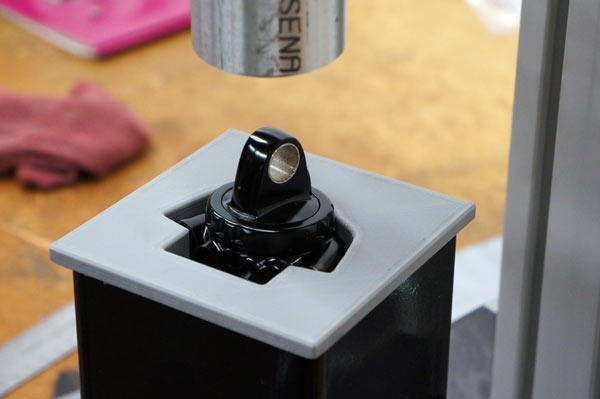
The design also allowed them to simply hollow out the end eye (shown above, the part that bolts to your frame/linkage) to be used for the nitrogen gas chamber since it didn’t have to be round to accommodate a piston seal, leaving more room for oil. In fact, the Inline shock uses 37% to 48% more oil than similarly sized models from other brands, which also helps it better manage heat build up. Lest you think the membrane is less durable than an IFP, they’ve tested it to more than a million bottom out cycles. Not just a million cycles, but full bottom out cycles that stretch the membrane to it’s roundest dome shape. Oh, and because the end eye is capped on as a separate part, it can be oriented in any angle the OEM customer wants, letting them spec adjustment controls to be aimed up, down or to either side. Once it’s sealed and gets the nitrogen charge, it can’t be rotated by the end user.

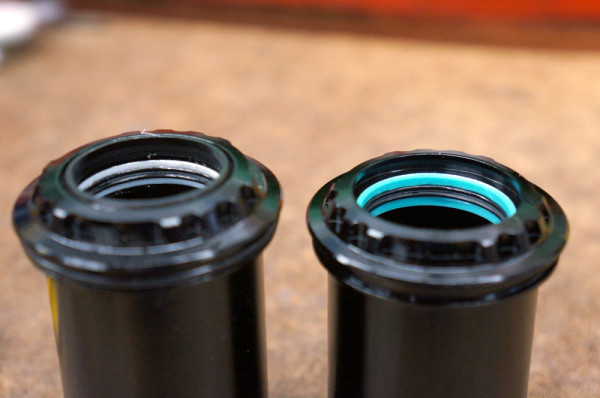
Speaking of a million cycles, the O-rings/Quad Rings used on the air seal and piston seal (right) are backed up by L-shaped bushings that wrap around the aluminum piston heads to prevent them from rubbing directly on the alloy tubes of the shock. That’s particularly important when shocks see a side load. Those are self-lubricating graphite impregnated Teflon and are good for one million full bottom out (i.e. full stroke) cycles. Or, as Josh put it, more riding than you’re going to do in a lifetime.
The seals inside the air can also get the L-shaped bushings on either side. Note how much more coverage the new ones provide compared to the originals.
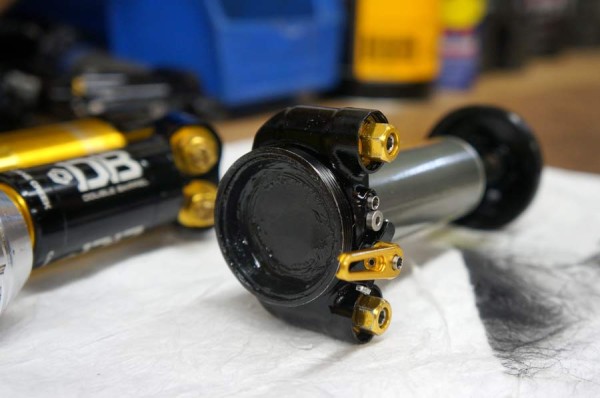
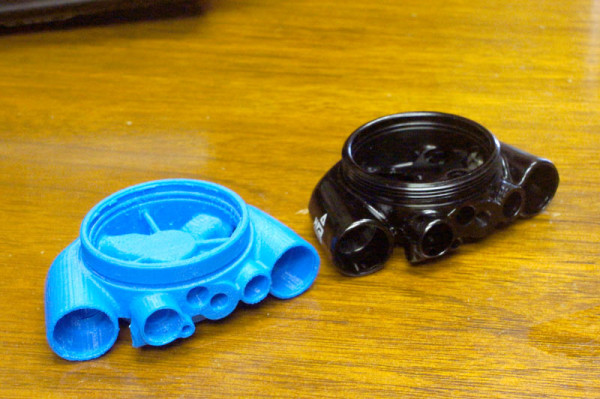
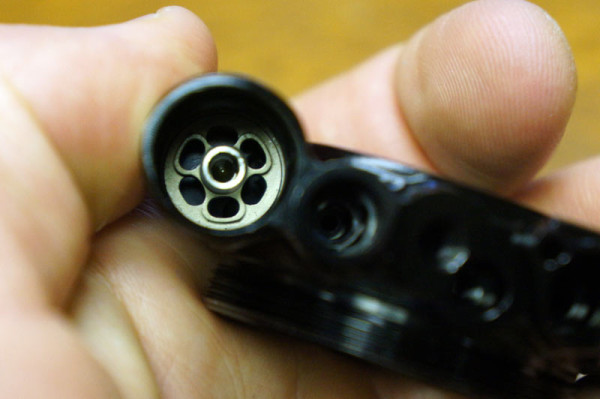
One of the biggest hurdles was packing all of the controls inline with the shock’s cap. Think about what all needs to happen there: Oil needs to flow through four ports on either side, two of which with their own controls and one of those having a secondary shutoff valve from the climb switch. Oh, and the low speed rebound port has to cross over to the compression side to pass by the climb switch, too. That’s a lot of pipes and valves to keep separate and a very small amount of space to do it.
The cap started out as an investment cast part which, which would have saved time by not needing any post production machining. Unfortunately, they couldn’t reliably get all the investment material out of the ports, ending up with some shocks that were awesome on the dyno, and some less so. The solution was forging and machining five pieces and assembling them to create the equivalent of the investment cast part.
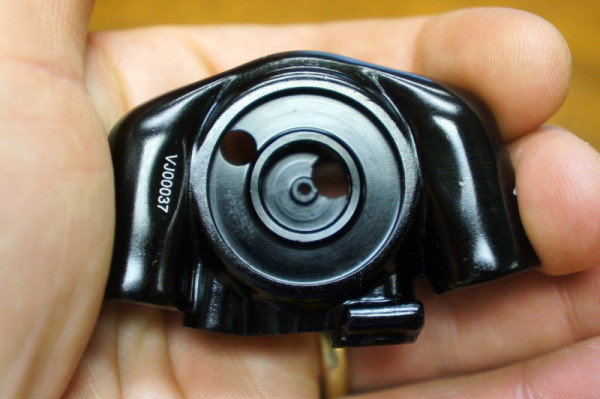
The bottom looks simple enough, just an intake and exit port.
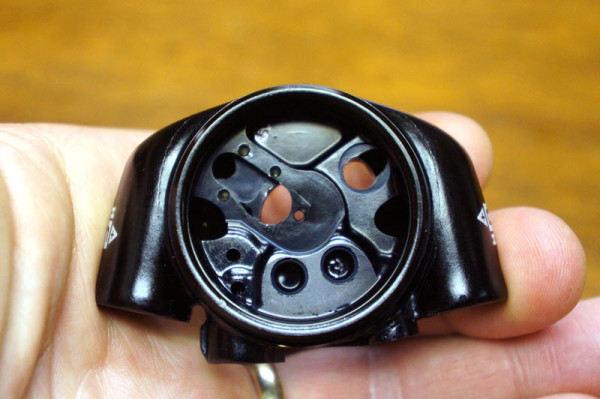
Flip it over and you start to appreciate the intricate plumbing that makes it all work.
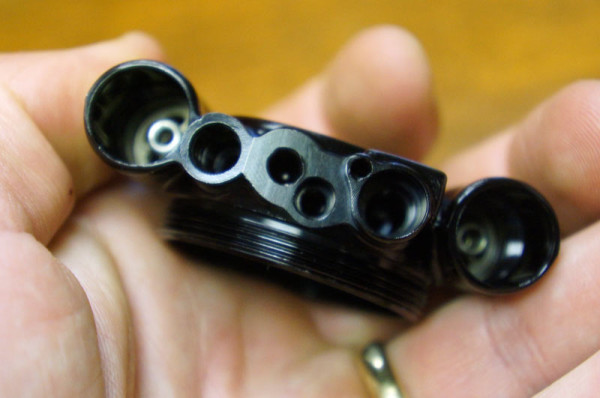
Half of the pipes have to run through one or two different control valves, and those valves need an external face so you can adjust them.
One of the high speed circuit ports, shown before the valve is installed.
Once it’s machined, three welch plugs (left) are popped into place over the holes required to machine all the ports. As they’re flattened into the holes, they seal and lodge into place permanently. The design has been used in carbeurators for years. A fourth cover (right) is then bolted into place and then the nitrogen chamber membrane is put in place and the end eye is bolted on with a larger nut. (Yes, one of the welch plugs is missing in pic on the right)
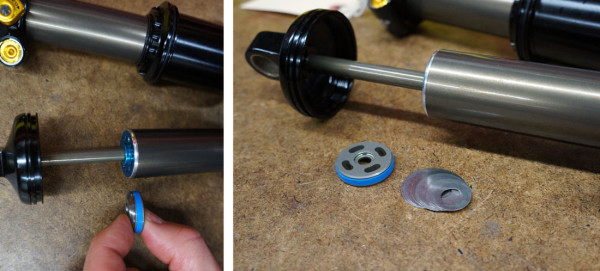
Compression forces on the shock are far greater than rebound. So, there’s a shim stack on the piston inside the damper tube to provide a primary compression damping effort. The small parts shown there would sit on the end of the piston rod heading into the oil chamber, flexing the shims to let some of the oil bypass at a specific rate. It’s the same on all shocks for all customers, OEM and aftermarket. All fine tuning and customization is done with port sizing and high speed circuit spring selection:
The circuits are divided into two systems, high and low speed. The low speed circuits flow oil through a port with a needle valve. As you turn the low speed control, the needle moves closer or further from the opening. The more open it is, the faster oil will flow and the faster your low speed damping will be.
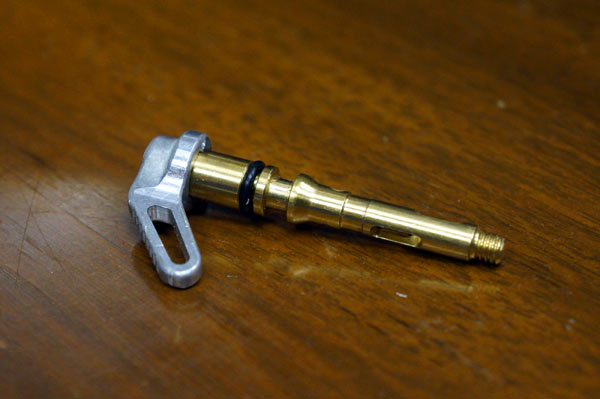
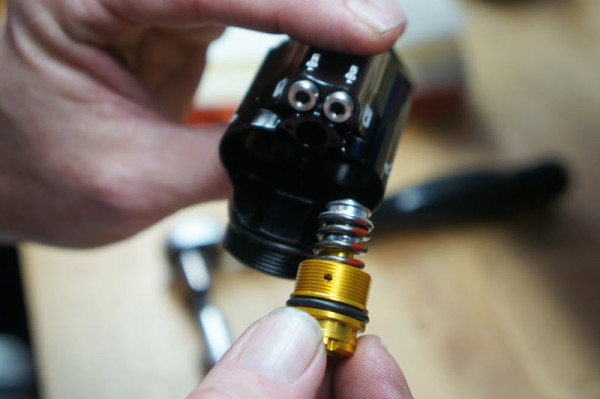
The high speed circuits use a spring loaded poppet valve (shown above) that blows open under the higher pressure of big hits that move the shock rapidly. Several different spring rates are available to OEM customers to help them tune the ride. If you’re ordering one aftermarket, they’ll put the right spring in based on the bike you have.
PERFORMANCE & FIRST RIDES
Honestly, one of the more interesting parts of riding with the crew from Cane Creek over two days was having them help tweak the shock while riding to illustrate what tweaks made what differences. Low speed rebound is what controls most of the shock’s return movement and will have the biggest impact on ride feel. They said most people will open up high speed compression if the shock feels like it’s getting bogged down.
So, low speed rebound affects the the return over roots, rocks, stutter bumps, etc. Opening it up can prevent the shock from “packing up” over repeated hits. High speed rebound helps the bike come out of deep drops and G-outs so it’ll be ready for the next one, but it only comes into play when the shock is compressed into the last ~20% of its travel. That’s because, like the high speed compression, it needs enough force to open the poppet and force oil through the high speed circuit. And, since rebound forces are position dependent, the highest forces are when the shock is fully compressed. As it rebounds, the air pressure pushing back diminishes, closing the high speed circuit pretty early in the return.
Base Tunes are custom for each bike and come with each shock, whether you’re buying it as part of a complete bike or as an aftermarket part to upgrade your current rig. The latter is a huge benefit compared to competing shock brands, which are generally sold aftermarket with one of one to three standard tunes that will hopefully match up with your particular bike. With the DB Inline, it comes tuned specifically for your bike and should feel good right out of the box.
Like with the other Double Barrel shocks, they’ll have an online database of recommended base tunes for the DB Inline, too. It’s a list that’ll grow as they test it with more bikes, but off the bat they’ll have a good bit of data for bikes that are spec’ing it. Those brands include Specialized, Intense, Ghost, Bianchi, Norco, Ibis and more for starters. In the event they haven’t worked with a particular frame in person, they can take the leverage ratio of your bike and compare it to others in their database to at least provide something close. As they say, this gets you to “happy”.
To get from “happy” to “stoked”, they include their DB Field Guide that walks you through the process of tuning it to max out your own personal stoke meter.
Jim Morrison, senior design engineer, says they’re intentionally set with the low speed compression pretty open so they have a plush feeling on the showroom floor, but that one of the best things to do (after marking down where those settings are) is to open each of the settings all the way then go ride a couple miles and change one setting to all the way closed. Because the adjustments have such a wide range, by cycling through each one, you’ll really learn how each one affects the ride.
With that in mind, they said it was a conscious decision to make each adjustment (other than CS) a tooled effort. By having to take out your mini tool and adjust the shock, you mentally become more aware that you’re tuning the shock and are really thinking about what you’re doing. The low speed circuits have fixed indents (12 for compression, 18 for rebound). The high speed circuits are not indexed, instead getting four complete rotations from end to end. Within the range, changes are linear, providing the same amount of change per movement across the entire spectrum of adjustment. In other words, it’s not going to have a big amount of change in the first couple clicks then no discernible difference for the rest.
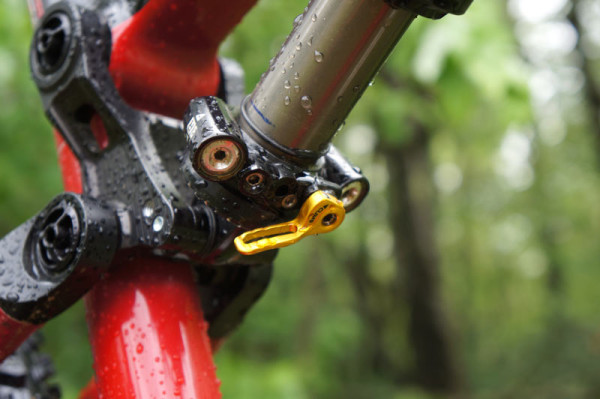
My test rides were on a 2014 Intense Spider 29er Comp. In the spirit of full disclosure, my bike’s first shock had a technical difficulty that prevented proper air movement out of the negative air chamber. The culprit was a damaged quad seal. Fortunately, one of the crew riding with my group swapped his same-size shock on to my bike and the ride continued. In order to get the eyelets to fit, we had to flip the shock, which is why the controls are at the bottom in most of these pics. Normally, they’d be at the top to make the Climb Switch easier to reach. All that said, production shocks go through a full dyno test that would catch issues like this before they ship, and no one else had any problems with their shocks for the duration of the camp. I believe this one was a preproduction fluke, but wanted to mention it. Moving on…
The video shows the DB Inline in action in various situations:
- start – descending with a few jumps
- 1:40 – descending with Climb Switch turned ON
- 2:03 – seated climbing, moving CS through various positions
- 2:40 – standing climbing, moving CS through various positions
If it isn’t obvious by now, I’ll say it: What sets the Double Barrel shocks apart is the immense control it gives you over your bike’s suspension performance. The individual high and low speed damping controls are amazing enough, the Climb Switch takes it over the top.
Our first big technical section started with a few bigger hits, then finished over small but repetitive root sections. The shock handled the big stuff fine, but seemed to get a bit harsh on the rapid fire small hits. Upon Jim’s suggestion, I opened up the low speed rebound 1/4 of the way and gave the high speed rebound a half turn. We left compression alone initially and the difference was good. The rear end recovered better and didn’t feel as harsh on the little stuff. The low speed compression was set just four clicks from fully open, so I split the difference with two clicks in and it got even better. That kept it feeling smooth over the rough sections with plenty of control in the berms and drops. The outer O-ring indicated I’d used all available travel, yet I never felt it bottom out.
On the inclines, the Climb Switch makes a noticeable difference both seated and standing. It’s not a total lockout, but racers will appreciate its firm feel when switched all the way on. For folks like me who actually want their suspension to work while ascending, I found leaving it about 1/3 of the way open balanced the best mix of bump absorption and pedaling platform. That almost-middle setting also worked well for smoother flat sections and sprinting. I intentionally left it on for a few techy sections and small descents, and it kept the bike under control even if it was noticeably firmer. That’s thanks to the high speed compression being unaffected. But it’s definitely better wide open when gravity’s working in your favor.

First impressions are very good. The Intense Spider’s stiff carbon frame and slightly slack head angle made a great bike for shredding the trails in Dupont and Asheville. Its VPP suspension was a solid platform for showing off the shock’s versatility, taking the inherent pedaling performance and dialing it up a bit with CS on. I’ve found that VPP designs are typically pretty good at wiggling over the little stuff as well as taking a big hit in stride, and the pairing worked very well here for logging first impressions.
If control is an illusion, then the DB Inline is your peek behind the curtain. It’ll open your eyes to what’s possible. And now that I have seen the light, I want this on my own bike.
SIZES, WEIGHTS & PRICING
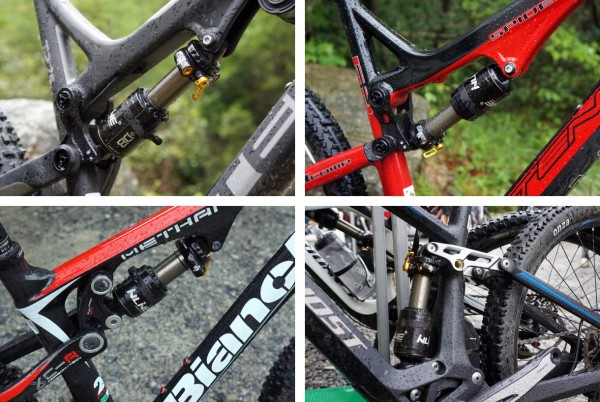
Claimed weight is 295g for the smallest size. That’s about 200g to 250g lighter than the DB Air CS, but probably about 100g heavier than a comparable Fox CTD shock. As such, it’s not aimed at the XC weight weenie in the marketing, but that doesn’t mean it won’t work there. They’re calling out 120mm to 150mm travel bikes, but they had it mounted to a 100mm travel Bianchi Methane XC full suspension bike at the launch. They also had it on a 165mm travel Specialized Enduro (26″). So, if the shock fits and you want its features, there’s no reason you can’t use it. It’s available in the following sizes:
- 165 x 38mm (6.5” x 1.5”) BAD0430
- 184 x 44mm (7.25” x 1.73”) BAD0932
- 190 x 50mm (7.48” x 1.96”) BAD0431
- 200 x 50mm (7.87” x 1.96”) BAD0432
- 200 x 57mm (7.87” x 2.24”) BAD0433
- 216 x 63mm (8.5” x 2.48”) BAD0944
It, like the rest of their line, is meant to be best in class and the $495 retail price reflects that. There won’t be any watered down models to hit lower price points. They’re shipping to distributors June 16 for aftermarket availability. Look for OEM placements on 2015 bikes from the brands mentioned here and more throughout the fall.
The shocks are all assembled in house in their North Carolina facility. And the engineering department is one wall away from the production line, so any time there’s an issue, everyone knows about it immediately. Cane Creek is 100% employee owned, so when they talk about improving their processes and making things better, know that everyone there is fully vested in making it happen.
