Tires are the component riders most frequently change on a bicycle, hands-down. While some people ride until they don’t have a single etching of tread left, other folks swap out their bike’s tires from ride to ride depending on conditions.
Even though changing a tire — either because of a new purchase or a flat — is the most common mechanical adjustment riders make, it still can present a frustrating set of challenges, even in the best circumstances.
BikeTiresDirect (aka BTD) knows tires inside and out, and they have worked tirelessly to create an exhaustive list of tips and tricks to smooth out any issues one might come across during a tire swap. We picked out some of the most important ones for tube-type and tubeless tires to ensure slapping on new rubber begins and ends with as much stoke as the first ride with them – rather than with sweat, sore hands, and cursing.
Tubes
Protect the tube: Even a slight puncture the size of a needle prick can destroy the integrity of the tube and lead to slow leaks that will have riders seemingly spending as much time pumping as riding. Before mounting a new tire with a tube, BTD recommends double-checking rim tape, spoke holes, and every surface that touches the tire for any sharp or pointy bits that could slice into a tube. This is particularly important while replacing a tube after a flat, since pesky bits of debris that caused the initial flat could linger.
Bike mechanics often make a point about having the valve stem lined up with the tire label – this is for more than just aesthetics when it comes to tubes. After a flat, inflate the tube after removing it from the tire to find the hole in the tube. Once the hole is located, reference where the site of the puncture or pinch flat is on the tire by comparing the position of the hole in the tube to the tire, using the tire valve and tire label as reference points.
This usually makes finding the cause of the flat much easier since you know where to look. Just because you can’t feel anything inside the tire at the point of a puncture also doesn’t mean there isn’t anything in the tire – pieces of glass could be embedded in the tire that you can’t feel inside the tire cavity, which could puncture the new tube once inflated. Make sure to remove any foreign objects completely before reinstalling the tube.

Keep it loose: Some tires fit more snugly than others. It’s not uncommon to find yourself struggling to get both beads of a tire onto a rim bed because they are so tight. To keep the tightest part of the tire loose around the wheel, riders can create more space by dropping one of the tire’s beads into the deepest part of the rim bed. From there, it is easier to roll the other side of the tire into place.
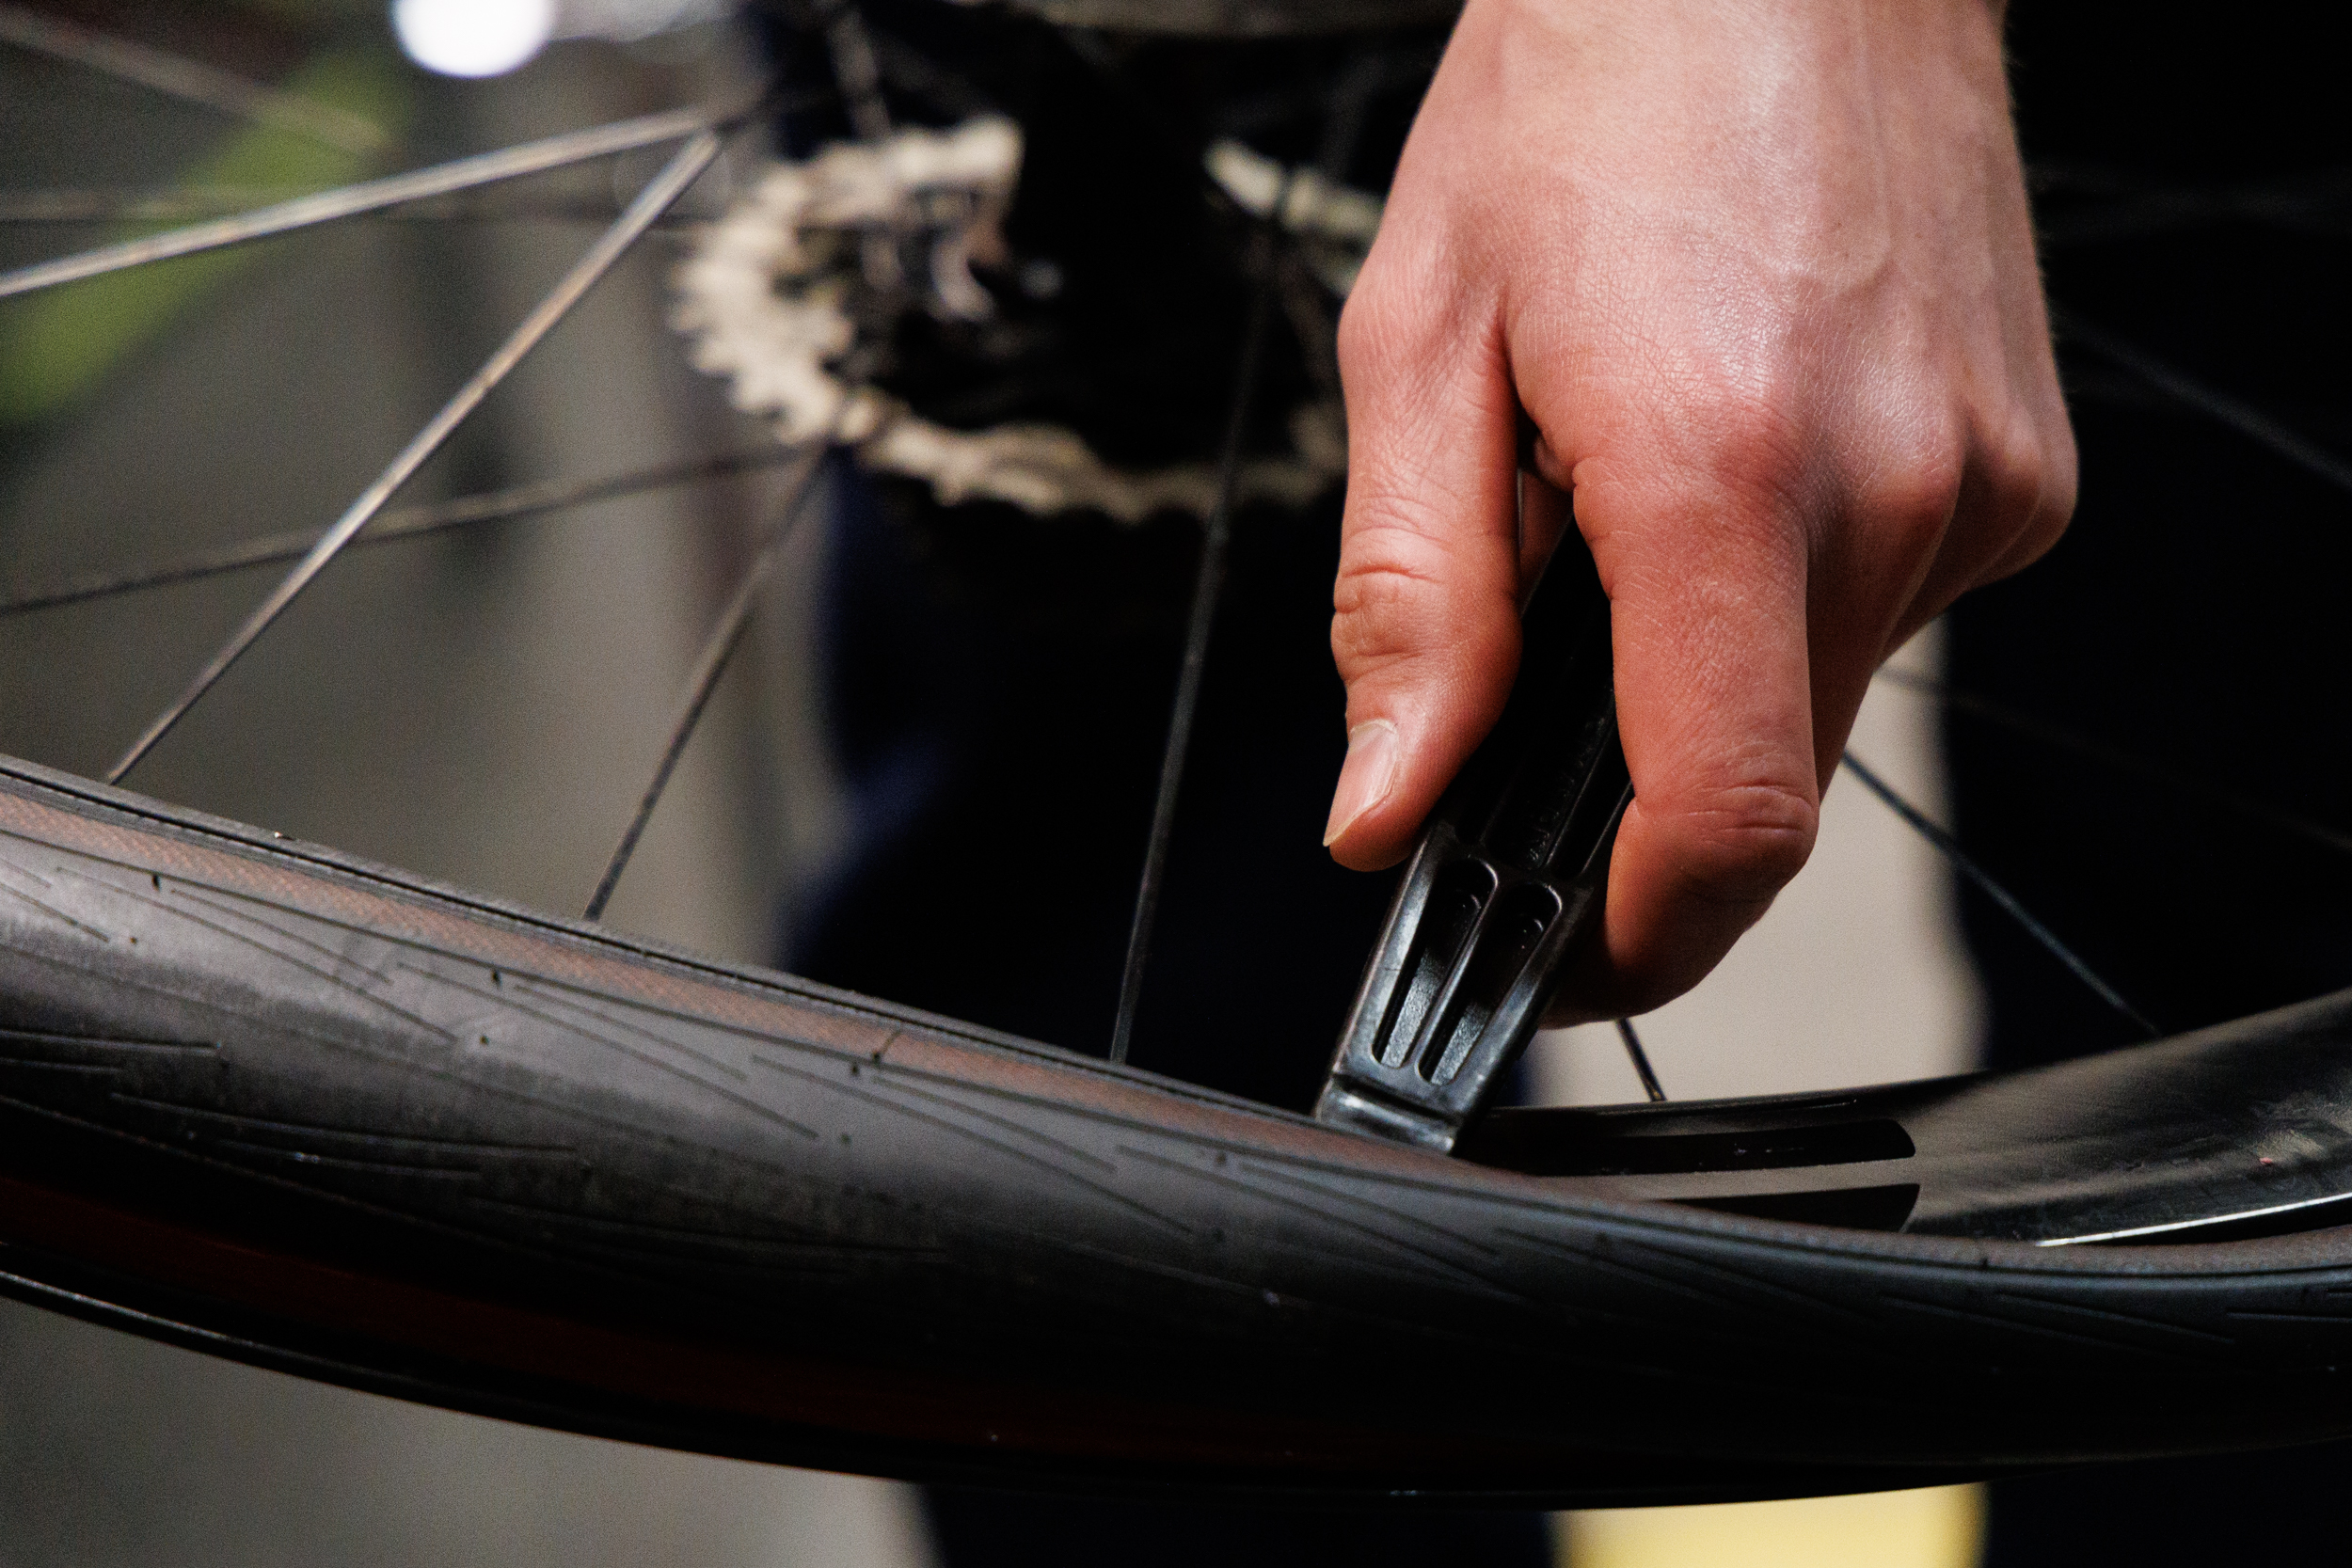
The hard part: The last couple of inches of a tire can be the most frustrating to get into place, even with the opposite bead placed in a helpful position. Once the tire starts to get tight when installing the second side of the bead, remember to pinch the two beads together all the way around the tire to get both beads to drop into the center channel to give you more wiggle room up top.
While many riders don’t mind struggling with their hands to muscle the last bit of the tire into position, quality tires levers or tire bead jacks can make the process more effortless. This is important since using the wrong tool, or even the right tool incorrectly, can result in damage to the tube, rim tape, or even rim.
Quarter pressure pitstop: Now that it’s time to inflate the tire, take extra time to ensure that everything gets into the right position as the tube inflates. BTD recommends stopping at about a quarter of the max tire pressure to inspect the tire for any signs that the installation went awry. This quick step could save people from a deafening and horrifying pop if something does go wrong.
Tubeless
Take time with tape: A good tape job is the foundation for any tubeless setup. Without it, tires will not hold air or sealant the way they should. If installing new tape, BTD says riders should use tape that is a couple of millimeters wider than the rim’s internal width to completely cover the central channel and under the tire beads. Begin taping a few inches past the valve hole, and be meticulous. Pull tight, smooth out any bubbles as you go, and continue for an additional two or three spokes past the valve holes. Also, make sure the rim is clean and free of any residue before applying tape.

No screws loose: Once the rim tape is on, it’s time to mount the valve stem. Start by cutting a small hole in the valve hole (an awl works well to puncture a hole, rather than using a blade to cut tape away), then push the stem through it. Use the locking nut to firmly lock the valve stem into place. Just as the valve of tubes is a prime spot for flats if the rim tape is bad, the stem of tubeless wheels is prime real estate for leaks. Ensuring a tight seal here will keep the air you’re about to blast into the tire where it should be.
Mount up: This is where tubeless tire setups get tricky. Seating tire beads onto a rim requires a lot of air volume and precision, so any mistakes can lead to failure. Trying to get it done with a floor pump can easily become one of the least fun things you do on your bike. If you have no other option, use a tube workaround mentioned below.
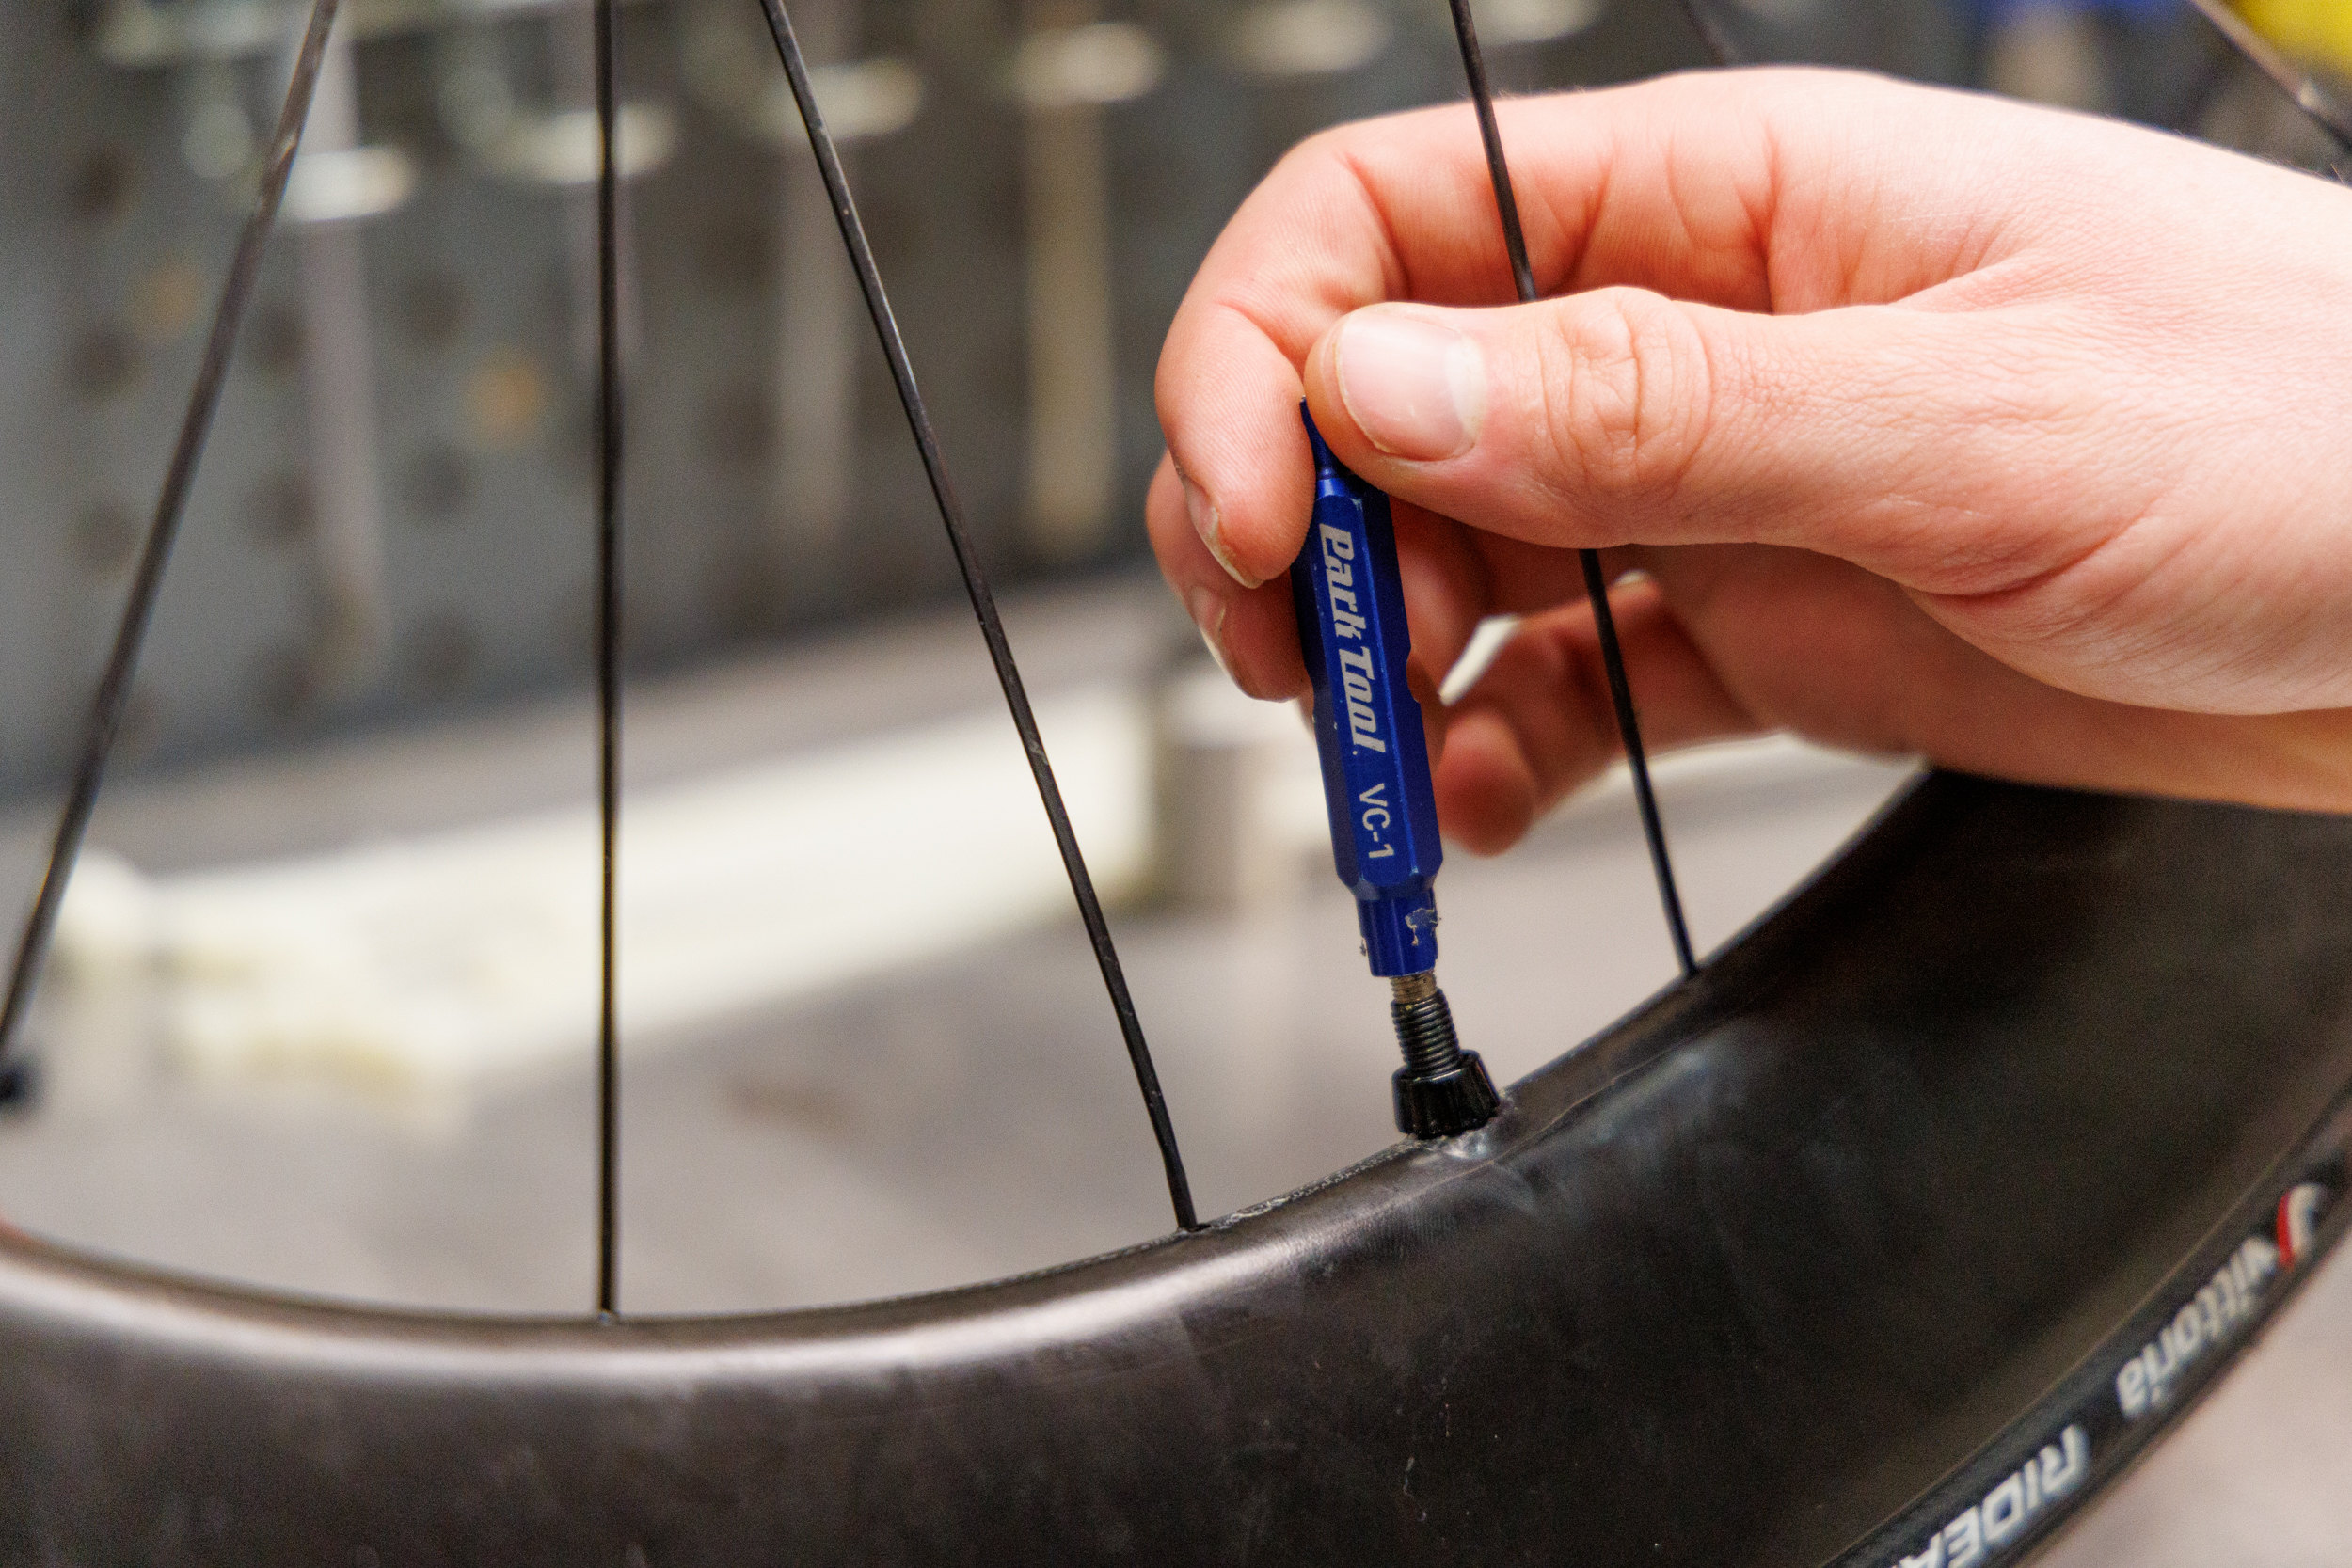
If you have a removable valve core, take it out to get the maximum airflow into the tire. Once the bead is properly seated, you can put it back in and reinflate it later after adding sealant. Air compressors make tubeless tire installation a breeze. They allow you to instantly hit the volume pressure needed to seat a bead without relentless pumping. Listen for a series of pongs and pings to know when the bead is properly seated. Note that if using an air compressor, be careful not to add air too quickly – too much, too fast can cause the tire to blow off the rim or even damage some carbon rims.
If the tire is holding air, but you’re struggling to get the bead to pop into place without a ton of air pressure, you can add some watered-down dish soap to the bead to act as a lubricant to help it slide into place.
The tube workaround: If you have tried everything and just can’t get the bead to seat, you can always use the tube trick. Just throw a tube into the tubeless tire without sealant and inflate it the way you would with a normal tubed setup. This will guide the tire into the correct position and seat the beads. After that, deflate the tire and only remove one side of the bead to take out the tube – now you can add sealant and only worry about seating one side of the tire bead instead of both
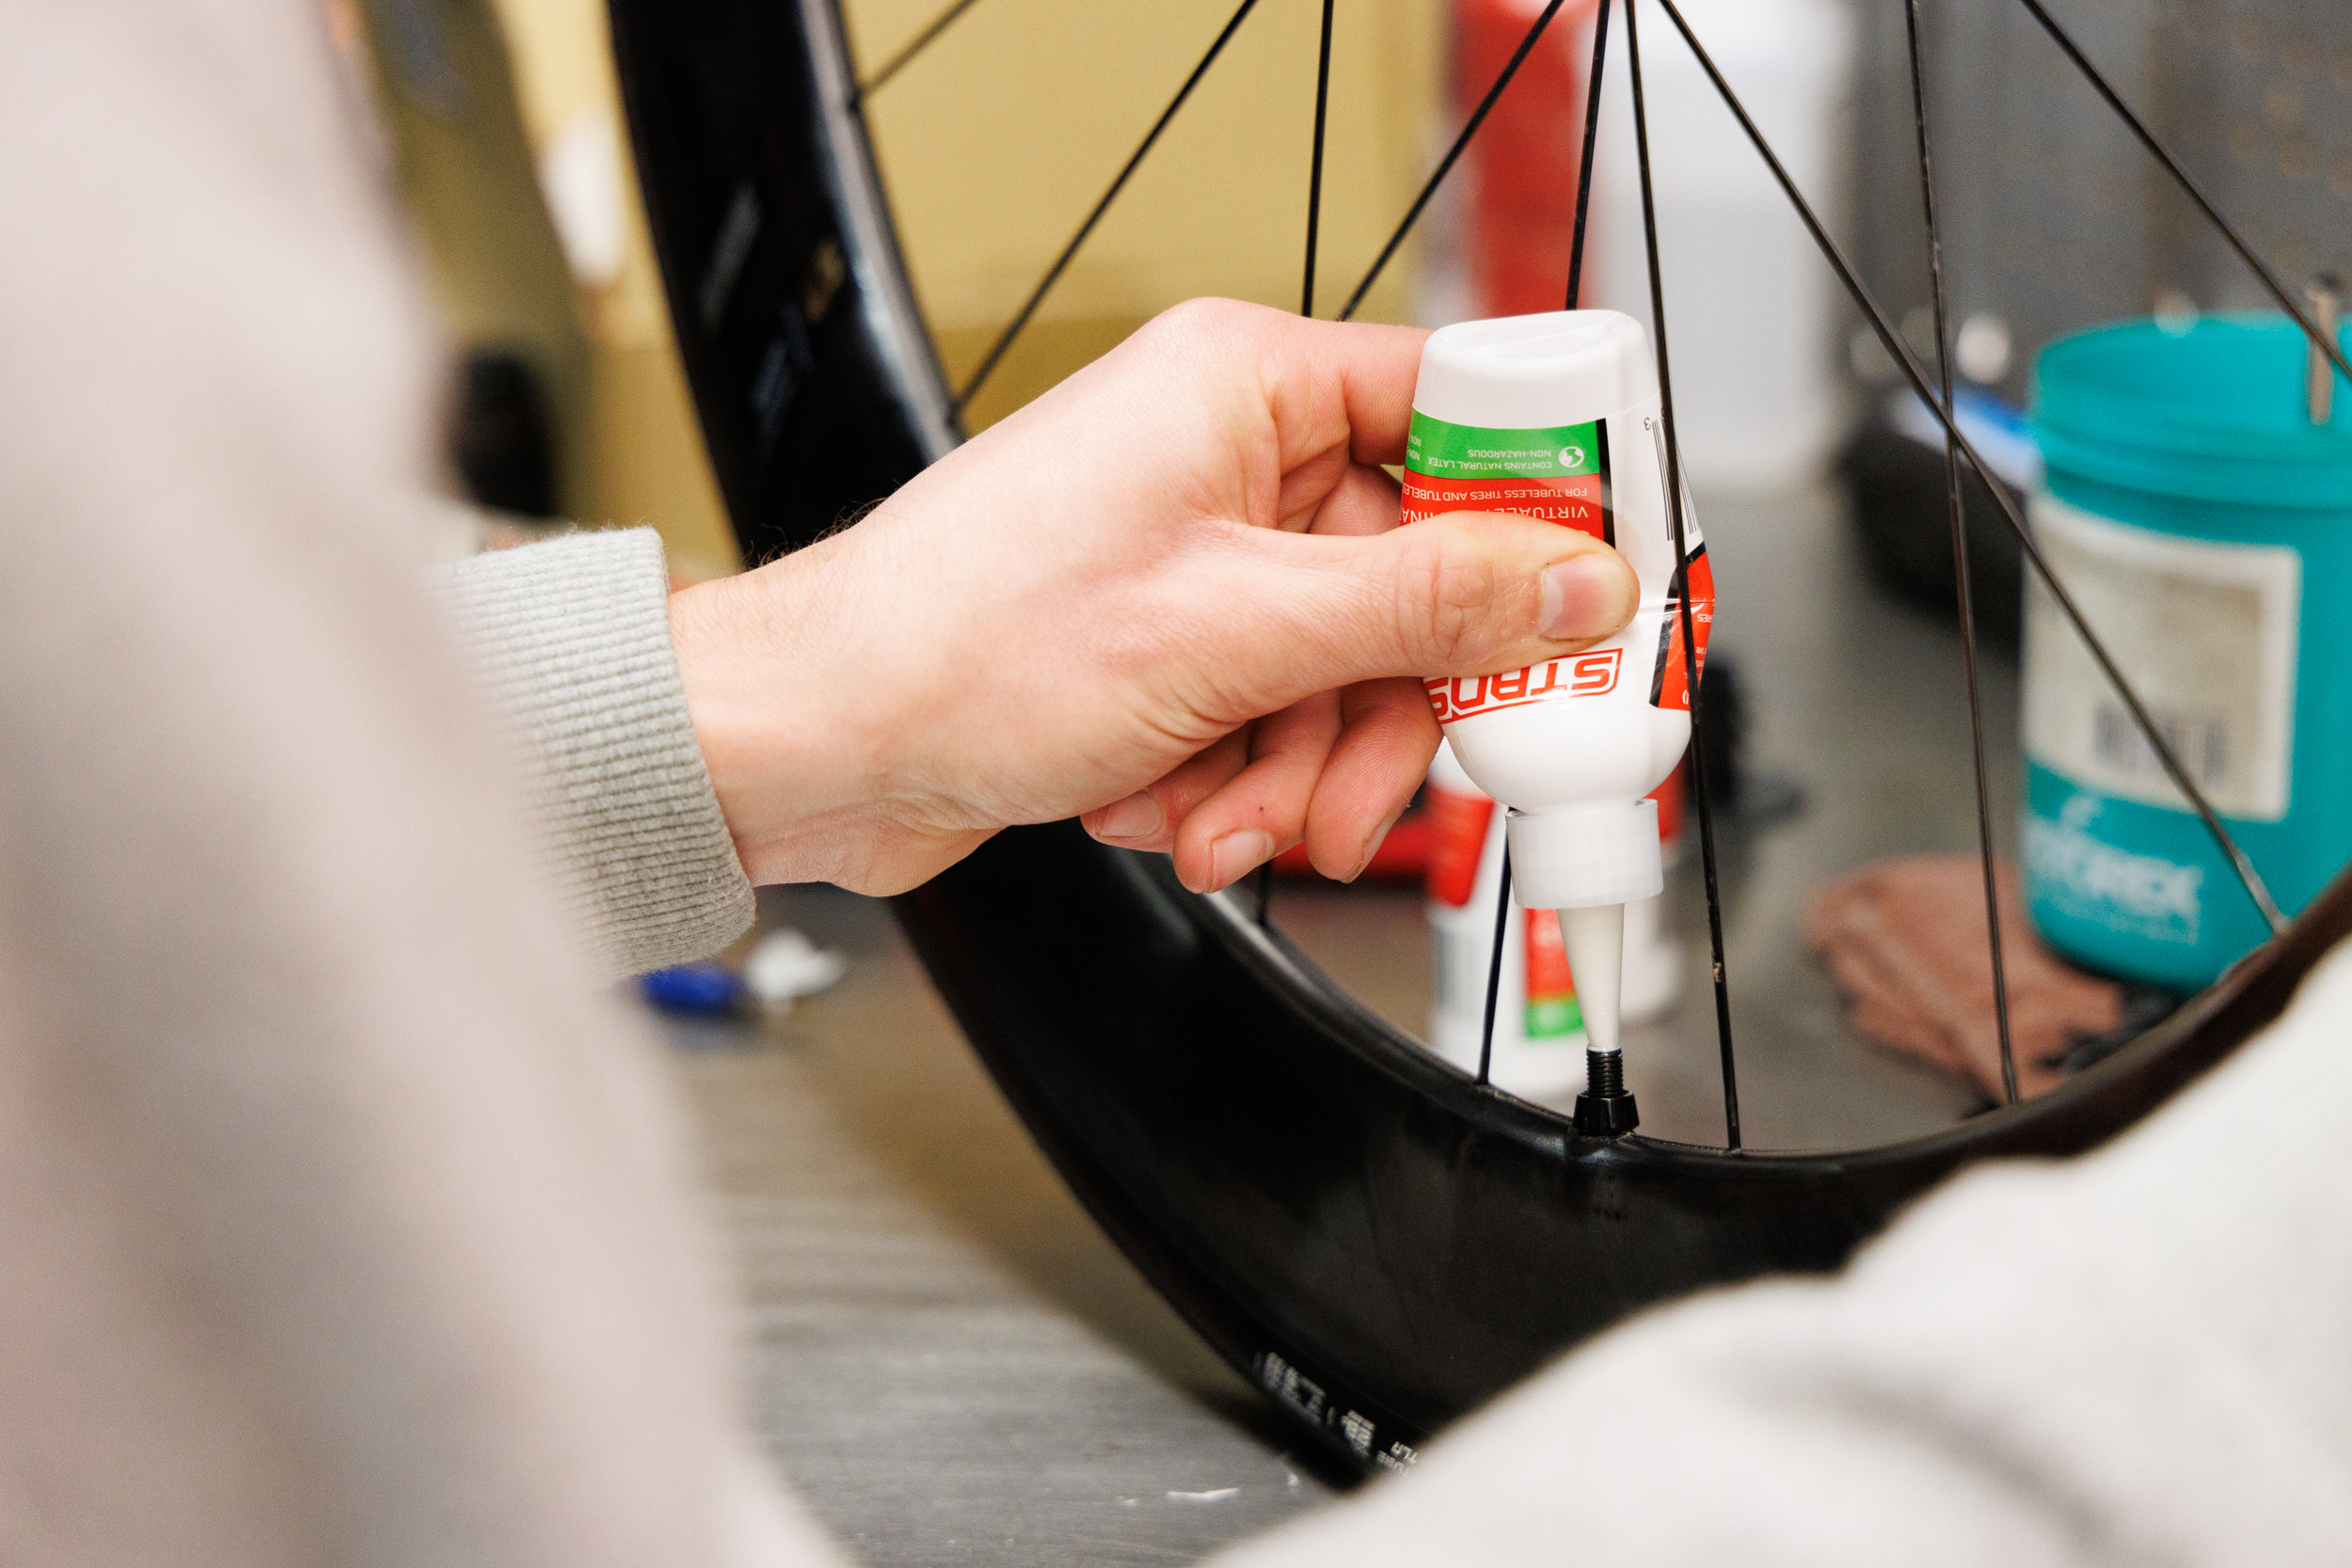
Sealant — shaken, not stirred: Riders need to start rolling and shaking the tire as soon as they inflate it to ensure sealant disperses completely throughout the tire. It’s not uncommon to hear a little air escaping here or there as the sealant finds seal imperfections to plug. It can be helpful to hold the wheel flat like a pizza to allow the sealant to pool around the bead area. Slowly move the wheel so the sealant moves all the way around the inside of the tire, and then flip the wheel and repeat for the other side. Listen for any leaks, and then think about how to orient the wheel so that sealant will pool over the sound of the leak – it’s oddly satisfying to hear the hiss stop as the sealant finds the hole.
After a few minutes of that, get the wheel back on the bike and go for a quick spin. This will help the sealant continue to plug any spots for a tight and lasting seal.
These are just a few tips BTD offers to help navigate the ins and outs of tire setup and maintenance. The brand also provides a lot more information on things like proper sealant amounts, safety tips for new tires, and a few interesting hacks to make installing new tires even easier.
For the full list of tips, head over to BTD’s website, and be sure to follow on Instagram and YouTube for more bike-centric content.
This post is sponsored by BikeTiresDirect.com.