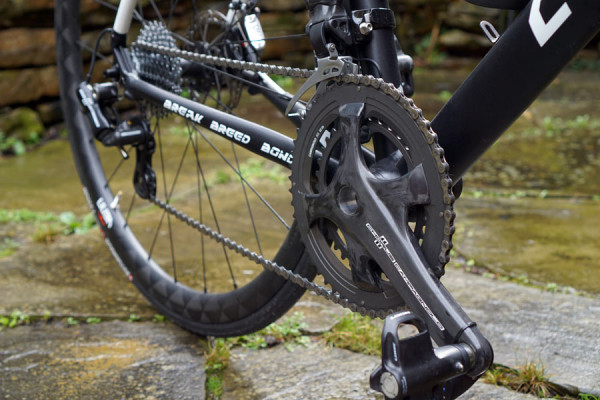
In Part One of this Project Road Bike build, we covered the Culprit RoaDi alloy disc brake frame and carbon fork, along with their full carbon bar, stem and seatpost. Now, it’s on to the drivetrain.
For an embarrassingly long time, I’ve had this Campagnolo Chorus EPS group sitting in the office waiting to be used. It’s not for a lack of trying…the original plan was to put it on the World’s Funnest Bike, but the Van Dessel’s chainstay yoke only clears a compact or cyclocross chainring combo. Then, we received a steel Rauler frame from Italy and figured an all-Italian build would be cool. But, as you’ll see, not all electronic wire ports are sized for Campy.
So, after far too many months, the Culprit came up and things finally came together. It was worth the wait…
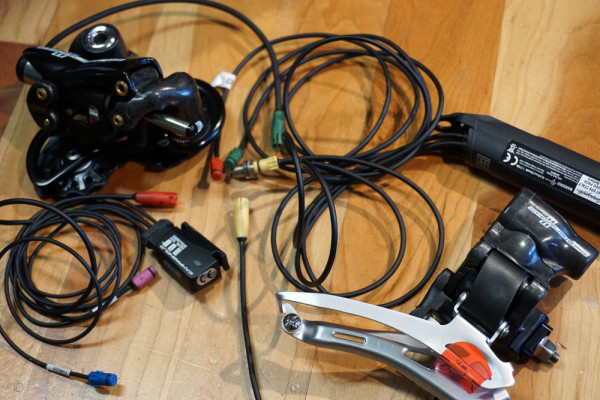
The EPS groups, which include Super Record, Record and Chorus, use those family’s same mechanical cranks, chain, brakes and cassette. The electronic parts include the shifter/brake levers, both derailleurs and a battery, all connected by a wiring kit. Unlike Di2’s junction box, most of the EPS wires emanate from their battery and make their way to each component. One small junction box connects the shifters, so the battery only needs to feed one wire to the front of the bike.
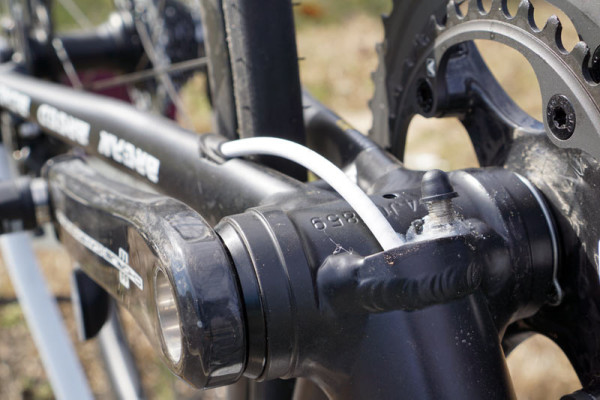
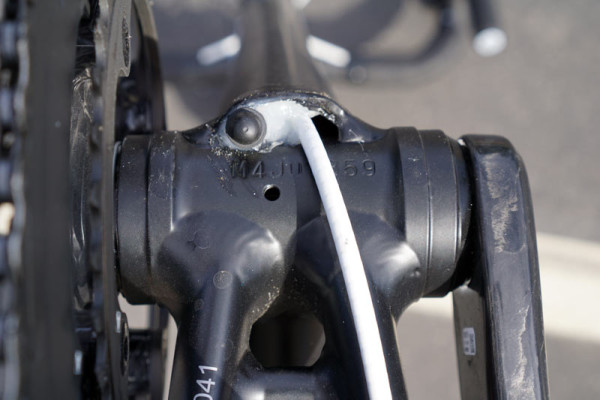
We’re testing the internal battery, so it runs a wire long enough to get somewhere around the bottom bracket, which is one of the bigger challenges for frames made with Di2 in mind. Not nearly as many bikes have a second port for Campy’s charging wire to come out of. So, while I was perfectly ready (with Culprit’s blessing and location guidance) to drill a hole in the frame, I managed to figure out something a little slicker.
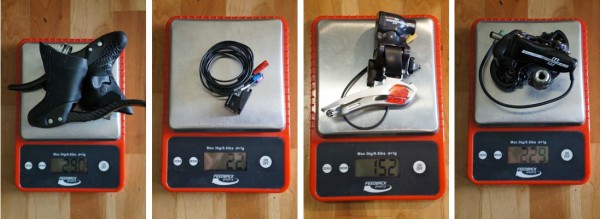
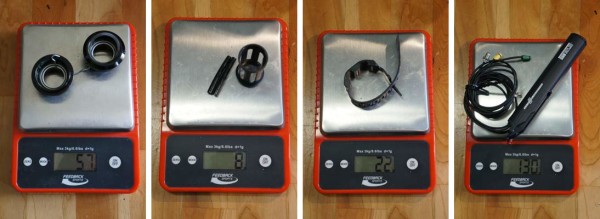
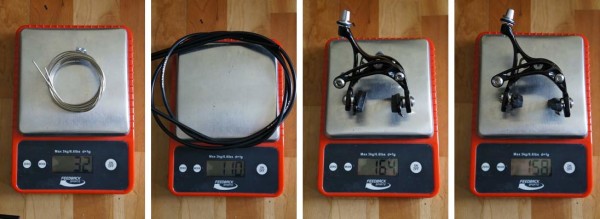
But first, the weights:
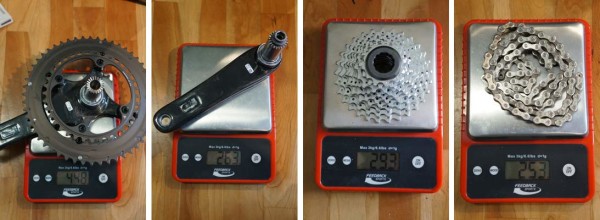
- 175mm cranks with 52/36 rings – 448g driveside, 263g non-drive (711g total)
- Cassette (12-29) – 293g
- Chain (uncut) – 253g
- Shifters – 290g
- Shift wire junction – 22g
- Front Der. – 152g
- Rear Der. – 229g
- Pressfit 86 BB w/ clip – 57g
- BB wire shield w/ accessory wire clips – 8g
- External battery on/off magnet – 22g
- Internal battery w/ wires – 130g
- Brake cables – 32g
- Brake housing – 110g
- Front brake – 164g
- Rear brake – 158g
(NOTE: I didn’t use these brakes, cables or housing since the bike is made only for disc brakes)
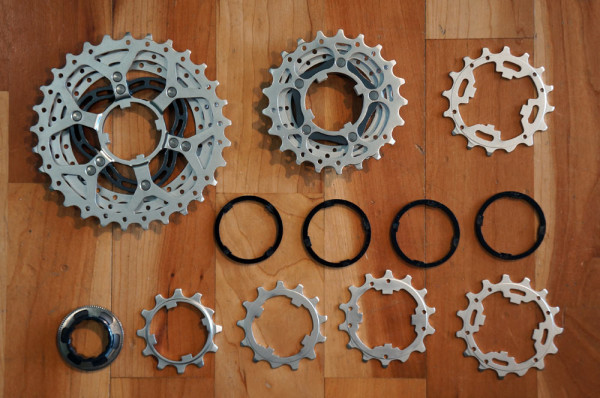
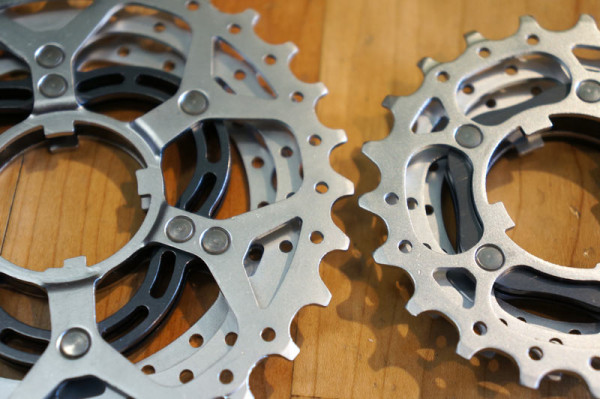
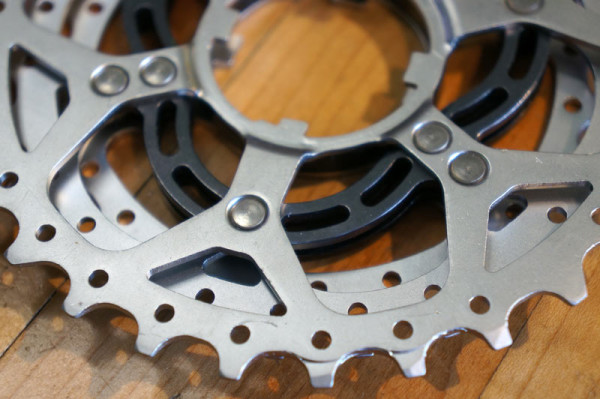
The Chorus 11-speed cassette comes as two upper clusters and five individual cogs, plus spacers and the lock ring.
Campy calls the construction of the upper six cogs a “double frame system, which differs from other brands’ cogs-on-carrier design in that the end cogs of each set is one piece all the way down to where it meets the freehub body. The carrier is simply sandwiched between them to all reinforce and stiffen the assembly. They say it’s done for speed, and indeed, these produce some of the fastest and crispest shifts around.
It’s worth mentioning that, for Super Record and Record, 2016 groups will have the V3 DTI junction box that added Bluetooth and ANT+ wireless data transmission and a charging port. They also got a new, slimmer but longer battery. But, for now, Chorus continues on in its original form as shown here, and beyond those two items, much of the tech and design is shared between the three groups. So…
At the front of the levers you’ll find a quick release pin to open up the brakes. Push the silver piece above the lever’s pivot outward and it lets the brake lever open up a bit and add slack to the cable.
The shift paddles are in the same place as their mechanical counterparts, with the downshift (easier) at your finger behind the brake lever and the upshift (harder) on the inside face of the body, activated by your thumb. Reverse the action for the front derailleur’s shifts.
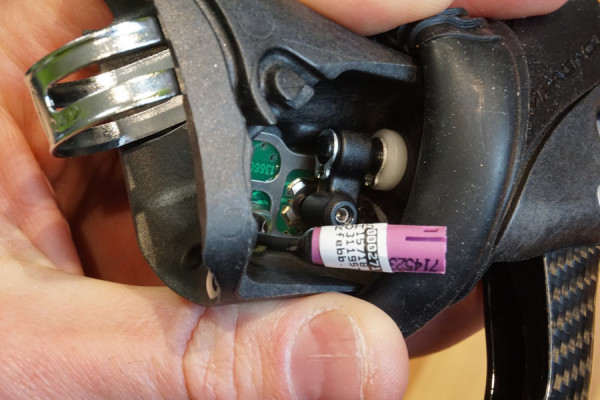
Under the hood is a bolt-on cover plate that must be removed to connect the wires.
Deeper inside you can see the moving parts actuated by the shift levers, which depress a small button to initiate the shift. The small grooves on the outside of the case loop the wire around before heading off to the junction box. Once the cover plate is bolted back in place, that loop provides a safety against yanking the wire out.
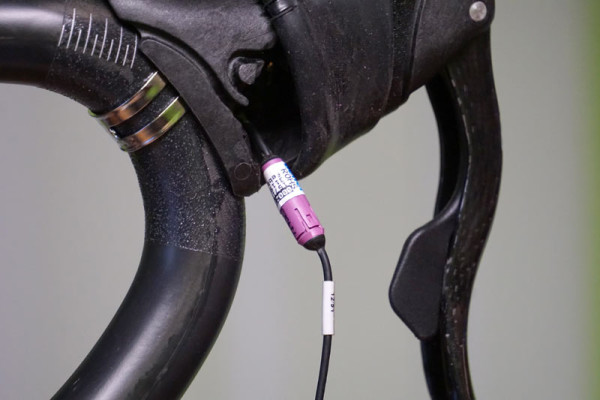
The connections also prevent accidental disengagements with small catches. Those slots and catches also ensure you’ve lined them up properly when plugging them in.
All of the plugs are color coded, so there’s really no way to mess it up if you’re paying attention. The one issue with EPS is the sheer size of the connector plugs. They’re about 50% larger than Di2, so frames that don’t take EPS plugs into consideration will likely have holes too small to fit. Shown above are the Di2 ports on the Rauler. We had the OK to drill them larger, but just couldn’t bring ourselves to do it.
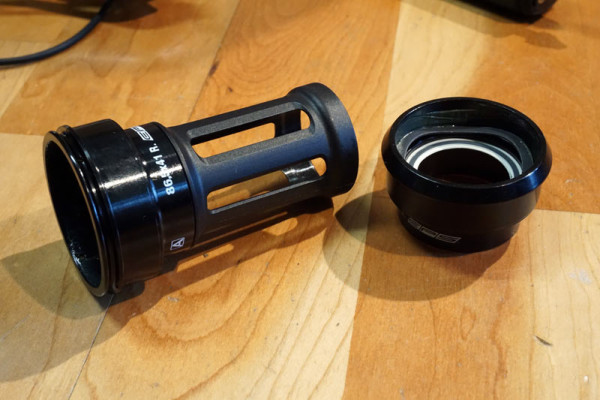
Since most installations will run at least one wire (likely most wires) past the bottom bracket, Campagnolo supplies a plastic sleeve to prevent them from rubbing on the crank’s rotating spindle.
Campagnolo’s design places the bearings on the crank spindle, so the BB shell is just that – a shell.
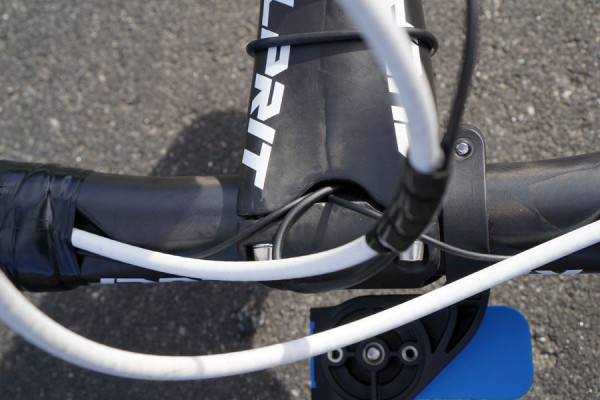
In an effort to keep the bike very clean looking, I used the massive stem’s hollow body and contoured face place design to hide the shift junction box inside. This meant sanding down the tip of the face plate a bit to ensure it didn’t pinch and damage the wires, but otherwise no modifications were needed. I wrapped the junction box in bubble wrap to keep it from rattling. This does mean I can’t see the lights, which indicate battery charge and are used during set up, but set up is done by holding buttons for a set period of time, so I managed just fine by counting one-one-thousand, two-one-thousand…
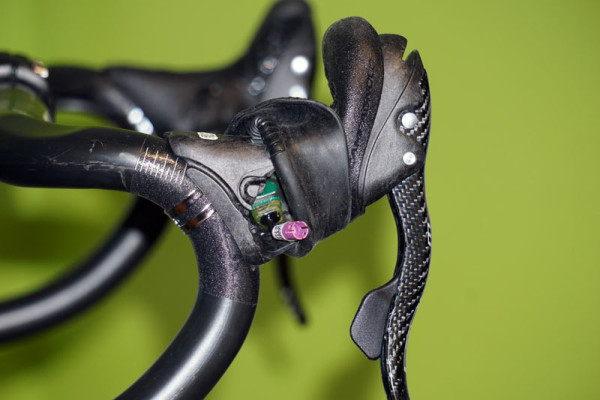
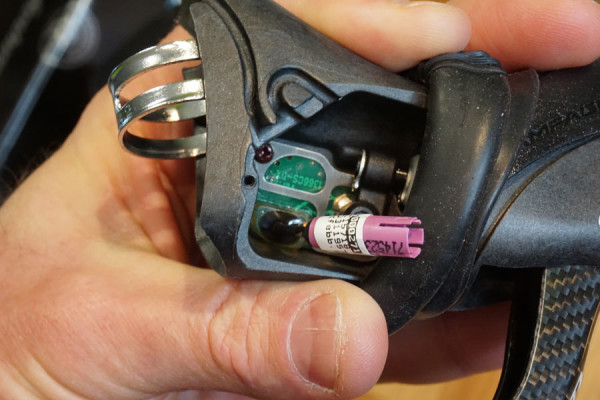
The charging wire ends in a threaded plug. The idea is to feed it through a hole in the frame, then thread a nut onto the outside to hold it in place. A smaller plastic piece threads into the plug to keep dust out, and the rubber top hat keeps water out. Since I didn’t need all of the space afforded by the frame’s cable port under the BB, we filed the inside of the frame port just enough to wedge the plug into place, then used silicone caulk to hold it there.
In my head, I imagined it looking much cleaner, but it works, and I can always redo the caulk later. Honestly, though, you’d never see this unless I showed you.
Of course, all this came after getting the battery into place, which is a royal pain in the arse. Depending on your bike, the water bottle bosses’ protrusion into the seat tube may make it hard to squeeze the battery into place behind them. On the Culprit, it just barely fit. On larger diameter seat tubes, it shouldn’t be a problem, as long as you have the proper tool. Yes, like most things Campy, they make a very specific installation tool, and that tool did not come with our group. Nor did any local shop have it. Fortunately, you can fudge it if you can find a bolt that’ll fit the threads on the top of the battery, but it took us about an hour to finagle it into place (huge thanks to Chris at Trek Bicycle Store Greensboro for his time, assistance and tools!). This is one of those things you really want a shop to do for you. Yes, I got the battery stuck in there. Yes, we broke some things. No, I would not want to install this again, so it’s very likely this bike will live with this group for the remainder of its useful life.
The short of it is this: The battery slides into place behind the seat tube’s water bottle bosses (or those on the downtube if you can wiggle it into that tube through the head tube or BB shell), then you thread small bolts into it, which pull it snugly against the inside of the tube. Since you can no longer insert the usual little magnet to “turn off” the system, they include a rubber strap and measuring instructions to show where to strap it around your seat tube for the same effect. This preserves battery life during transport or if your bike will sit idle for very long.
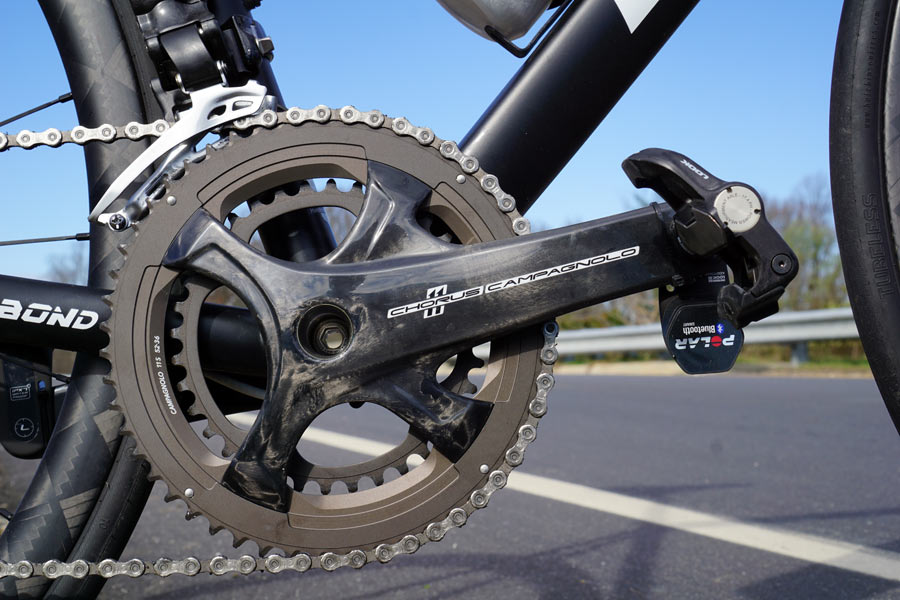
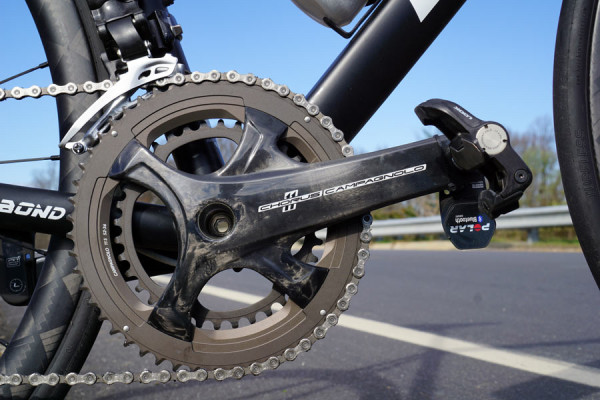
The cranks use Campy’s asymmetric four-arm design and they’re stiff as hell. While the Italian firm has dabbled in a 30mm spindle, most of their stuff uses their Ultra-Torque two-piece spindle:
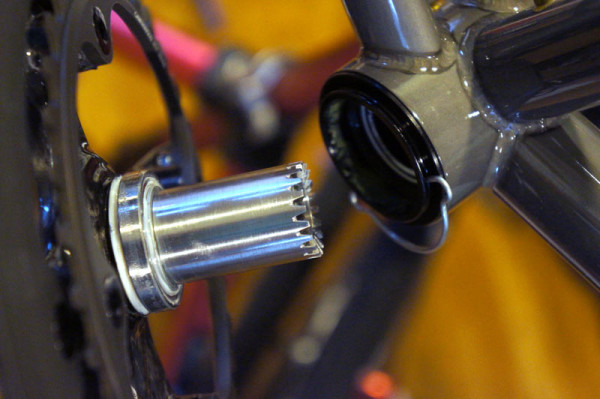
The spindle is cut in two and given teeth, which mate up to each other in the middle. A bolt is inserted from the drive side and tightens them together. Note the bearing on the spindle.
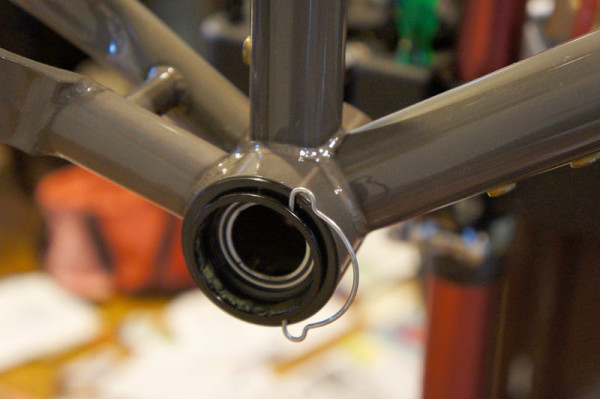
Shown here on a different bike, Campy’s BB uses a clip to hold the driveside in place while the group is assembled. The bolt in the spindle is what actually keeps things from falling out, but this design ensures proper alignment. One of the benefits of this overall design is that there’s no need for preload adjustment. Indeed, there’s no adjustment at all, so the frame better be within tolerance. They also say it allows for thinner crankarms and less heel rub. They have a video that explains it.
Once installed, they spun freely. I did get a very annoying squeak out of them for the first 50 miles, but it’s disappeared and hasn’t returned (and yes, I tested every other moving part…it was the cranks). My hunch is the seals were just settling in and getting into their groove.
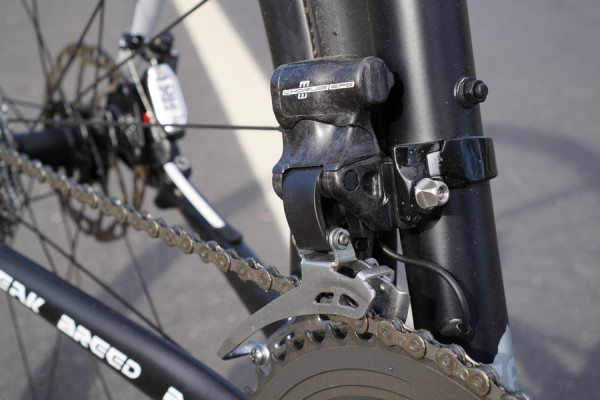
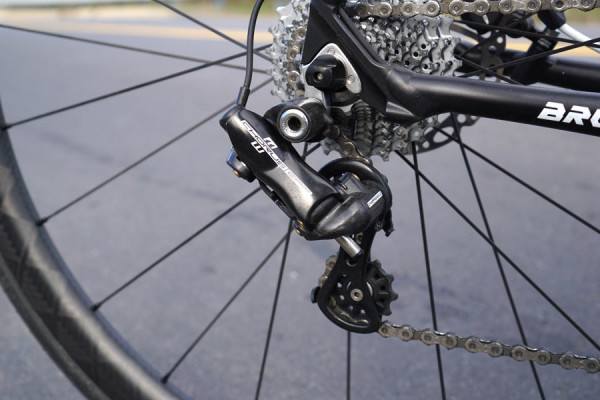
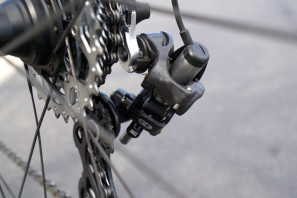
With the same motors and parallelogram designs, it really is only materials that separate Chorus’ derailleurs from the two top groups. And even Chorus gets its fair share of carbon. The front derailleur installs like any other, but the setup does require some button pushing. When first installed, the fine tuning adjustments were not enough to prevent chain rub in both extremes, so I went through the more intensive adjustment procedure outlined in this excellent setup video from Excel Sports. Basically, you press and hold the function buttons on both shifters (near the thumb shifter button) and start by zeroing the rear derailleur, then move on to the front. Watch the video if you need to set it up.
From a performance standpoint, it doesn’t get much better than Chorus. You’ll get lighter weights and more carbon making the jump to Record or Super Record, but the motorized bits are the same. For more on the materials and tech, check here and here.
That means very fast, very accurate shifting. In fact, it’s at least as fast as Di2 and definitely faster than eTap. It comes standard with multi-shift, just hold down the buttons. On the way down the cassette (easier to harder), it’s almost too fast in multi-shift. But, it does manage to engage on every gear where Di2 can sometimes jump across one or two. And, clicking the buttons for each shift can be done as fast as you want and it’ll catch every gear smoothly and leave each one just as smoothly.
Campy says this is because of the teeth’s profiles, and we suspect the chain has a lot to do with it, too. We initially installed a Connex 11-speed chain that we want to test, but it seemed noisy and just a bit clunkier than we thought a Campagnolo drivetrain should be. Once the Campy Chorus 11S chain was on, things were super smooth and super quiet and remain so. Overall, it’s very impressive.
Shifting does slow noticeably as the battery’s power dwindles. Assuming you’ve hidden the DTI box and can’t see the lights, that’s your indication it’s time to top off. If you’re paying attention, there’s more than enough heads up to finish a ride with shifting intact.
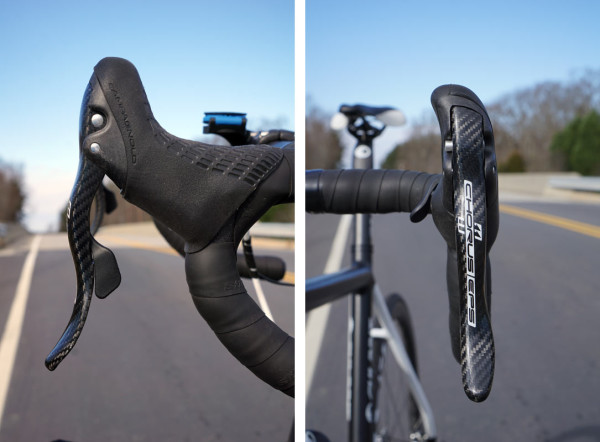
The more I’ve ridden this, the more I wonder why I haven’t been riding Campy longer. The ergonomics of the levers are fantastic; comfortable in all hand positions. The brake levers are easy to reach and, as a bonus for anyone using a setup like this with TRP’s HyRD mechanical-to-hydraulic disc brakes, they seem to have the perfect amount of cable pull for those calipers. Not all levers do, but this set up brakes exceptionally well. (Worth re-mentioning that they’re using Yokozuna compressionless housing and premium cables)
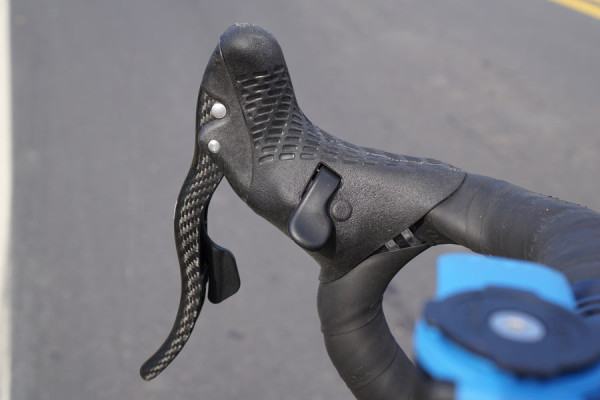
The button layout is different than Shimano and SRAM, so if you’re fortunate enough to have bikes from one or more, there’s a slight learning curve switching back and forth. But once you’re used to it, it makes sense. I was surprised that the thumb lever never really gets in the way of grabbing the hoods for sprints. The EPS lever is slightly less pronounced than their mechanical shifters, but the placement just works.
Campagnolo’s Chorus provides a cost effective way to get premium electronic shifting. MSRP is $3,500, but street price is much lower. Coupled with the efficient alloy frame and the rest of this build, you have a mid-range priced race bike that punches well above its weight class in performance.
Stay tuned for Part Three: Wheels, brakes and more…
