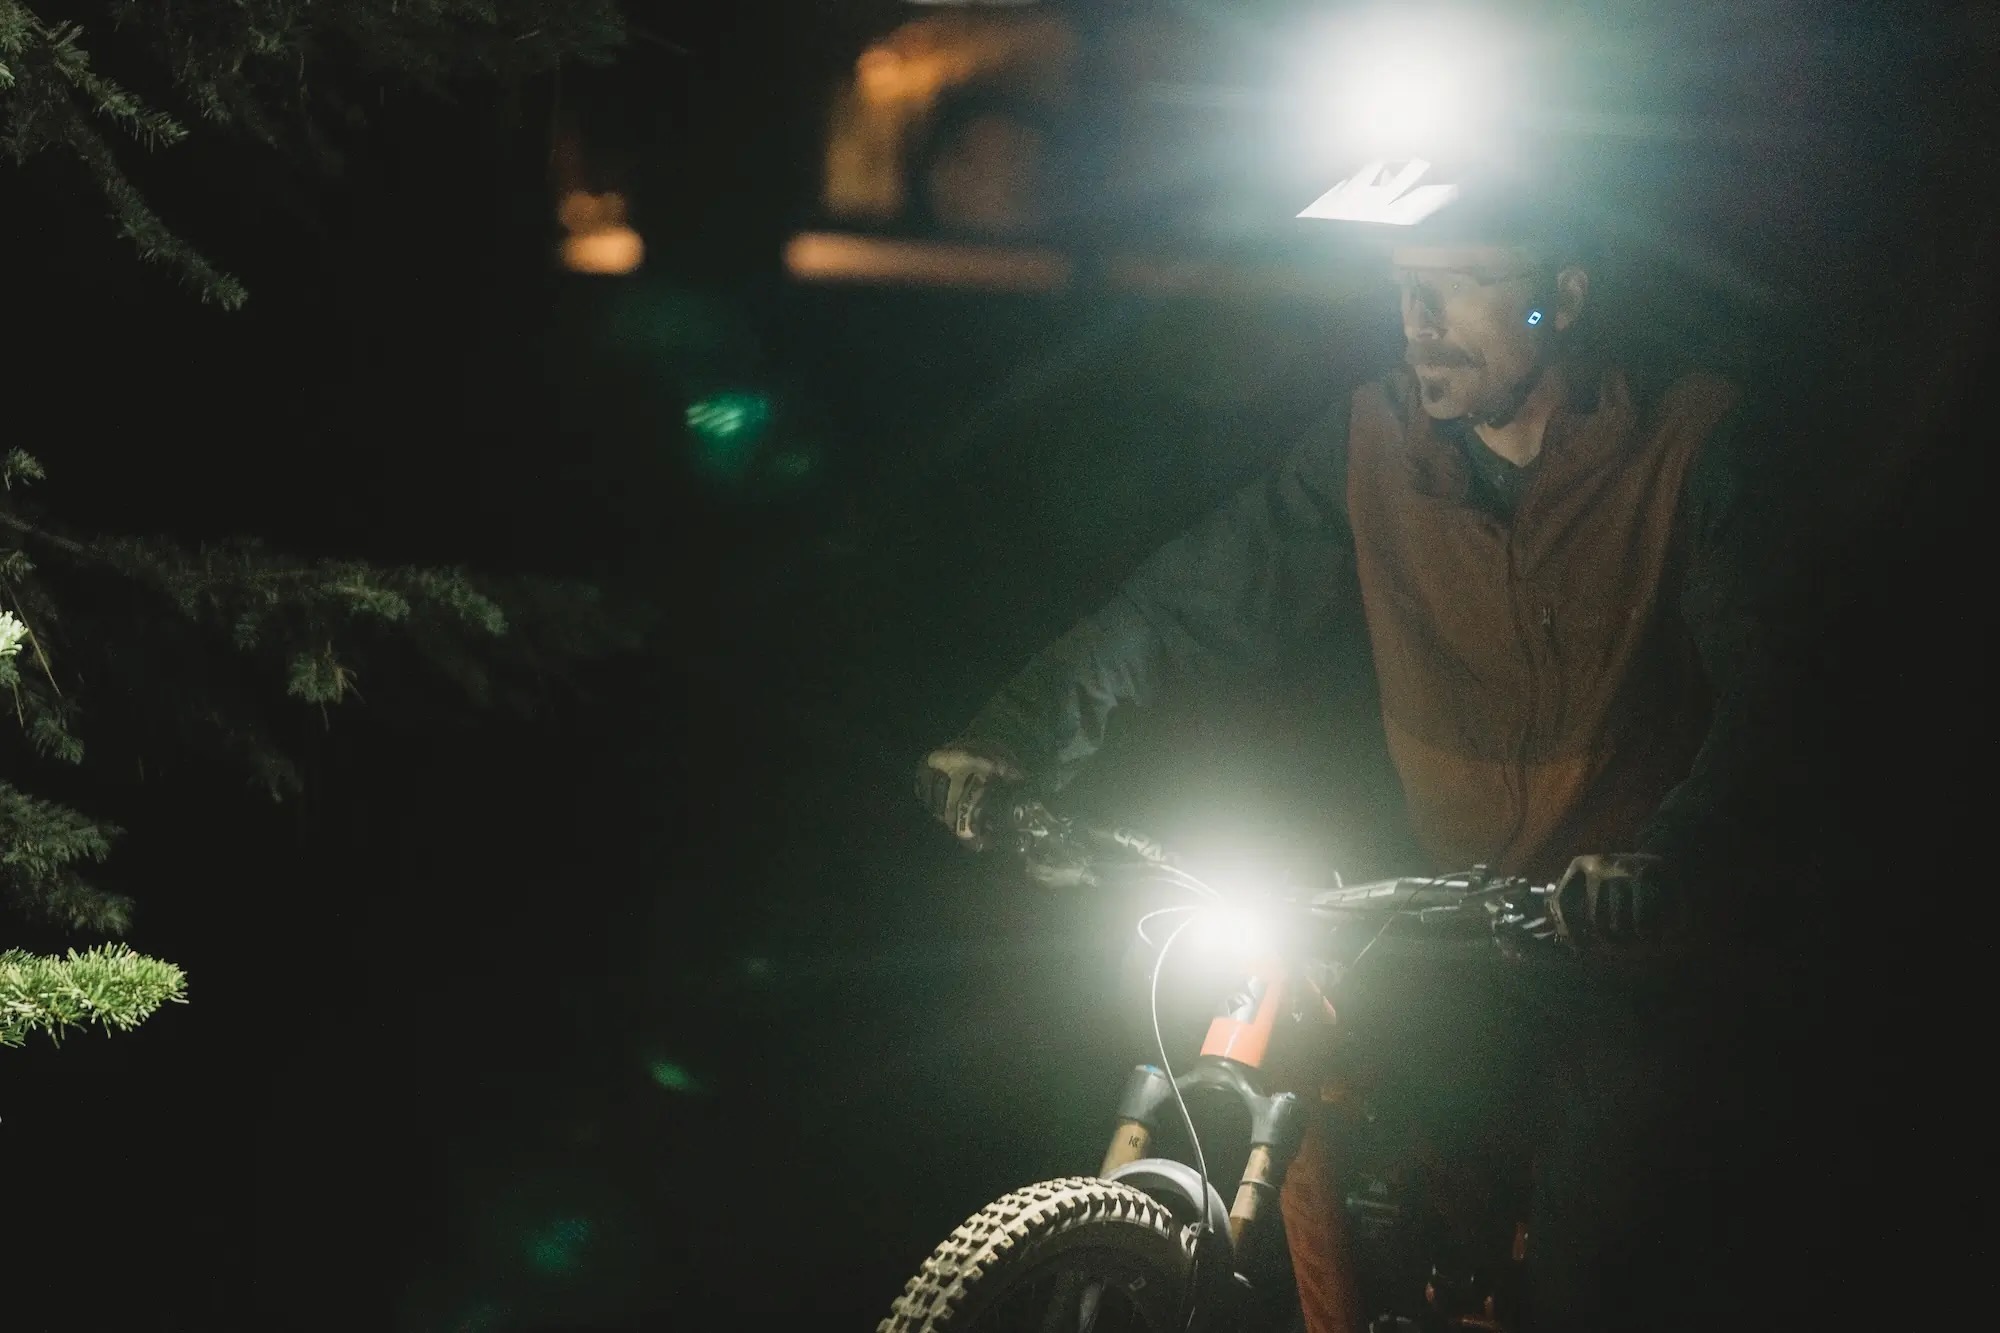
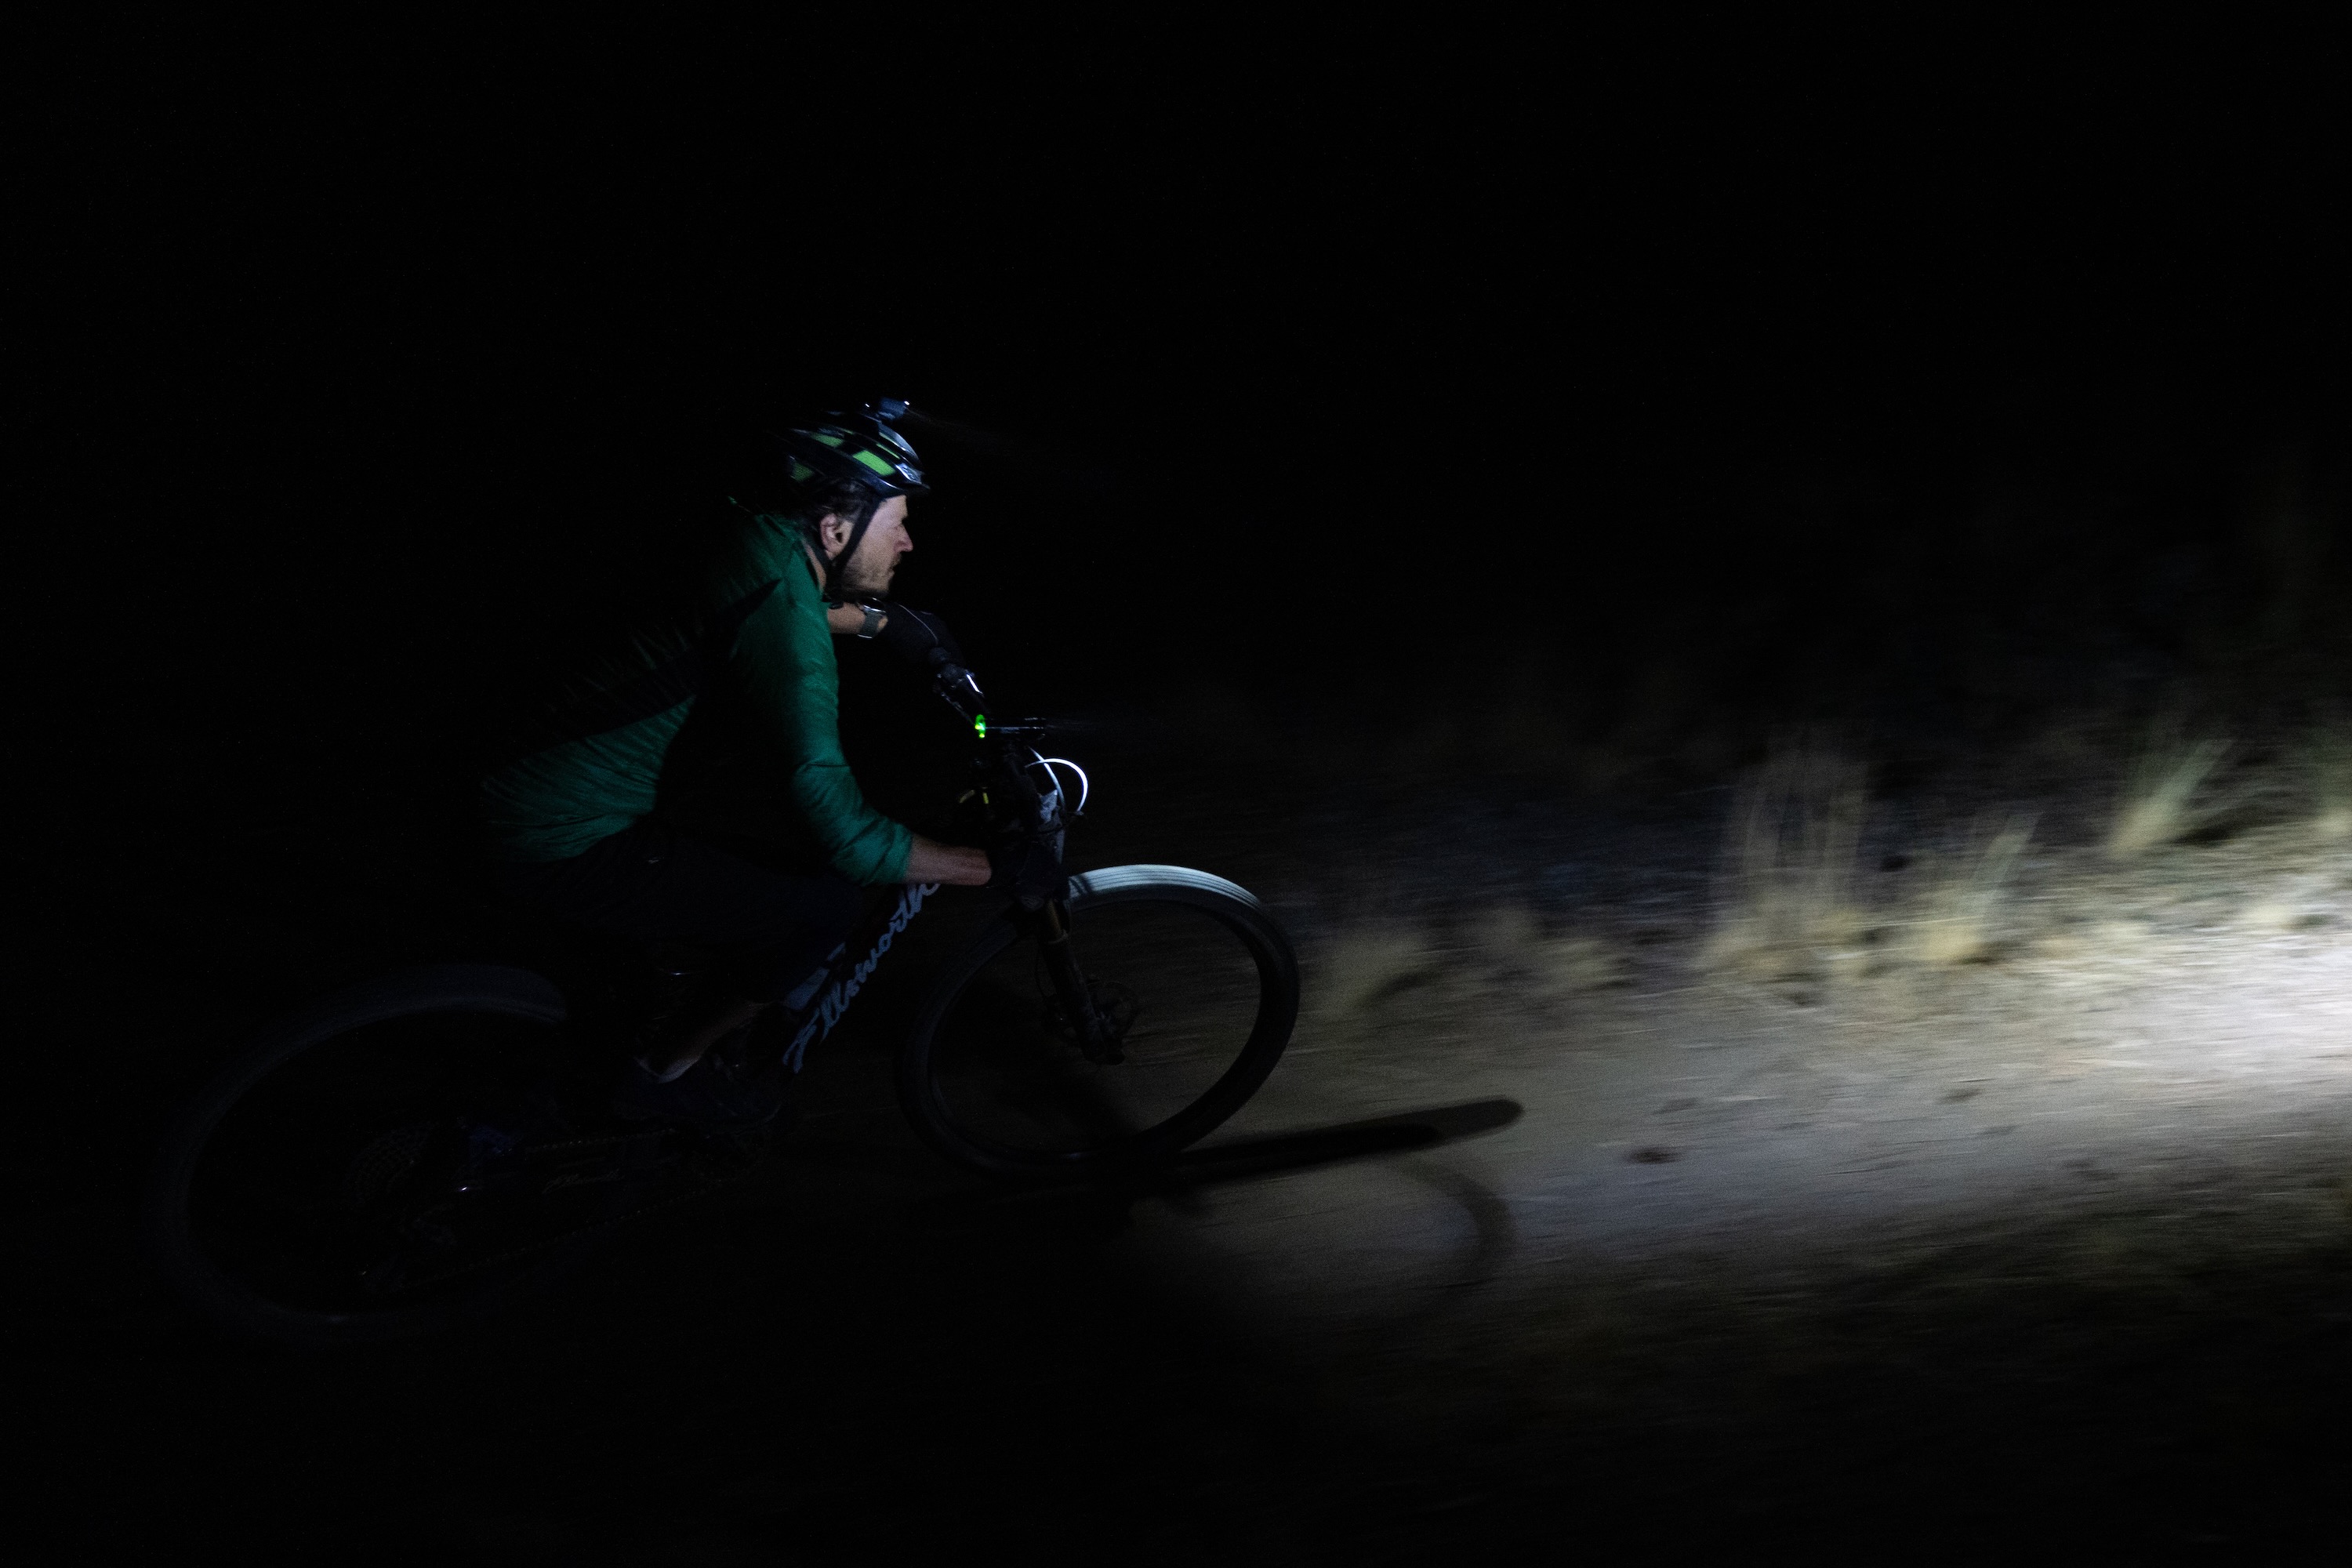
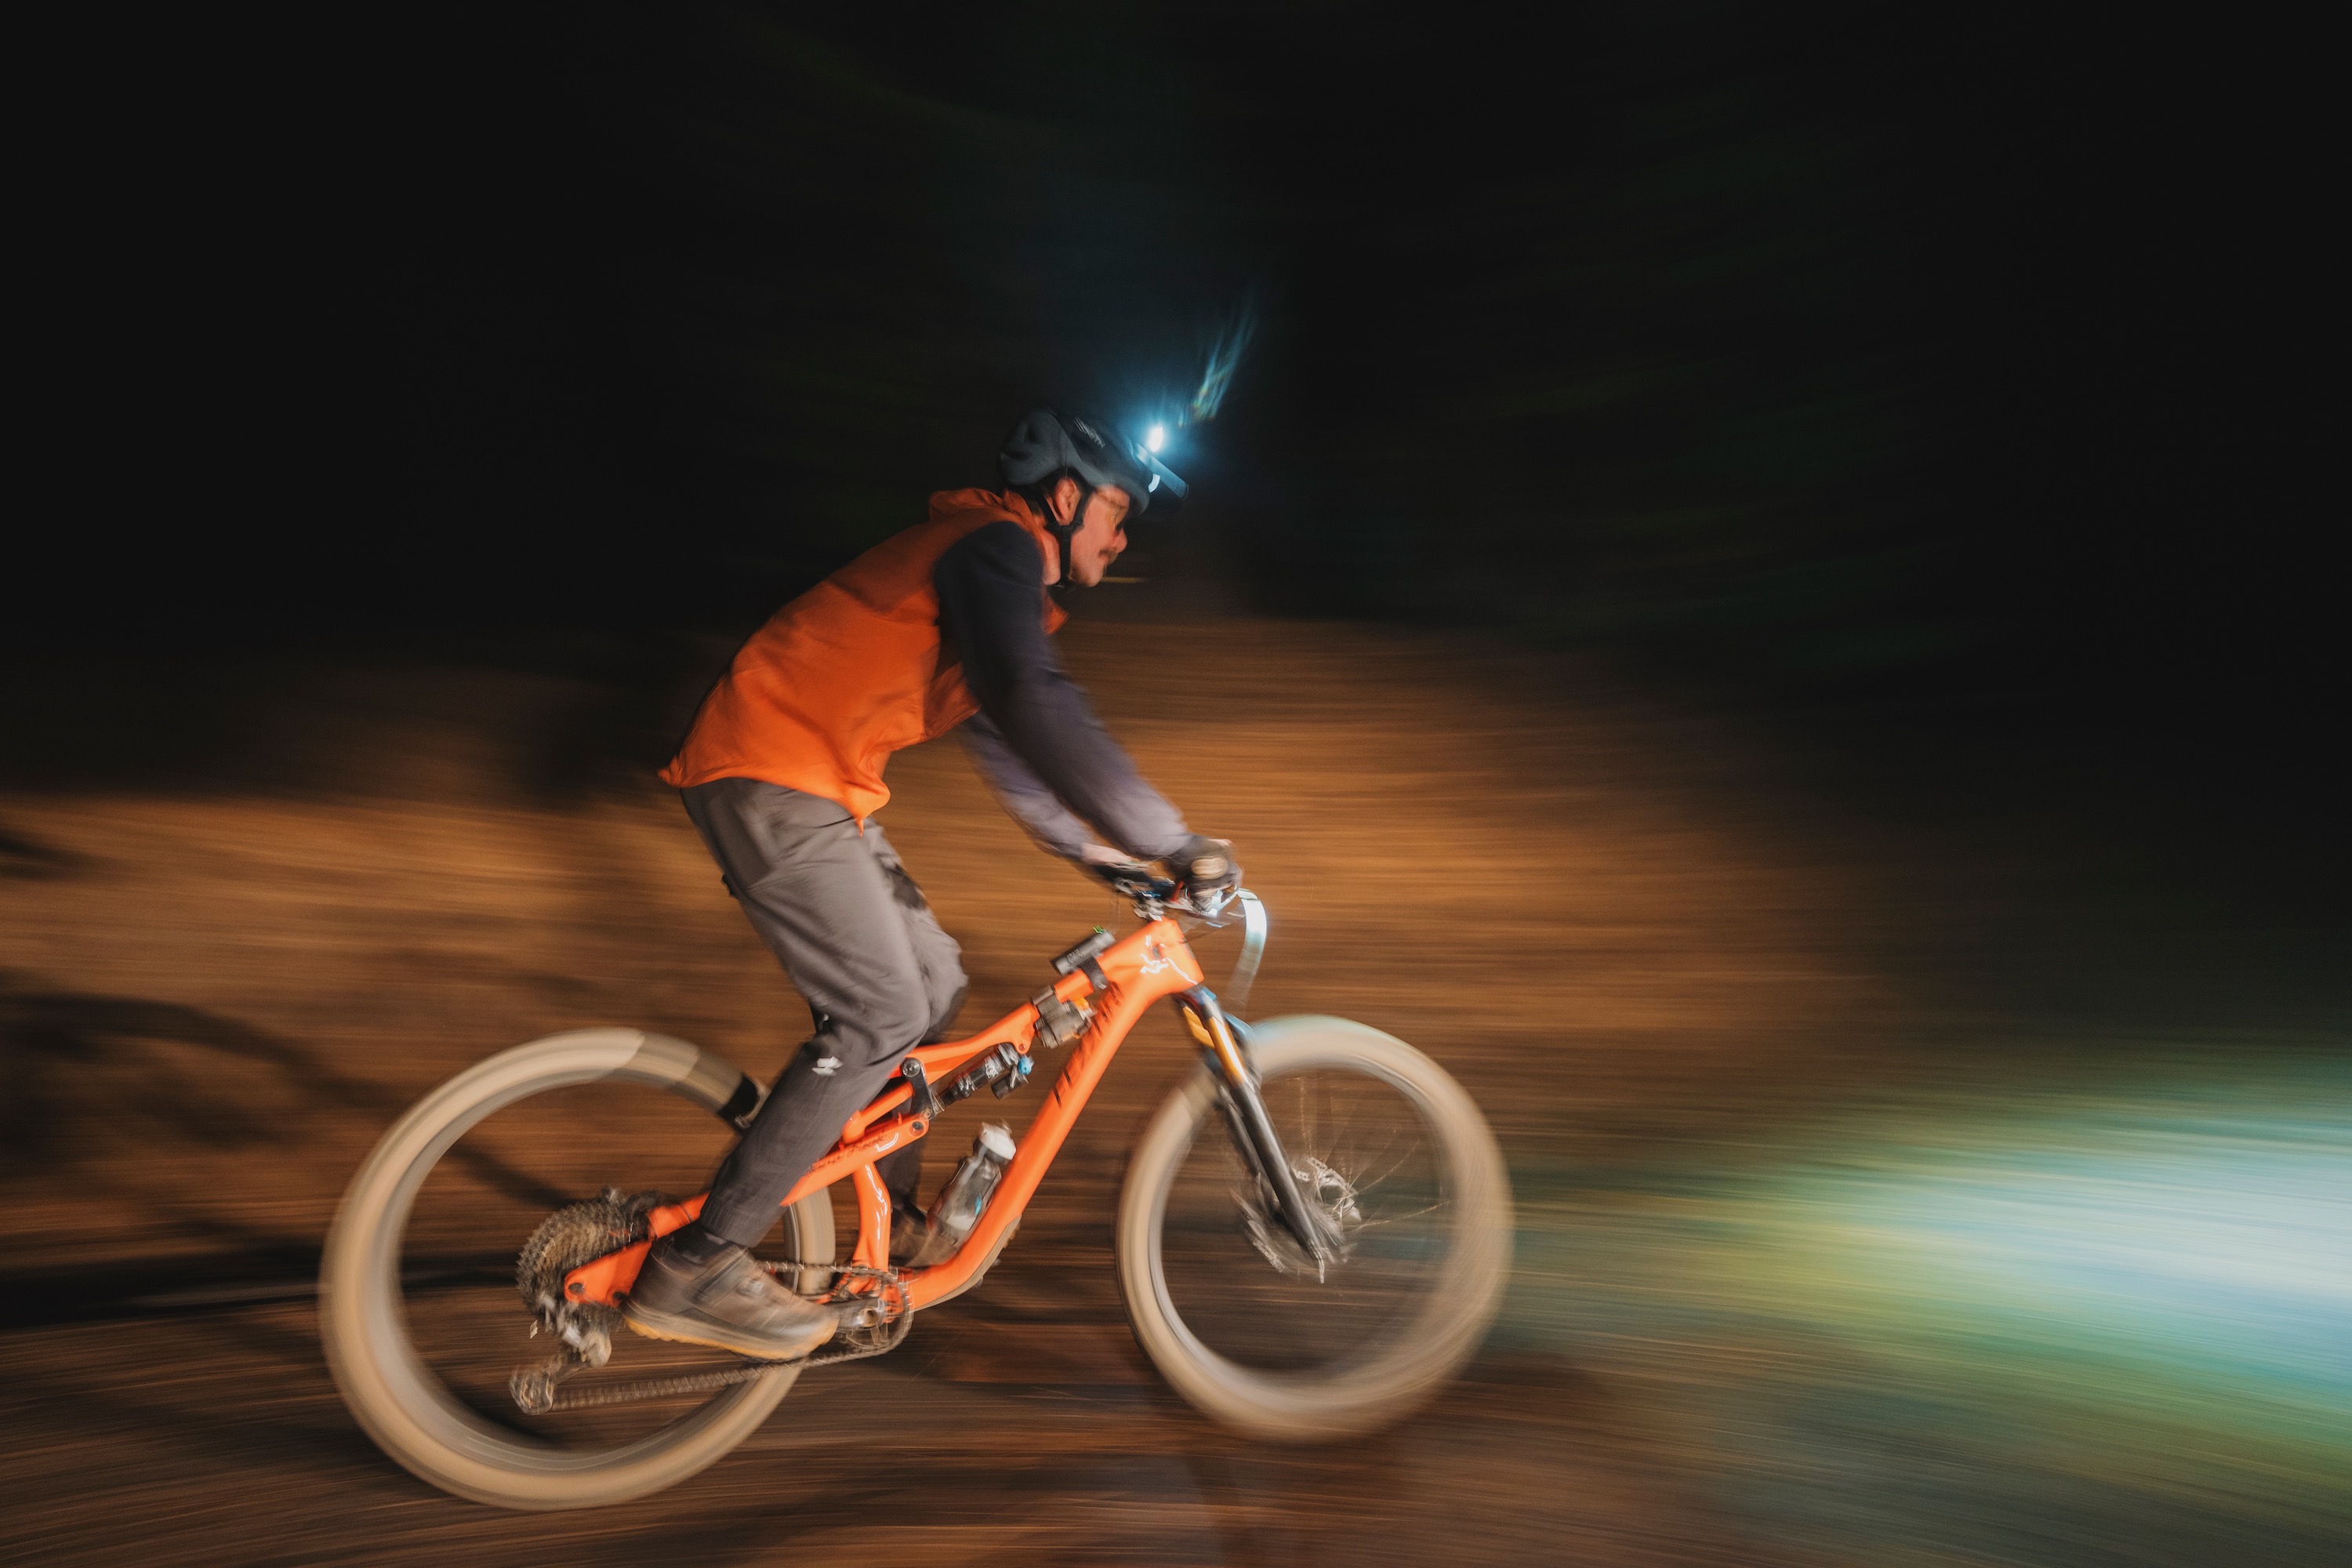
Mountain biking at night is amazing when you have the best mountain bike lights to cut through the darkness. Whether you’re not ready to hang up the bike when the days are shorter or you simply enjoy riding at night for fun, novelty, or racing, a good set of lights is an absolute necessity.
Our testers are adventure racers, mountain bike coaches, and mechanical engineers who have been riding with mountain bike lights for years. Collectively, we’ve tested dozens of different models while considering key performance characteristics like brightness, beam patterns, form factor, ease of use, battery life, price, and durability.
From the top-rated Exposure Six-Pack 15 and Zenith 4 to the value-packed Outbound Lighting Hangover and Trail Evo, we’ve got recommendations to suit your needs and budget.
Editor’s Note: This guide was recently transferred to BikeRumor from our sister site, GearJunkie.com, on March 1, 2026. Additionally, we added several new models to our selection, including the Exposure Lights Six-Pack 15 and Zenith 4, and the Gloworm CX Core.
The Best Mountain Bike Lights of 2026
Exposure Lights Zenith 4

- MSRP: $305
- Type: Helmet, can also be used on handlebar
- Lumens (max): 2,360
- Battery: 6,000 mAh
- Charge time: 2 hrs., 45 min.
- Run time: 1 to 36 hrs.
- Weight: 144 g (light only), 161 g (light w/ helmet mount)
- Mounts: Universal helmet mount and universal handlebar mount
Pros
- Very bright
- Excellent quality and finish
- TAP technology works well
- Self-contained
- Reasonable weight
- Nice storage case
Cons
- Expensive
- Fairly short run time on max output
- Universal helmet mount may not work with all helmets
- Another mid-brightness setting option would be nice
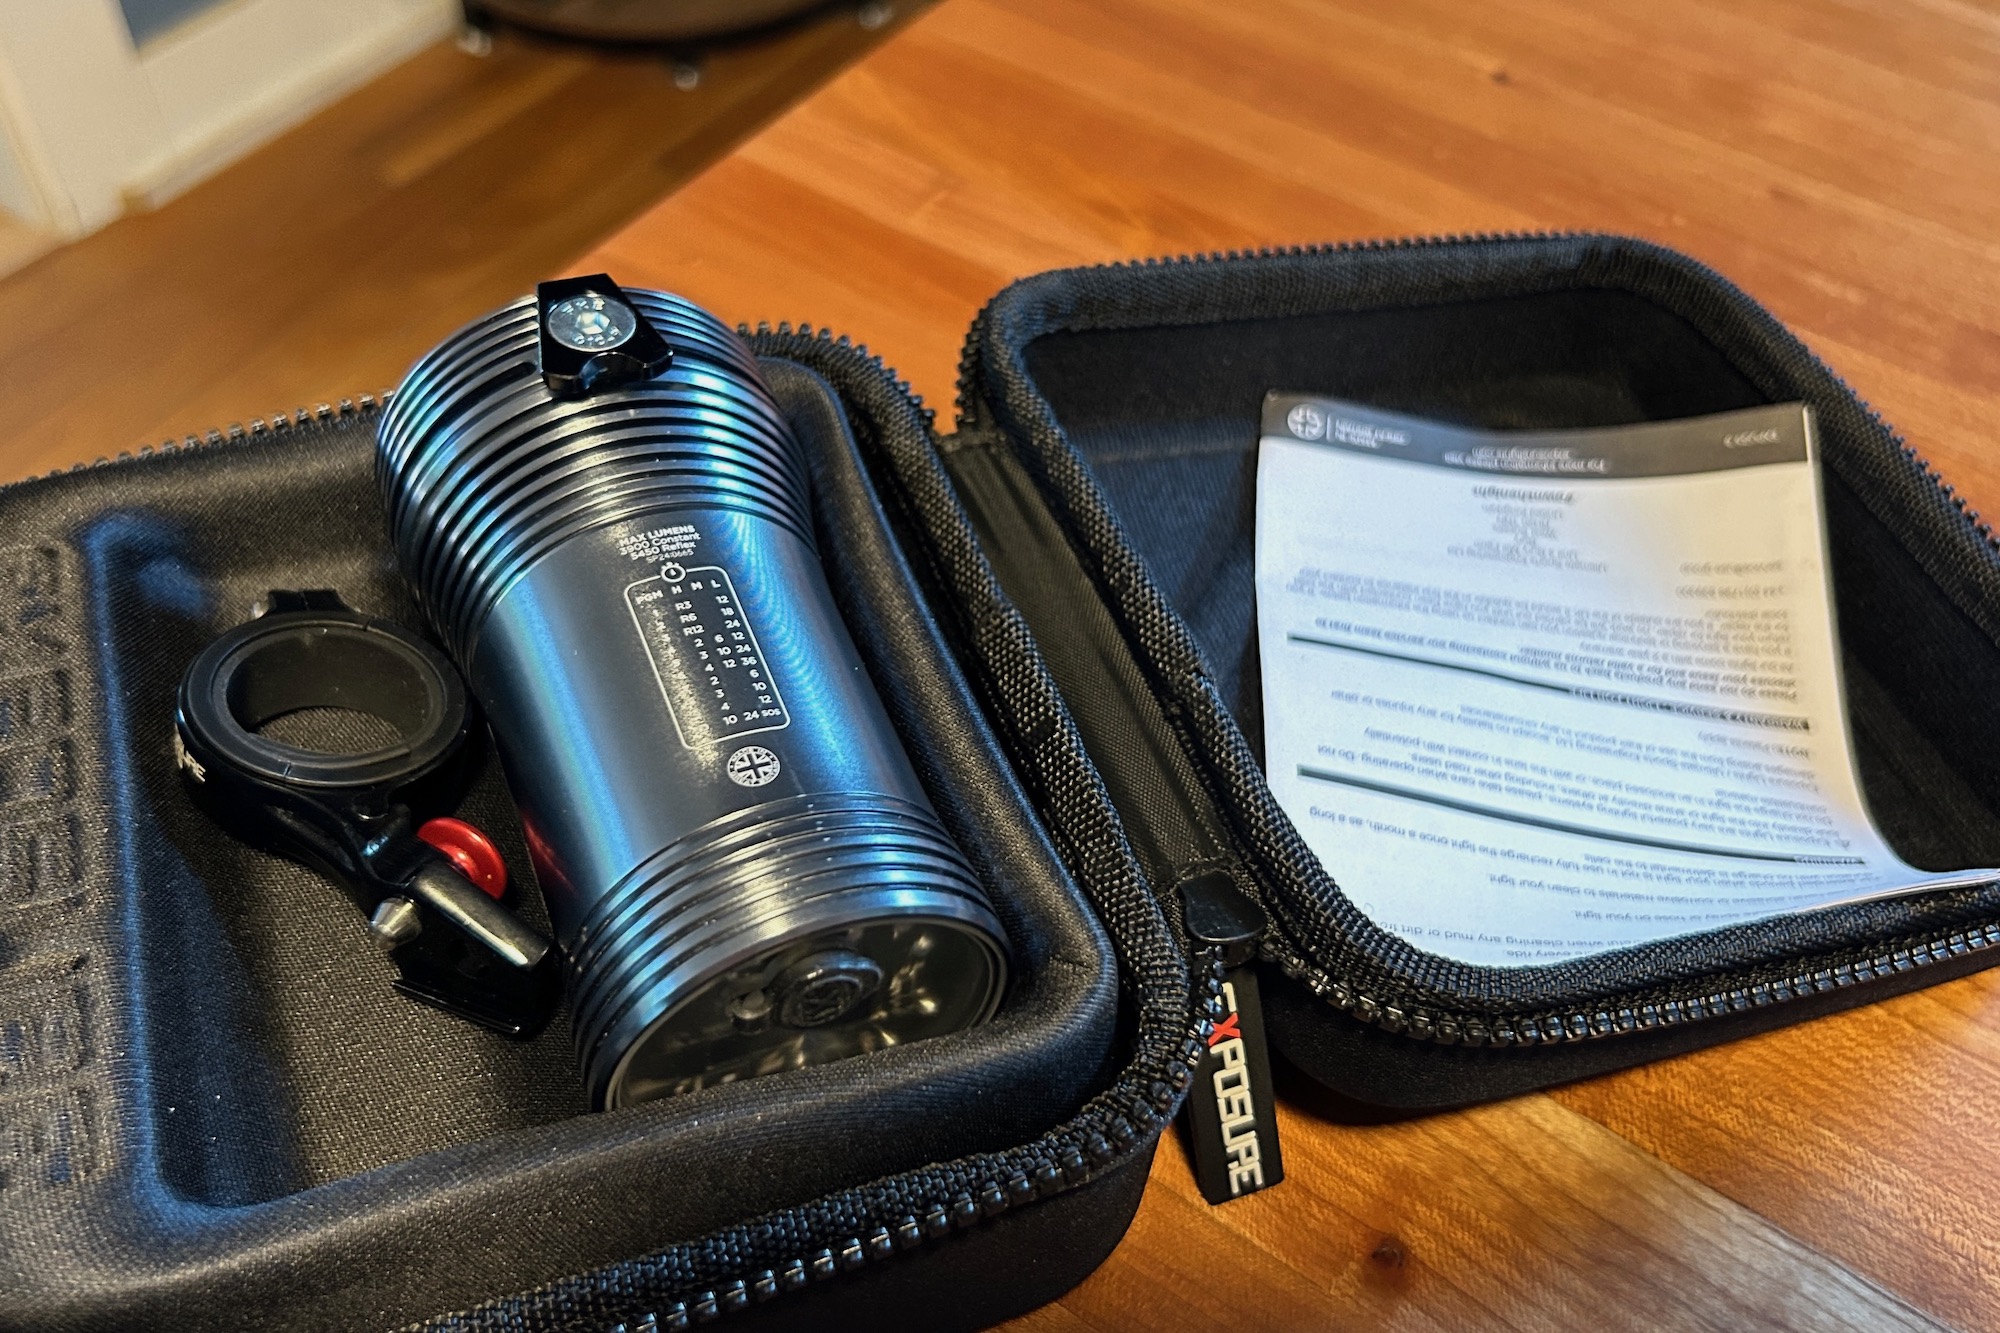
Exposure Lights Six Pack 15
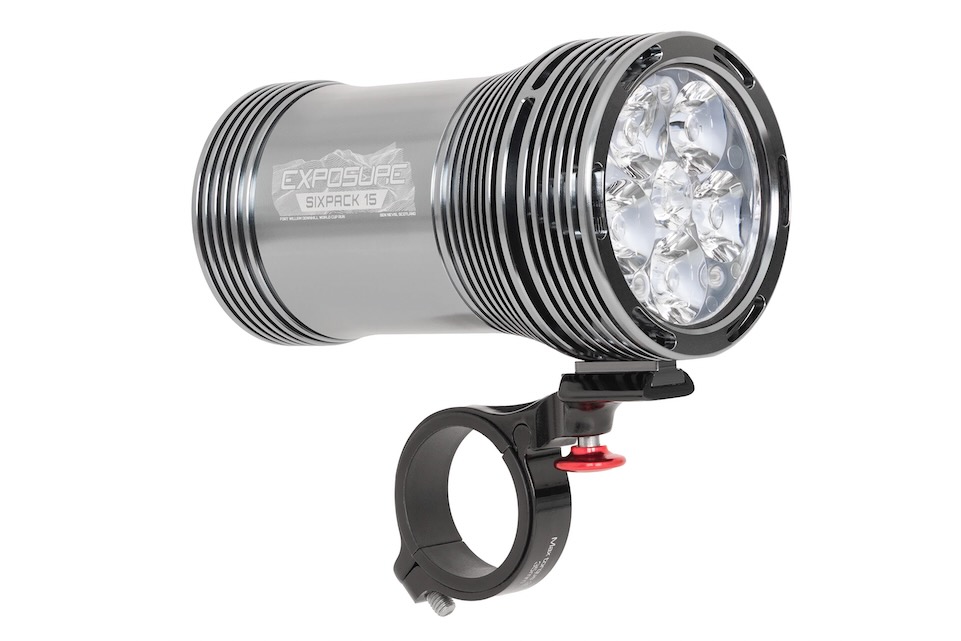
- MSRP: $540
- Type: Handlebar
- Lumens (max): 6000 (Reflex), 4240 (constant)
- Battery: 20,000 mAh
- Charge time: 5 hrs., 22 min.
- Run time: 2 to 36 hrs.
- Weight: 429 g (light and handlebar mount)
- Mounts: Handlebar
Pros
- Incredibly bright
- Self-contained
- Sturdy and stable bar mount
- "Reflex 2.0" system works well
- Digital display
- Excellent build quality
Cons
- Very expensive
- Heavier weight
- Somewhat fiddly setup
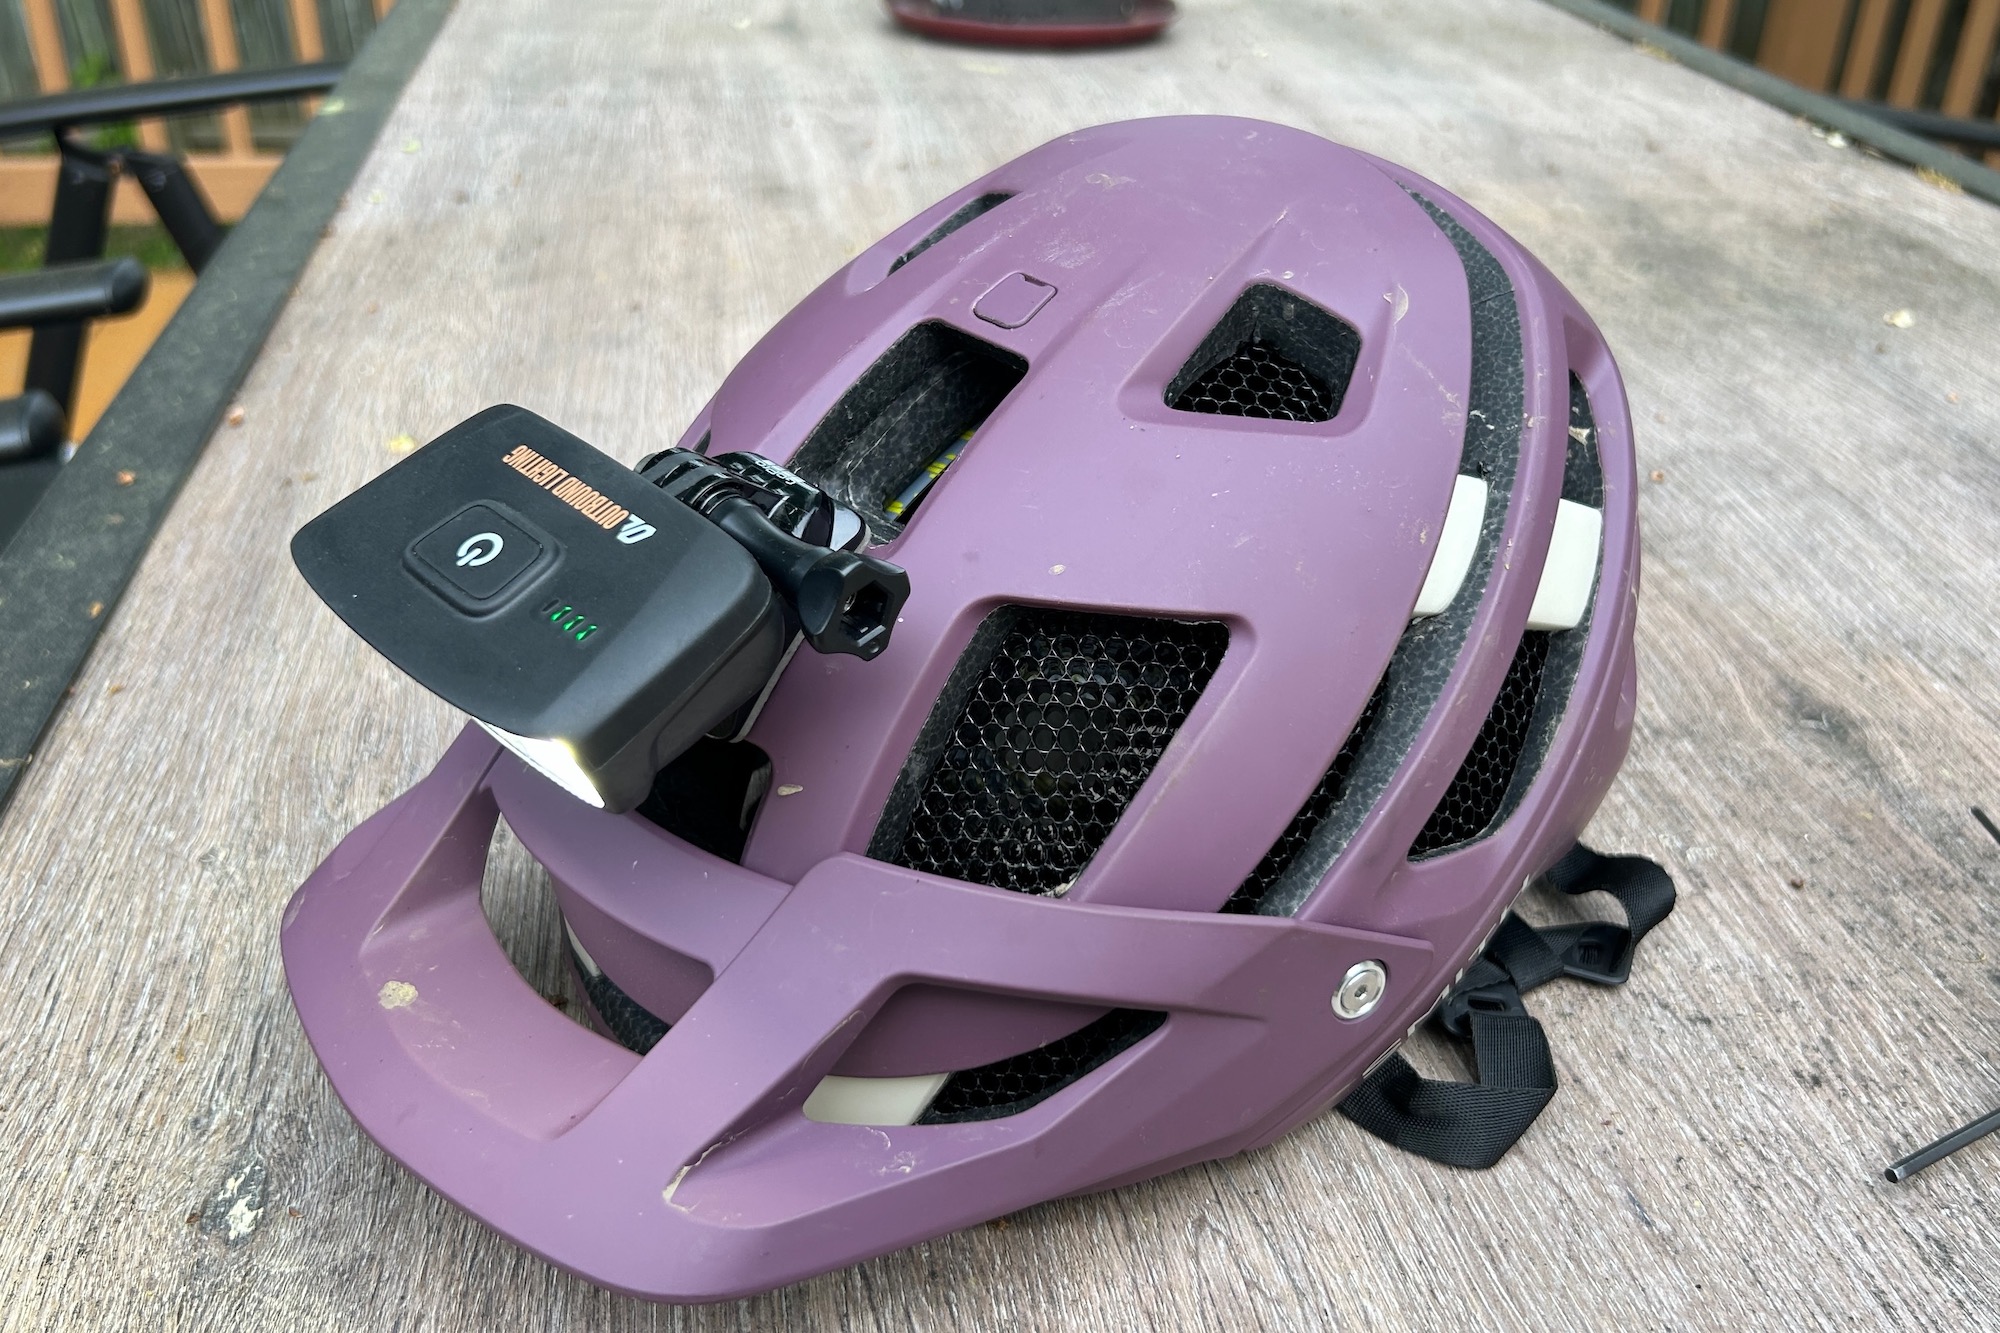
Outbound Lighting Hangover
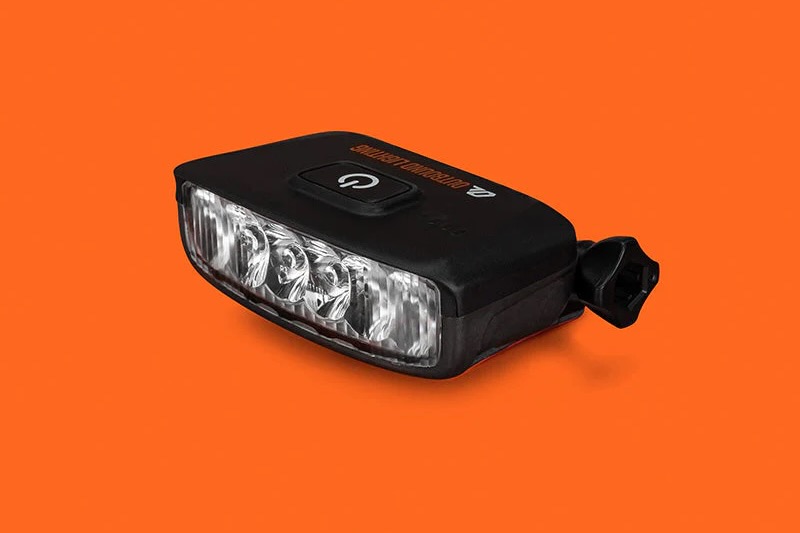
- MSRP: $135
- Type: Helmet
- Lumens (max.): ≈ 1000
- Battery: 3,500 mAh internal
- Burn time: 1.1 hrs. (high), 1.6 hrs. (adaptive), 6.5 hrs. (low)
- Weight: 108 g
- Mounts (included): Helmet: GoPro
Pros
- Sleek
- Great included helmet mounts
- Wide beam pattern
- Great UX
- Lightweight
- Not too expensive
Cons
- Can be underpowered for very fast night riding
- Not the brightest or longest lasting
Outbound Lighting Trail Evo
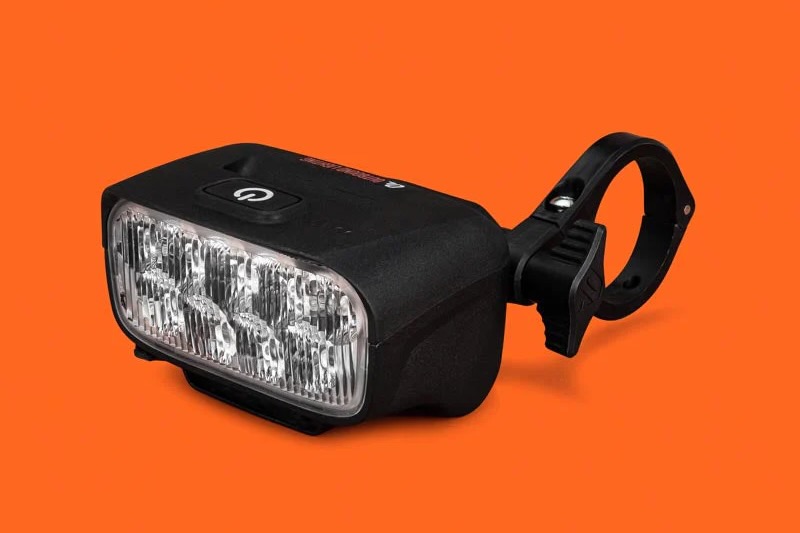
- MSRP: $245
- Type: Handlebar
- Lumens (max.): ≈ 2200
- Battery: 10,000 mAh internal
- Burn time: 1.7 hrs (high), 2.6 hrs. (adaptive), 8.5 hrs. (low)
- Weight: 275 g (light), 42 g (handlebar mount)
- Mounts (included): Quick release handlebar mount
Pros
- Well executed handlebar clamp
- Wide beam pattern
- Great UX
- No external battery
- Adaptive mode works well
Cons
- Beam can be outrun during very fast night riding
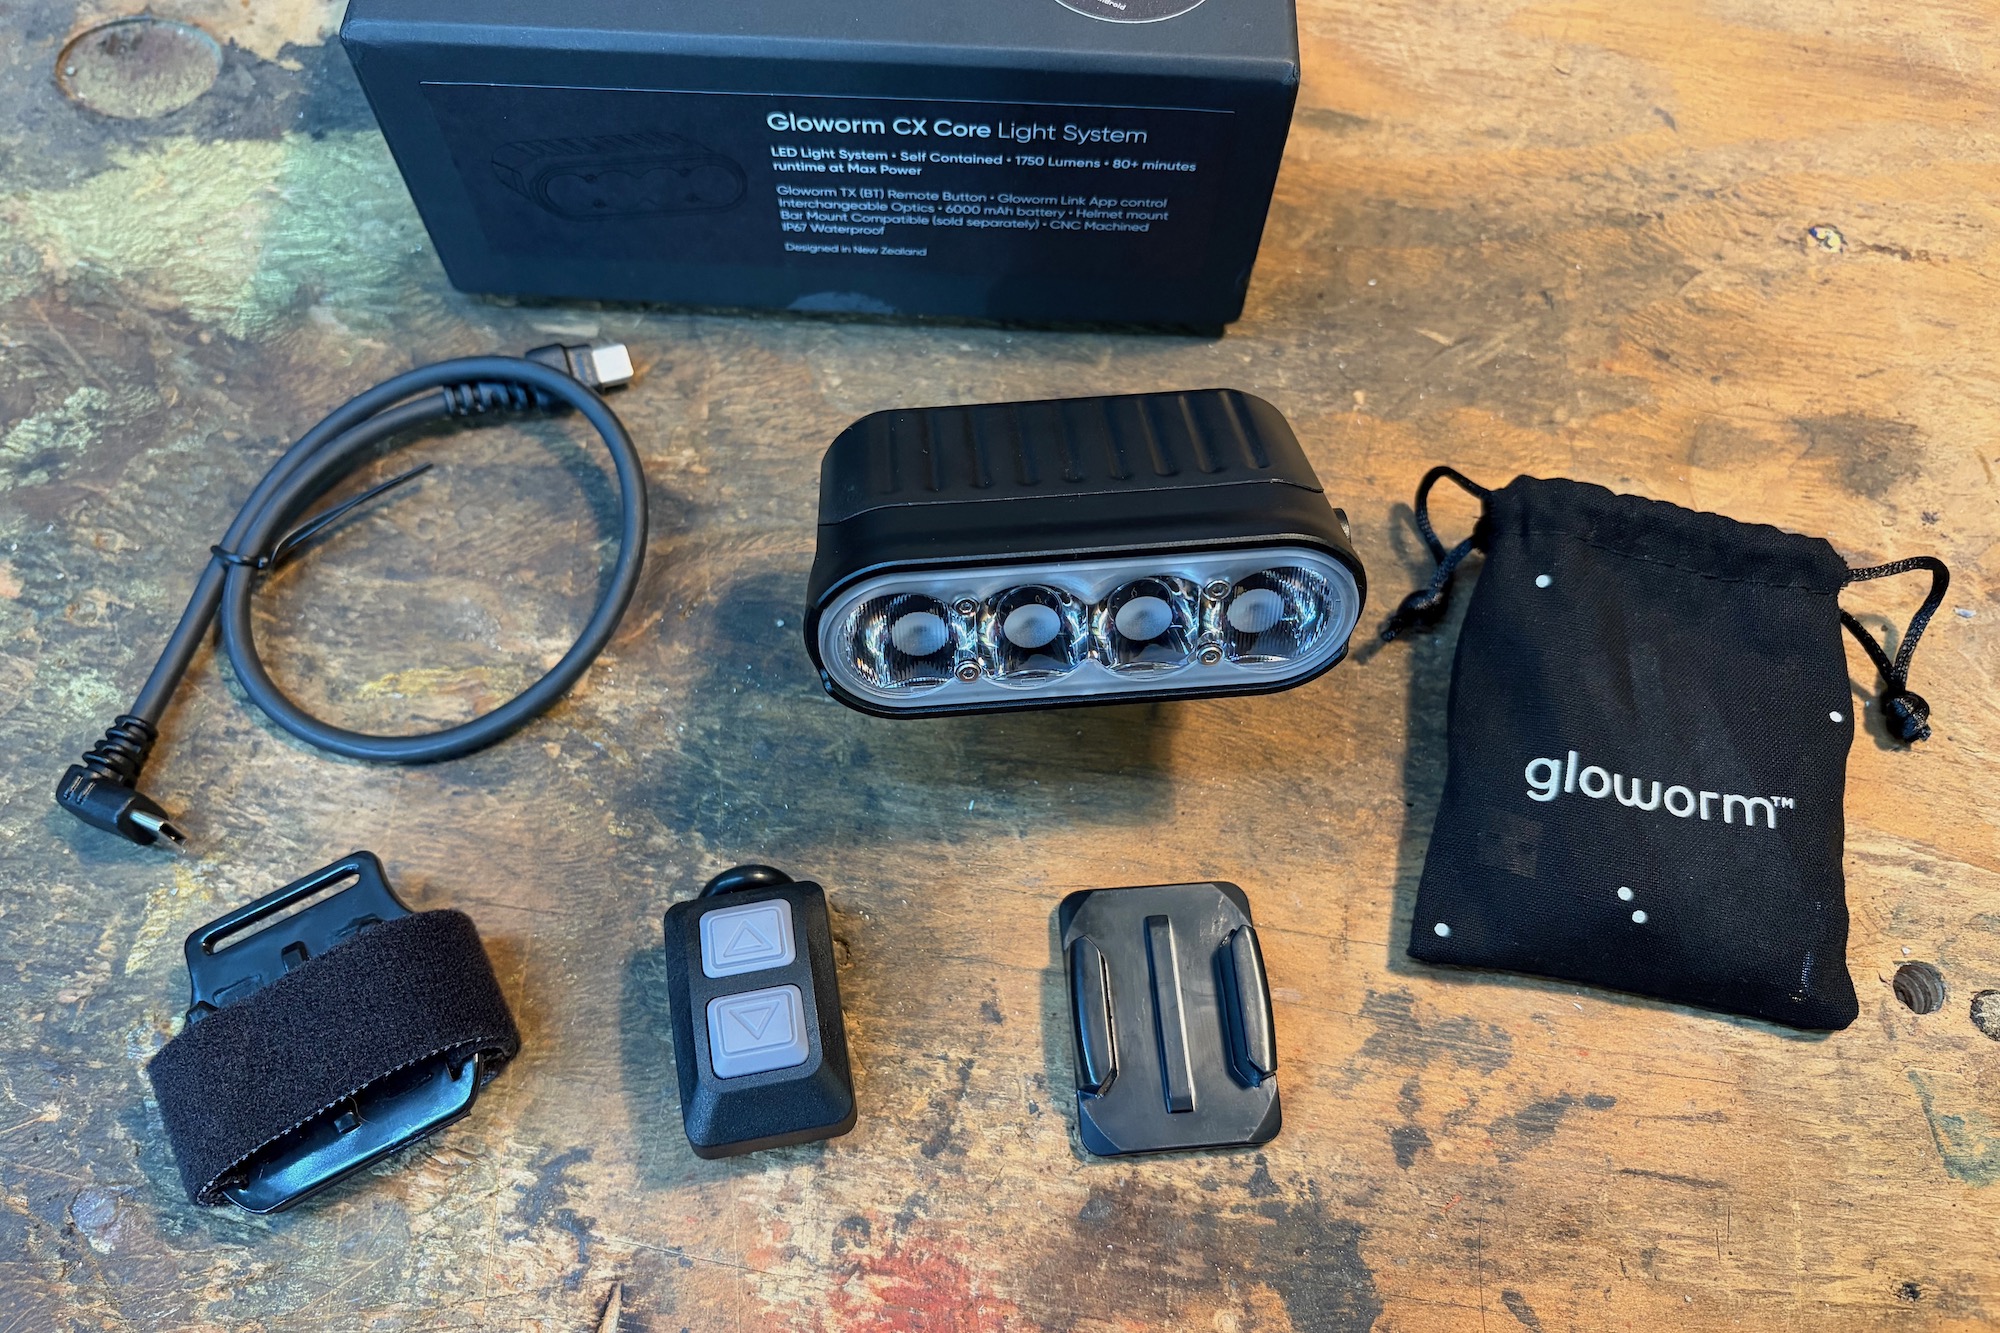
Gloworm CX Core
- MSRP: $175
- Type: Helmet, handlebar kit is available
- Lumens (max): 1,750
- Battery: 6,000 mAh internal
- Burn time: 80+ min. (high), 10 hrs. (low)
- Weight: 182 g (light), 17g (GoPro mount)
- Mounts: Helmet (stick-on GoPro style mount and Velcro strap incl.)
Pros
- Reasonably priced
- Self-contained, no cords
- Bright enough most of the time
- Wireless handlebar remote is super handy
- Included helmet mount options
- Bar mount kit available
Cons
- Not the brightest option
- Not the lightest, but not too heavy either
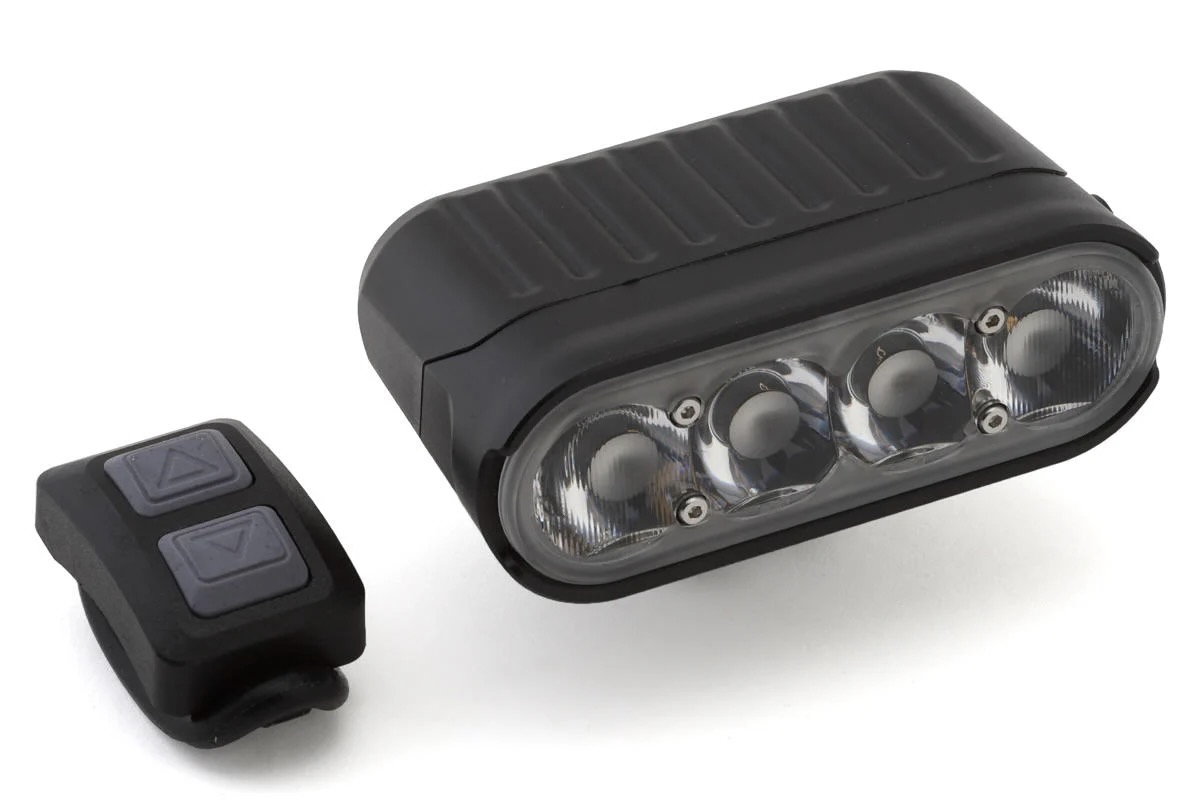
Fenix BC30 Bike Light V2.0
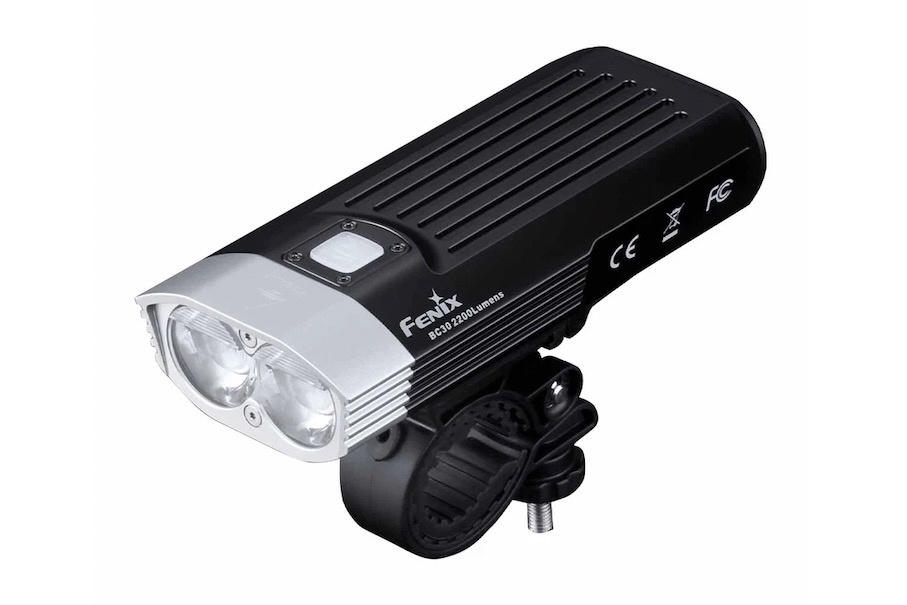
- MSRP: $90 (not incl. batteries)
- Type: Handlebar
- Lumens (max): 2200 (burst), 1500 (high)
- Battery: 2 x 18650 rechargeable Li-Ion batteries (not incl.)
- Burn time: 2.3 hours (high)
- Weight: 154 g
- Mounts: Handlebar
Pros
- Reasonable price
- Bright for the price
- Replaceable batteries
- Wireless handlebar remote
Cons
- Need to purchase batteries separately
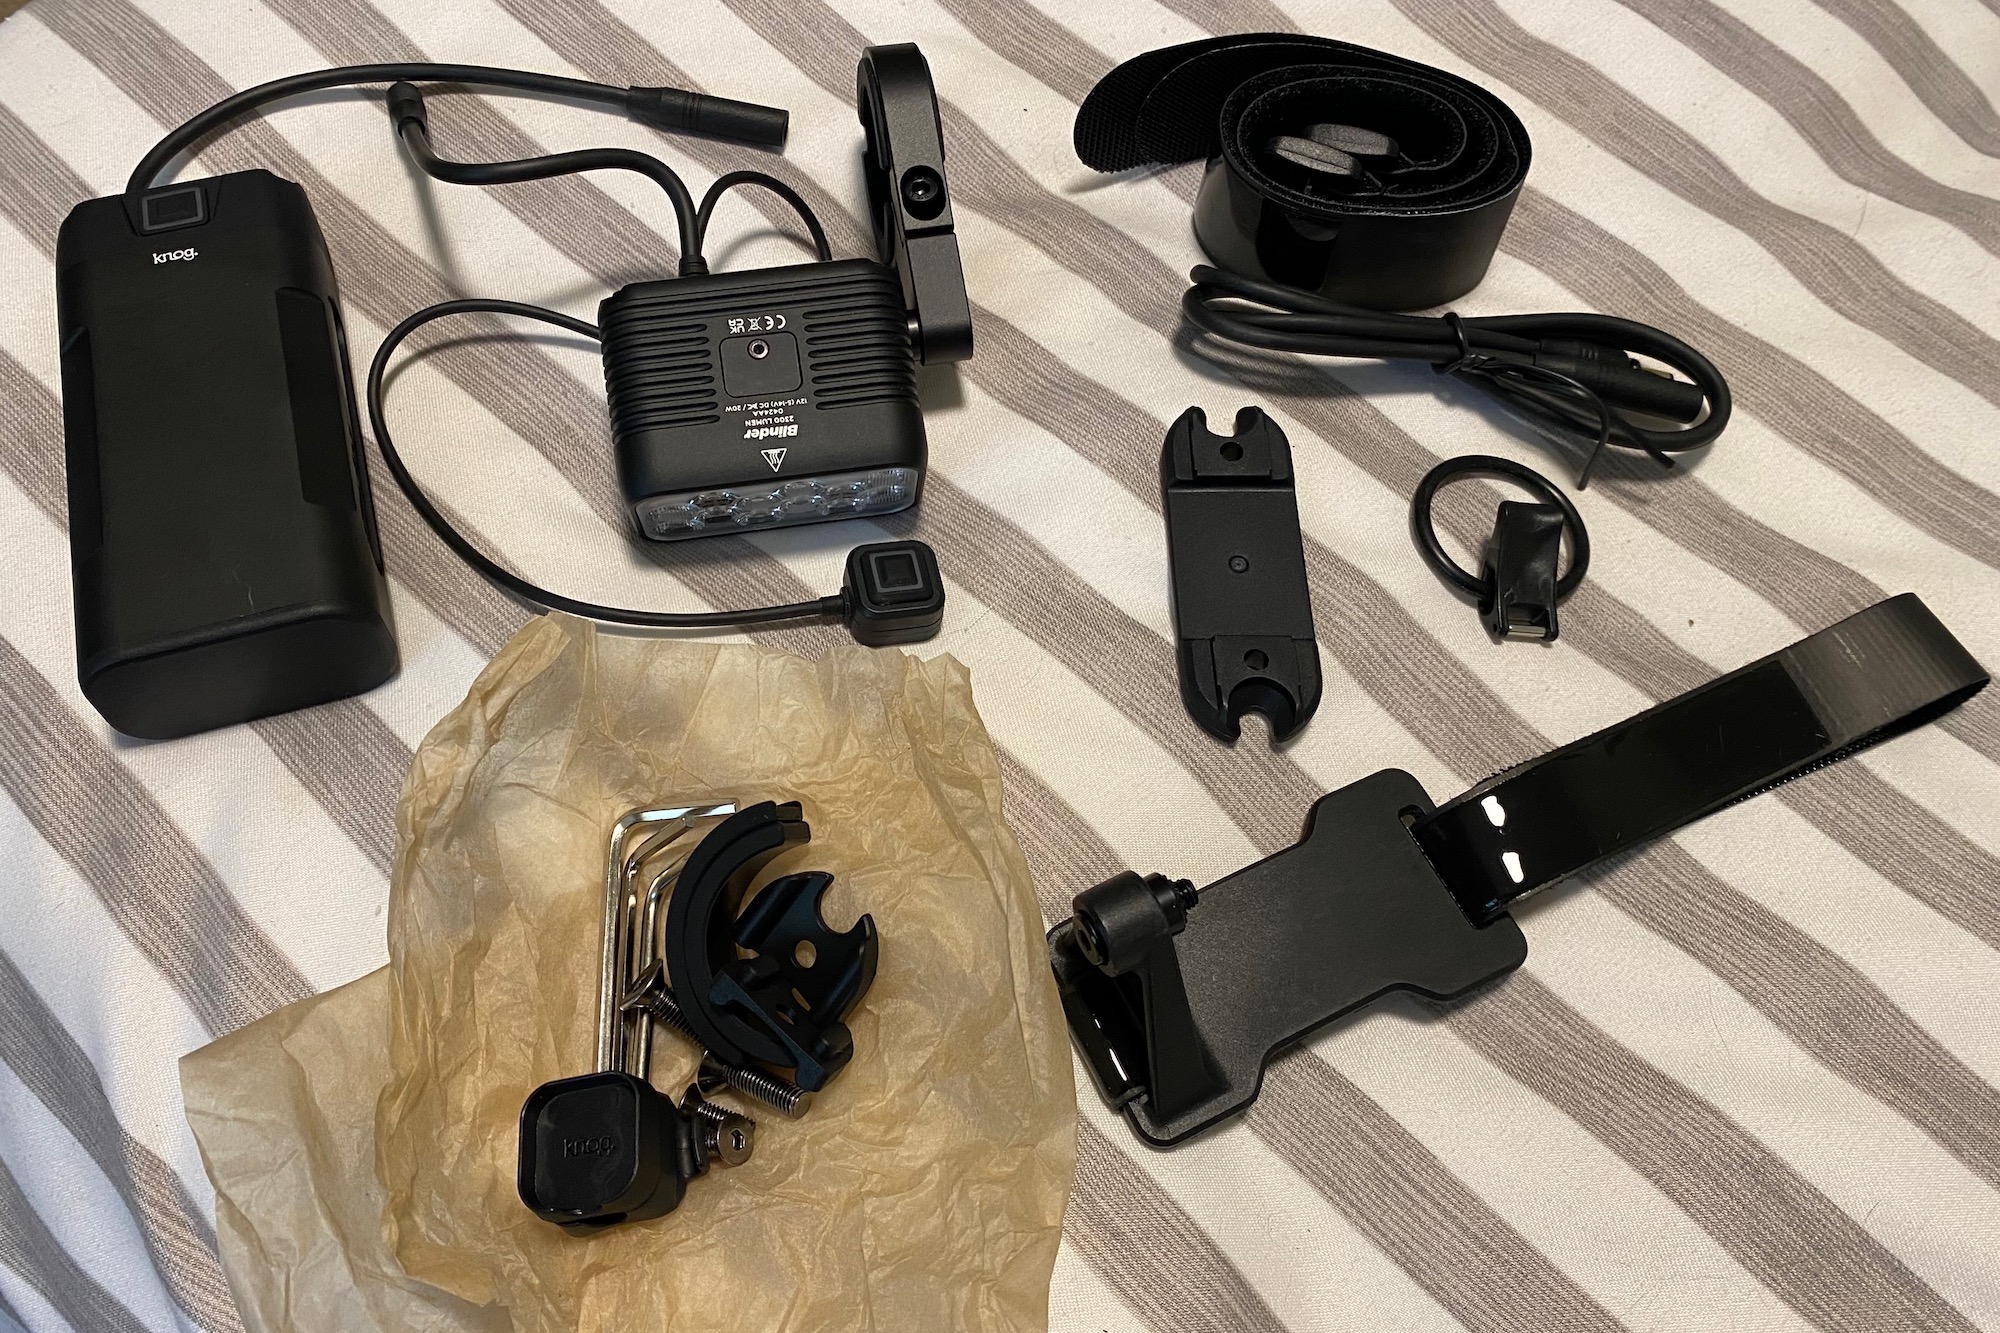
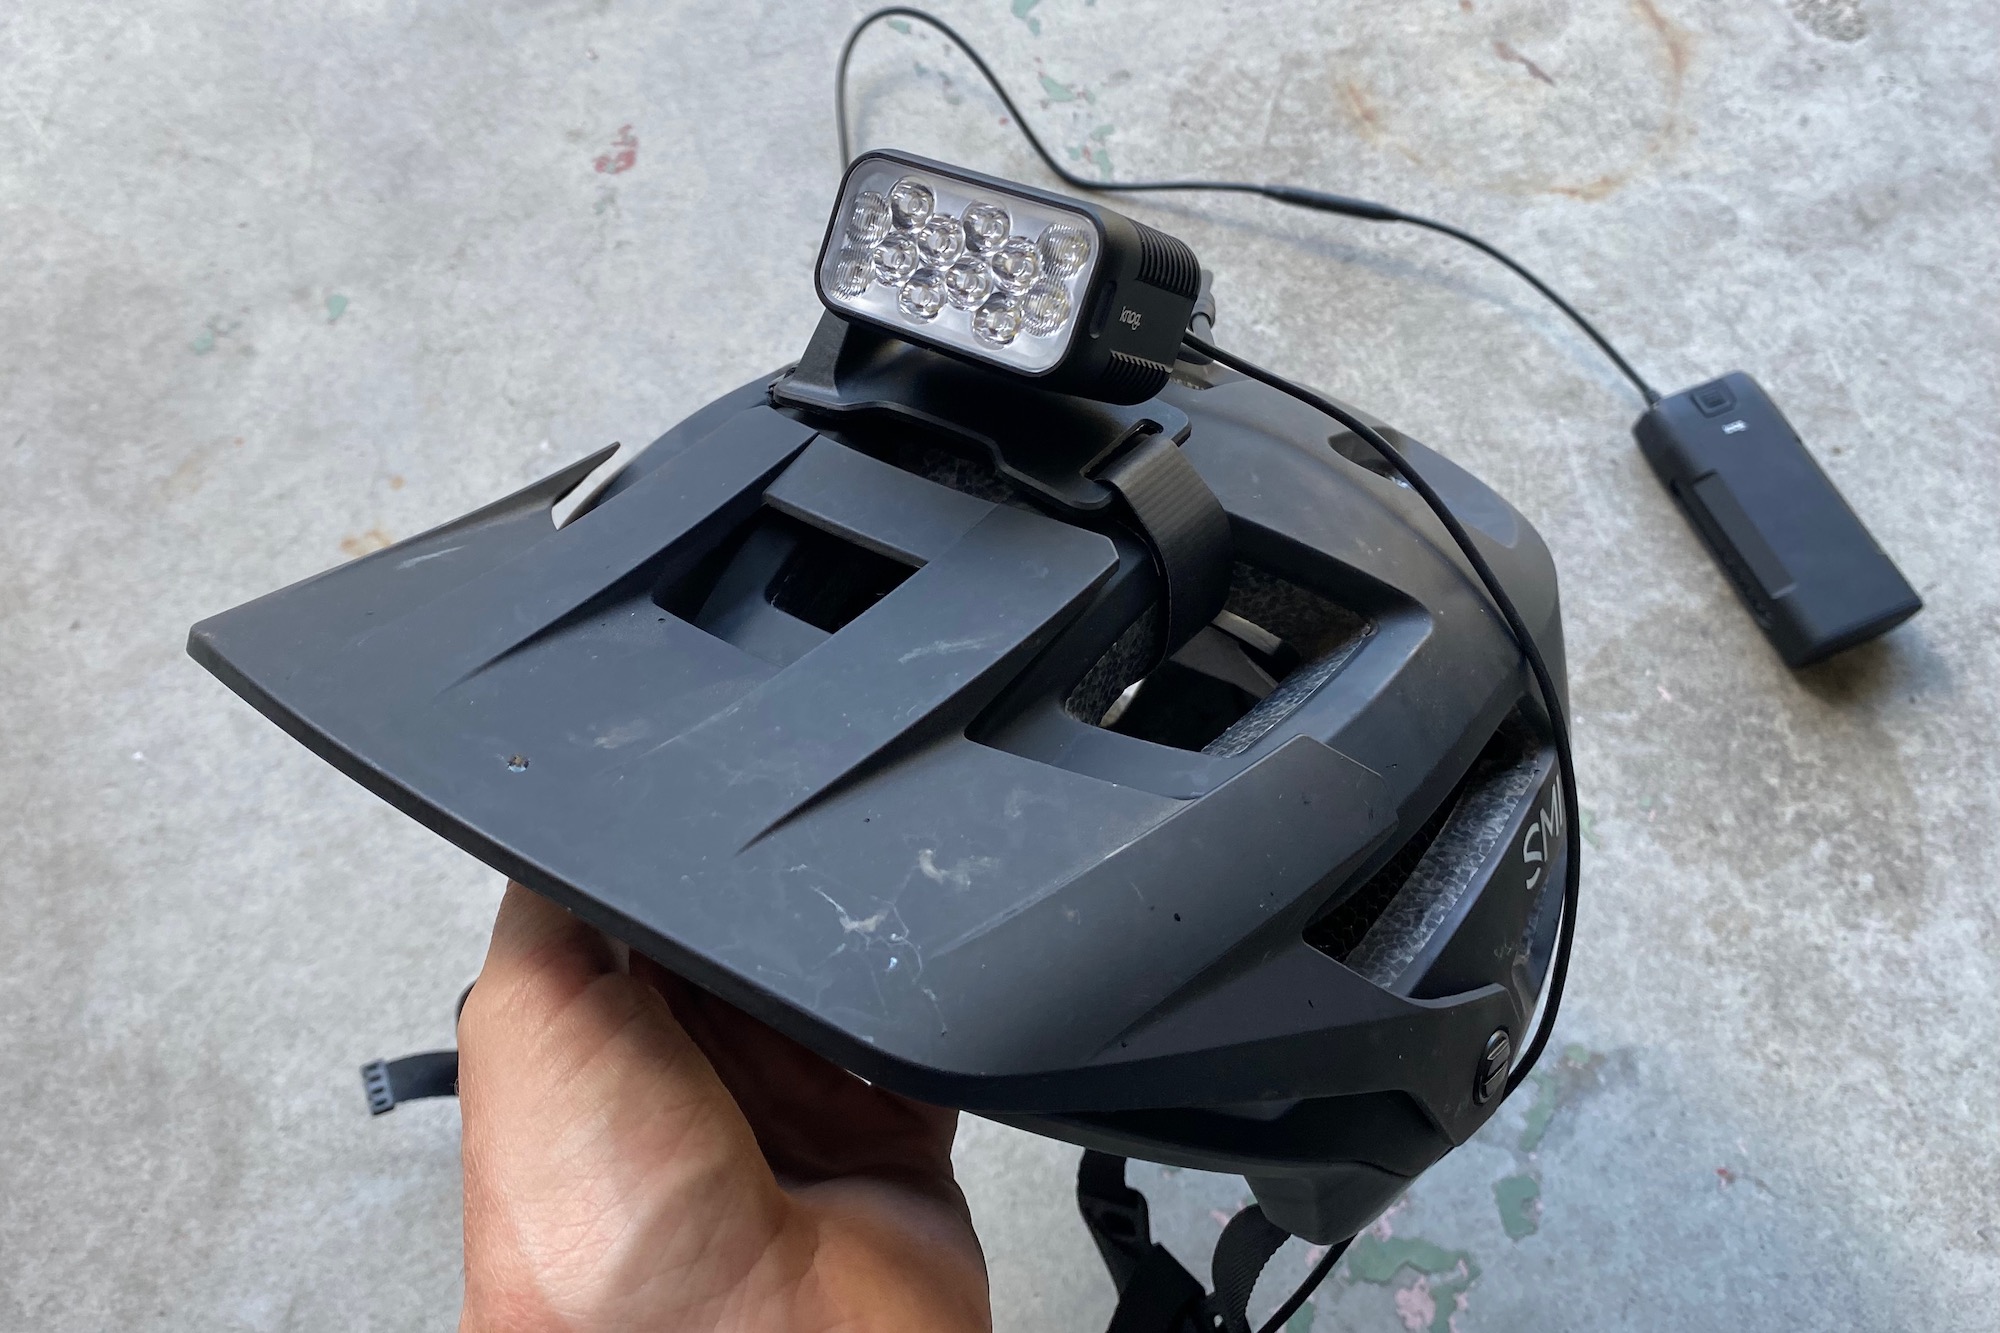
Knog Blinder X 1800
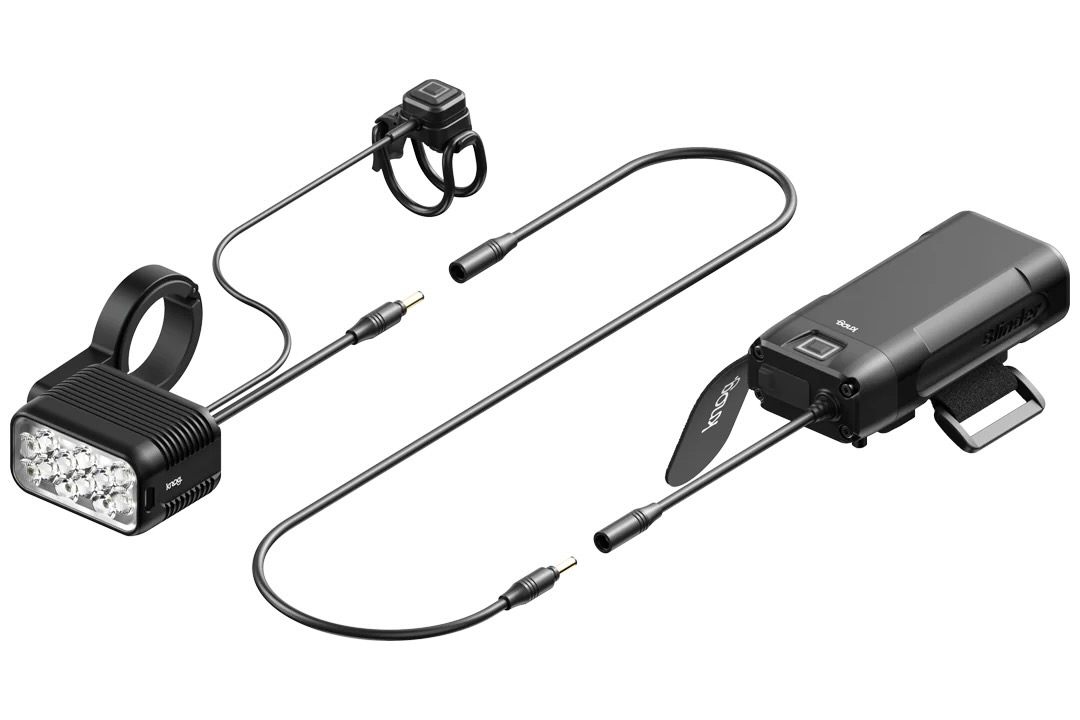
- MSRP: $240
- Type: Handlebar or Helmet
- Lumens (max): 1800
- Battery: 10,000 mAh external
- Burn time: 2.5 hrs. (high), 6.5 hrs. (med), 15 hrs. (low)
- Weight: 153 g (light/handlebar mount), 280 g (battery)
- Mounts: Handlebar, Helmet, Battery
Pros
- Comes with helmet and handlebar mounts
- Handlebar remote (wired)
- Bright
- Great beam throw and spread
- Long run times
Cons
- External battery pack adds complexity
- Heavier system weight
- Helmet mount won't work with all helmets
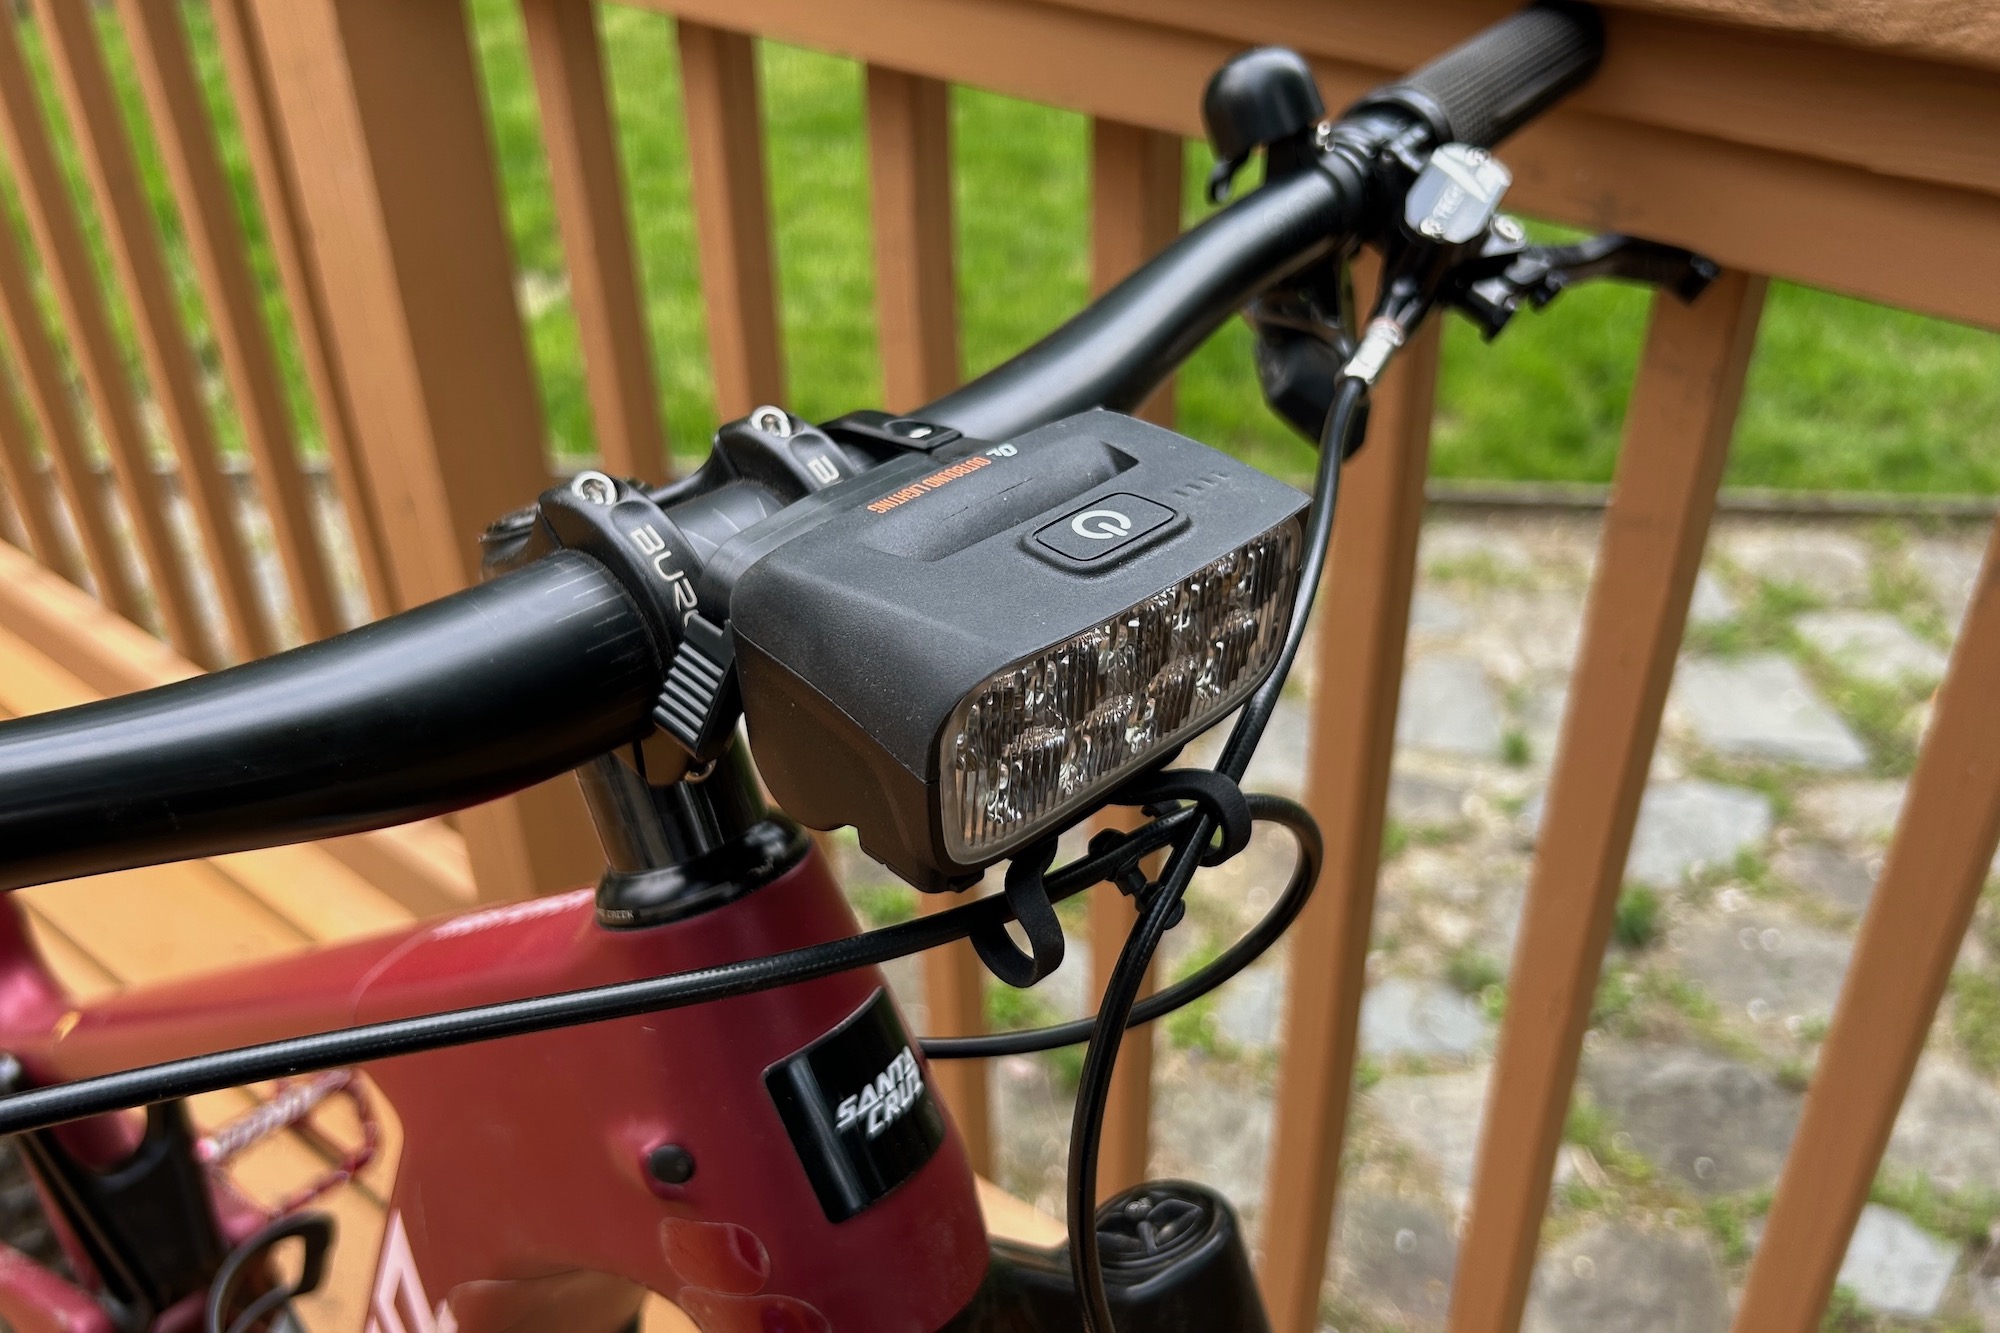
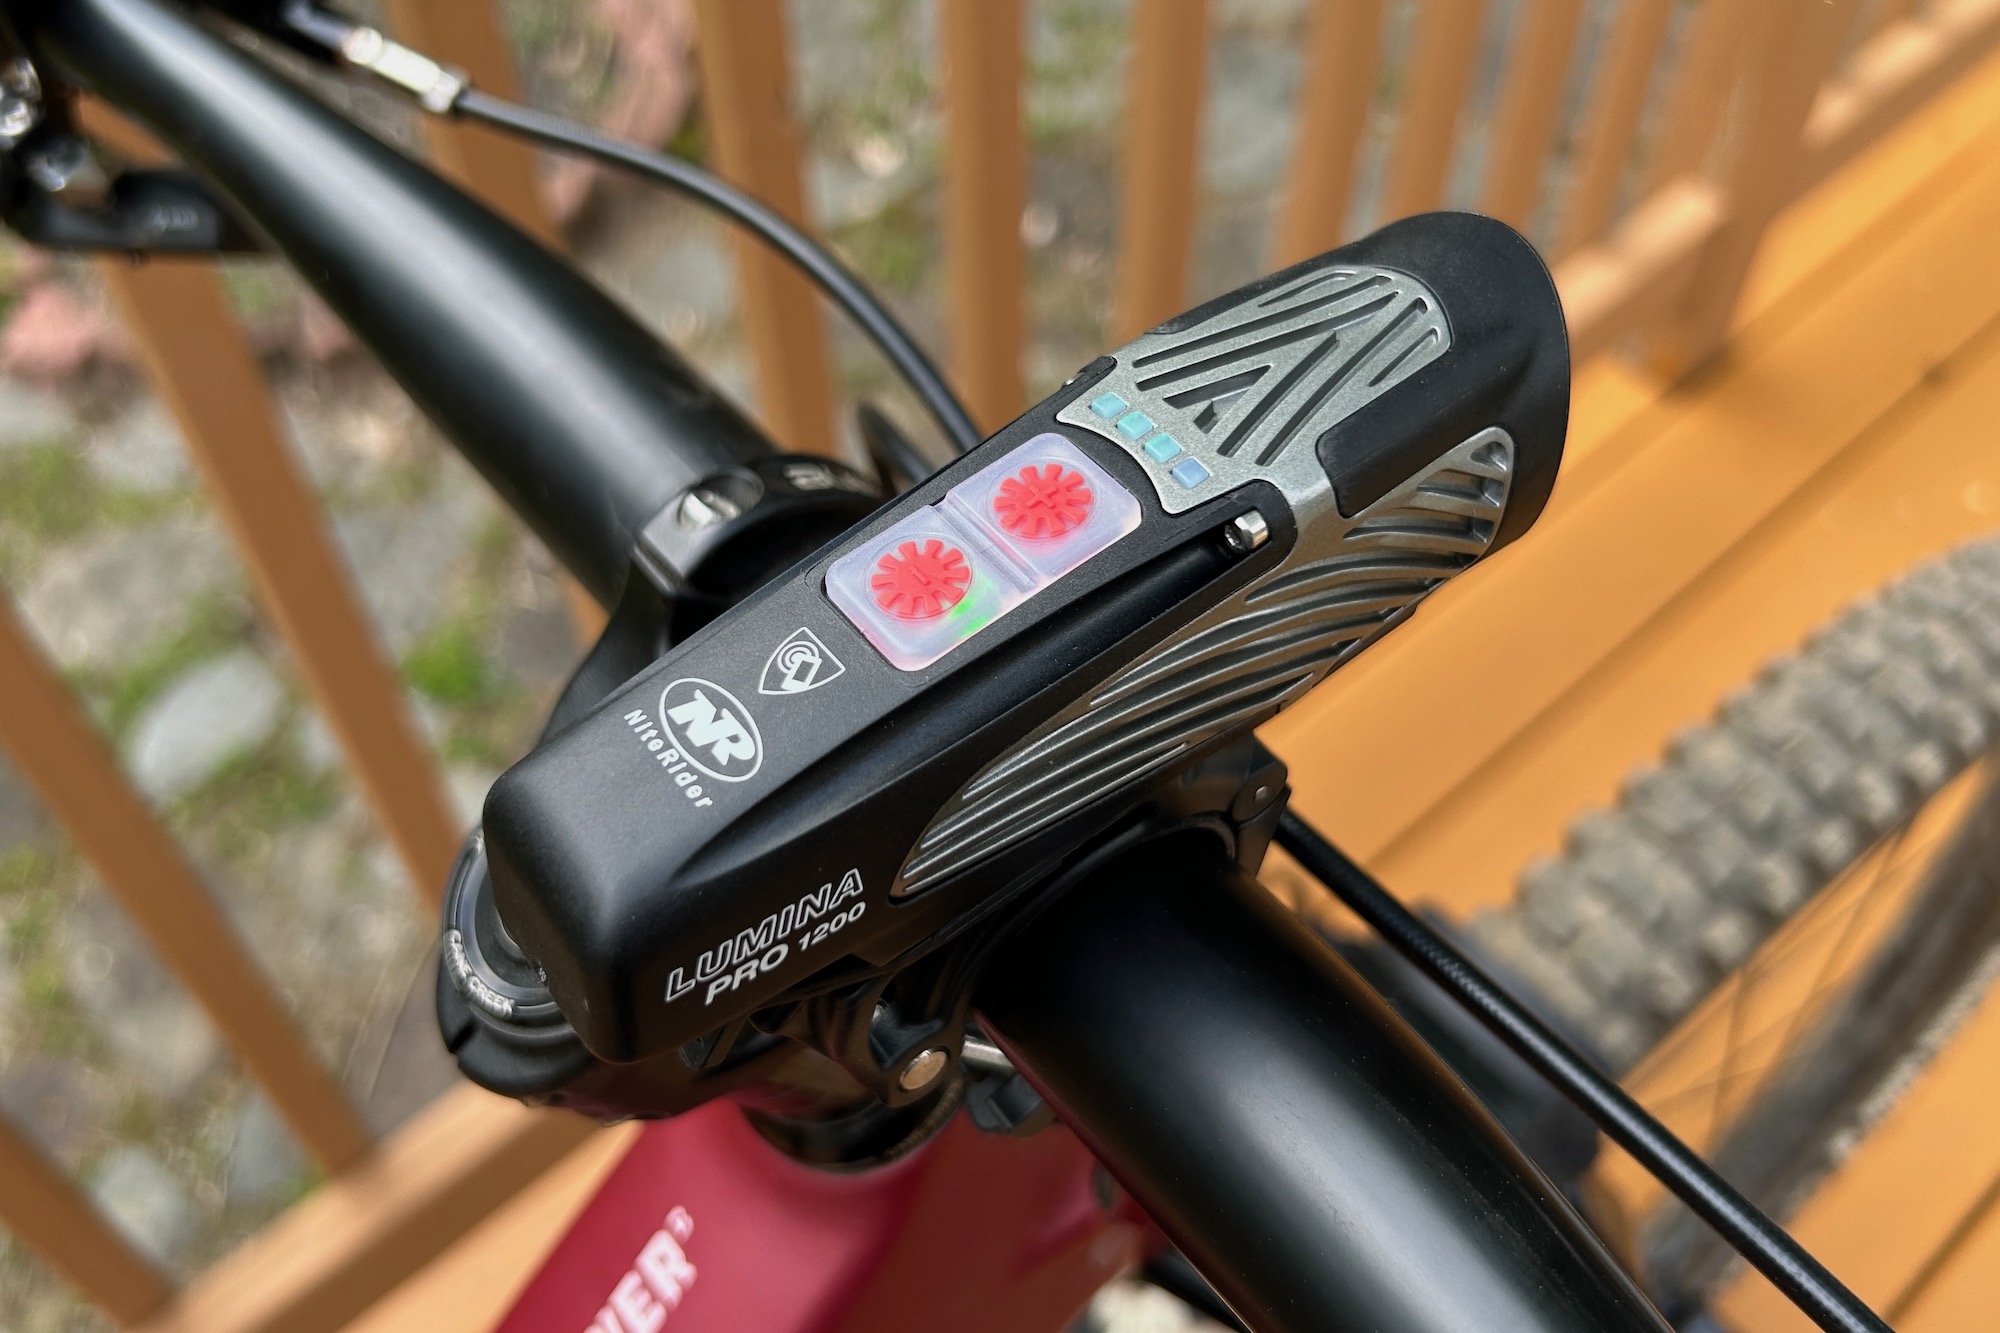
More Options to Light Up the Trails
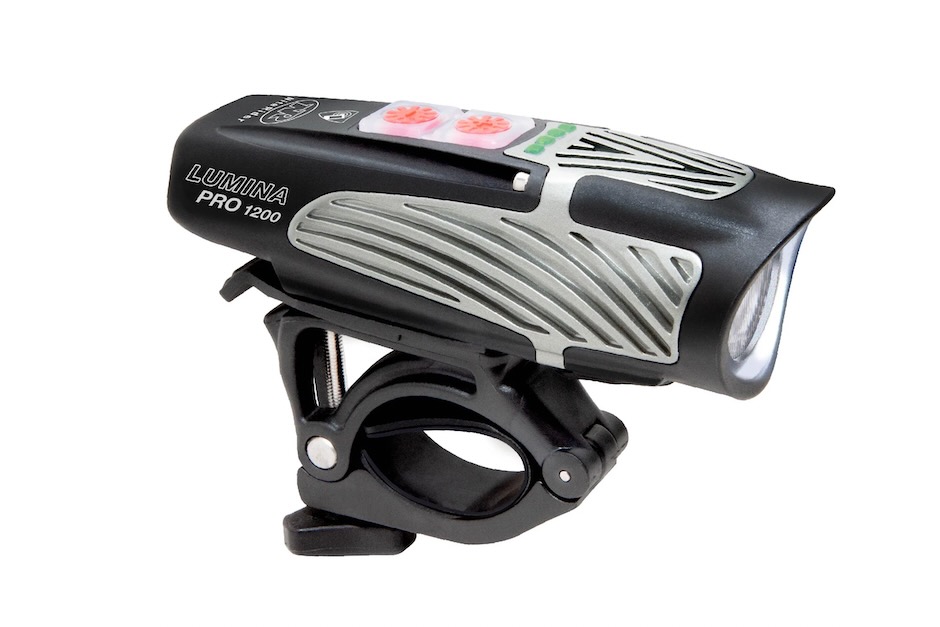
- MSRP: $115
- Type: Helmet or Handlebar
- Lumens (max.) 1200:
- Battery: internal, not-specified
- Burn Time: 55 min. (high), 7 hrs. (low)
- Weight: 193 g
- Mounts (incl.): Handlebar, (Helmet: not incl.)
Pros
- Reasonably priced
- Easy to use
- Stable, tool free, included handlebar mount
- Versatile option for trail riding (enough power for handlebar or helmet mounting)
Cons
- Shorter battery life in Boost Mode
- Slightly heavier on the helmet than other options
- MSRP: $269
- Type: Handlebar or helmet
- Lumens (max): 2000
- Battery: 5,000 mAh
- Burn time: 2 hrs. (high)
- Weight: 79 g (light head), 211 g (battery)
- Mounts: Handlebar, Helmet
Pros
- Excellent value
- Small footprint on handlebars or helmet
- Wireless remote
- Interchangeable lenses
- Customizable through Gloworm app
Cons
- External battery – and associated complexity
- Heavier system weight
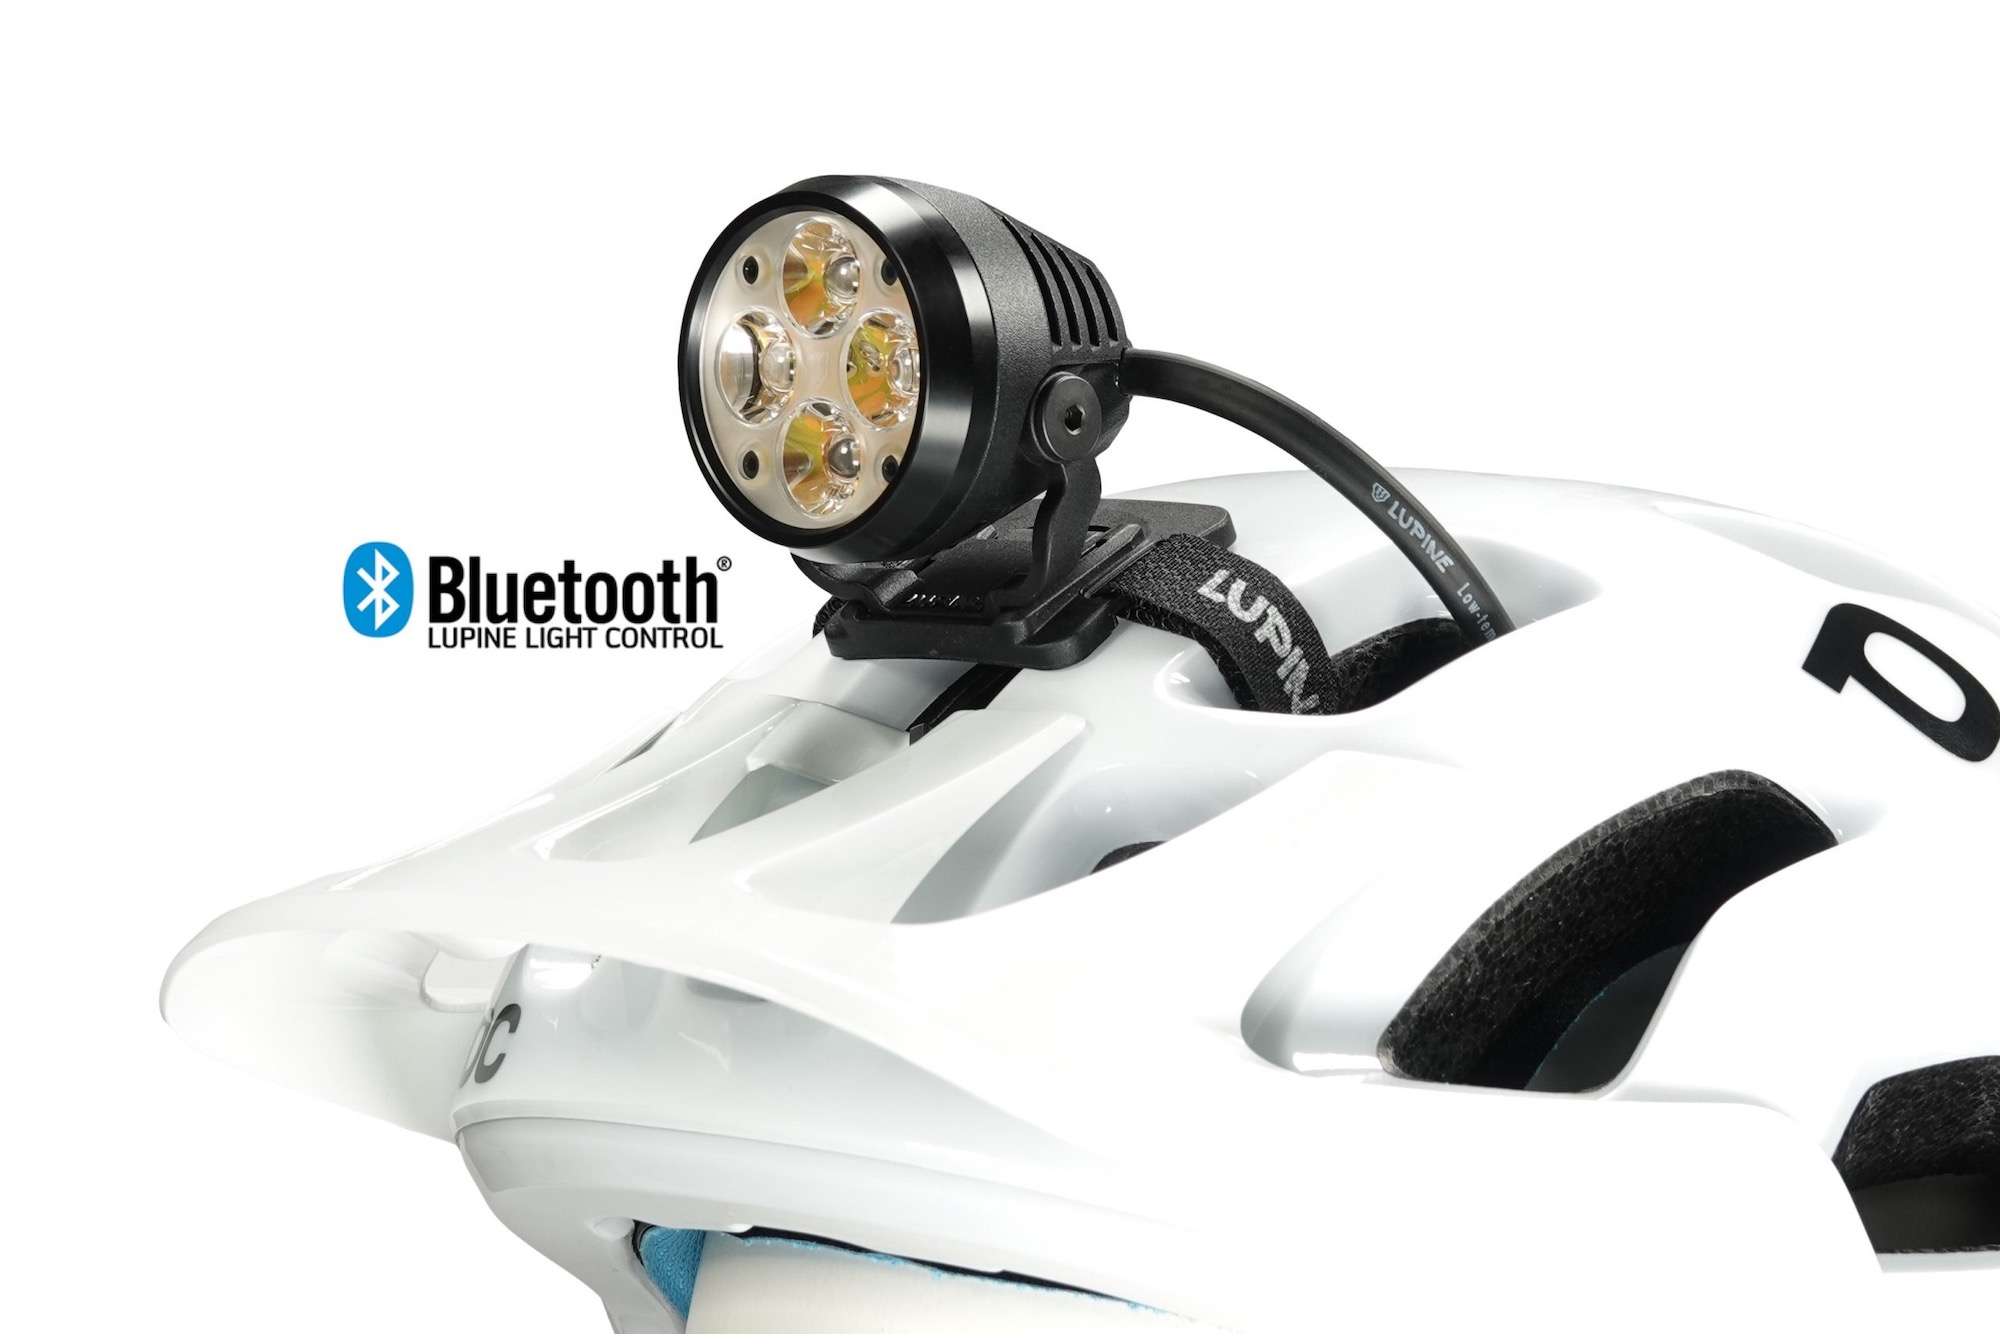
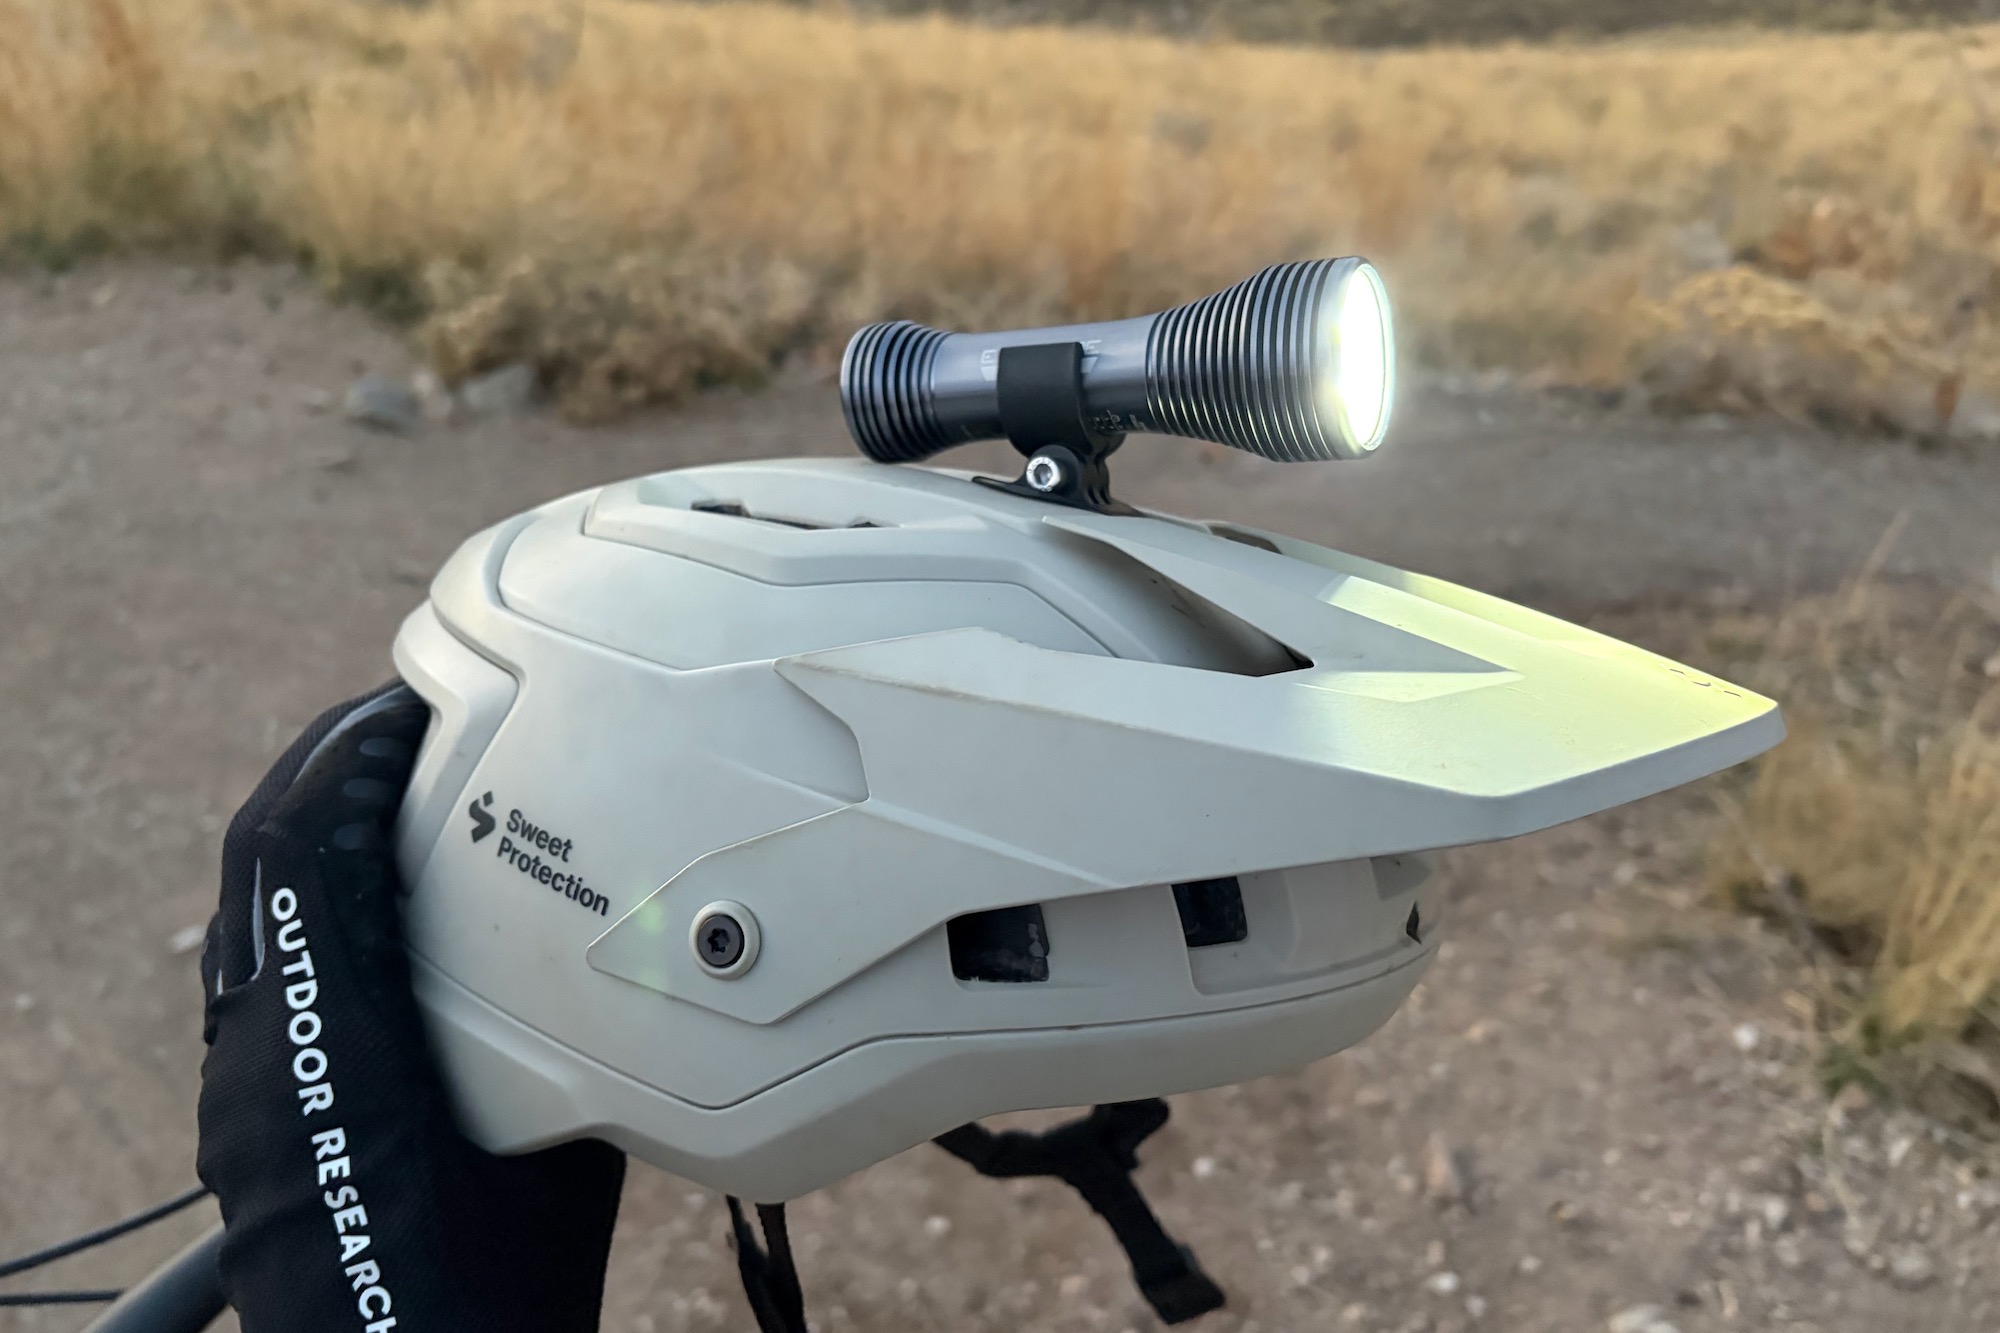
- MSRP: $650 – $775
- Type: Helmet
- Lumens (max): 3600
- Battery: 6900 mAh external (compatible with other sizes)
- Burn time: 1.45 hours on high
- Weight: 122 g (lamp head only)
- Mounts: Helmet (lots of other aftermarket options)
Pros
- Many compatibility options for mounts and batteries
- Bluetooth controllable through an app or remote
- Exceptionally bright
- Great beam throw and spread
Cons
- Very expensive
- External battery adds complexity
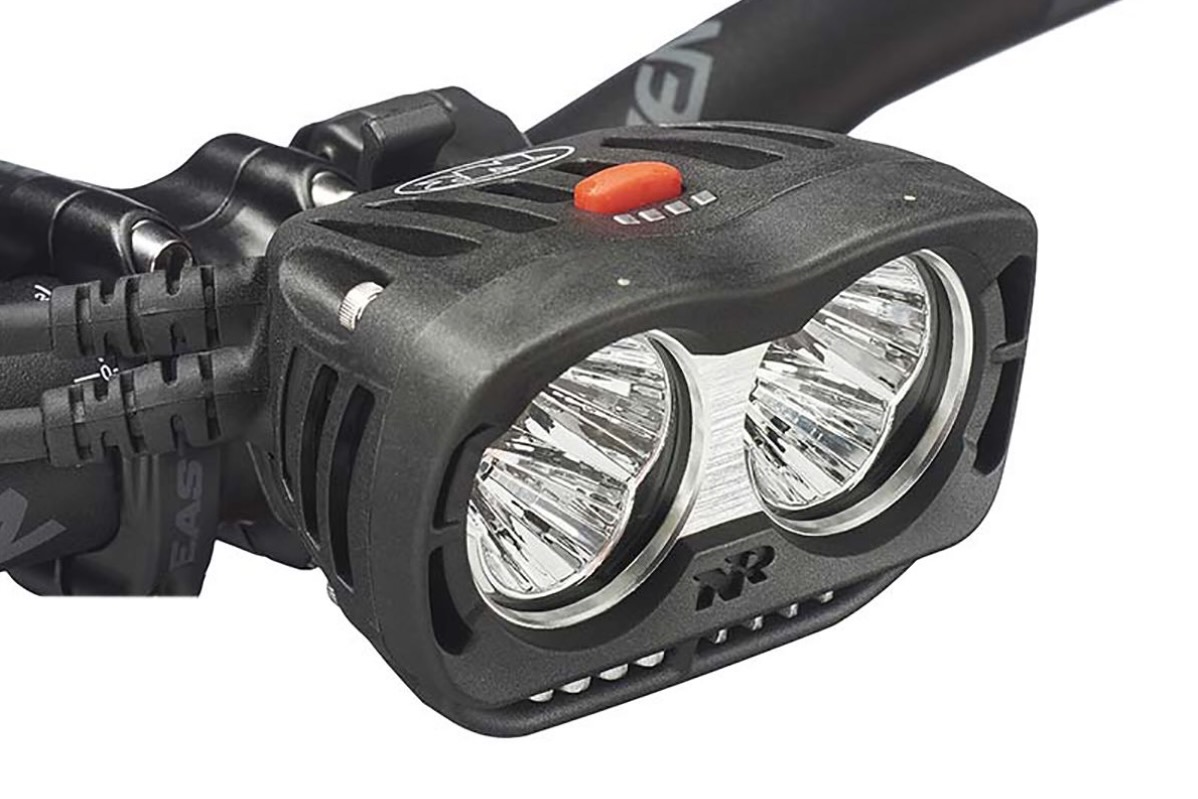
- MSRP: $450
- Type: Handlebar
- Lumens (max): 4200
- Battery: 8-cell Li-Ion
- Burn time: 3 hrs. (high)
- Weight: 3 lbs., 1.6 oz.
- Mounts: Handlebar
Pros
- Blazing 4,200 lumens
- Long burn time at 600 lumens
Cons
- Price
- Heavy system weight
Mountain Bike Lights Comparison Chart
| Model | MSRP | Type | Wired? | Lumens (max) | Battery | Burn time | Weight |
|---|---|---|---|---|---|---|---|
| Exposure Zenith 4 | $305 | Helmet | No | 2360 | 6,000 mAh | 1 to 36 hrs. | 161 g |
| Exposure Six-Pack 15 | $540 | Handlebar | No | 4240 (constant), 6000 (Reflex) | 20,000 mAh | 2 to 36 hrs. | 429 g |
| Outbound Lighting Hangover | $135 | Helmet | No | ~1000 | 3,500 mAh | 1.1 to 6.5 hrs. | 108 g |
| Outbound Lighting Trail Evo | $245 | Handlebar | No | ~2200 | 10,000 mAh | 1.7 to 8.5 hrs | 317 g |
| Gloworm CX Core | $175 | Helmet (or Handlebar) | No | 1750 | 6,000 mAh | 80+ min to 10 hrs. | 182 g (+17 g mount) |
| Fenix BC30 V2.0 | $90 | Handlebar | No | 2200 (burst), 1500 (high) | 2 x 18650 rechargeable Li-ion batteries (not incl.) | 2.3 hrs (high) | 154 g |
| Knog Blinder X 1800 + Blinder X 2300 | $240 and $300 | Helmet or Handlebar | Yes | 1800 or 2300 | 10,000 mAh | 2.5 to 15 hrs. | 433 g |
| Niterider Lumina Pro 1200 | $115 | Helmet or Handlebar | No | 1200 | not specified | 55 min. to 7 hrs. | 193 g |
| Gloworm X2 Adenture | $269 | Helmet or Handlebar | Yes | 2000 | 5,000 mAh | 2 hrs. (high) | 290 g |
| Lupine Wilma R 7 | $650 – $775 | Helmet (other options) | Yes | 3600 | 6,900 mAh (other sizes available) | 1.45 hrs. (high) | 112 g (light head only) |
| Niterider Pro 4200 Enduro | $450 | Handlebar | Yes | 4200 | 8-Cell Li-ion | 3 hrs. (high) | 1,406 g |
How We Tested Mountain Bike Lights
The BikeRumor crew spends its fair share of time in the saddle. From after-work mountain bike laps, night rides, the occasional 24-hour race, and even some adventure racing — we know that good mountain bike lights can be the difference between a great ride and a dimly lit slog. After years of both casual riding and full-tilt pedal mashing, we’ve keyed in on the best mountain bike lights on the market that’ll see you through the night. And to be clear, there are plenty of other great lights on the market; the lights listed here are our recommendations among the models we’ve tried.
During our years of testing, we’ve learned that a light for charging downhill might not be the same as the best for all-night cross-country travel, so we carefully weighed each light against one another with these use profiles in mind. We also aimed to assess the real brass tack performance metrics such as brightness, burn time, and weight. Both battery and LED technologies are constantly improving, and MTB lights are only getting better.
Our Expert Testers
GearJunkie contributors Chelsey and Jason Magness originally kicked off this guide back in the winter of 2021 by testing a wide selection of mountain bike lights. As professional adventure racers, the Magnesses have spent countless hours riding at night and rely on bike lights to get them through the dark hours of races safely and efficiently.
As such, they have a thorough understanding of what separates the best mountain bike lights from the rest. Additionally, they leaned on their friends and fellow racers for testing and their opinions on the lights in this guide.
Adding to this guide is BikeRumor contributor Paul Clauss. Paul is a mechanical engineer, avid mountain biker, coach, and trail builder who lives in northern Vermont. When the days get shorter, Paul keeps riding into the darkness on his trail and fat bikes, and he has relied on mountain bike lights to brighten the way for many years.
Given his engineering background, Paul enjoys digging into the details of design as it relates to functionality and the user experience. In addition to mountain bike lights, he has contributed his knowledge and expertise to numerous other review categories, including the best bike pumps, flat pedal mountain bike shoes, and the flat pedals that go along with them.
Additionally, BikeRumor Editor Jeremy Benson has added some of his experience and favorite models to our list. Benson is constantly testing and reviewing products of all kinds, and frequently uses mountain bike lights when the days are shorter.
Our Testing Process
To test the best mountain bike lights, we first assess the current market through extensive online research to identify the latest, greatest, and most highly regarded models on the market. We then gather up our choices and put them through rigorous testing to see how they fare in the real world.
The first step is unboxing each product as it arrives, taking stock of all the included parts, and examining the build quality. We then weigh each model for consistency and comparison to the manufacturer’s specifications. After charging the lights, it’s time to ride, so we mount each bike light to our bikes using the included mounts to analyze the ease of installation on handlebars and/or helmets.
Once mounted and adjusted, we take each model out for a number of night rides to get a feel for each model’s brightness, beam throw, beam spread, brightness settings, controls, stability, and overall ease of use. When possible, we switch between models to get a more direct side-by-side comparison. Additionally, we use each brand’s associated app (when applicable) to make adjustments and customizations to light settings.
After testing each model for months, we compare notes and determine which models are our favorites and those that excel for specific reasons compared to the rest. Many of the lights here have been used by our staff for years of tough riding and are still going strong today. As we test new models, we’ll update this list to reflect the current best-in-class in mountain bike lights.
Buyer’s Guide: How to Choose the Best Mountain Bike Lights
When the time comes to select a mountain biking lighting system, there are several key factors to consider. In this how-to-choose guide, we’ll cover the major variables that will help inform your decision.
Types of Riding
Mountain bike lights vary as widely as the types of riding that people do, so you’ll want to be sure to get lights that suit your riding style. This applies to the brightness of the lights, but also to the size of the battery and the form factor of the lights.
The faster you ride and the more technical your trails, the brighter and more stable you’ll want your lights to be. Low to moderate speeds and smoother surfaces typically don’t demand as much brightness, but you’ll still need your lights to be bright enough. Regardless, we always recommend riding with lights on both your helmet and handlebars, as the combination provides the best illumination in the dark.
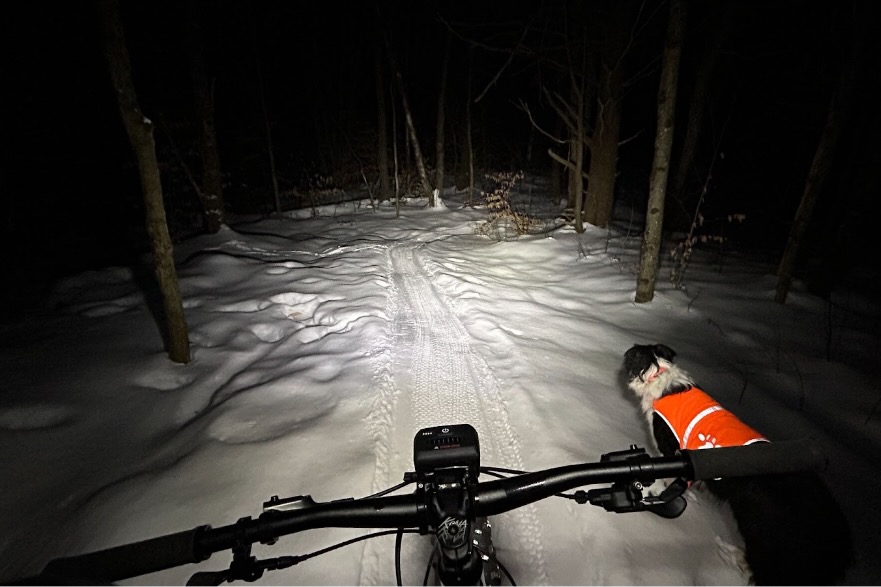
You’ll also want to consider ride duration, as that will play a role in determining which light will work best for your needs. If you’re like most people and you only ride for a couple of hours at a time, just about any light will do. If you’re hardcore and need your lights to last through the night, then you’ll want to find something that can run for many hours on end. Additionally, if you’re riding primarily in the winter over snow, your lights don’t need to be quite as bright since the white surface is more easily illuminated.
Helmet vs. Handlebar Mounts
There are two places where mountain bike lights are designed to be mounted: on your handlebars and on your helmet. As mentioned above, a proper setup for riding at night includes lights mounted in both locations. You can get away with one or the other, but for the best visibility, having both is ideal. Many lights will come with one mounting system or the other — sometimes both — or you can often purchase an aftermarket mount to switch locations.
Handlebar-mounted lights always point in the general direction you’re traveling, but will move with the handlebars as you steer, meaning they may not always be pointed directly at what you’re looking at. Many mountain bike lights mount to the handlebar using a hinged clamp that is tightened with an allen key — these are usually the most secure and stable. Typically, these types of mounts will come with shims to fit on both 31.8 mm and 35 mm handlebars.
Alternatively, some lighter-weight lights come with a stretchy rubber strap as a mount, and these are tool-free and very easy to use for frequent installation/removal, but they aren’t quite as secure as the clamp mounts. Generally, you want to mount the light as close to the stem as possible so the light is centered on your bar at the steering axis.
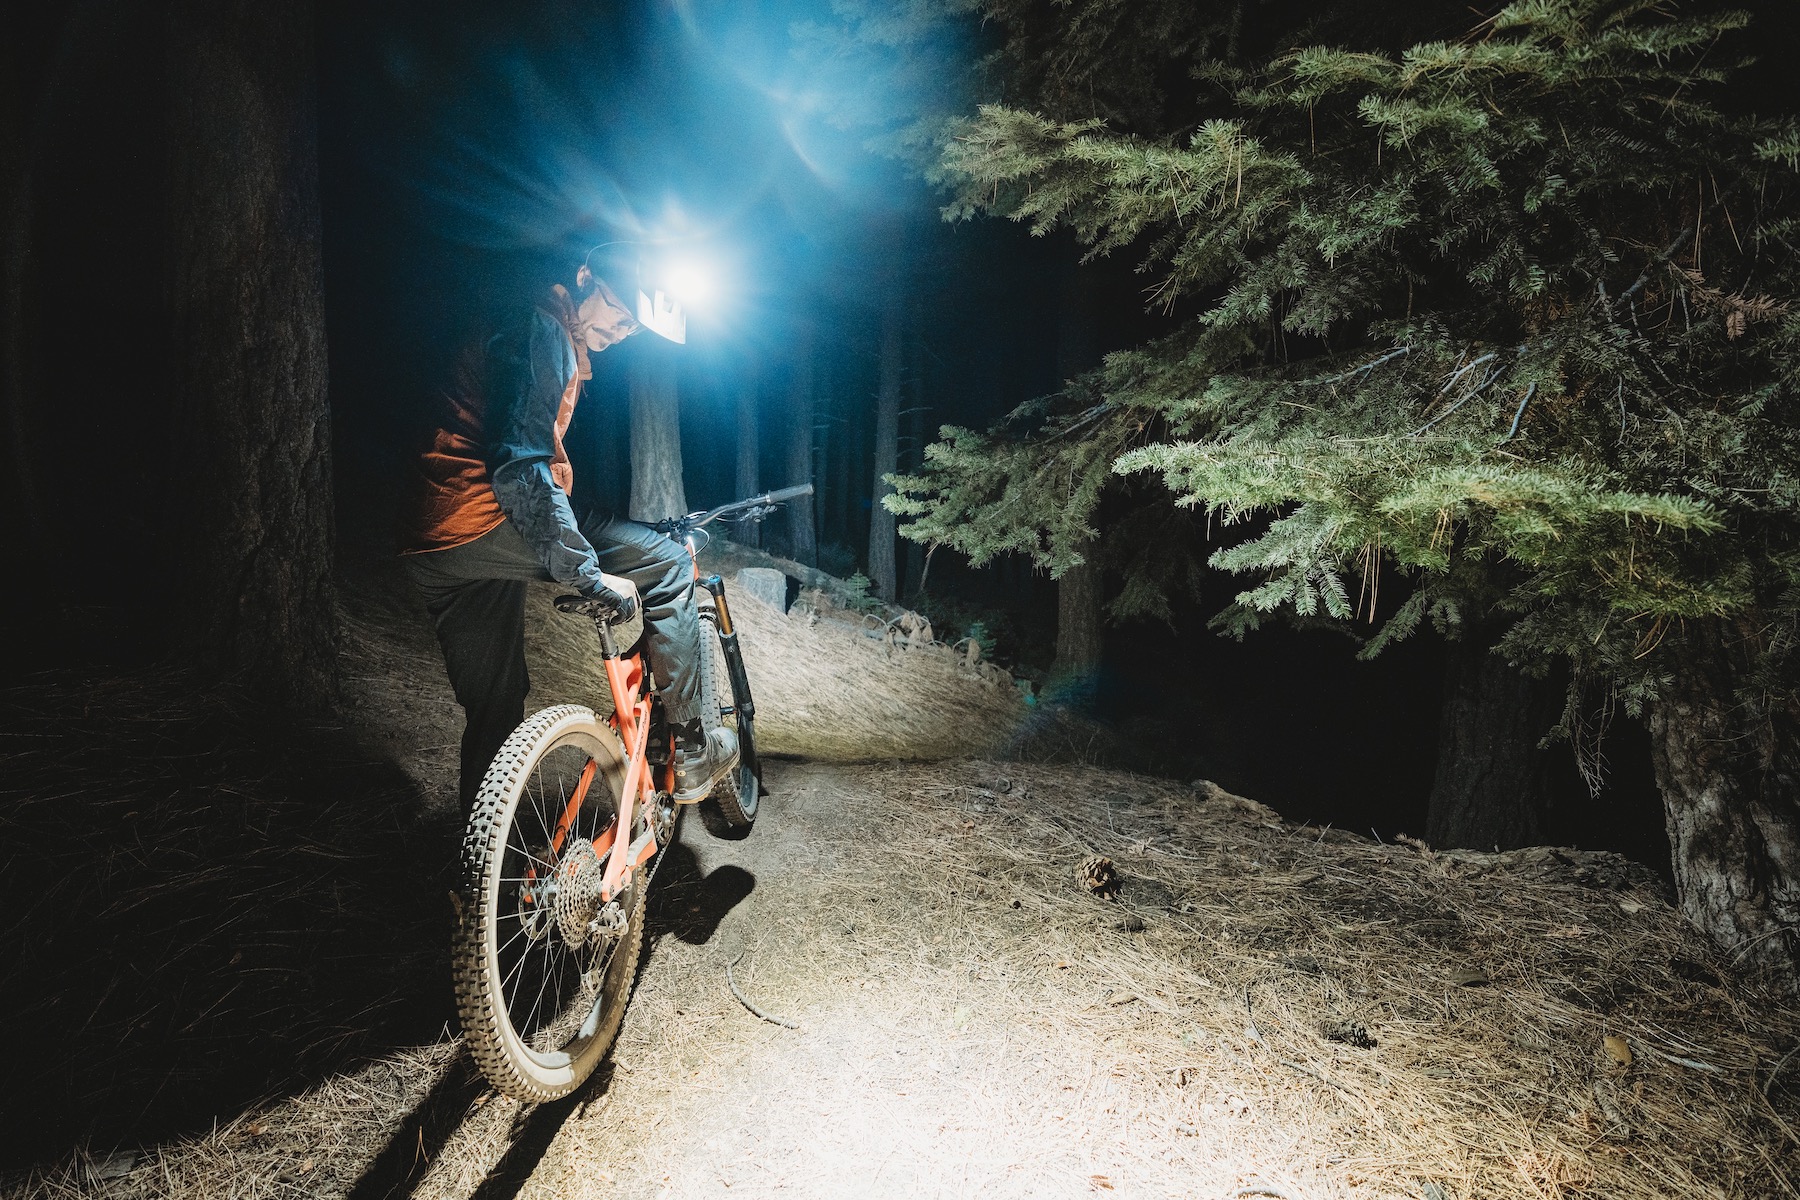
Helmet-mounted lights are excellent because they are attached to your head, so the beam moves in relation to where your head is pointed and you are looking. Additionally, the light source is higher up, so you can cast light over and around obstacles more easily. As such, we feel they are incredibly important to have, especially on twisty, chunky, or undulating terrain.
Many lights come with helmet mounts, which are often a Velcro strap system that gets threaded through the vent holes on the top of your helmet. Others may come with a stick-on or clip-on mount or an adapter that attaches to an action camera mount (like a GoPro).
The only real drawback to helmet-mounted lights is that the mounts can sometimes be a bit less stable — particularly the strap variety — so they can bounce around a bit while riding. The weight of a light on your head can also take some getting used to and may require tightening your helmet more than usual to keep it steady. That said, most helmet-mount lights weigh around 200 grams or less, so they aren’t too heavy on the head.
Brightness and Lumens
The brightness of a light is typically measured in lumens. While mountain biking in low light, you’ll definitely want a bright light that adequately illuminates the terrain ahead. Check out this podcast we did with Outbound Lighting if you’re interested in learning more.
If you plan to ride in full darkness, you’ll want to use lights with a bare minimum of 500 lumens on your handlebars and 500 lumens on your helmet. This will get you by for lower speed, less aggressive riding scenarios, but realistically, we recommend getting lights that put out at least 1,000 lumens or more for doing any proper night riding. The brighter your lights, the more clearly you’ll be able to see, and the faster and more safely you’ll be able to navigate mountain bike trails in the darkness.
Light technology has advanced greatly in recent years, and mountain bike lights are now smaller and brighter than ever. Many of these compact marvels are as bright or brighter than car headlights, with some boasting 4000+ lumens that you can attach to your handlebar.
Honestly, lights that bright are almost overkill, but they can be nice to have from time to time. We’ve found that the sweet spot for most riding is in the neighborhood of 2000 lumens. This is adequately bright for virtually any speed or riding scenario without being excessive.
That said, most lights have numerous brightness settings, so you can turn them down to optimize them to your liking, the speeds you’re traveling, or the terrain at hand. While it is often ideal to have your lights at full brightness for descents, turning them down for slower speeds on climbs or mellower terrain is a great way to conserve battery.
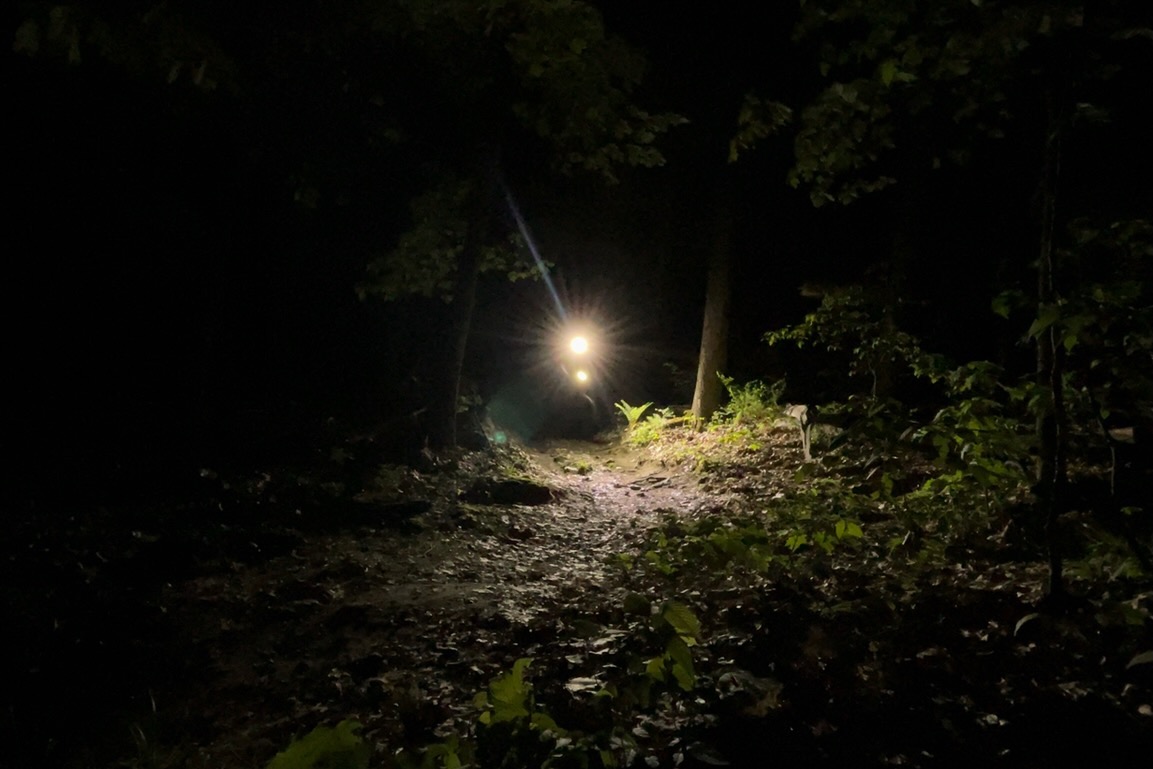
The brightest light we tested is the Exposure Six Pack 15, which tops out at 6000 lumens for short periods in its Reflex 2.0 mode and can put out a continuous 4240 lumens in its high setting. The Lupine Lights Wilma R 7 has a max output of 3600 lumens, and the Niterider Pro 4200 Enduro can put out a whopping 4200 lumens. These lights can illuminate the forest like it’s daytime.
Beam Pattern
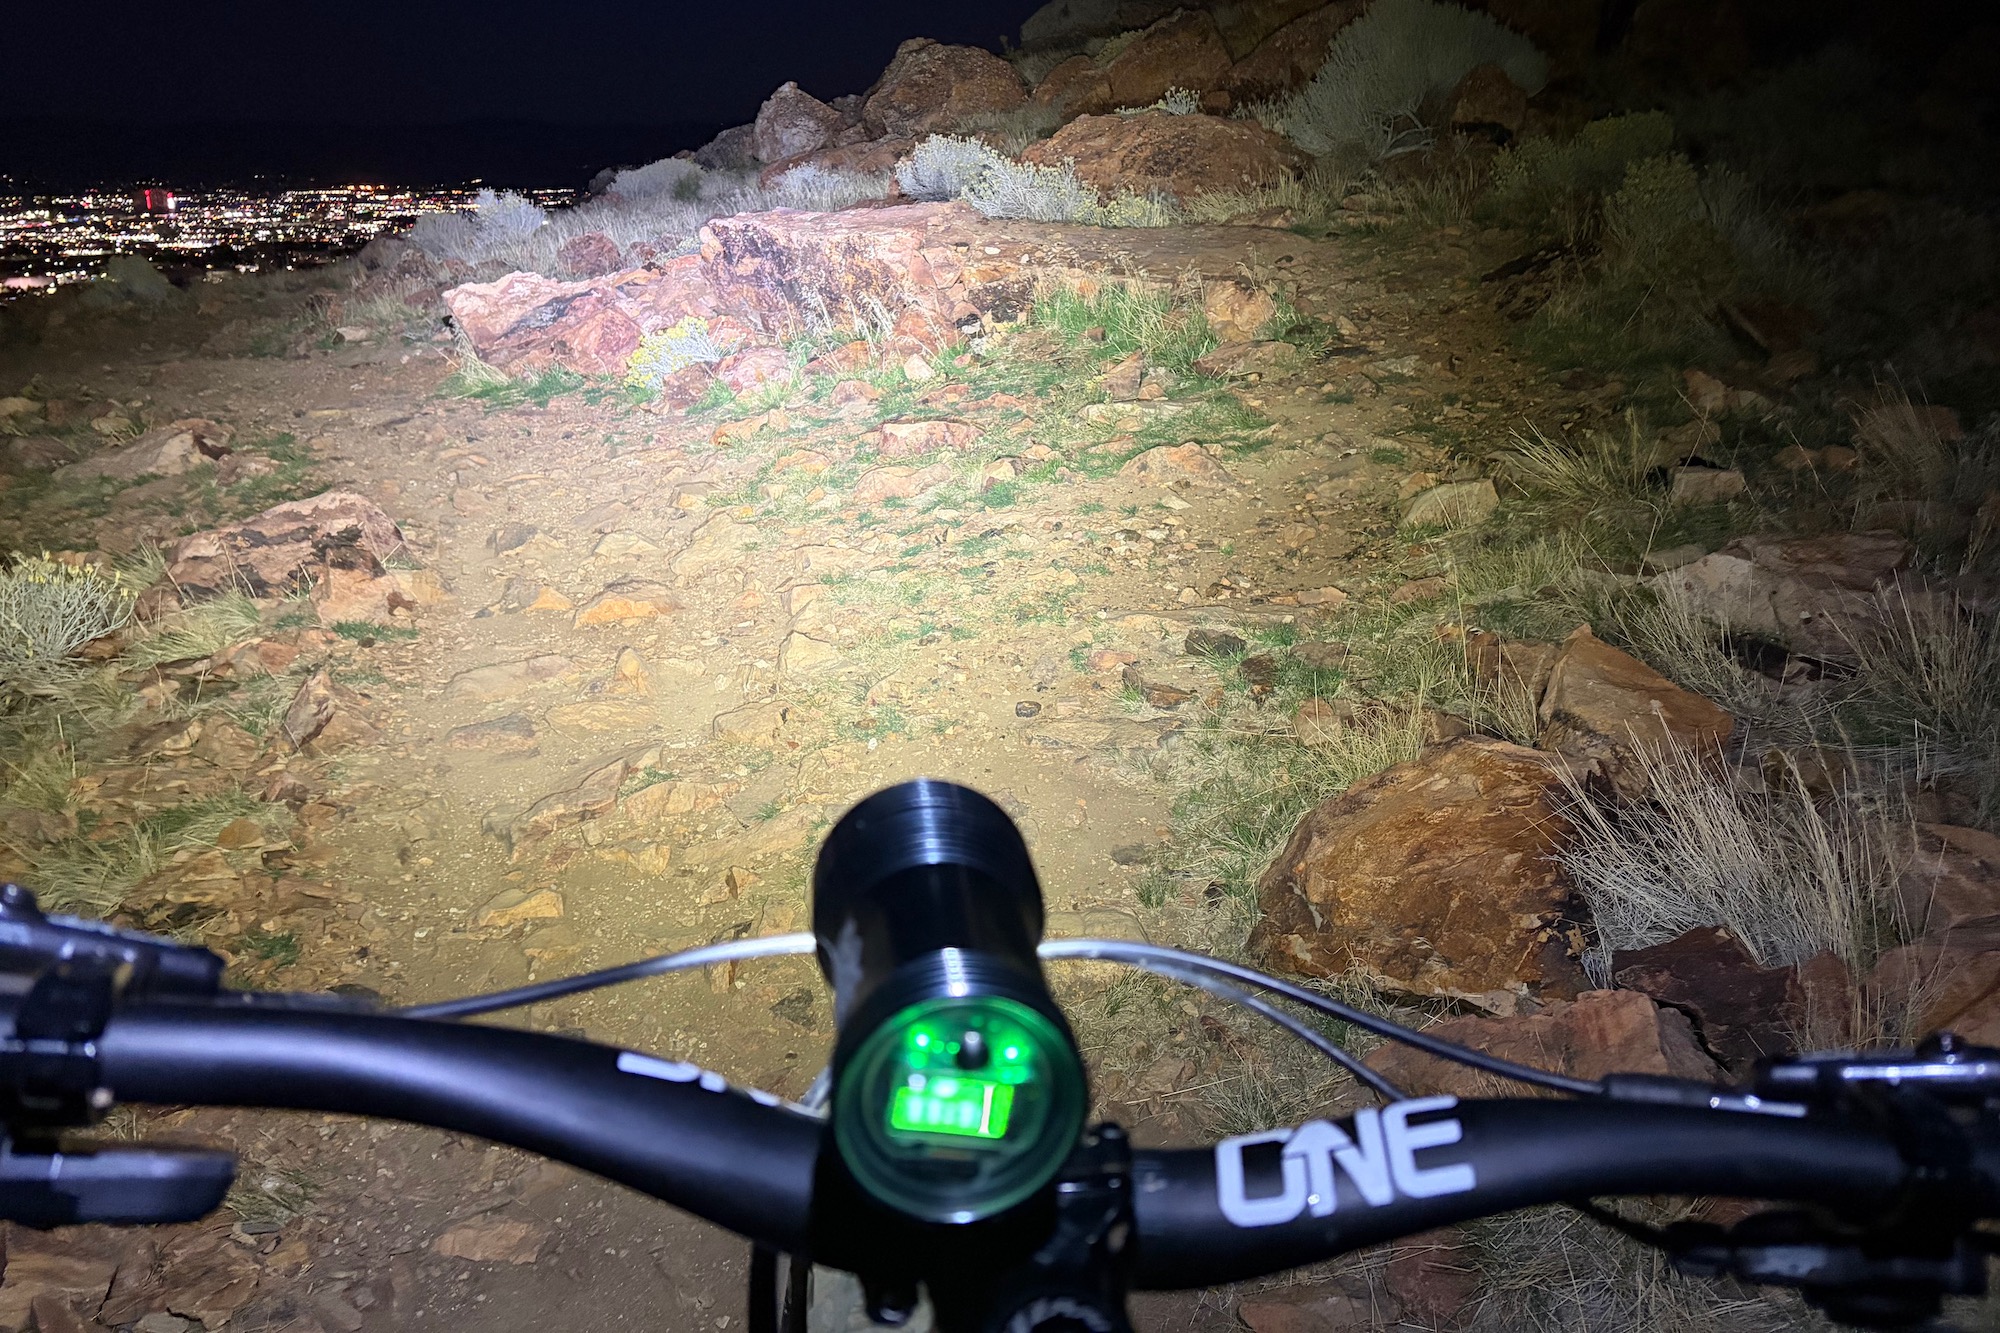
It’s important to understand that lumens are not the only factor that determines a light’s performance. Beam pattern and beam throw will also play a role in how well you can see while riding. While lumens are important, a super-bright light only fulfills its potential if the beam pattern is effective.
A light’s beam pattern refers to how it disperses light across the trail. Our favorite beam patterns fill the entire trail with light and focus the brightness where you need it most.
Some lights have more of a focused, spotlight type of beam (typical of helmet lights), while others are more of a flood light (more typical of handlebar lights). The best lights manage to combine the two for a balanced beam pattern. Many lights are actually made of multiple lights with varying beam characteristics.
For example, the Knog Blinder X models have 12 LEDs. The center of the lens is clear for a longer throw, while the side of the lens is textured to spread the light out toward the sides. Taking it a step further, the Gloworm X2 Adventure comes with interchangeable lenses that allow the user to choose the beam pattern that best suits their needs or preferences. Similarly, the Gloworm CX Core can be purchased with a handlebar mount that comes with an interchangeable optic that widens its beam.
Similarly, you want the beam to extend a good distance ahead of you so you can see what’s coming. This is more important at faster speeds, as the faster you go, the more important it is to see farther down the trail. Generally speaking, the brighter the light, the farther the light can shine down the trail.
Ride Duration and Burn Time
Are you looking for something to brighten up your trails for an all-nighter or 24-hour race? Or are you just looking for a light that you can use once or twice a week on a 2-hour ride? Your answers to these questions will help find a light that best suits your needs.
Burn time is the total length of time a bike light can stay on before its battery is depleted. This is a function of a light’s battery size and output level. The brighter or more powerful a light is, the more battery power it uses. The larger the storage capacity of a battery, the longer it will last.
Like lights, battery technology has advanced rapidly in recent years, and batteries have become more compact and lighter than ever. And, since light technology has also advanced, they are brighter and use power more efficiently.
Still, it can be difficult to balance the power demands of bright lights with the weight and size of batteries to create lights that are bright, compact, and lightweight. Regardless, we’re way better off than we were a decade ago. Some bike light batteries used to be the size and weight of full water bottles.
Batteries vary in size, which is usually listed in Milliamp Hours (mAh). The higher the number, the more power it can store. You’ll also notice that brighter lights tend to have larger batteries, and this is because a more powerful light will burn energy more quickly. It’s also important to note that batteries are one of the heaviest parts of bike lights, so that’s something to keep in mind if weight is a consideration.
A good example here is the Exposure Six-Pack 15, which has a 20,000 mAh battery — the largest of all the models we tested. This internal battery gives the Six-Pack a larger overall size and its heavier 404-gram weight — even though that’s still impressively light for what it is.
The majority of lights we tested can run on their highest setting for around 1.5 to 2 hours. Running them at lower settings or switching back and forth depending on your speed or the terrain can extend the battery life significantly. Since most of us are going out for shorter-length night rides, the burn times of most lights are more than adequate.
If you’re a 24-hour racer, you’ll need to search out the longest-lasting light — like the super heavy Niterider Pro 4200 Enduro — and run it on a lower output setting to make it through the night. Or, be prepared to swap batteries or recharge at some point during the night
Internal vs. External Batteries
When choosing mountain bike lights, there are self-contained units with internal batteries and those that have external battery packs. Both work well, but generally speaking, the all-in-one units are a bit more straightforward and easier to use. That said, internal batteries are often, but not always, smaller, which can result in shorter burn times.
Lights with internal batteries are sometimes a bit heavier, as well, which can be noticeable when used as a helmet-mounted light. Additionally, you typically can’t swap out the batteries, so they need to be recharged once depleted.
We tested a number of self-contained models with internal batteries, including the Exposure Zenith 4 and Six-Pack 15, the Outbound Lighting Hangover and Trail Evo, and the Gloworm CX Core. These lights top the charts for ease of use.
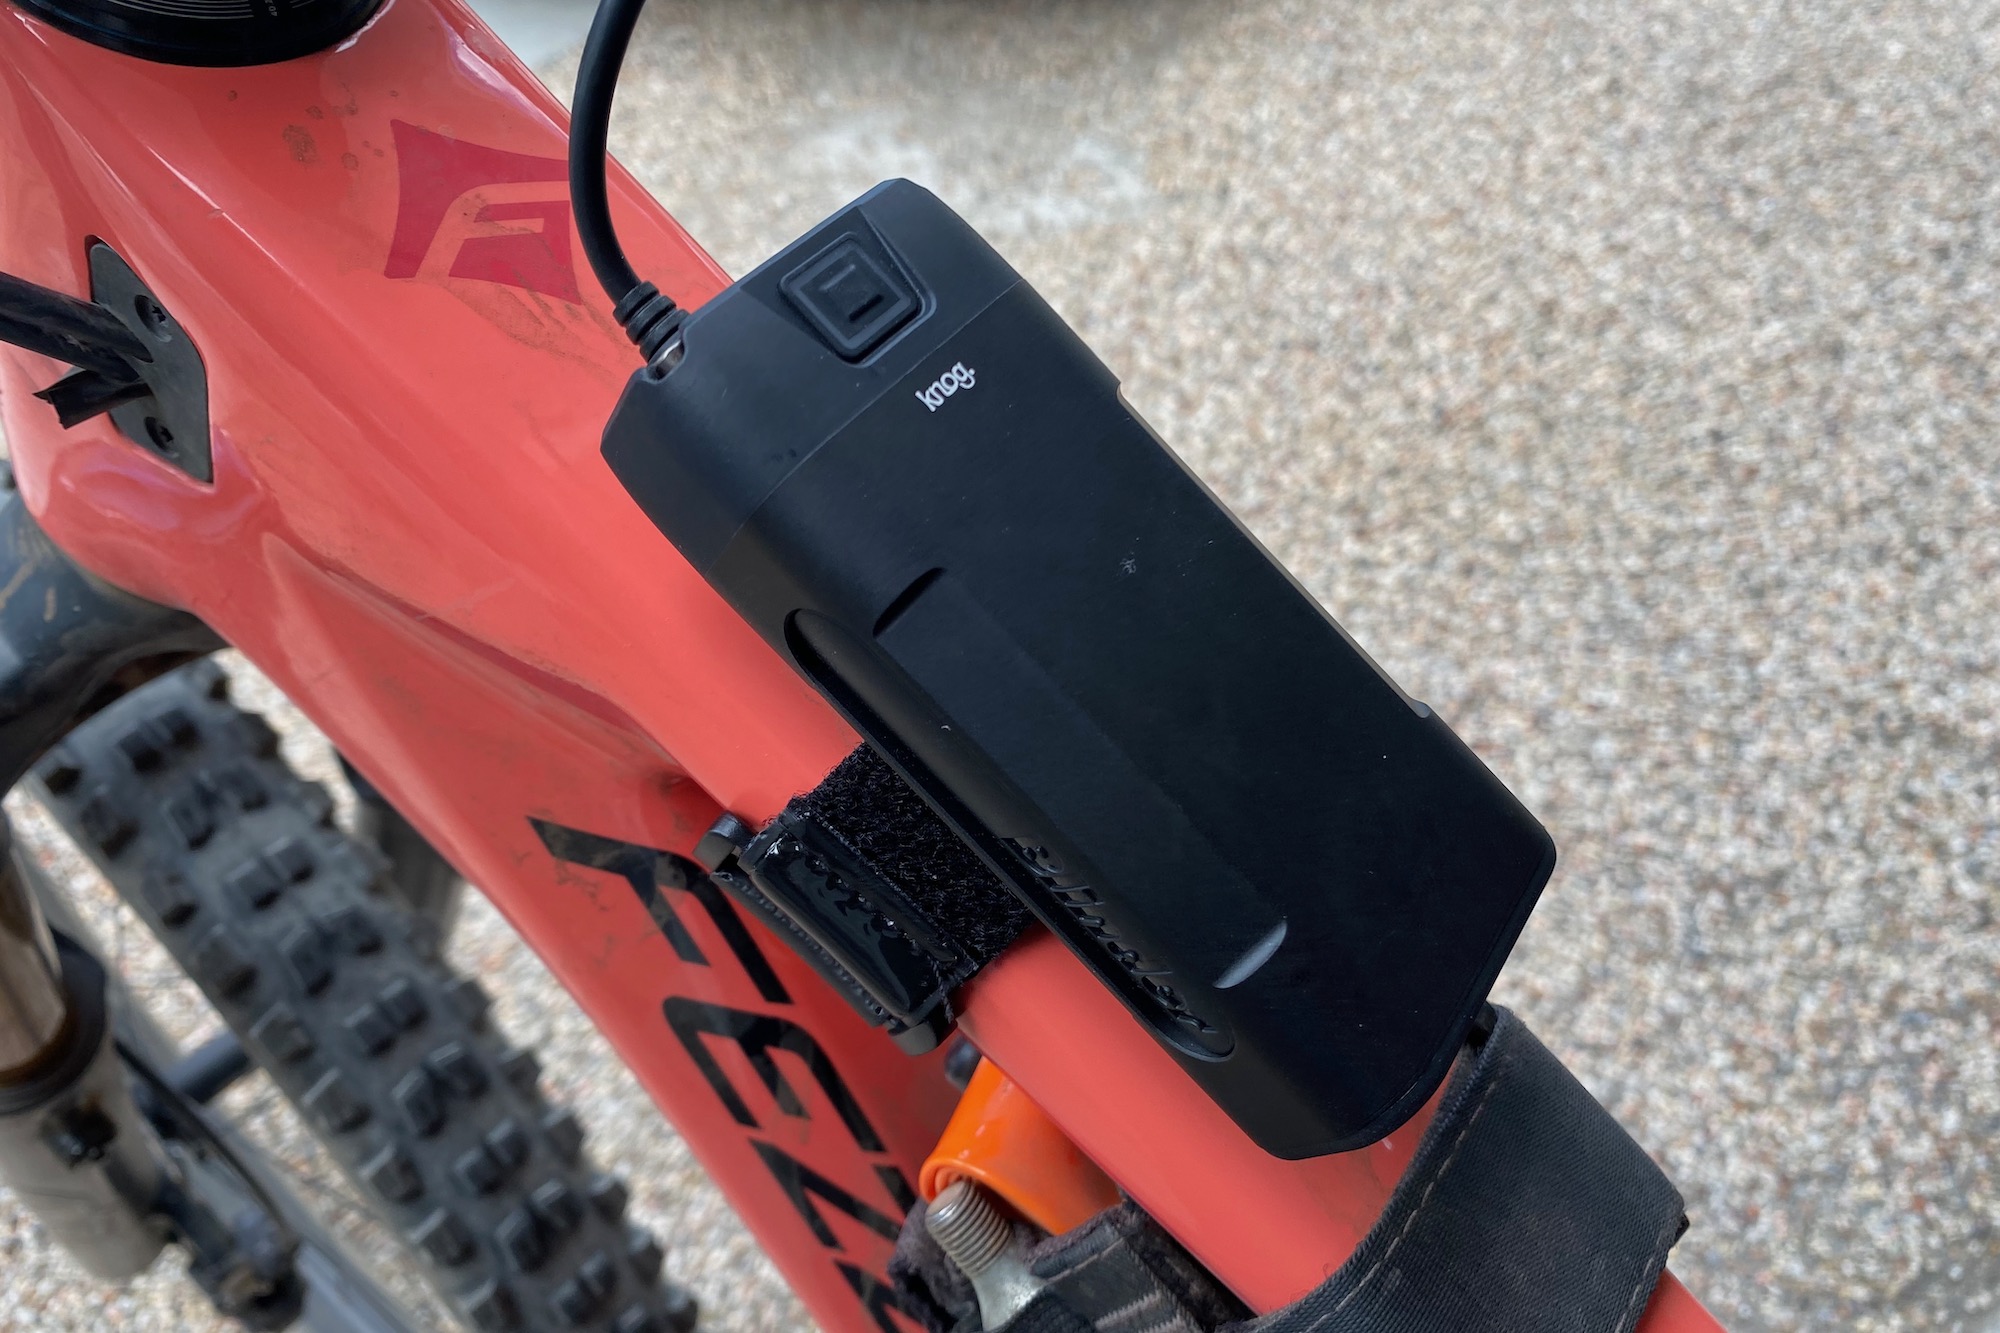
Lights with external battery packs separate the light head from the battery, and they need to be connected with a cord that runs between them. This adds a bit of complexity, considering you need to mount the battery to your bike frame or stash it in a pack or jersey pocket (when used with a helmet mount). You’ve also got a cord to deal with, which can potentially snag on things if not secured properly.
On the plus side, the light head can be lighter than it would be with a battery attached to it, so it may be less noticeable on your head. The battery packs can also be larger and interchangeable — within the same brand — for longer rides or overnight races.
Some of the best lights on the market have external batteries, including the new Knog Blinder X 1800 and 2300, the Lupine Lights Wilma R 7, and the Gloworm X2 Adventure. All of these lights are fantastic, but you’ll have wires to deal with. This adds complexity. That said, a wired handlebar-mounted light is easier to deal with than a wired light on your helmet.
User Experience
Are you able and excited to put in the time to program and set up your light system? Or do you want to take it out of the box, clamp it on, and have it ready to go? There are many lights out there that cater to both, as well as some in-between.
There are many that are ultra-fancy, like a really expensive watch that can do nearly everything you can imagine (and more you’ll likely never use), and then there are others that are super simple. They charge by the cord you already have or, better yet, just take batteries. Self-contained lights with internal batteries are generally a bit easier to deal with than those with external batteries.
Take some time before you buy to think about the amount of time you’re willing to put into your lighting system. Systems like the Lupine are easily upgradeable in nearly every way but might seem overly complicated for less serious night riders.
While the top-level performance, fancy features, and customizability of a light like the Exposure Six-Pack 15 make it arguably the best handlebar light you can buy, it might be overkill for a lot of riders. Meanwhile, the Outbound Lighting Hangover and Trail Evo are exceptionally easy to use while being bright and long-lasting enough for the vast majority of people’s needs — and much less expensive, too. Likewise, the Gloworm CX Core’s wireless remote makes it a breeze to use and change brightness settings on the fly.
Price & Value
In the mountain bike lights market, prices range widely. The models we tested range from around $100 all the way up to $650. Generally speaking, brighter lights, larger batteries, and more advanced technology drive prices up, but often the differences are truly appreciated only by a select few.
Budget
You can buy some super cheap bike lights on Amazon, but you’ll almost definitely be disappointed. If you want to do some real-deal night riding but you’re operating on a budget, we recommend spending between $100 and $150 on some higher-quality lights that will actually be bright enough to light your way, last long enough to get through a ride, and not crap out on you after only a few uses.
Lights in this price range tend to be a bit simpler overall, with brightness ranging between 1,000 and 2,000-ish lumens, along with smaller batteries. In some ways, this simplicity is great because they are easy to use, relatively compact, lightweight, and adequate for infrequent use or rides of shorter durations.
One of our favorite inexpensive lights is the Niterider Lumina Pro 1200 ($115). This light can be mounted on your handlebars or helmet, lights up the trail with 1,200 lumens, and is incredibly user-friendly. Or, check out the Fenix BC30 V2 ($90), which is even brighter, but you need to purchase the rechargeable batteries separately.
FhanWhile we don’t necessarily consider it a “budget” light, the Outbound Lighting Hangover’s ($135) price is so competitive that it qualifies. Given its impressive ease of use, compact form, light weight, and great beam spread, this is one of our favorite helmet-mounted lights, regardless of price.
Mid-Tier
As we climb the price ladder, we typically see an increase in brightness, larger batteries, and a generally higher level of performance. Most lights in the mid-tier will set you back between $150 and $300, but they usually boast 2000+ lumens and batteries big enough to handle the increased power needs.
Outbound Lighting’s Trail Evo ($245) boasts an impressive 2,200-lumen max output, a stable and secure handlebar mount, and a 10,000 mAh internal battery. Like the Hangover, it’s super easy to use, making it a great option that we feel will work best for most people. Similarly, the Gloworm CX Core ($175) is a great new option to consider. It’s bright with a 1,750-lumen max output, self-contained with no cords, can be mounted on the helmet or handlebar, and it has a handy wireless remote.
Similarly, Knog’s new Blinder X 1800 ($240) and Blinder X 2300 ($300) lights are impressively bright, stable, and long-lasting with 10,000 mAh external batteries. The wired battery-to-light connection isn’t as user-friendly, but the performance is otherwise stellar.
Premium
As we crest the $300 mark, we enter the high-end of the mountain bike light market. Again, we typically see an increase in brightness with lights capable of blasting 2,000 to 4,000-ish lumens. We also see an increase in build quality with nicer finishes. Technology also comes into play with advanced features like companion apps, touch sensitivity, or auto-adjust brightness.
Our favorite premium bike lights are those made by Exposure. These also happen to be the highest-performance lights we’ve tried. The Zenith 4 ($305) is a compact helmet mount unit that puts out a whopping 2,360 lumens and weighs in under 150 grams with an internal 6,000 mAh battery. It features TAP technology for on-the-fly changes to settings and has a super slick design.
Likewise, the Six-Pack 15 ($540) shares a similar sleek design but takes brightness to another level with the capability of putting out 4240 lumens continuously in its high setting. The 20,000 mAh internal battery adds some weight but keeps it running as long as you want, while its advanced Reflex 2.0 mode makes automatic changes to brightness based on speed and the pitch of the trail. That performance will cost you, but it is truly an incredible handlebar-mounted bike light.
Frequently Asked Questions
While you can get by with just one light on your helmet, we always recommend riding with lights on both your helmet and your handlebar for the best visibility while riding in the dark.
If you have to choose just one, we think a helmet-mounted light is the most important as it moves with your head and always points where you are looking. It is invaluable on trails with many technical features and tight turns.
Meanwhile, a handlebar-mounted light will point toward where your bike is headed — which is not always the direction you want to go. Still, since your bike is generally pointing in the direction you’re going most of the time, it’s great to have a light on your handlebar as a secondary source of illumination.
That depends. If you only ride midday, chances are you won’t need to use a light, maybe ever. Still, it can be wise to be prepared for anything. We often carry bike lights just in case, for the same reason we carry a first aid kit. You never know what’s going to happen on your rides.
Whether you have a mechanical issue that keeps you out after the sun goes down, you’re just having too much fun to stop riding, or you misjudged your ride distance and timing, having a bike light in the pack can be a huge benefit. Even a low powered light can be the difference from riding out safely and efficiently or feeling your way out in complete darkness.
Fortunately, many modern bike lights are relatively small and weigh in the neghborhood of 200 grams or so, so putting one in the pack or a jersey pocket doesn’t come with too much of a weight or space penalty.
Eventually, all battery-powered mountain bike lights will be depleted and need a recharge. The battery life or burn time of a light ultimately depends on the size of the battery, brightness of the light, brightness settings used, and the air temperature.
If you’re running a high-quality bike light at peak power, it will generally only stay on for between 90 and 150 minutes. At lower outputs, the same lights may be able to last for two to three times as long or longer. The mountain bike lights with the biggest and most powerful battery packs may be able to stay on at full output for up to 4 hours.
To get the most out of your lights, we recommend always starting your ride at full charge. Additionally, switching between brightness modes — using lower settings for lower speeds like climbing — can extend the battery life. And just because some modern lights can put out a ridiculous number of lumens doesn’t mean that it’s necessary. You can often run many of the lights we have listed at half power and it will still be plenty bright.
Compared to road cycling or commuting, where the emphasis is often on being seen by motorists or lighting up a road, mountain bike lights typically need to be much brighter to illuminate narrow, twisty, and often rocky trails. While it depends somewhat on the trails you ride and the speed you’re traveling, we typically want bright lights with a long throw while also having a good amount of spread to light up the periphery.
Through our testing, we’ve found that we like to have a bright light on our helmet and usually prefer to have a slightly brighter light on the handlebar. In general, lights with a maximum output of about 1000 lumens are at the lower end of what we like to use for faster-paced riding or in more technical terrain.
The faster or more aggressively you ride, the brighter you’ll probably want your lights to be. For most riders, however, a 1,000-lumen light on the helmet will provide adequate illumination where you’re looking with a brighter — 1,500 to 2,000-ish lumens — light on the handlebar.
Even then, you probably won’t need to run your lights on full blast all of the time. Turning down the brightness for lower-speed riding will help you conserve battery so you can stay out for longer.
Related Content
The Best Cycling Sunglasses of 2026
We tested 18 of the best cycling sunglasses on the market to help you find the right model to suit your needs and meet your budget.

The Best Mountain Bike Helmets of 2026
We tested the top models from Giro, Specialized, POC, Smith, and more to help you find the best mountain bike helmet for your next ride.