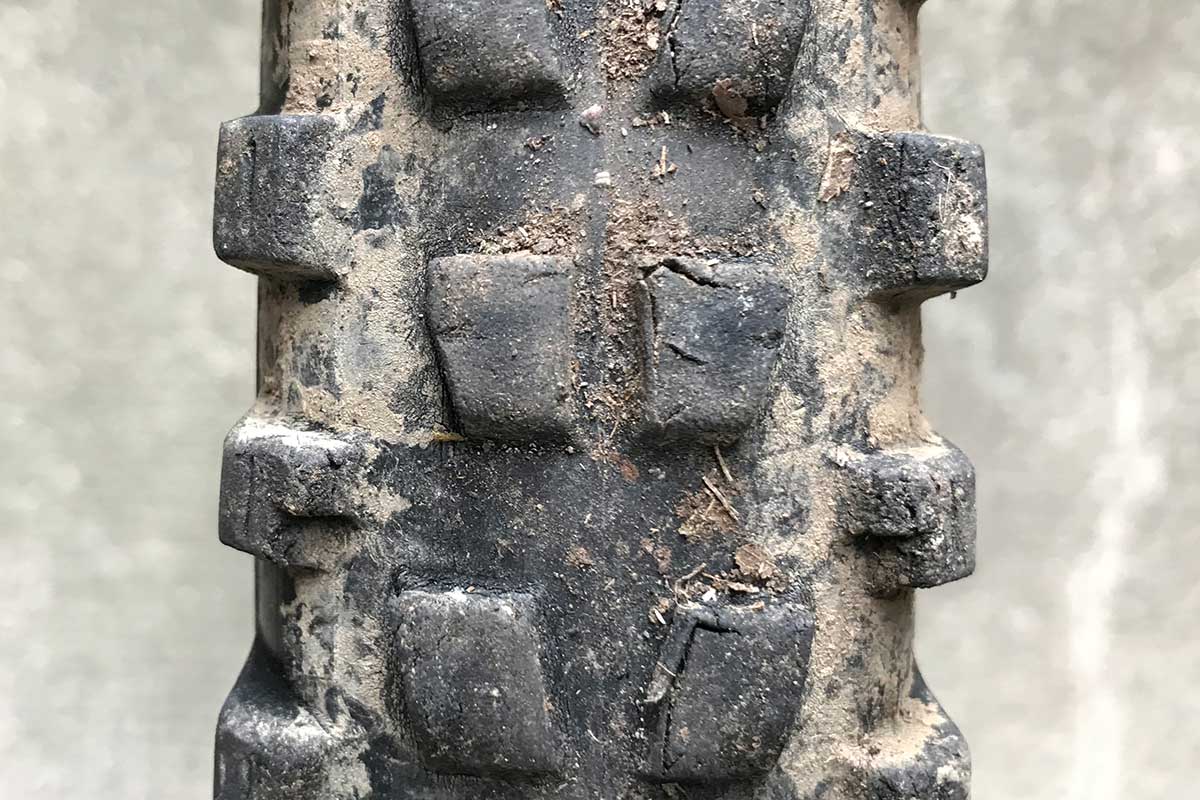
Choosing a tire for enduro racing presents a lot of choices and challenges. Because enduro is equal parts climbing and all-out, haul-arse downhill descending, finding that Goldilocks tire can be difficult. Add in varying trail and weather conditions and it’s even harder.
The massive amount of brands, sizes, casings, and tread patterns multiplied by your potential riding conditions as well as your own personal preferences for qualities like bombproof-ness versus a lighter weight can make it seem like a daunting process.
Here, we’ll explain what to look for in a good tire, and our picks for the best enduro mountain bike tires for every condition. This will help you narrow it down to the right tire or tires for your local trails, riding style, and goals. If you’re new to this, scroll down for a primer on tire construction, technology, and terminology first. That will help you understand what to look for, and it will help our picks and explanations make more sense.
And if you want even more intel, check our complete Mountain Bike Tire Tech explainer here to learn more about casing, construction, and tread patterns first.
The Best Enduro Mountain Bike Tires
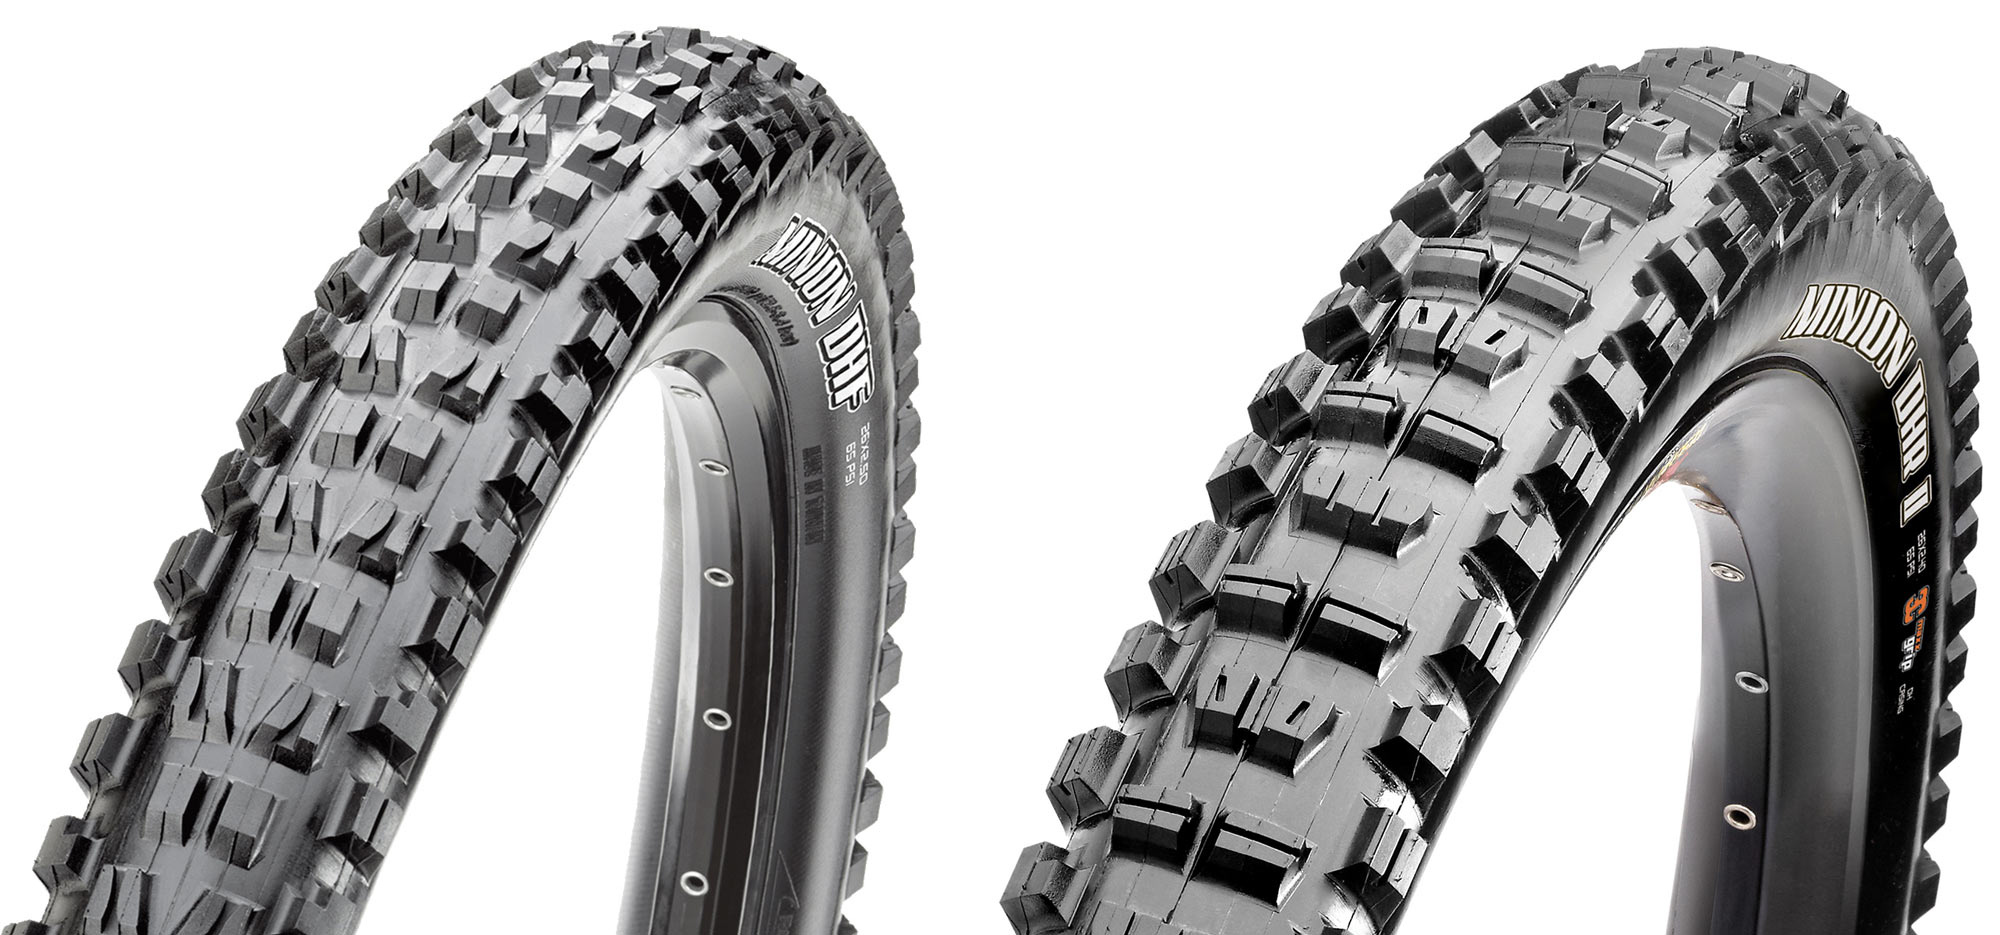
ALL CONDITIONS: Maxxis Minion DHF / DHR II
“Just get a Minion.” Ask your friends what tire you should buy, and there’s a good chance you’ll get that answer. But that’s understandable considering the Maxxis Minion is one of the most beloved tires of all time. Originally intended as front (DHF) and rear (DHR II) specific downhill racing tires, the Minion has evolved into one of the top choices for an all-conditions tire with tons of grip. It’s not the fastest tire, and certainly not the lightest, but that weight is put to good use in terms of trail-hugging grip in almost any condition.
Those front and rear designations are just suggestions, some run a DHF front and rear. Others may use the DHR II as a front tire for environments like Moab. However you choose to run your Minions, it’s hard to go wrong. If you’re new to enduro and not sure exactly what you need, just opt for the Maxxis Minion DHF in the front, and the DHR II in the rear.
Just pay attention to the specs and make sure you buy the right one. There are 17 different options just for the 27.5″ DHR II tires, with five different rubber compounds, wire or folding bead, four widths plus two rim-optimized widths, 60 or 120 tpi, and four different casings. Fortunately, there’s a handy guide on their website to help you find which ones best match your intended terrain.
- Tire Width: 2.5, 2.6, 2.8
- Front/rear-specific: Yes (DHF is front, DHR II is rear) but both can be run as front and rear
- Wheel sizes available: 27.5″ and 29″
- Tubeless Compatible: Yes
- Price: $70
PROS: Ideal for most conditions, options for everything
CONS: Not terrain specific, rolls a bit slow
TOUGHEST: Specialized Butcher & Eliminator GRID TRAIL
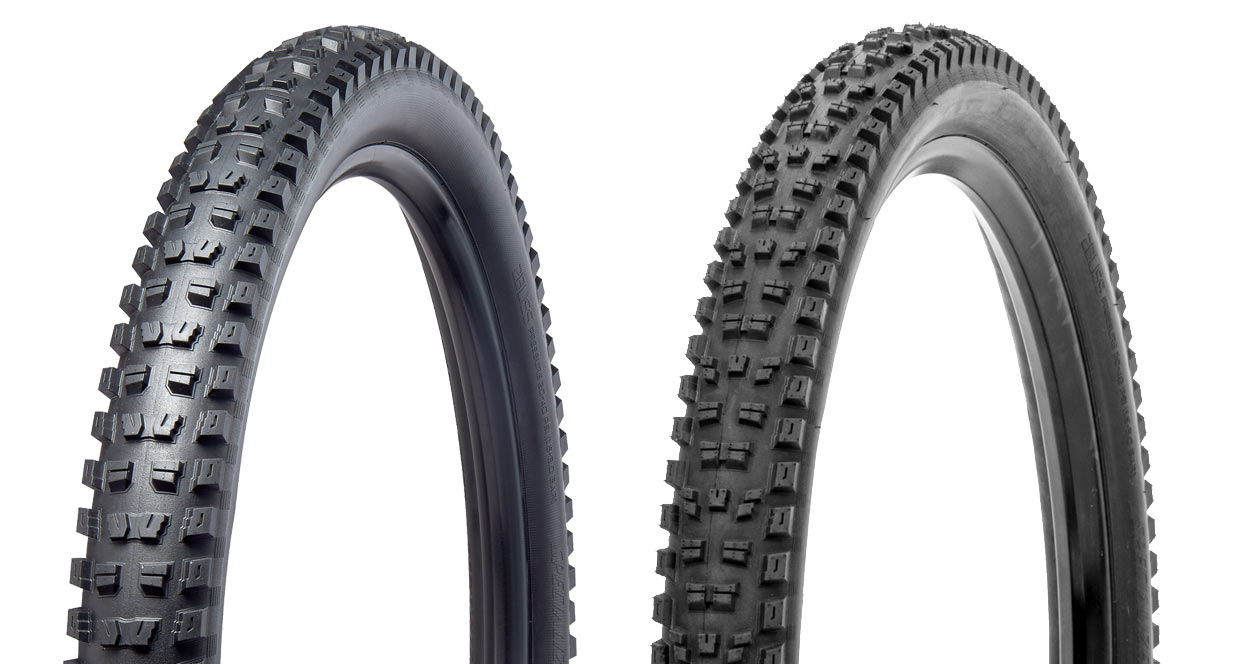
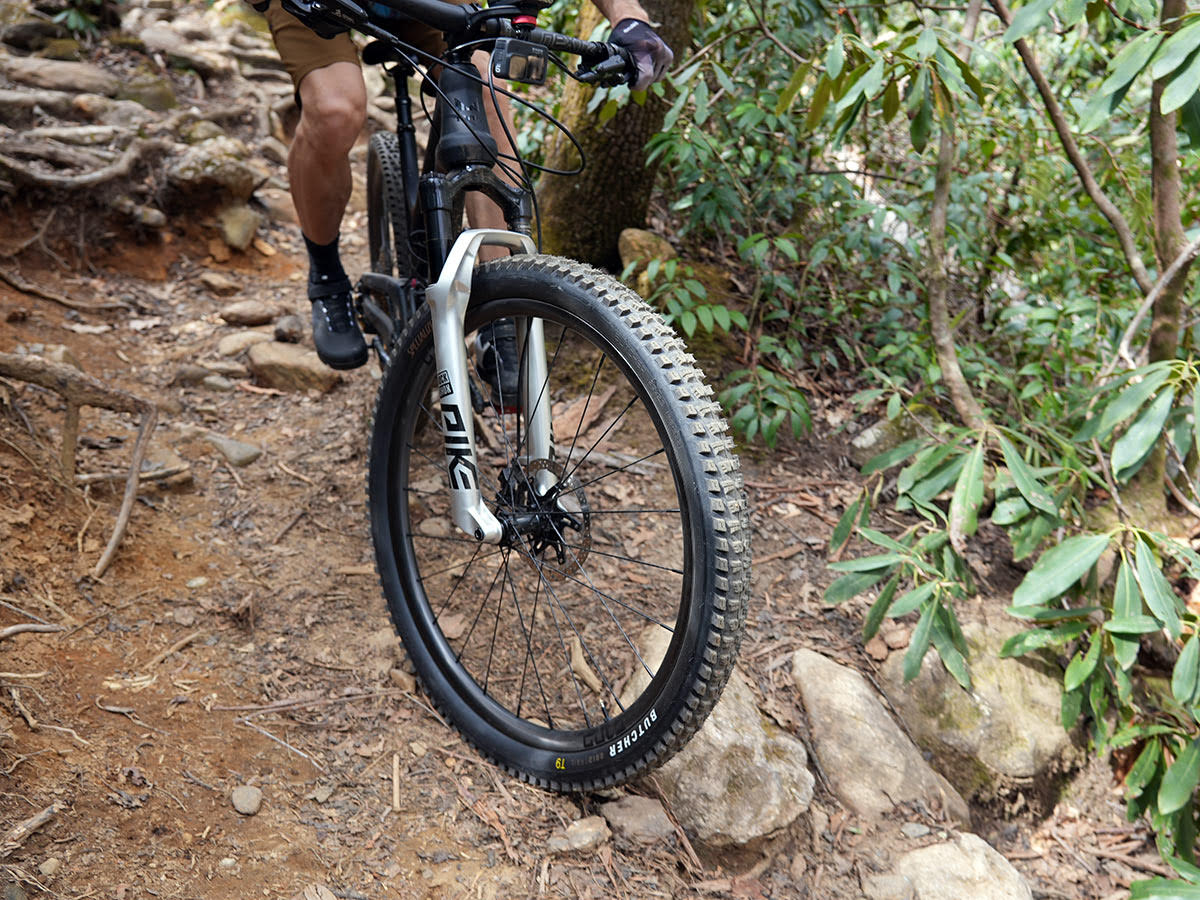
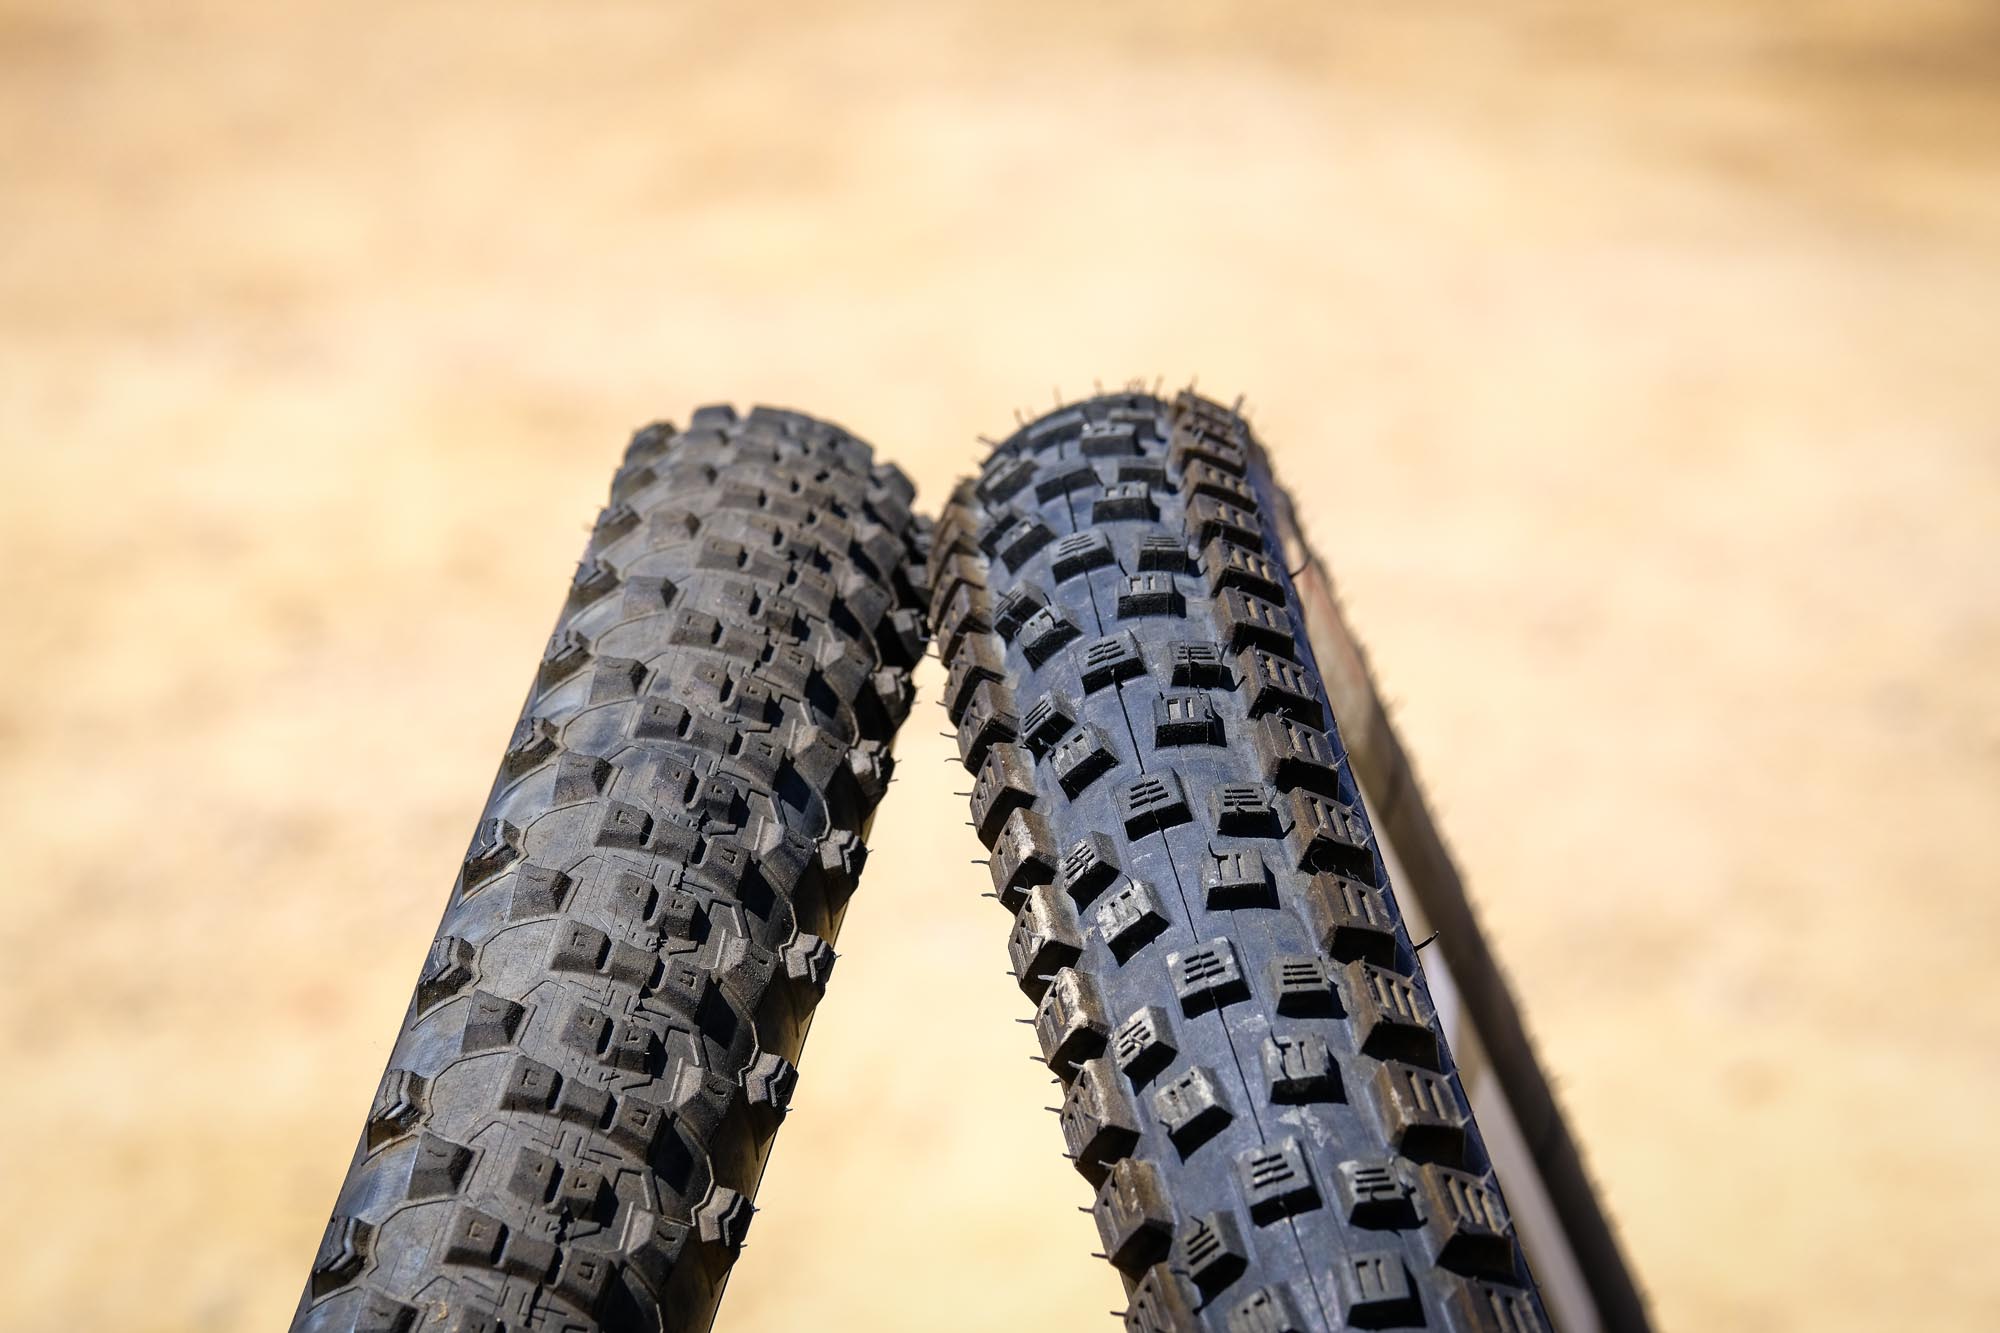
Riding the combination of the Specialized Butcher (left) and Eliminator (right) GRID TRAIL tires through Pisgah’s rocks and roots proved their grippy-ness and durability. While they’re a bit heavy for those hour-long climbs that NC’s Blue Ridge Mountains are (in)famous for, they make up for it on the chunky, rocky descents where lesser tires get sliced and shredded.
The Specialized Butcher and Eliminator come in a standard GRID version, but if you need a tough tire for anything from all-mountain to enduro, upgrade to the GRID TRAIL versions. They won’t disappoint. And even on an e-MTB, the stiffer reinforced TRAIL casing lets our editors get away with low pressures without squirming, while the grippy rubber bit into whatever they rolled across, from soft dirt to solid rock surfaces. (Read a full review of the tires in our Turbo Levo bike review.)
They come in two rubber durometers – T7 (Trail compound, balanced between grip and speed) and T9 (Gravity compound, slow rebound, and max grip), plus a dual-density T7/9 option. While either tire works well for front or rear, a Butcher front and Eliminator rear combo worked great for us on multiple bikes.
- Tire Width: 2.3, 2.6
- Front/rear-specific: No
- Wheel sizes available: 27.5″ and 29″
- Tubeless Compatible: Yes for 2Bliss versions
- Price: $60-75 depending on size and tubeless compatibility
PROS: Great all-around grip, super sturdy & tough sidewalls
CONS: None, really
BEST DAMP CONDITIONS: Pirelli Scorpion S & R Enduro
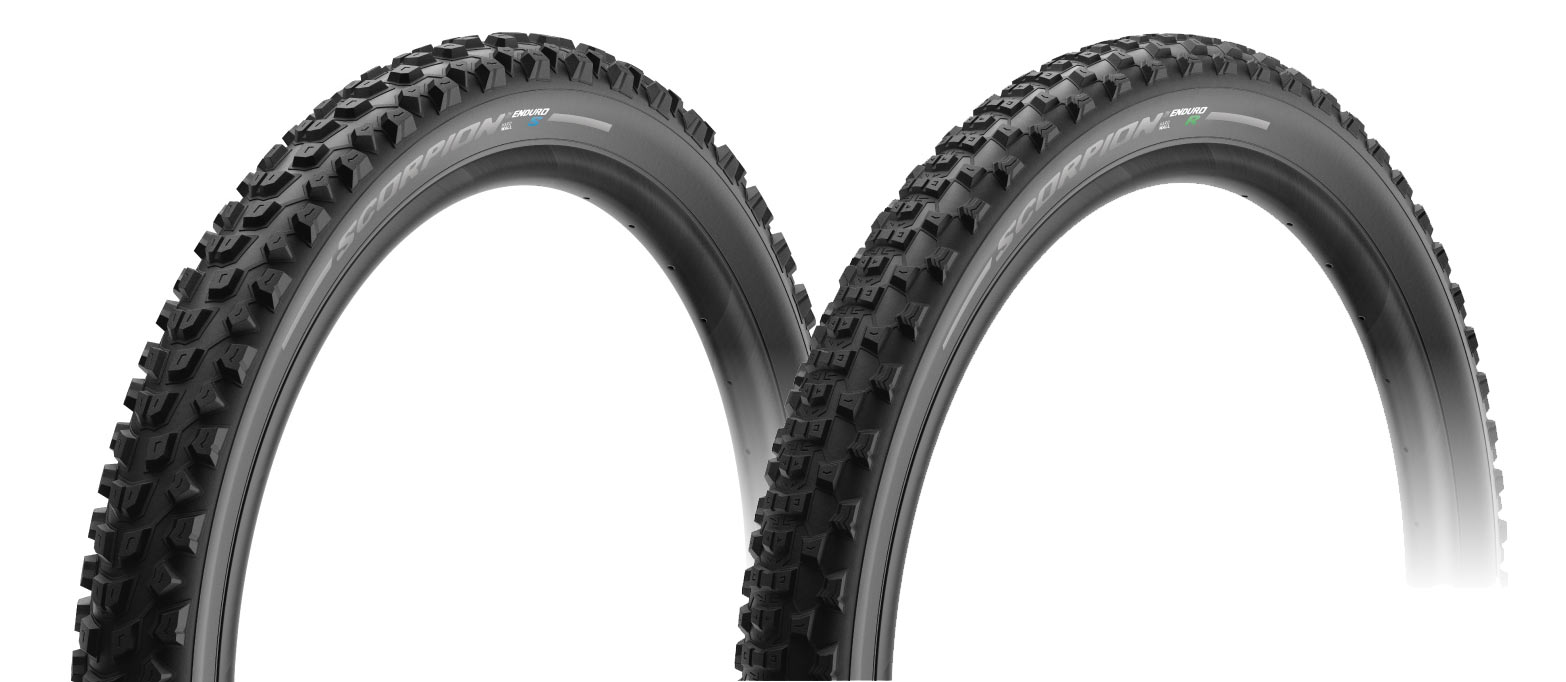
If your idea of “wet” is really more of misting rain or damp surface rather than full-on mud, the Pirelli Scorpion Enduro S could be just what you’re seeking. In fact, we found this combination to offer just the right mix of steering precision and smooth-rolling in most mixed conditions.
The Enduro R is specifically designed as a rear tire, ideal for accelerating and braking on normal, drier surfaces. But, the Enduro S is designed for performance on soft terrain, so it’s ready for a bit of mud and works great in the rear, too. So, simply run the “S” front and rear when things get a little too slick for the R’s shorter knobs and tighter spacing. Mix and match as conditions warrant.
The Enduro tires get a reinforced HardWall construction that starts with a nylon casing, adds a bead-to-bead nylon protection layer, plus thick rubber inserts at both beads to prevent pinch flats and rim damage, all with minimal weight gain.
- Tire Width: 2.4, 2.6
- Front/rear-specific: S = No, R = Yes (rear)
- Wheel sizes available: 27.5″ and 29″
- Tubeless Compatible: Yes
- Price: $72
PROS: Firmer rubber and good spacing bites into soft, damp terrain
CONS: Designed for speed, not comfort, and not for slick rock
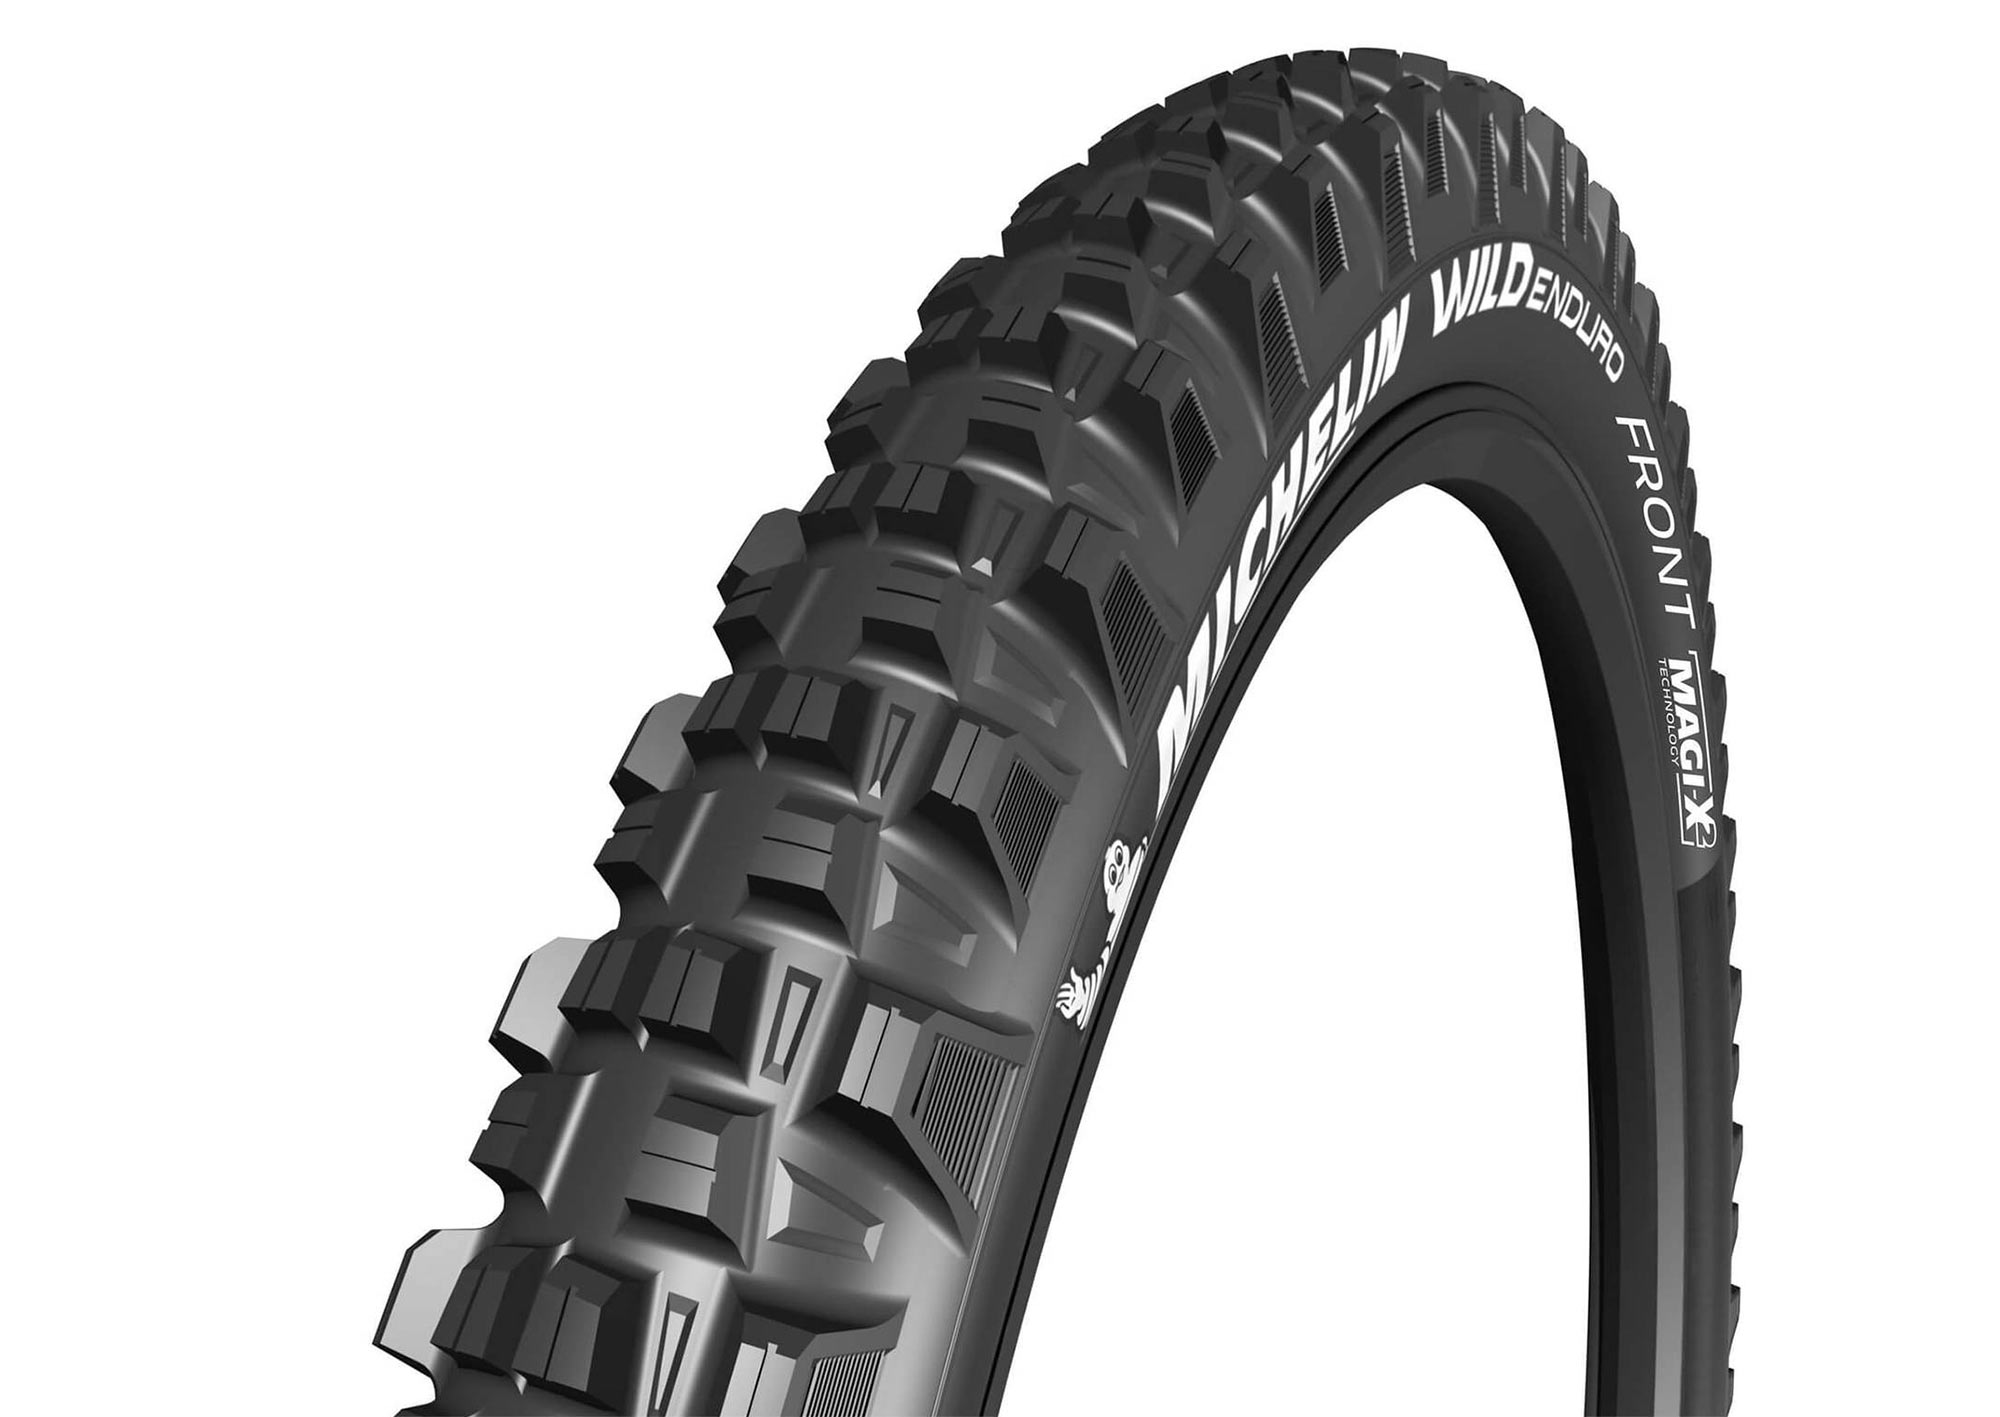
BEST FOR REAL MUD: Michelin Wild Enduro Front
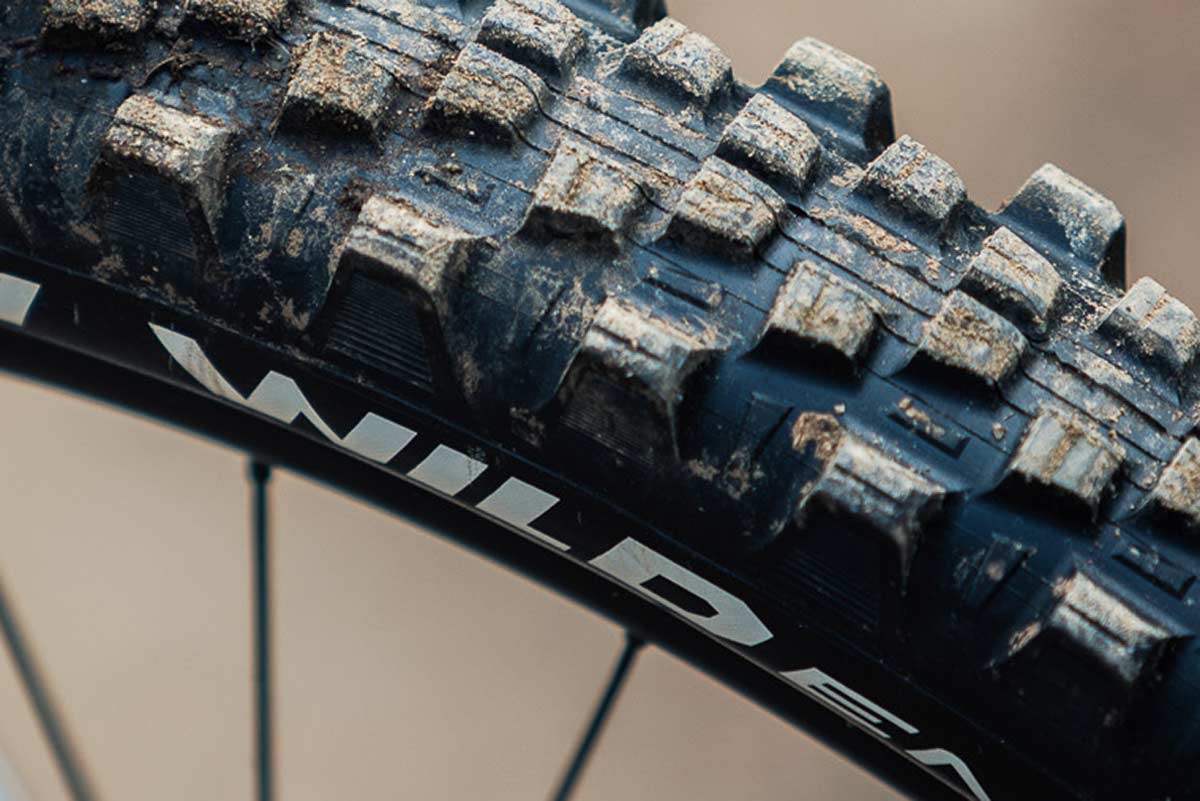
Though not specifically marketed as a mud tire, the tall, well-spaced knobs on the Wild Enduro work well in some of the sloppiest, slipperiest off-camber conditions there are. It’s a great UK winter tire. The Wild Enduro 2.4” with the MAGI-X compound is a fairly hard compound, but it rebounds slower than other hard rubber compounds. That makes the knobs better able to deform to the terrain, catching grip instead of pinging the rider about on rough stuff.
The Wild Enduro feels like a slow-rolling tire. But, on wet, muddy trails, rolling resistance is the least of your worries – grip is your major concern. This is where the Wild Enduro outperforms a vast majority of tires on the market. You immediately feel the side knobs tear into and through soft terrain, demanding grip while leaning the bike over into slippery, squirmy corners.
Despite being labeled as a front tire, we’ like it in the back, too, and have seen a number of top competitors racing it on both ends of the bike. (Read our full review here.)
- Tire Width: 2.4
- Front/rear-specific: Front, but we’d run it as a Rear, too
- Wheel sizes available: 27.5″ and 29″, though 29er seems hard to find
- Tubeless Compatible: Yes
- Price: $70
PROS: Lots of fun in tough conditions, somewhat affordable
CONS: Not great in dry conditions, 29″ size basically impossible to find
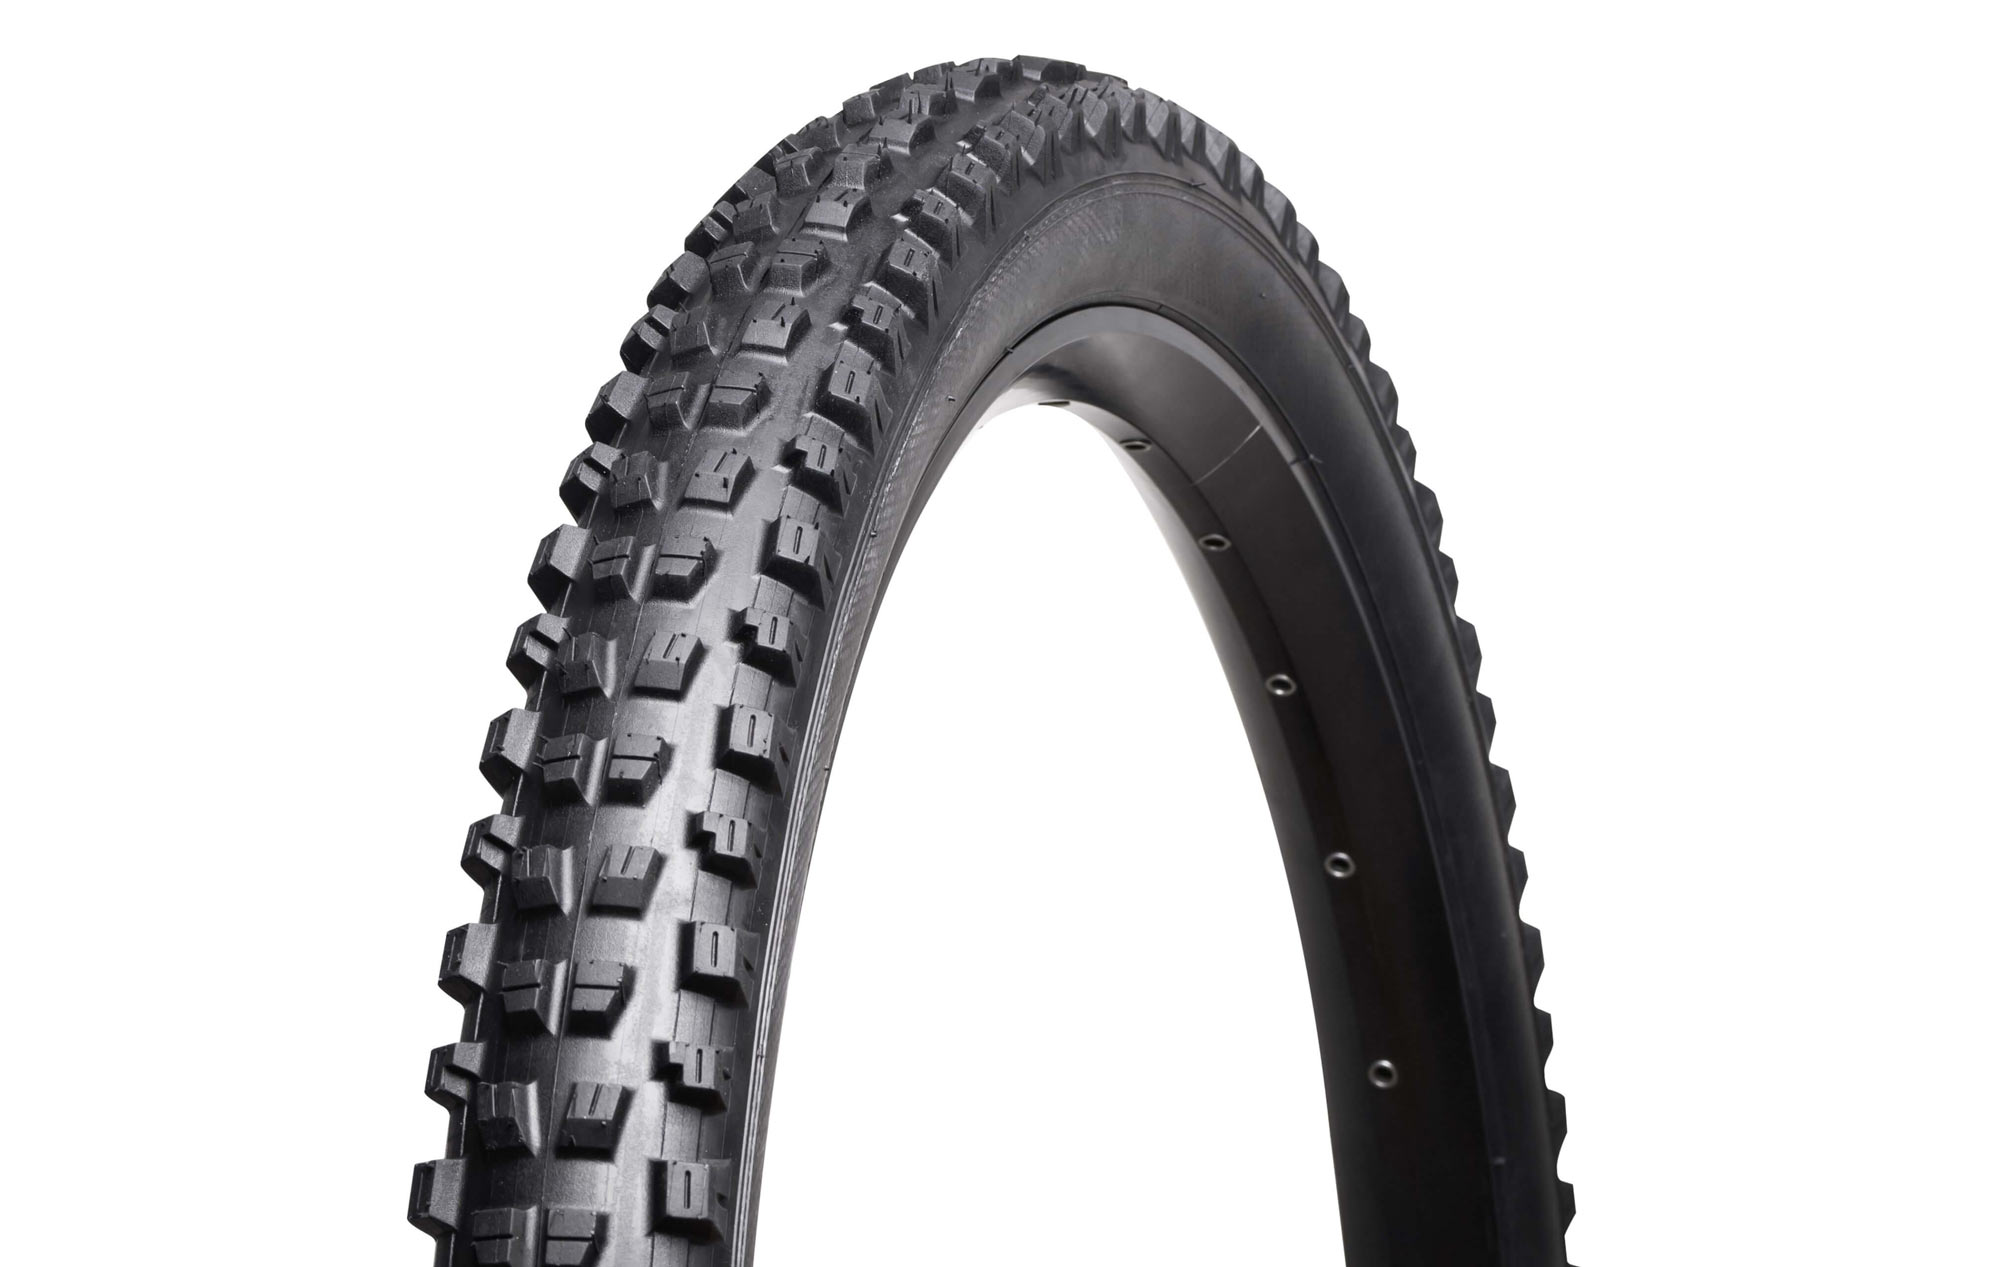
BEST ALL-OUT GRIP: Vee Tire Co Snap Trail
Vee’s Snap Trail borrows their super-sticky, ultra-low “TOP40″ 42A durometer rubber from their downhill tires and puts it on a lighter, trail/enduro worth casing. On the dry, dusty tracks, we were impressed with the grip offered over rock faces, and through flat loamy turns. And on wet, muddy trails, the grip offered by this tire is exemplary. It tracks incredibly well through turns.
That TOP40 compound sticks like Velcro, which means it’s not likely to lose traction, but it won’t roll as fast as a firmer rubber either. There’s sufficient flex in the side knobs to allow them to deform and mold to the trail, but enough support that they don’t fold over.
The combination of a 2.35” width makes them ideal for smaller riders (bigger or heavier riders would benefit from something wider), and the extreme grip is great for those just getting into enduro and want something with precise steering while still feeling stable. (Read our full review here.)
- Tire Width: 2.35
- Front/rear-specific: No
- Wheel sizes available: 27.5″ and 29″
- Tubeless Compatible: Yes
- Price: $81-87 depending on size
PROS: Precision steering, great at shedding mud, grabs everything
CONS: Grippy compound rolls slowly, wears quickly, narrow for the category
BEST FOR MIXING & MATCHING: Schwalbe Super Trail/Gravity Tires
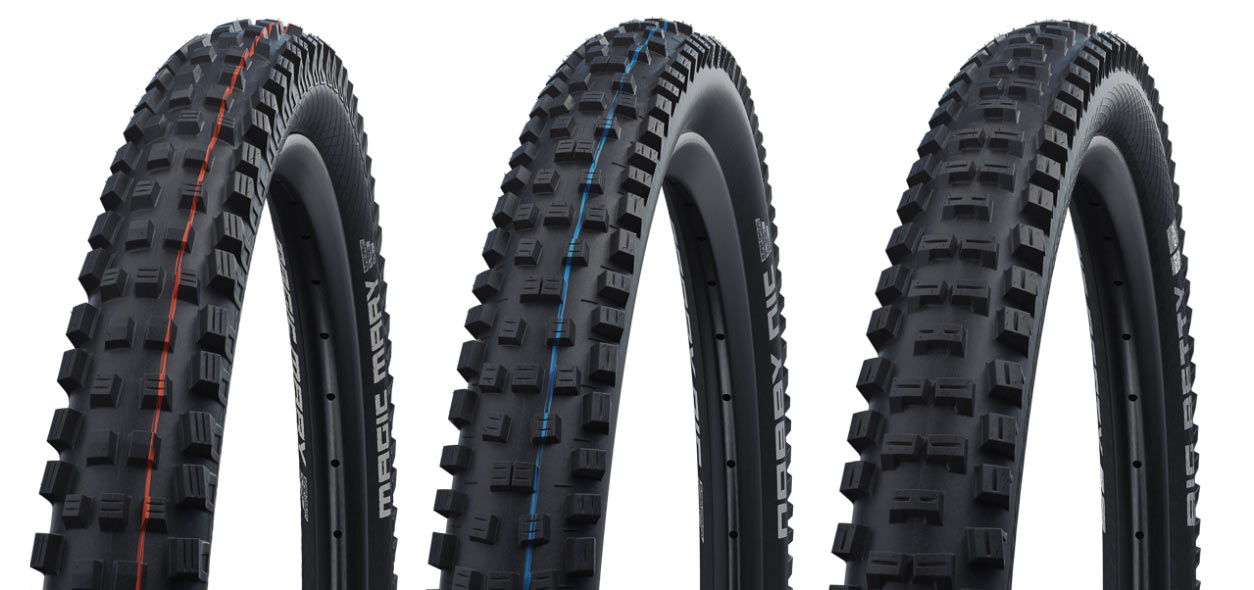
Between the Magic Mary, Nobby Nic, and Big Betty (shown left to right above), Schwalbe has a few different options when it comes to enduro tires. And now with their new Super Gravity and Super Trail casing constructions, those tires are better (and more durable) than ever.
The exact combination of those tires largely comes down to personal preference and terrain, but one of our favorite combos is the Magic Mary up front with the Nobby Nic out back. The Magic Mary is a popular front tire choice as it offers impressive grip with plenty of support during hard cornering.
For a fast, all-around combination that works on many terrains, the new Nobby Nic’s updated tread pattern rolls fast, but is still grippy. It only comes in a Super Trail casing, though, so it’s best for lighter, more nimble riders. We’ve found the Super Trail casing to be surprisingly durable, but this combination is still best for those who don’t need the full-on protection of the Super Gravity casing, which adds a fourth carcass layer.
If you’re heavier, more aggressive, or just harder on your tires or ride in really gnarly terrain, opt for the Super Gravity casings on a Magic Mary and pair it with a Big Betty on the rear.
- Tire Width: 2.25, 2.35, 2.4, 2.6, 2.8
- Front/rear-specific: Not specifically, but we have preferences.
- Wheel sizes available: 27.5″ and 29″
- Tubeless Compatible: Yes
- Price: $95-$101
PROS: Great casing tech that allows for broader choice of tread selection
CONS: Expensive, lots of options can be confusing
Enduro MTB Tire Buyer’s Guide & FAQ
What makes a good enduro mountain bike tire?
For most riders, if you’re actually “racing” in an enduro, you’re probably planning on ripping the downhill timed segments as fast as you can. So, you want to prioritize grip, traction, and toughness over saving weight.
Grip and traction will come from the rubber compound (a lower durometer number is softer and grippier, but won’t last as long and tends to roll more slowly) and the tire volume. A 2.4″ width should be considered the minimum width for most riders, and 2.6″ tires are great for drier, looser conditions (and bigger, heavier riders) if they’ll fit in your bike.
Yes, heavier tires will be slower to pedal back up the mountain during the transfer stage, but extra sidewall cut protection and puncture resistance under the treads are worth it. If you flat on a descent, you lose the race, plain and simple. Below, we’ll explain more about these features and what to look for, and our MTB Tire Tech Explainer dives deep into all of them.
How do I choose the right Enduro MTB tire?
Once you’ve determined the casing, width, and other technical specs based on the tips in this guide, the next biggest factors are weather and surface conditions.
Conditions will dictate the type of tread pattern and rubber durometer you want. That said, the Maxxis and Specialized tires listed above are great all-purpose tires for those who aren’t swapping based on moisture levels. But there are definite advantages to running a firmer rubber in muddy conditions, and a wider knob spacing will help the tires shed mud more easily.
One of our testers lives in Scotland and rides much of the year in damp if not downright sloppy, greasy conditions. The rest of us have more varied soil and rock and tend to run a more all-purpose tread.
Softer surfaces (loam, loose soil, sand) will benefit from deeper, firmer knobs that can bite into the ground. Firmer surfaces (slick rock, hardpack, dirt, rocks, roots) will benefit from softer, grippier compounds and lower center knobs that will roll faster and won’t squirm.
What should I know about the tire’s casing?
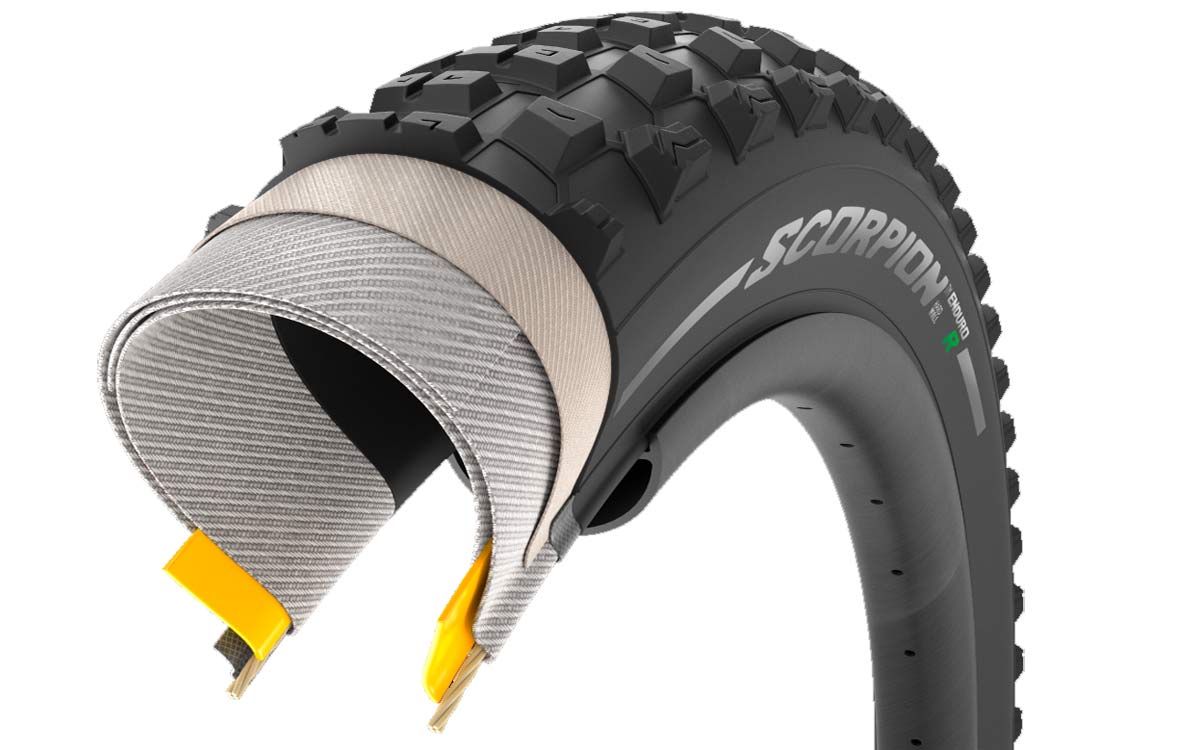
The casing is the structure of the tire that holds the bead and the outer rubber sticks to it. Every tire listed here offers some combination of nylon, Kevlar, Vectran, and/or butyl layers to prevent cuts, punctures, and pinch flats (aka Snake Bites).
In the photo above, the yellow layer is the pinch flat protection, often called an “apex layer”, and adds a rubbery pad that prevents the tire’s sidewall from getting pinched to the point of puncture should you smash the tire so hard that the ground impacts the rim.
The gray layer is usually nylon and could be anywhere from a 60tpi to 120tpi nylon material. Lower numbers are generally tougher and more supportive, and higher numbers are more supple and lighter. For Enduro, 60tpi is fine, and most will have multiple layers to give the tires better protection and support, which also lets you run lower pressures for better traction.
The beige layer is usually Kevlar, Vectran, or a similar special material that’s better at resisting punctures. Sometimes you’ll see this wrap all the way from bead to bead, but often it’s just under the treads since that’s where punctures are more likely to occur.
Do I need an Enduro casing, Trail casing, or Gravity casing?
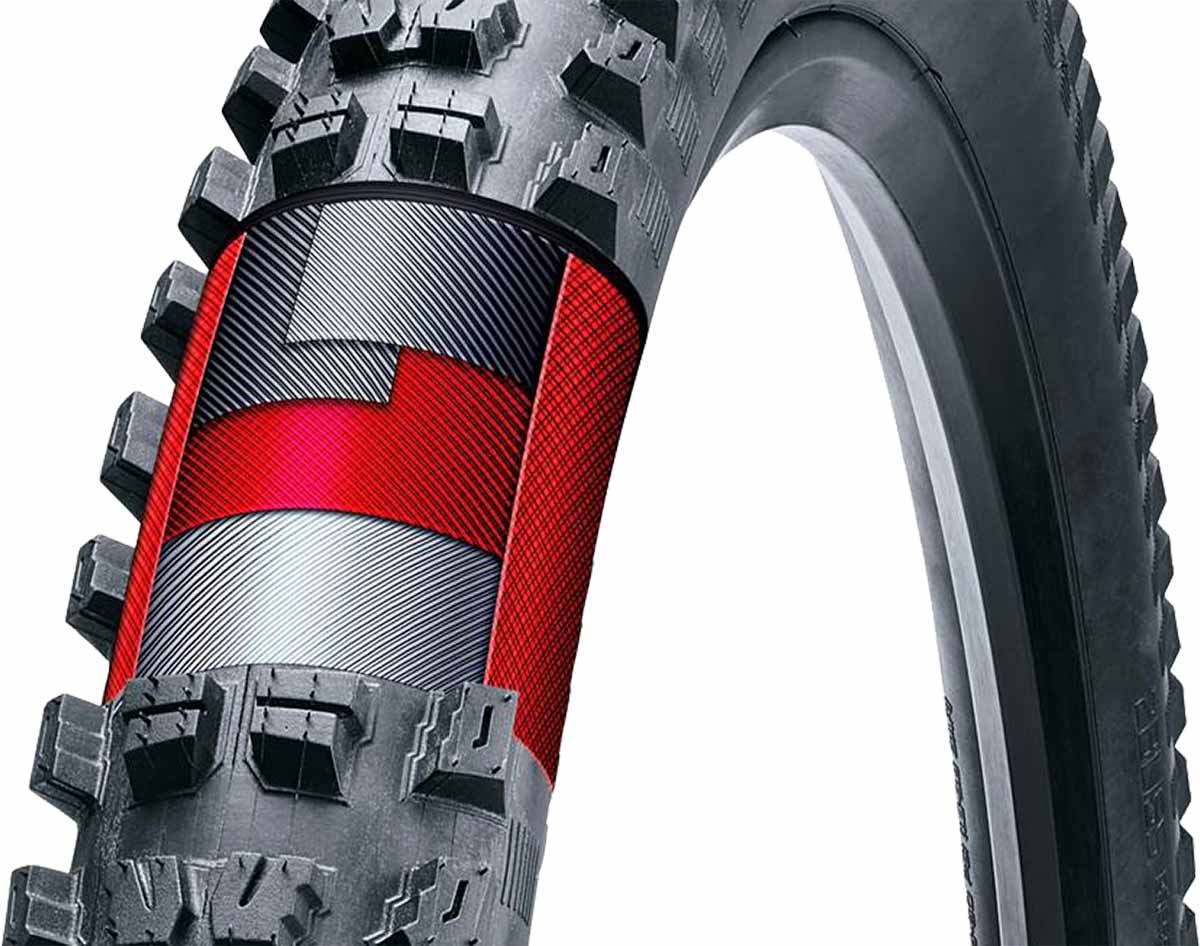
Gravity casings are designed for downhill and park riding and are going to be overkill for enduro. Some are still wire-bead designs, and possibly not tubeless-ready, so steer clear of these.
A Trail casing could work if you’re not taking this too seriously. It’ll be lighter and more supple, but it’s designed for general mountain biking, not pushing the limits on extremely aggressive terrain at top speed where failure means dropping off a leaderboard.
An Enduro casing will be burlier and more resistant to damage, but heavier. These will offer the most protection from cuts, punctures, and slashes.
All of these options will be burlier than even the best XC tires, which lose most of the protective elements to save weight, but won’t stand up to the rigors of true enduro racing.
What are “transition knobs” and do I need them?
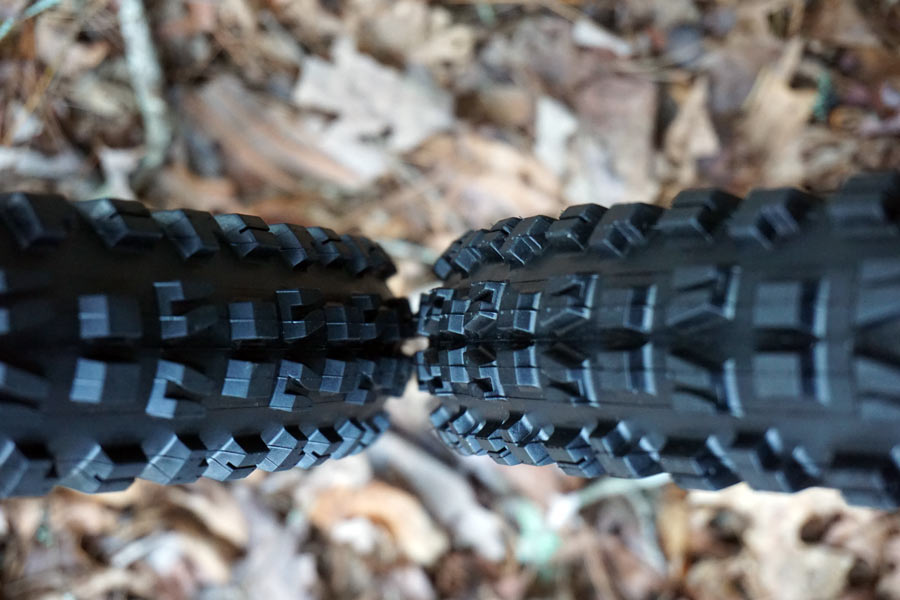
Between the center tread of your tire and the side knobs lie the transition knobs. If you corner slowly — think switchbacks — you’ll want these. They help maintain consistent traction as you gradually lean the bike in and out of corners.
If this sounds like you, a tire with a wide channel between the center and side knobs can make it feel like the tire slips a bit as you lean further into a turn. That’s because it’s literally losing traction from the center knobs before the side knobs fully hook up, and it can be disconcerting.
In contrast, if you tend to aggressively dive into a corner and throw the bike from side to side at high speeds, transition knobs become less important. Riders who flick the bike into a corner, or whip it around quickly, won’t miss them if they’re gone. The benefit is more clearance to help shed mud and muck.
TL;DR: If you’re a high-speed, aggressive descender, you may not need much in the way of transition knobs. Smoother riders who corner at varying speeds will benefit from them.
What is a tire’s ‘rebound’ and why does it matter?
Rebound is the rate at which the tire recovers to its original form after encountering an impact. A tire with a slower rebound will likely lend more grip, while a faster-rebounding tire will roll much faster.
For a great example, check out our full review of Vee Tire’s Snap Enduro Tire we mentioned above: It has an incredibly slow rebound, which makes it wonderfully grippy, but it’s also noticeably slow when the opportunity to pedal hard on a flat, fast section comes up.
In contrast, the wet/mud tires we recommend have firmer rubber to bite into the ground. Most enduro tires are designed with softer, slower rubber to maximize grip. If you want more speed and stick to less technical trails, look for a firmer tread compound.
What about mountain bike tire inserts?
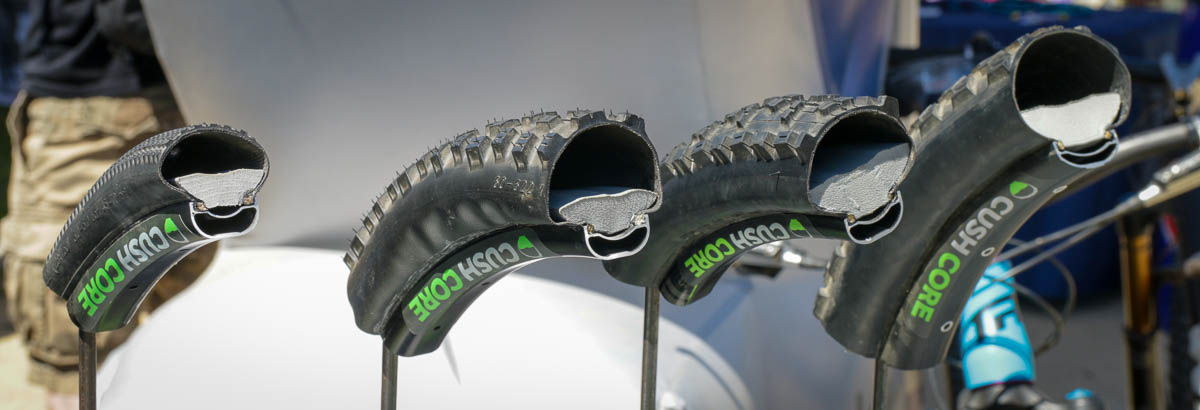
As tubeless tires have grown in popularity, the trend toward lower tire pressures has also grown. Mountain bikers generally seek out more grip, which tubeless tires certainly lend. Running lower pressures also comes with some risk. It’s much easier to bottom out your tire and hit your rim, for example. And a tire’s casing can also fold or collapse on itself, sacrificing cornering stability.
To counter these problems, a lot of companies have developed tire liners that live inside your tire against the rim. These serve as a layer of protection between your rim and any potential impacts, and they also help support your tire’s sidewalls during hard cornering.
Of course, tire inserts add weight to your bike and aren’t entirely necessary in your tubeless setup. But they do offer peace of mind and increased cornering stability. They’re a nice-to-have option, but not a must-have. Stay tuned for a full Buyer’s Guide to our favorite tire inserts—being tested right now!
Mountain Bike Tire Construction + Terminology
If you’re new to MTB, the terms we’ve used might be a bit confusing, so here’s a quick breakdown.
Tread: The tread is the part of a tire that connects to the ground. These are the ‘knobs’ on the outside of the tire that provide grip. They are made from rubber compounds that can vary from brand to brand. The tread lives on the outside of the tire casing.
Casing: Essentially the structure of the tire and includes the sidewalls — or, the treadless sides of your tire. Some tires feature an additional puncture-resistant layer between the tread and the casing. This generally adds weight to the tire, but it also helps keep flats at bay.
Tire Bead: Every tire has a bead, which is the part of the tire that locks in place into the rim. The most common types of beads are steel (“wire”) and Kevlar (“folding”). Other than some DH tires, almost every modern mountain bike tire worth upgrading to has a folding bead.
Foldable: A foldable tire is one that can be folded, obviously. This is possible due to the bead construction. Kevlar beads are foldable because Kevlar is a fiber that can be manipulated into a fold. Steel beads are not foldable because steel holds its shape.
TPI: Stands for threads per inch. 60 TPI and 120 TPI are the most common measurements, with every tire on this list coming in at 60 TPI. A tire’s casing is made up of nylon fibers, and TPI indicates how many individual threads a tire has per inch. Generally, a higher TPI tire will feel more supple and will be lighter than a lower TPI tire.
Tire measurement: Every tire has two general measurements. The first number represents the rim size, and the second number represents the tire’s width. For example, a 29 x 2.5 tire fits a 29-inch wheel and measures 2.5 inches wide.
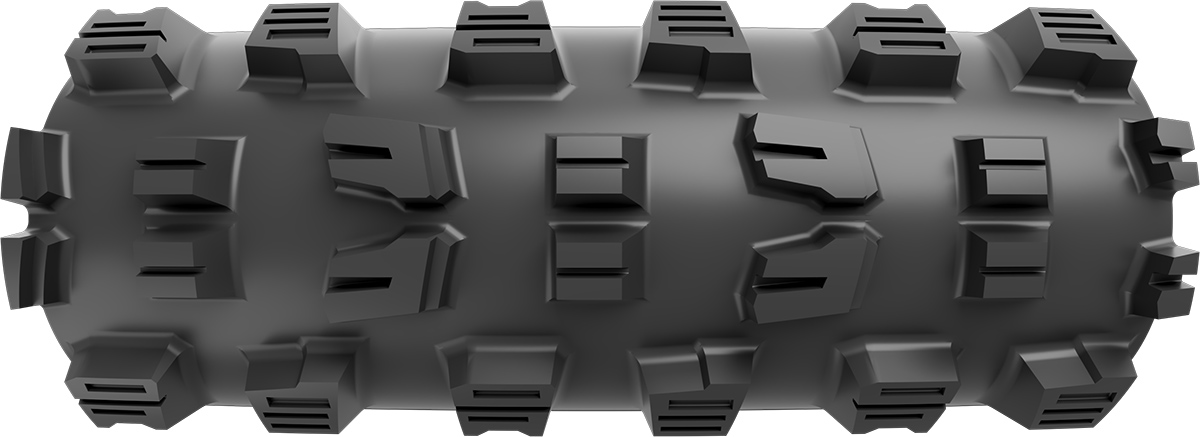
Siping: Small channels on the tire’s knobs. These long, thin channels are directional and allow better flex of the tread knobs, thereby increasing traction.
Tubeless: Just about all-mountain bike tires are now tubeless, which is to say they can be used without an inner tube. You can still use such tires with an inner tube if you want to, but tubeless mountain bike tires can be inflated when combined with a tubeless rim (and usually some sort of sealant).
Tubeless tires allow you to run lower tire pressures, which in turn provides more grip due to a larger contact patch between the tire and the ground. The sealant is there to plug any leaks from small cuts or punctures so you can keep riding.
Durometer: A measurement of a rubber compound’s firmness. A higher durometer tire will be more resistant to wear, while a lower durometer (softer) tire will wear faster but have better grip capabilities.
Why you should trust us
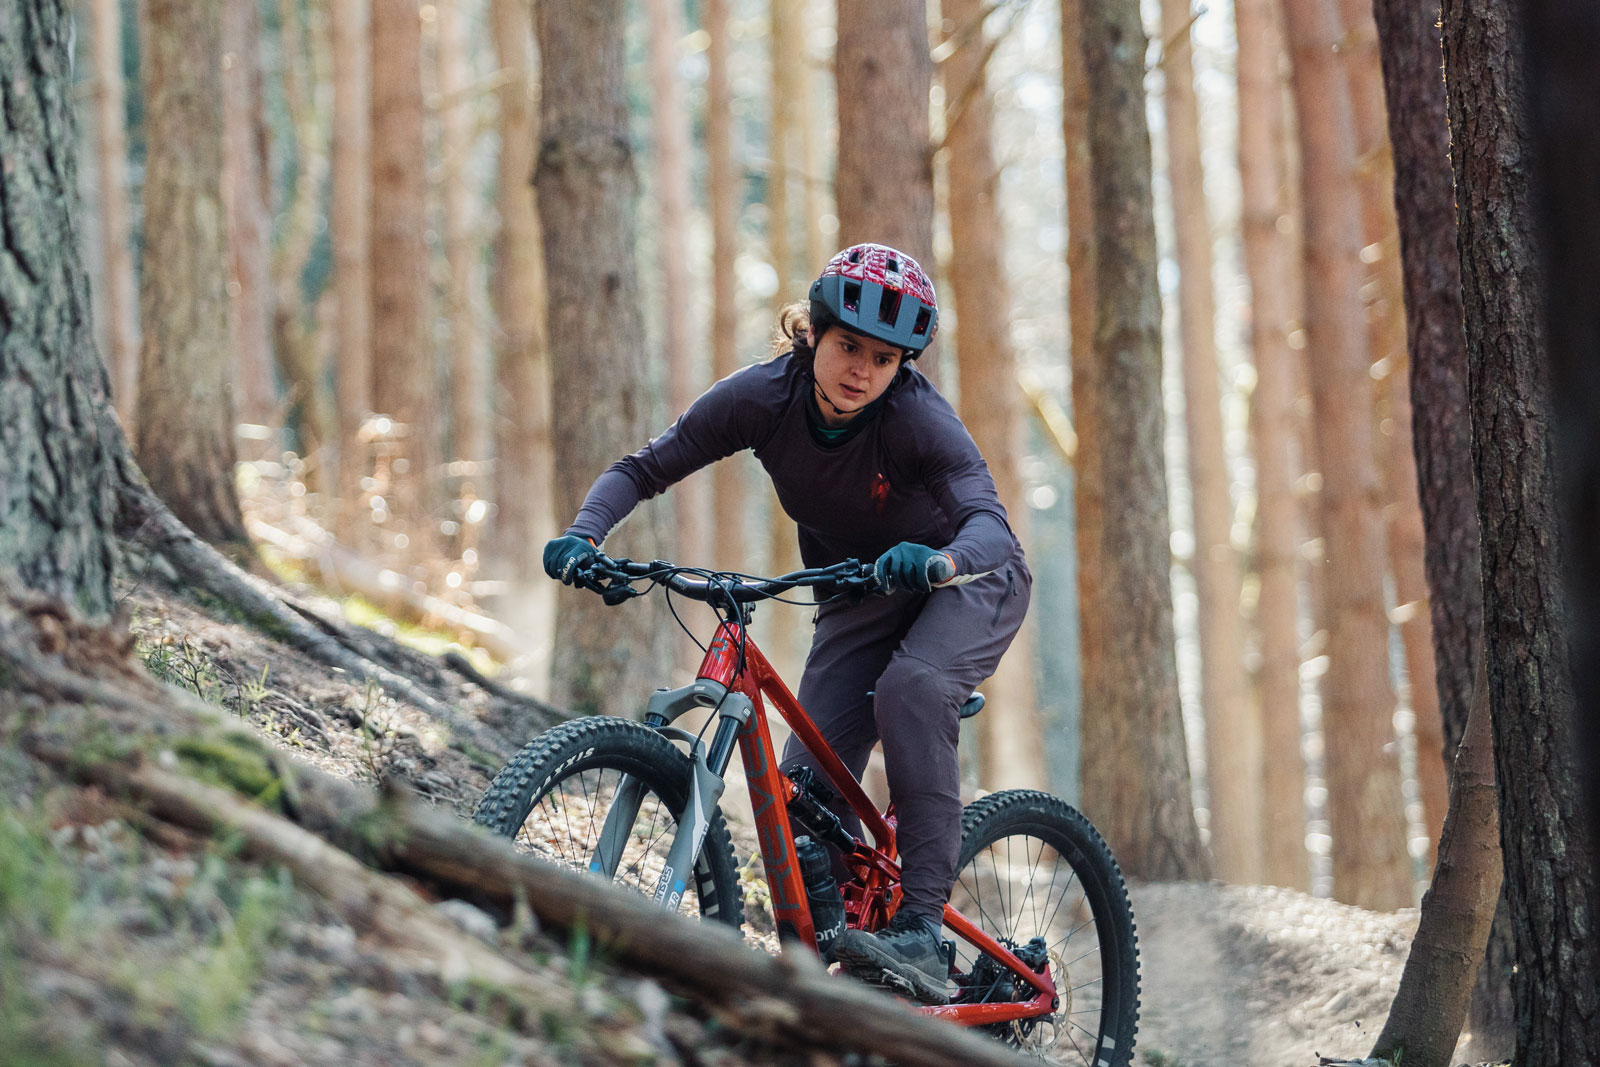
We ride a lot, and we do it all over the world! We’ve got Bikerumor writers posted up in the muck and mud in Scotland, the loam in the Pacific Northwest, the slick rock of the southwest, the dust and pea gravel of the Colorado front range, and even the slippery rocks and roots of the east coast.
And we test a lot of mountain bike tires all year, every year, in all conditions. Since tire choice ultimately comes down to which conditions you ride in regularly, it’s safe to say we ride those conditions too!
Got questions? Leave them in the comments and we’ll answer them!
