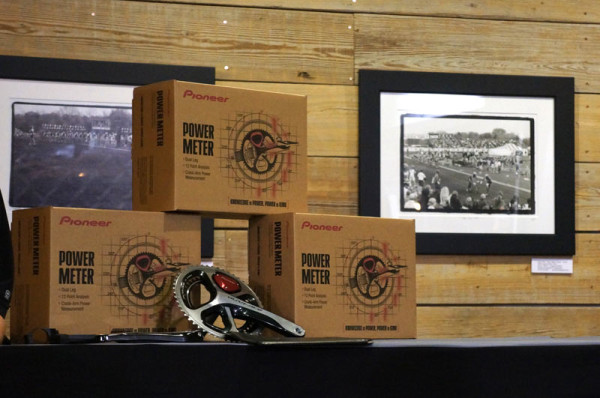
The first question I had when invited to Pioneer’s launch camp for their 2nd generation power meter crankset was Why cycling? Without prompting, that’s the first question they answered.
Many of their California-based employees are cyclists. Across the Pacific pond, Fujita-San and Shioda-San, two employees in their Japan office, are both cyclists, one with a son that’s turning pro. Pioneer has all the core technology in house, and those two had access to all of the different departments to pull resources together to create both the hardware and software. It’s been their pet project for almost 2.5 years. About 20 engineers worked on this second generation iteration, which fixed a lot of the issues with the first version.
What were those issues? After testing it with the Belkin pro team for two seasons and working with shops during installation, they found that it needed to be simpler. Gone are the zip ties, BB magnet ring and full shop installation. The original relied on shop employees to bond the strain gauges to the crank arms, not just bolt it on the bike. The zip ties simply weren’t elegant enough for a high end system. The magnetic ring required to determine rotational position was overkill and required modifications to the bottom bracket. And the in-shop install proved to be too much work when considering mechanic turnover and retraining, and there was always the chance for error.
My test unit is among the first 11 off their assembly line in Long Beach, CA. The parts are made in Japan, then the units and cranksets come arrive in CA and the cranksets are disassembled and prepped. They’re placed in a jig where the strain gauges are glued into place, then cured in an oven for three hours. After that, the transmitters and chainrings are installed and everything’s repackaged. Then it’s off to the shop…
The Power Meter is already selling in Japan and US. Australia and Netherlands are coming soon, and they expect four more countries in Europe by summer. Pricing is very competitive: It’s $1,850 for the power meter on a Dura-Ace crankset and $1,550 on Ultegra. Add $299 for the new, smaller CA500 computer and you’re around the same price as most high quality, single-leg measuring crank or hub based power meters.
In May, they’ll add in a cycling computer bundle that includes a HR strap and speed/cadence sensor for $380. The only reason you’d need the bundle is if you prefer wheel-size determined speed rather than GPS speed and/or if you want to just use their computer without their power meter and need a cadence sensor. Otherwise, the power meter parts handle cadence measurement already.
All of it’s available through QBP and KHS distributors. By summer, they’ll likely have an aftermarket installation service that lets you send your existing crankset in to have the power meter attached. But, that’ll run you $1,450 for the product, plus an installation charge and bike set up charge at your local shop. So, if you have Dura-Ace, you could maybe justify it, but realistically that pricing means it’s probably just worth getting a whole new crankset.
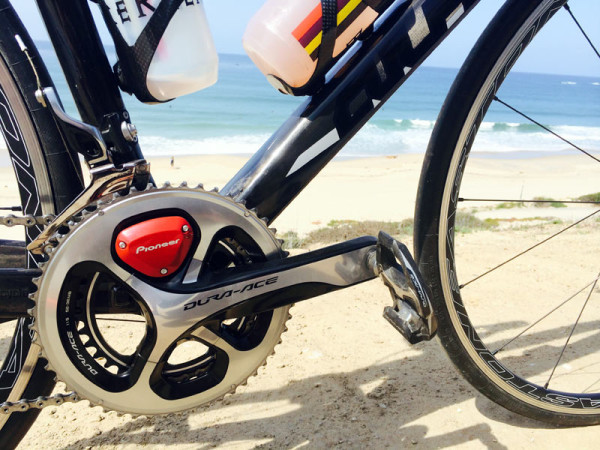
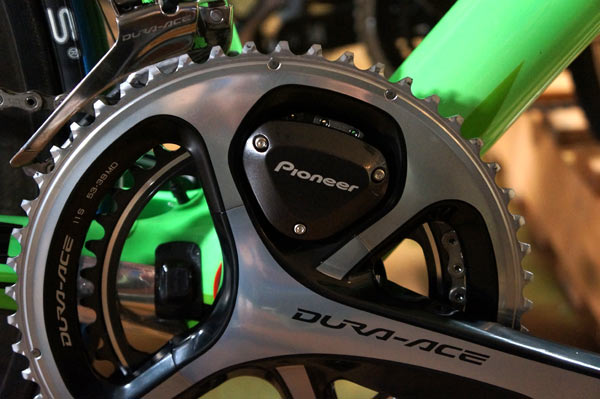
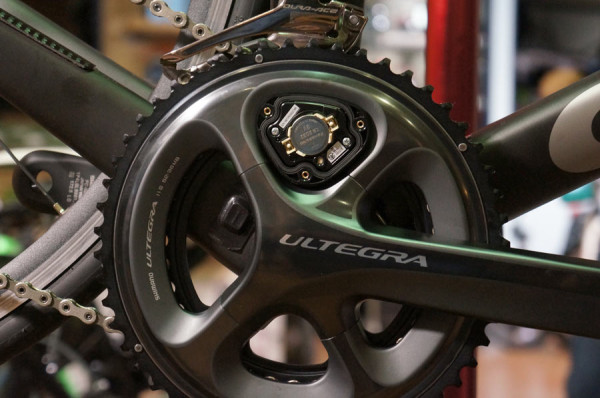
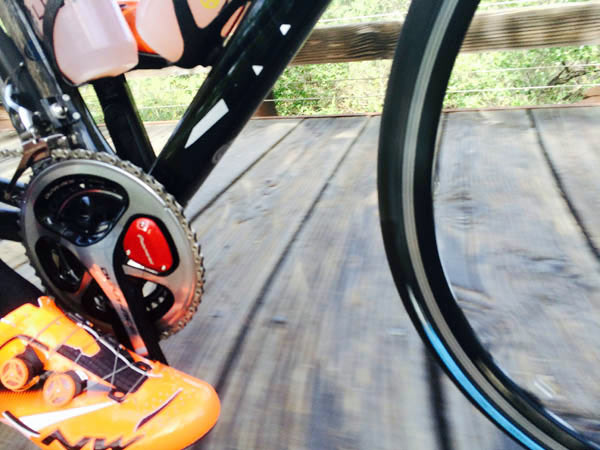
Gone are the zip ties for the transmitter, which makes for a much, much cleaner appearance.
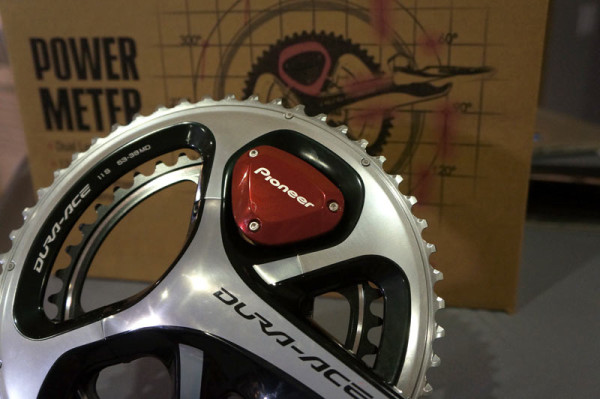
It comes with the red cover preinstalled and this black cover in the box. It’s just three bolts away from a stealthier look. They’re considering a green one to match the Belkin team issue parts.
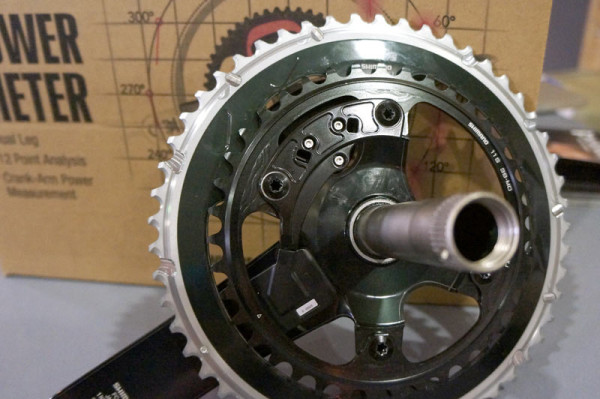
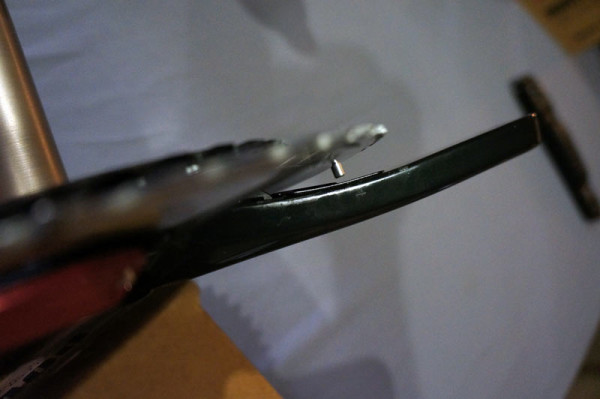
They got rid of the zip ties by bolting the transmitter directly to spider with the OEM crank bolts, which provides protection for the wire running to the drive-side strain gauge…which is very thin:
Despite that minimal width, there’s a lot going on in there. To capture the 12 points of rotational data per leg, there are two accelerometers in each side plus the strain gauge. Having two accelerometers lets it determine direction of movement. It compares the direction and the torque to calculate the direction of force as you pedal.
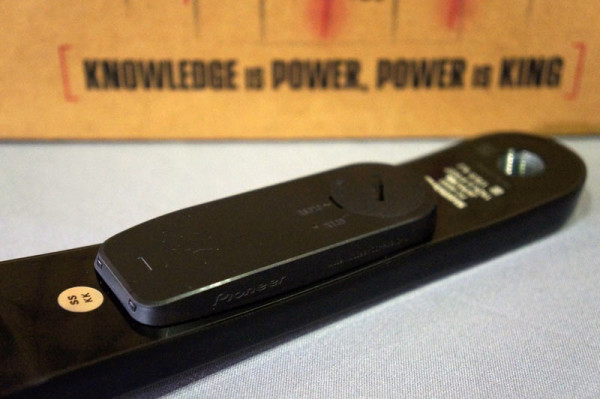
The non-drive strain gauge is wireless and only 9mm thick, necessary to house the battery and transmitter on that side. The old one was 13mm, which caused clearance issues on a lot of bikes, particularly Treks, so now it works with virtually every frame.
Magnets attach directly to the frame, usually on the stays. The drive side magnet is visible in the pic above just behind the BB.
When the crankset arrives, it needs to be calibrated to the frame. This, they recommend, should be done at the shop. It’s done, after all, by turning on something called Dealer Mode. First, the magnets need to be placed on the frame. Then, the batteries are installed and the setup button is pressed and held for about 7 seconds. Once the light blinks in a sequence that only dealers know (kidding), the crankset must be rotated around seven times, lighting up a small LED as it passes the magnet. Then the setup button is pressed and held again to store it all. This is telling the system where the magnets are on the frame. After this procedure, it’s ready to be zero’d out and ridden.
If you’re running only the Pioneer power meters but transmitting it to a third party computer (Garmin, etc.), there’s a switch under the cap that “dumbs it down” to basic ANT+ to send standard power data. But, that’s stripping out some of the key features that are transmitted in “Hi Def” using their ANT++ system. Features like force vector torque and direction that measure the radial and tangential forces to create the graphics that show how efficient your pedal stroke is.
In the event there’s not enough clearance on the non-drive stay, it can be stuck on the downtube or seat tube. It comes with articulating plastic mounts with magnets preinstalled for frames that have serious clearance issues, which is shown on the right (ignore those other cables and such, they’re not part of Pioneer’s system). Passing by the magnet simply tells it that it rotated one time.
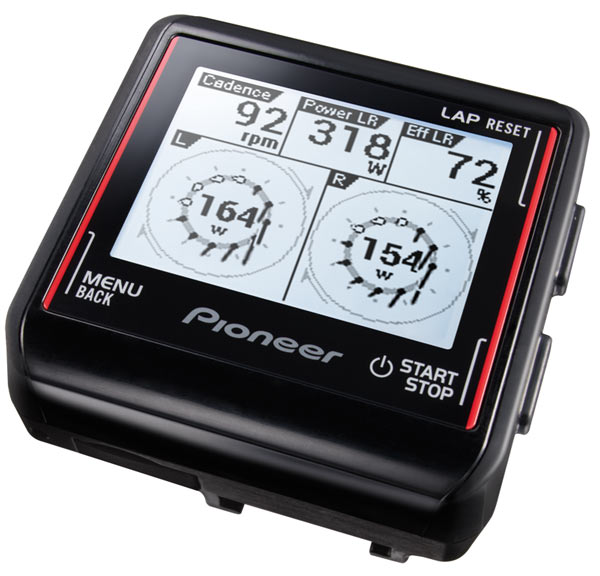
With the 2nd gen power meter, they also introduced the new, smaller CA500 computer. The original (left) is also still available and has a color screen, the new one is black and white only. The reason for the smaller computer option was that the Belkin team wanted something smaller for racing. The larger one is great for training as it makes the force vector and torque figures on the pedal circles much easier to see. Both are touch screen.
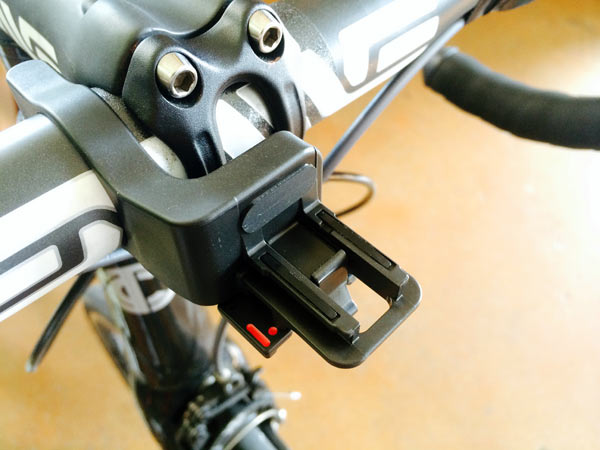
The new mount for the CA500 has a nifty sliding lock (red) to keep the computer from popping out. To remove the head unit, you slide the lock out, then depress the release and slide the computer forward.
GETTING STARTED & MORE TECH
Once the bike’s in your possession with all the hardware on board, set up is a snap. All of your personal profile info is entered on the head unit. Since the CA500 has built in WiFi, you don’t actually ever have to plug it into your computer.
Presumably, your shop will have done the initial Zero Calibration for each crank arm, but you’ll need to know how to do it, so ask. Basically, you place the right crank arm straight down and go through the menu like so: Sensors / Right Arm / Zero Calibration / Start. Then you go to Force Preview to confirm it’s set at 0 (+/- 3 N). Repeat for left arm.
Why do you need to know this? Because you’ll need to do it periodically on your ride. Why? To help the system learn: There are six memory settings that save calibrations for different altitude and temperature settings. This lets the system automatically figure out what the correct power is over the course of the ride. For instance, if you live at sea level but routinely climb a few thousand feet up the mountains, simply zero it out when you start and at the highest point of the ride. From there, it’ll monitor elevation, temperature and humidity and auto calibrate the data across the ride. The result, in theory, is extremely accurate power data regardless of environmental conditions. But you’ve gotta give it at least four varied reference points to make the most of the system. All six would be better.
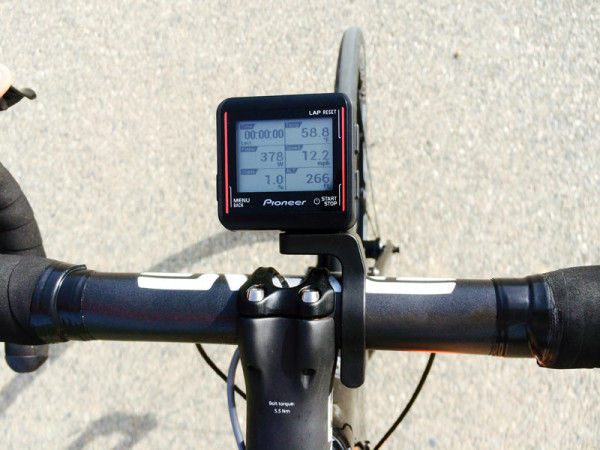
During set up, it’s super easy to change one of the data points on the screen. Tap the box for any metric and it’ll expand. Hold your finger on it and it’ll give you the option to change the metric displayed in that box. That means quick changes at the stop light without having to scroll through multiple menus. Awesome.
There are six pre-configured screen collections, each with six preset screens ranging from the one shown below to one with nine metrics displayed. You can turn screens on or off to limit the number, and you can customize every one of the boxes on all of them to set it up exactly the way you want. Once you’re out riding, simply swipe left or right to move to the next screen. Swipe up or down to change the brightness.
Hold the circle and you can switch between seeing force direction and positional torque.
AFTER THE RIDE
Assuming you’ve already downloaded their CycloCloud app for your home computer (Mac/PC), you could plug your head unit into your computer and upload the data to Pioneer’s cloud-based CycloSphere online training center that way. But that’s so 2013.
The CA500 has WiFi, allowing automatic uploads as soon as you finish and save the ride. Just bring the head unit within range of your WiFi network and your data goes to the Pioneer Cyclosphere cloud. It’s all web-based, so it’s immediately PC and Mac (and tablet and phone and everything else) friendly. I feel the need to repeat: You really don’t ever need to connect it to your computer. Even firmware updates for the unit are done wirelessly. You can also manually upload wirelessly.
Strava and Training Peaks uploads are possible now by downloading a .FIT file from CycloSphere and uploading to your preferred 3rd party service. But, by the end of March, they’ll have direct Strava uploads. Training Peaks will come when TP gets their WKO 4.0 up and running.
FIRST IMPRESSIONS
Oh boy. There’s so much going on here, that one test ride really only scratches the surface. But there’s a lot to like, so I’ll start with my only two nitpicks so we end on a well deserved positive note:
First, the screen is not super sensitive, turning lighthearted swipes into mere touches. Second, the Menu/Back button always jumps back to the Cyclemeter screen rather than just moving back in the menu system. Fortunately, nothing’s very deep in the menu, but it’s still inconvenient. That is something they’re probably changing in a future firmware update as even the US Product Manager says he wishes it didn’t do that.
Now, the good. Batteries are simple CR2032 and can be user replaced. The computer uses a non-replaceable USB rechargeable battery good for 12 hours at a stretch, even with the WiFi left on. They say it’s not constantly searching for a network, so it shouldn’t affect battery life during normal use, but I’d say if you’re not planning on using the computer and recharging it a couple times per week, maybe best to turn WiFi off when not in use.
Two things stand out: the sheer volume of data points that are available to the rider, and the fact that they’re so easily accessible. Honestly, this is the easiest computer I’ve ever set up. The menu system is intuitive enough to get it up and running and quickly enter your base profile. And it’s incredibly easy to change it on the fly to see different metrics while you’re riding.
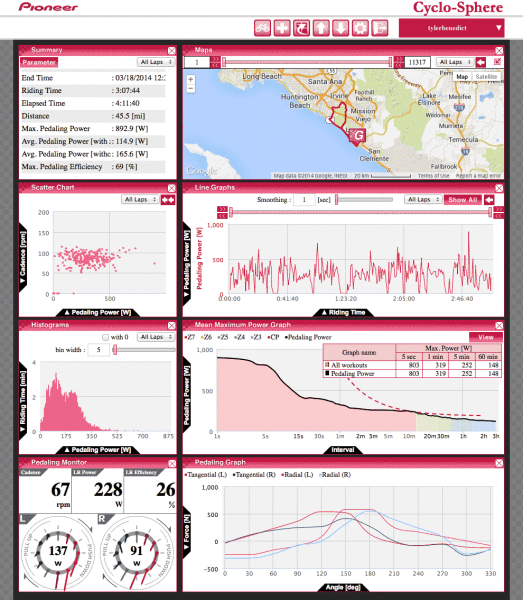
I’ve only just finished my first ride on it and it uploaded the ride in under a minute. The amount of data produced is staggering. Here’s a sample screen shot without any customization:
Click to enlarge. That top left box can scroll through something like 200 data points, and all of those are available on the head unit, too. The online portal is almost as customizable as the head unit, letting you move the boxes around and set different metrics to each axis on the charts to compare whatever you want. For example, you can tell if there’s an imbalance between your legs. Or if one leg is more efficient at higher cadence while the other’s better when mashing. Or, if you add an ANT+ heart rate monitor, at what point you’re most efficient in terms of power output versus HR. Or cadence versus power. Or HR. And over time you’ll be able to see trends like how temperature, incline, altitude and other factors affect your performance.
I haven’t dug into it all yet, but the system’s coming home with me for a proper long term test. And I’m excited about it…as they say, knowledge is power. And as Pioneer says, #PowerIsKing.
True, some of this can be gleaned from any power meter, but with their complete system, it’s really more than just a cycling power meter. It’s also a cycling pedaling monitor. And it’s all of that at a price that’s comparable to other dual leg power measuring systems, which makes it not only a great training tool but a relative bargain in the power meter market.
First impressions are good, with this caveat: There were a few times during the ride where I could tell it needed more Zero Calibrations to handle the changing environment. We started in the cool morning at sea level and climbed into the sun around 800 feet up. At at times the power reading didn’t seem consistent with how my legs felt. Nor did the left/right balance, and it fluctuated a bit too much under some early sustained efforts. We didn’t get a chance to add additional memory points on our test ride, so that’s something I’ll do on my home turf and report back. Stay tuned for a mid-term report followed by a full long term review later this year.
WHAT THE FUTURE HOLDS
Warranty – They’re working on getting Shimano’s approval to maintain the manufacturer’s warranty on the crank and chainrings, but for now just they’ll let you ship the entire crankset back even if it’s a Shimano parts issue and they’ll warranty it through Pioneer.
Carbon cranks – They say the challenge is the consistency of the material and surface finish, but they’re trying hard. They say possibly by summer, but nothing’s guaranteed.
Other brands – They’re also looking into systems for SRAM, Campagnolo and FSA alloy cranksets.
Huge thanks to the folks at Pioneer and Bike Religion for the hospitality and bike setup.
