Home > Bike Types > Mountain Bike

Readers’ Rides: German’s DIY XTR Derailleur Cage

21 Comments
Support us! Bikerumor may earn a small commission from affiliate links in this article. Learn More

German diy xtr derailleur cage aluminum  (7)

When it comes to bicycles, there are quite a few things that many of us probably take for granted – access to great trails, well established dealer networks, and affordable repair parts to name a few. Depending on a rider’s location, that last one can make getting your bike back in service much more difficult than just cruising down to the local bike shop and picking up a replacement.

That was the situation a former mechanic from Argentina found himself in when an XTR derailleur needed an entirely new cage. Citing the extremely high cost and limited availability of repair parts in Argentina, German who is now a college professor has continued his bike repairs at his house. Having already repaired 7 or 8 derailleurs for local racers including XT, XTR, and SRAM XX/X0, this was the first time German attempted to build a complete cage for a rear derailleur.

Without a machining background we think German did an amazing job with little more than basic tools, pen, and paper…

German diy xtr derailleur cage aluminum  (2)

German diy xtr derailleur cage aluminum  (3) German diy xtr derailleur cage aluminum  (4)

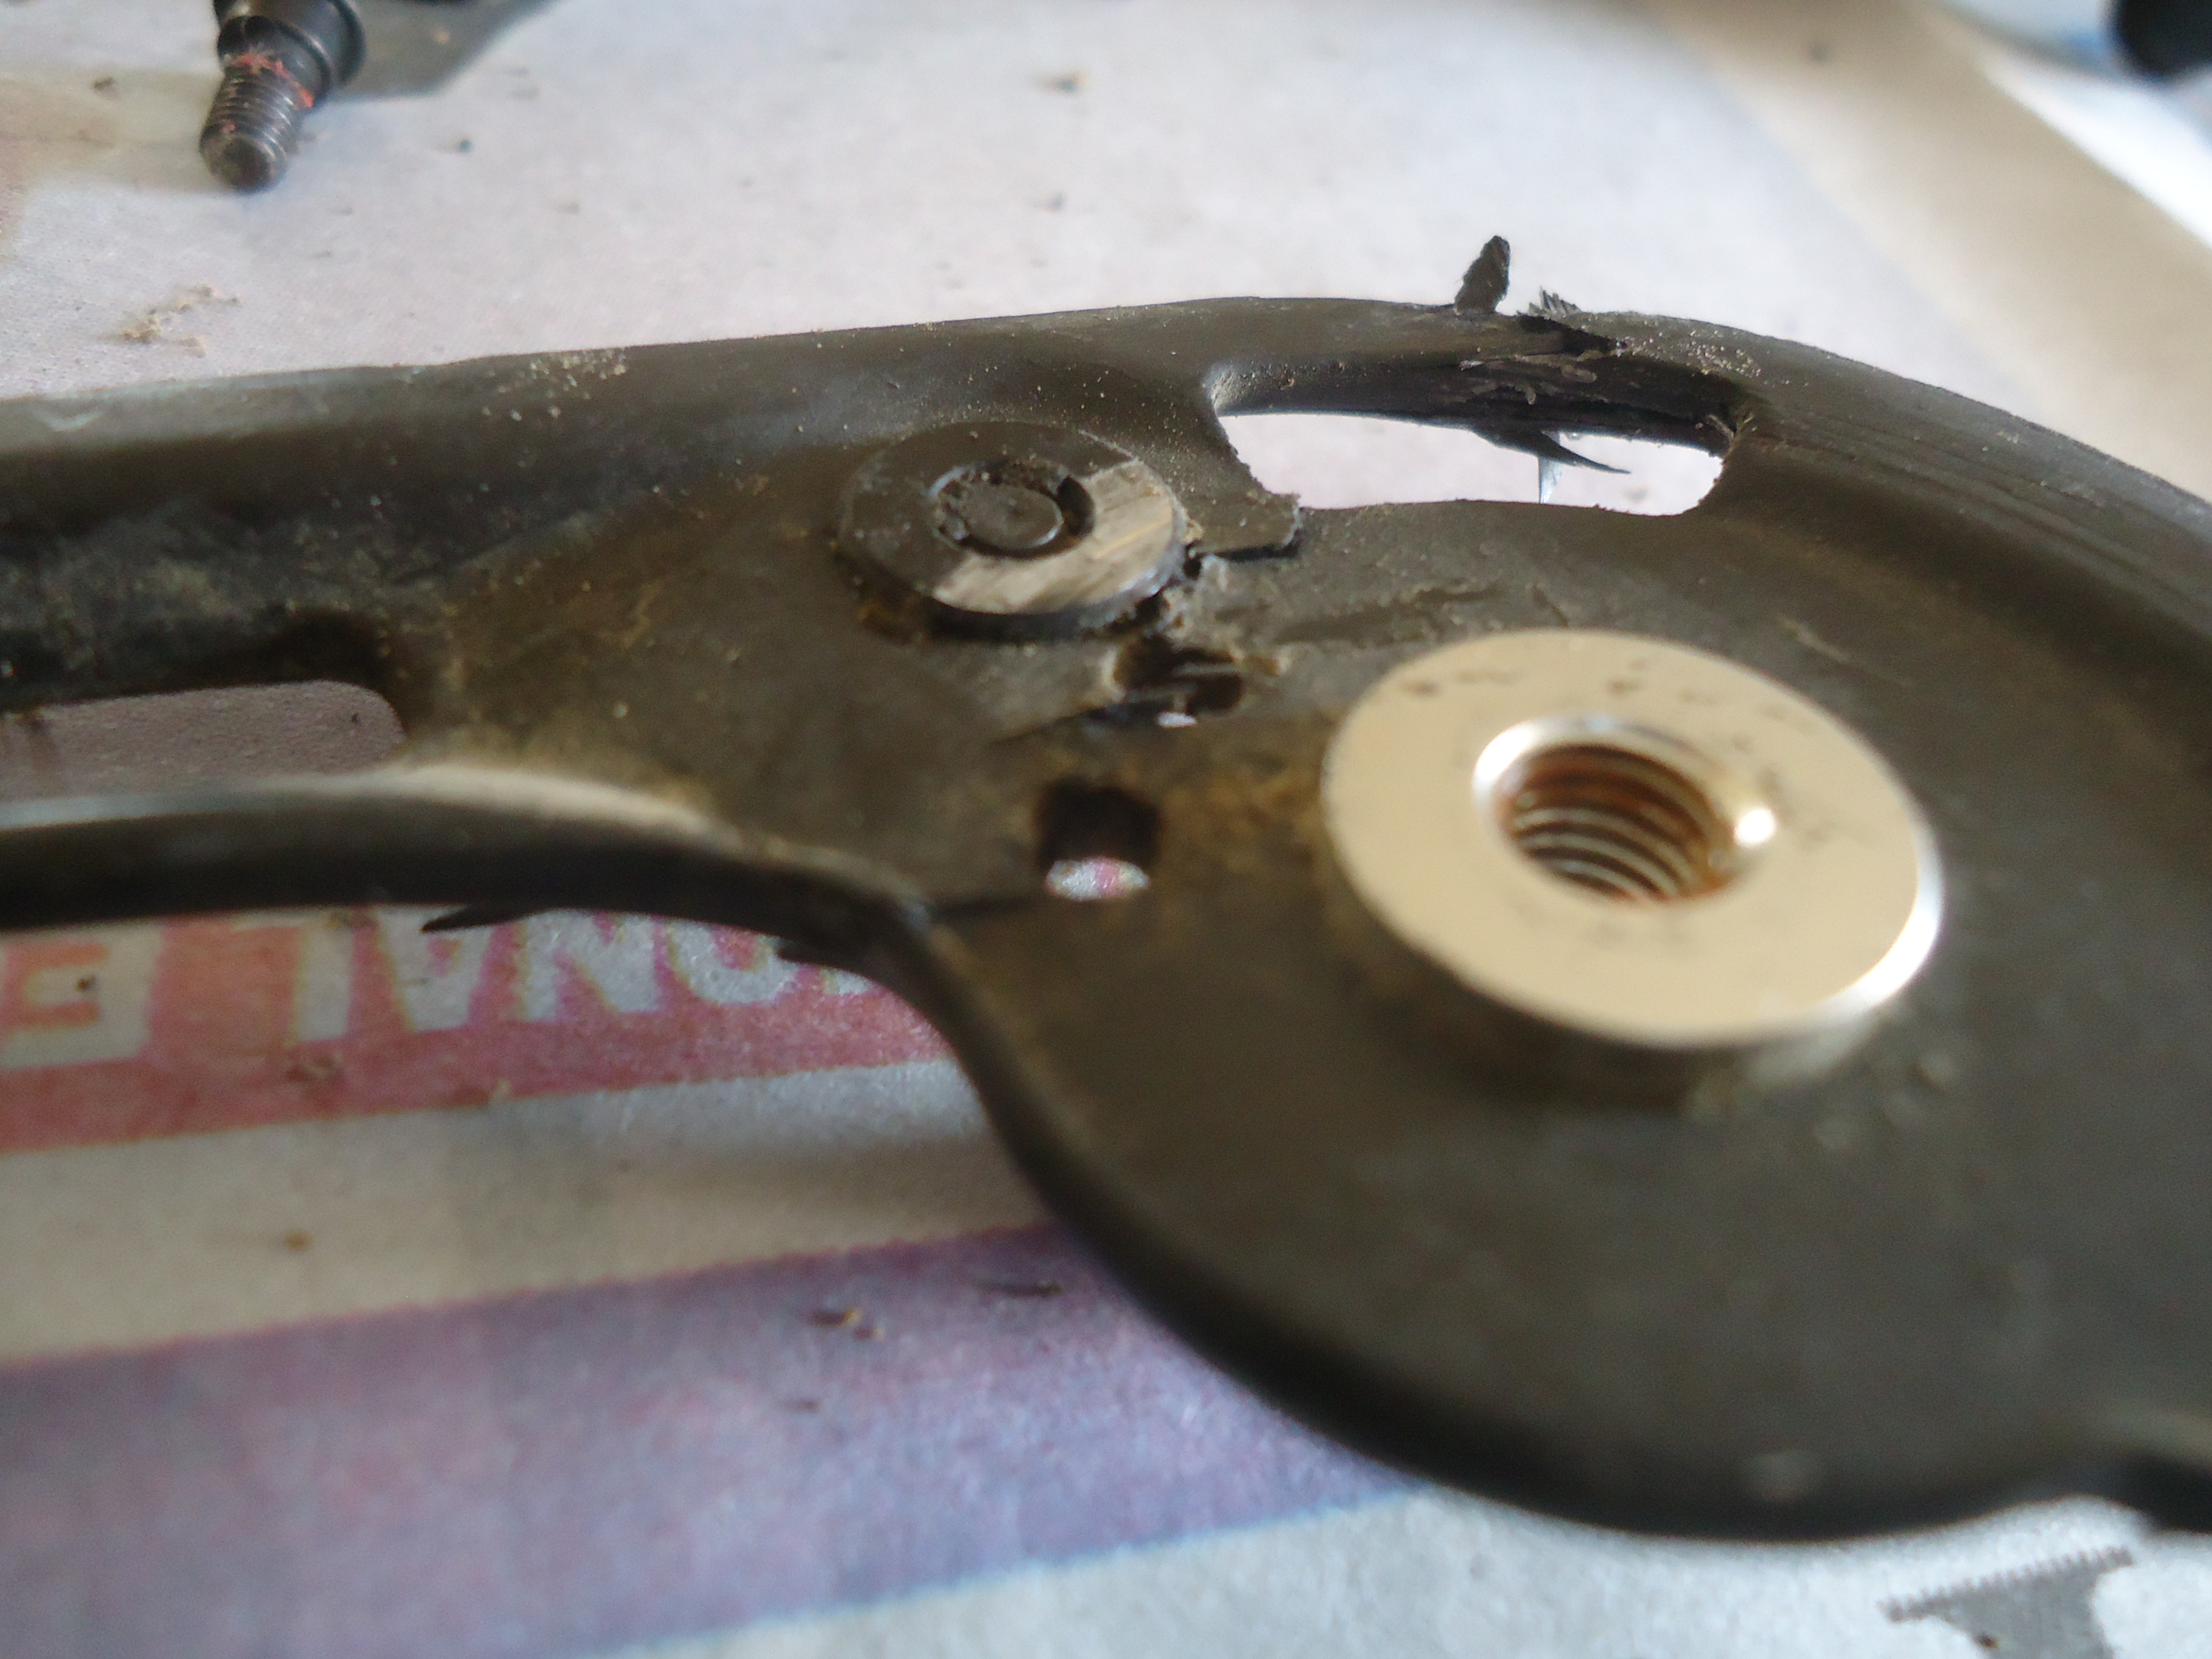
German may be working on his dining room table now, but once a bike mechanic, always a bike mechanic, right? German says he started as a mechanic in 1998 and continued to work at shops through college. The project started with a disassembly of the derailleur to inspect the damage. Putting his love of drawing to good use, the original design is transferred to paper, then transferred to a plate of aluminum.

German diy xtr derailleur cage aluminum  (6) German diy xtr derailleur cage aluminum  (9)

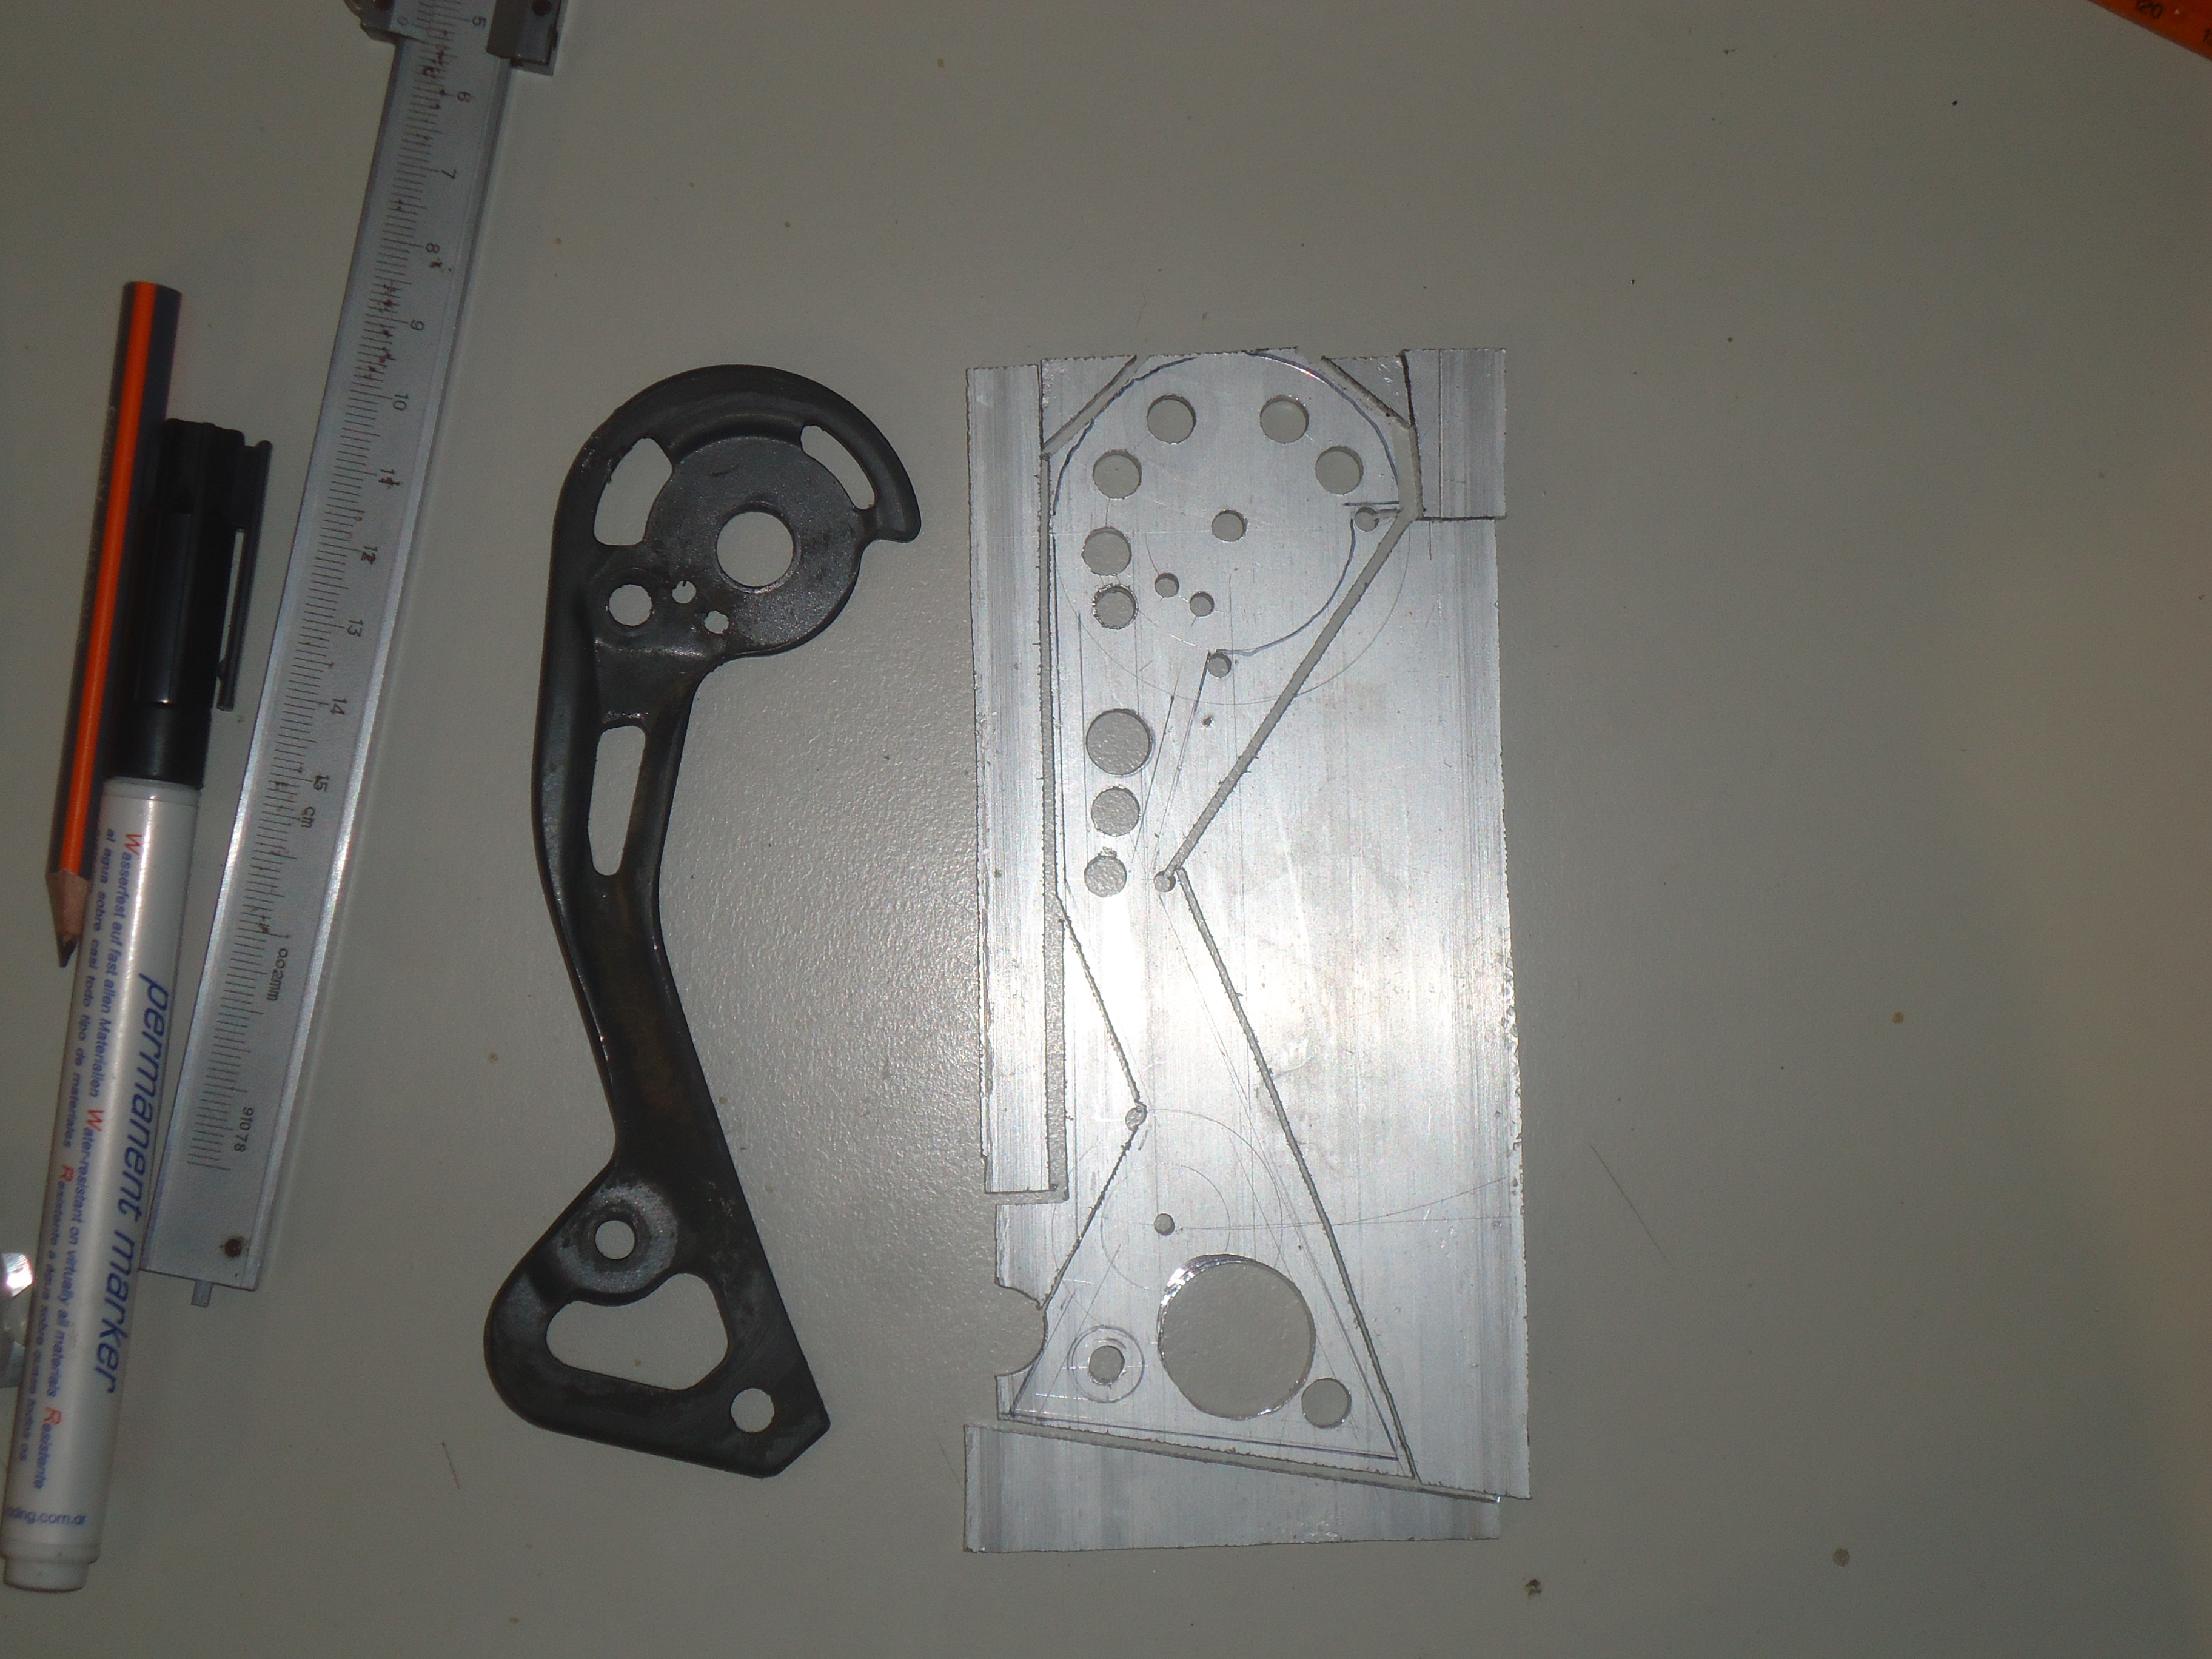
Using a saw, drill, files, and sand paper the cage is slowly cut out from the plate.

German diy xtr derailleur cage aluminum  (10)

German diy xtr derailleur cage aluminum  (12) German diy xtr derailleur cage aluminum  (11)

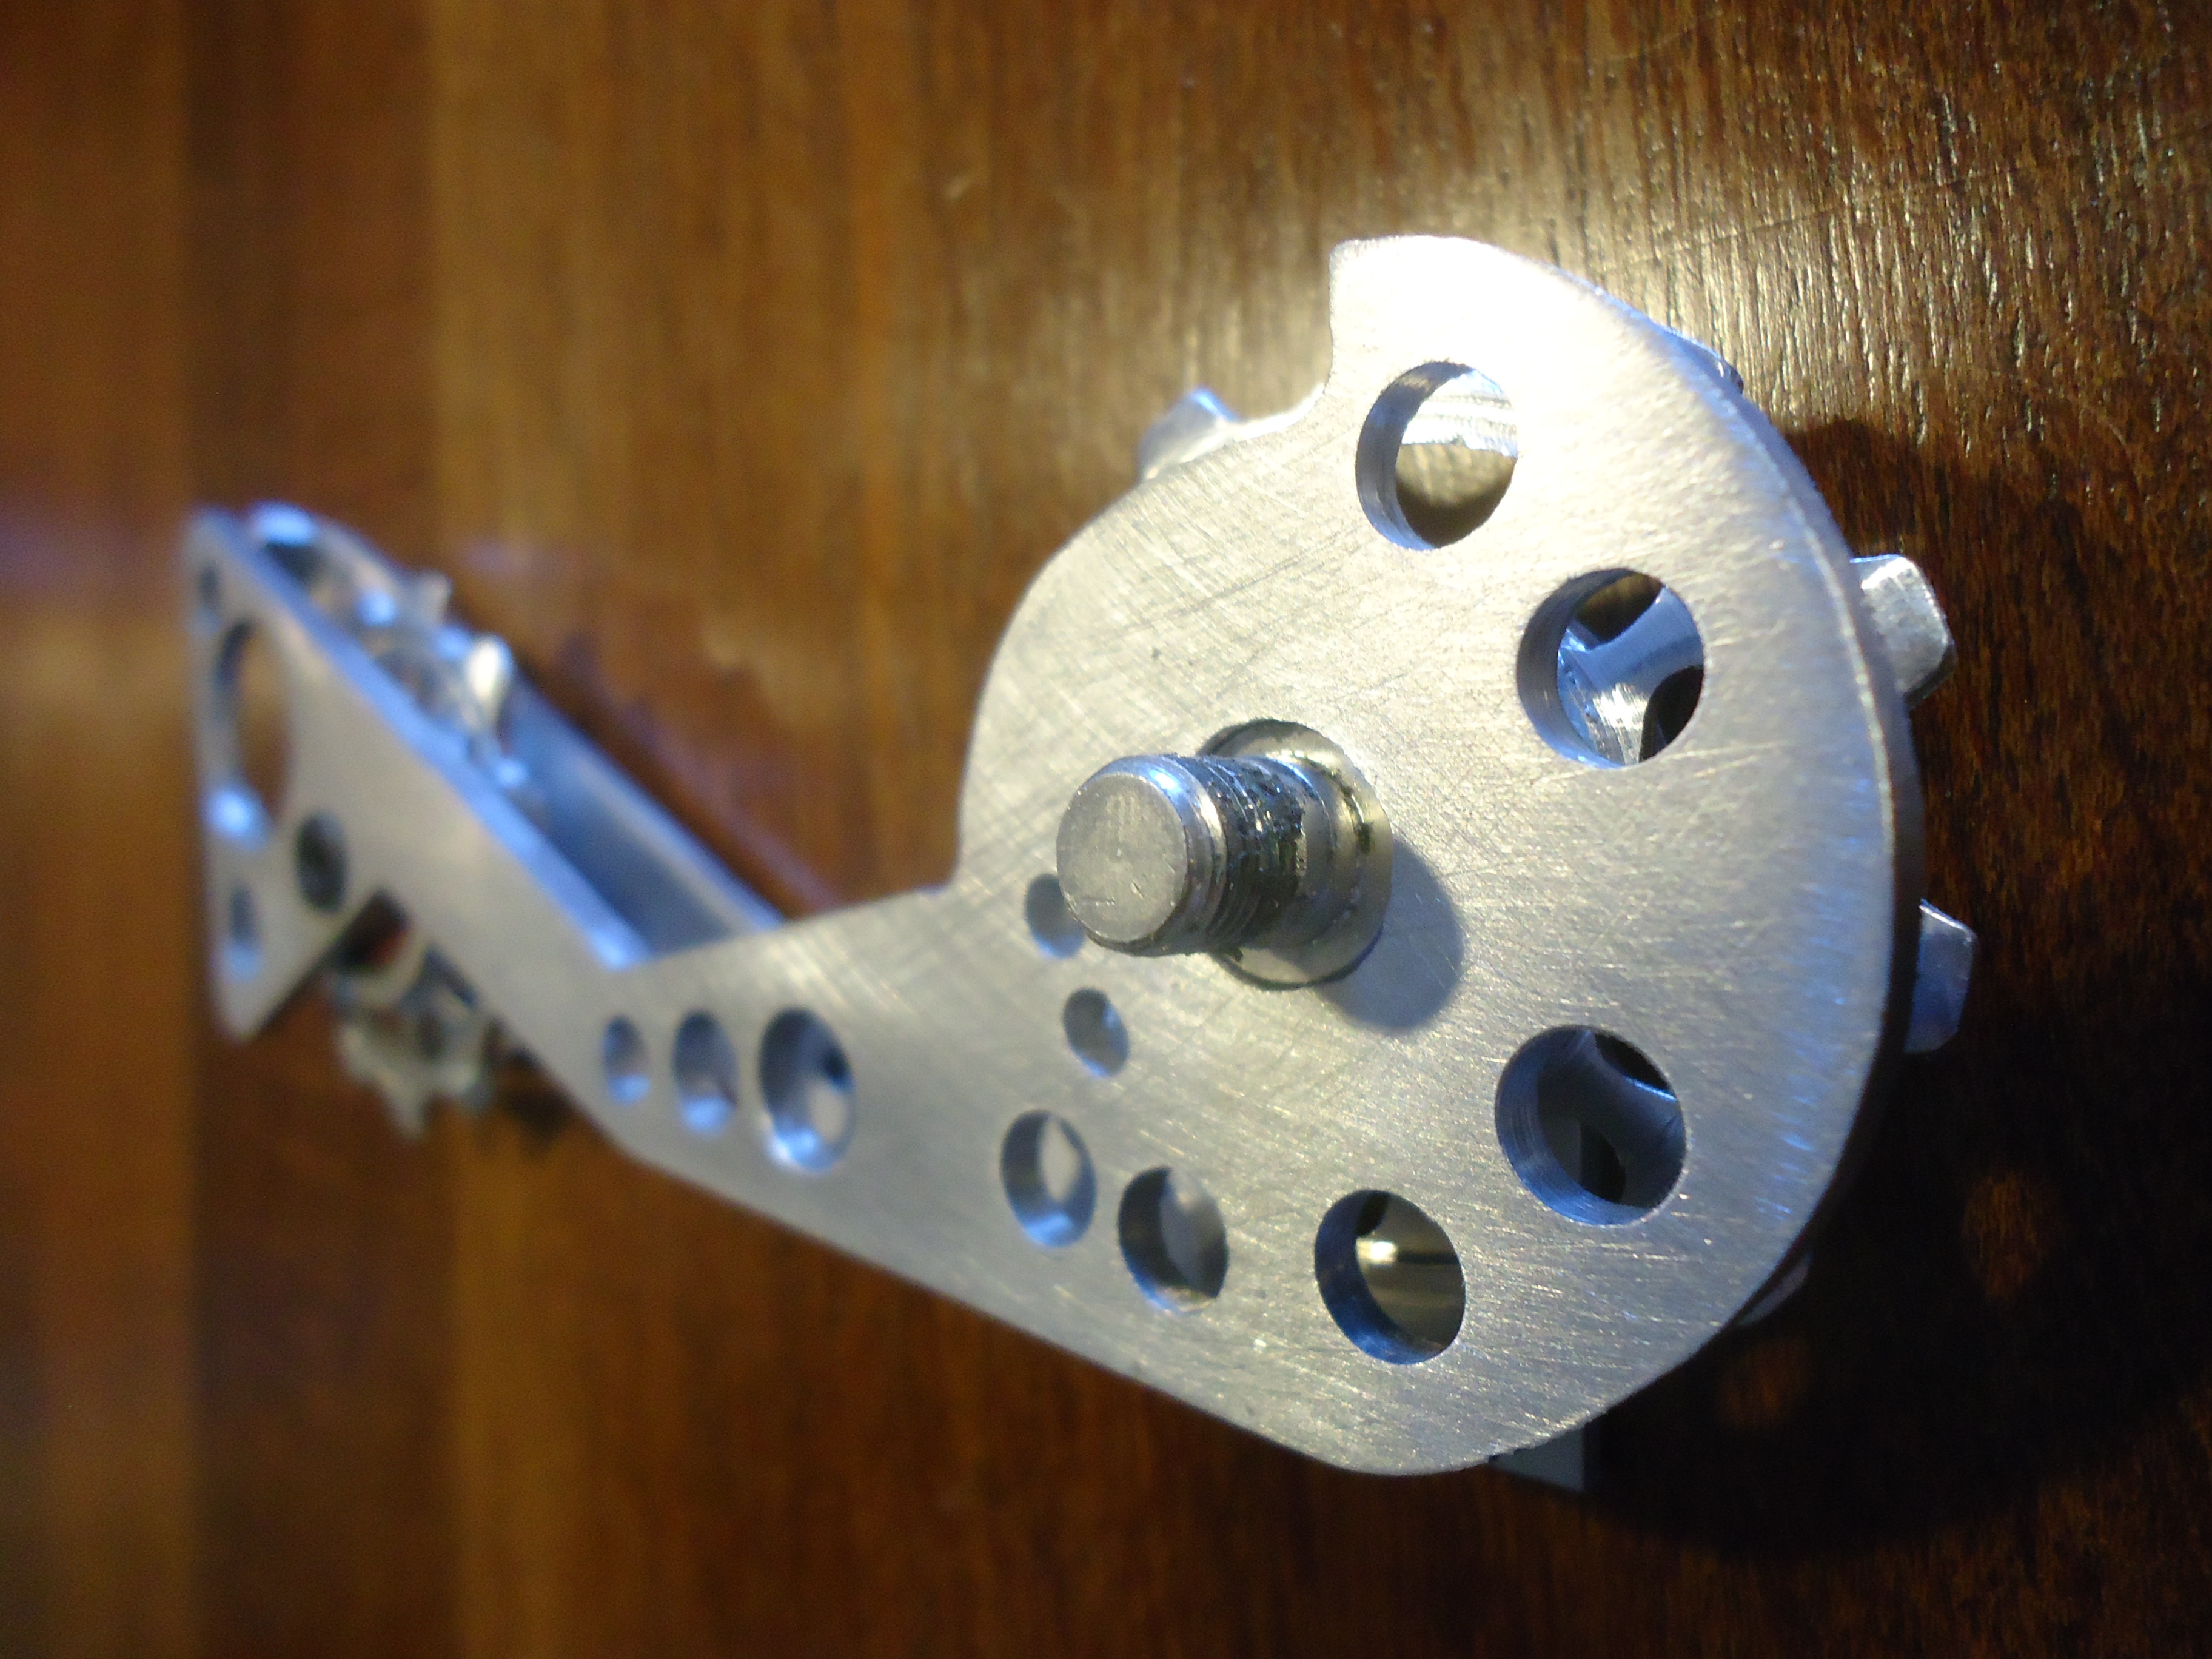
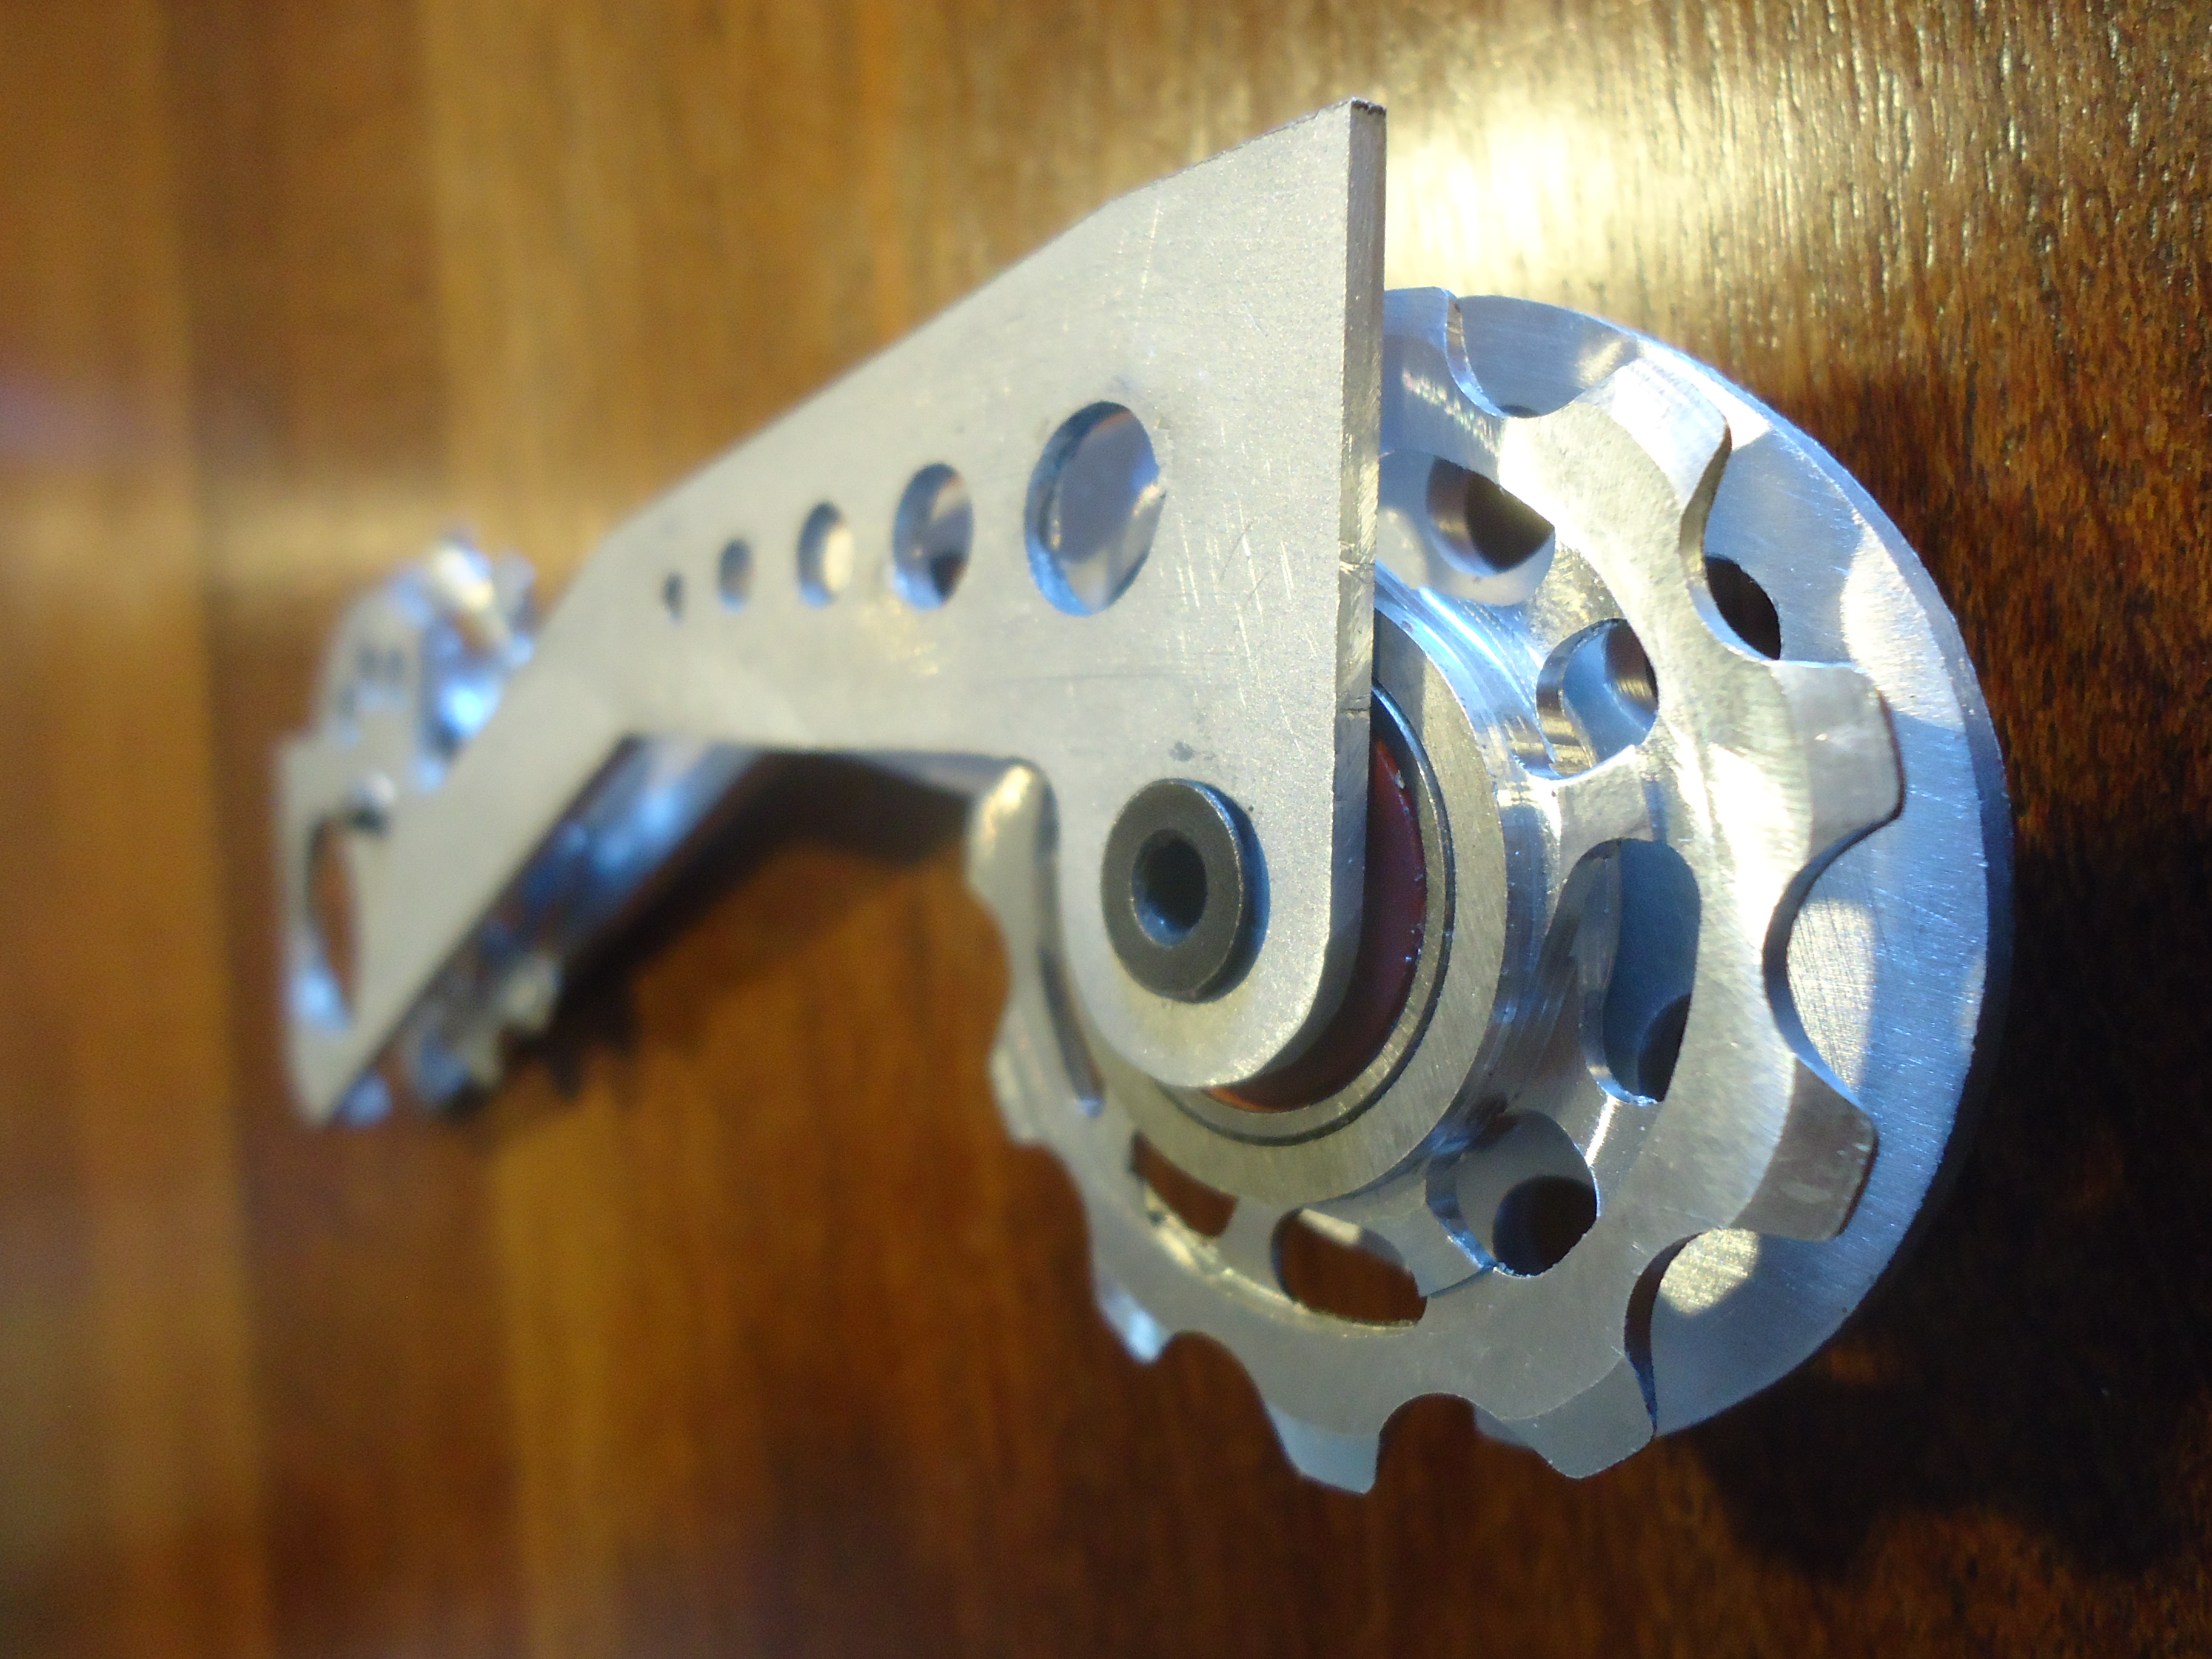
Finishing touches are added to both sides of the cage and checked for fit with new pulleys.

German diy xtr derailleur cage aluminum  (13) German diy xtr derailleur cage aluminum  (14)

German diy xtr derailleur cage aluminum  (1)

Pretty impressive for a DIY derailleur cage. German says it was finished on a Saturday and then proven the very next day with a 60km mountain bike race on the Chilean border. Great work German, we love to see ingenuity and problem solving like this from around the world!

Got a bike hack/custom/DIY project you think is worthy? Send it to us: editor@bikerumor.com 

Subscribe
Notify of
guest

This site uses Akismet to reduce spam. Learn how your comment data is processed.

21 Comments
Oldest
Newest Most Voted
Inline Feedbacks
View all comments
Keris
Keris
9 years ago

Awesome, I’m inspired to do something similar!

Remi
Remi
9 years ago

Dang. A professor of ingenuity. Good work man!

Veganpotter
Veganpotter
9 years ago

Amazing work. Bike gear is insanely expensive in Argentina and Brazil. I’ve sold gear to a handful of guys on vacation(and work trips) in the states and it seems pretty much everything is double the price in those two countries.

Kovas
Kovas
9 years ago

Is this what they mean when they say, “fine German engineering…”? Nice work.

Nuno Pinto
Nuno Pinto
9 years ago

Probably better than the original, lol

German Stoessel
9 years ago

What a surprise!!
Thanks a lot for the article on my job.

saludos desde Santa Cruz, Patagonia, Argentina

Dogui
Dogui
9 years ago

De cat is ander de taibol

Pulpoh
Pulpoh
9 years ago

Amazing job German, looks like a retro Paul Components derailleur.

ARIEL
ARIEL
9 years ago

volvé German! great piece of craftsmanship, congrats

Johnny Chicken Bones
9 years ago

This is the first time I I haven’t seen a stack of BR readers writing in to say how many places the fabricator/crafter blew it!
How they would have done it better, or how their franken cog 8spd thumb shifter 1x set up is better….

And indeed German- well done. Thank you for some inspiration.

Craig
Craig
9 years ago

Thanks for the article Bike Rumour. Really cool to read about this great job of hand fabrication.

Reading about this kind of stuff, and the brilliant articles like the Sacha White interview are what
I like to hear about. Product advertorials are great too (sometimes a bit overdone though), but articles that are a bit more personal make for interesting reading.

Like the several wood bikes you have featured lately, that’s interesting stuff.

More of this please!

Sardinien
Sardinien
9 years ago

@Dogui : ma che minchia dici ???? Mi fai spaccare dal ridere cazzo…:-)))))

carbonfodder
carbonfodder
9 years ago

muy caliente

dockboy
dockboy
9 years ago

Nice work. From the looks of it, it’s simply an aluminum copy of the original? I’m thinking of building one of these myself with a higher offset top pulley for my cross bike, I like seeing it done with few specialty tools.
Did you use the stock pivot bolt for the cage, or did you make that, too?

Carl
Carl
9 years ago

awesome. really tidy for a one-day job too. kudos German. Also, BR, it’s nice to see something not put on a digital scale (ffs) for a change.

ifbikes
ifbikes
9 years ago

but what kind of cookies are those and did he make those too?

German Stoessel
9 years ago

@Ifbikes, those cookies are “boca de dama”. A famous brand around here. And what you see on the right side of the picture, covered by some leather, is a “mate”. I was drinking “mate amargo”.
In the same dining room, but notshown in the picture, there is -also- a hand made clay oven, with a 7mm thick metal door, with fully functional cycling parts.

saludos!

erin sikkink
erin sikkink
9 years ago

argentina has very strict and very expensive import fees. basically any bike parts are insanely expensive. when we toured there on 700c wheels and it proved to be difficult finding replacement tires/tubes, and when you did find them they were incredibly expensive. If youre doing an extended tour in argentina, plan on bringing a spare set of folding tires. or just ride 26″.

James
James
9 years ago

Lovely bit of fabrication there, just be careful of the placement of the lightening holes. Most specifically on the inner plate mid bend, a hole right across the thinnest section is a massive stress raiser, expect to see it to crack from here from the hole edge toward the aft direction of the bike.

david french
david french
9 years ago

If you can’t afford the replacement parts then don’t run XTR!

German Stoessel
9 years ago

David: in this case, there are no xtr parts available around here. If they were, they would be expensive.

Subscribe Now

Sign up to receive BikeRumor content direct to your inbox.

Subscribe Now

Sign up to receive BikeRumor content direct to your inbox.