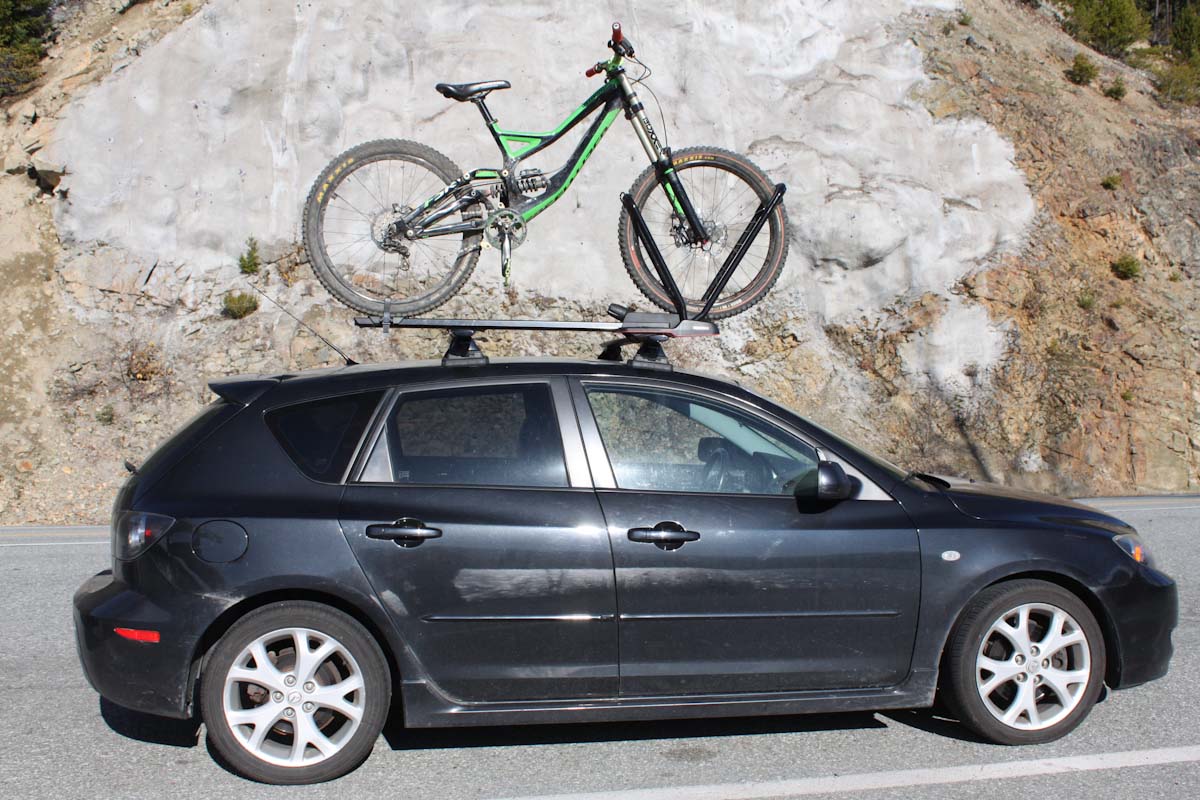
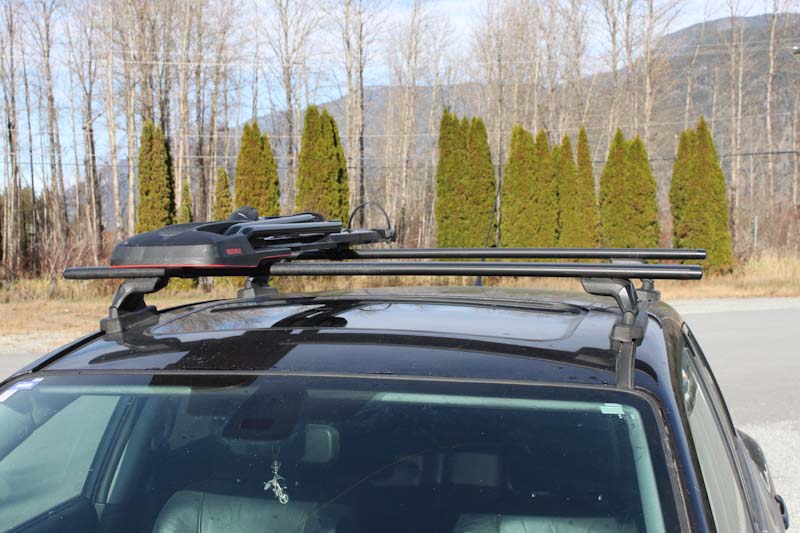
This summer I went looking for a bike rack to haul my downhill rig to and from the Whistler Bike Park. Yakima came to the rescue with a Skyline roof rack system, which has safely and securely hauled my DH and trail bikes around all summer. That said, I will mention one key thing that could have posed a serious problem if I didn’t use common sense.
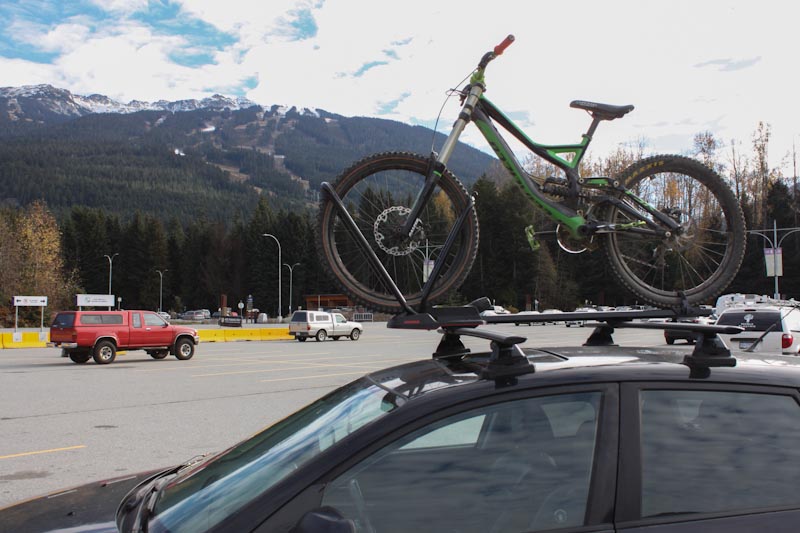
For my ’07 Mazda 3, Yakima sent me LP22 Landing Pads, Skyline Towers, a pair of small Jetstream crossbars, and a HighRoad bike carrier. The HighRoad bike carrier has a weight limit of 45lbs, which should handle any trail bike and most downhill bikes, but is not enough to carry most (if any) E-MTBs.
The weight limit for the crossbars and towers is 165lbs, which is more than ample for two maximum weight bikes and two 18lbs HighRoad carriers. The HighRoad will accommodate 26-29” bicycles, with tires from 23mm to 4” in width. I hauled my 26” DH, plus 27.5” and 29” trail bikes (all medium frames) with no fit issues. I asked Yakima if they’ve found any fit issues with longer bikes like XL-sized 29ers, and they said some may be too long- the tray will fit up to a 48″/1219mm wheelbase.
Yakima Skyline roof system installation:
 At a casual pace with a coffee in one hand, it took me 2 ½ hours from opening boxes to securing my bike on my car’s roof. I’m sure the job could be done quicker than that, but I take my time with mechanical stuff! I had no problem following the instructions and getting the rack installed correctly. With the exception of a measuring tape for checking your crossbars’ alignment, the other few tools required are supplied by Yakima.
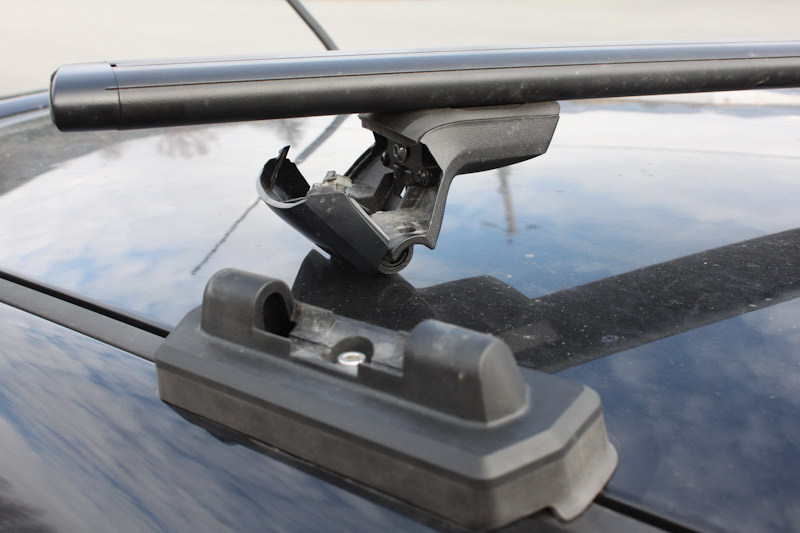
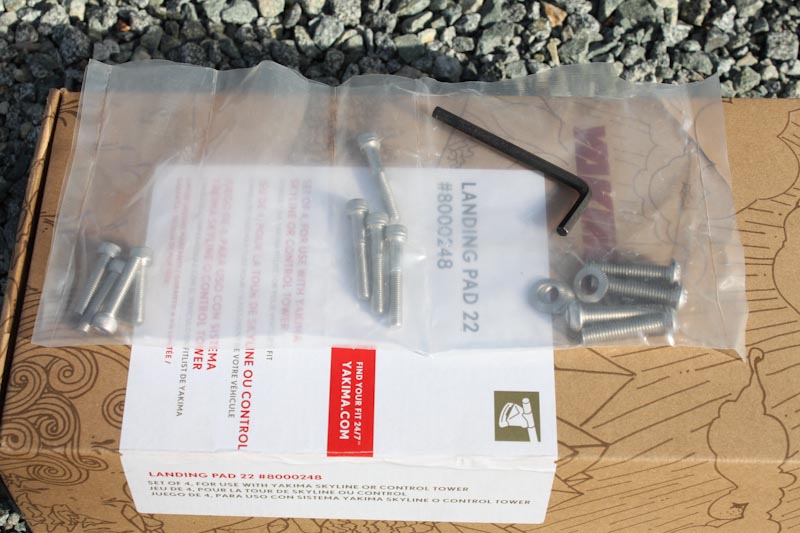
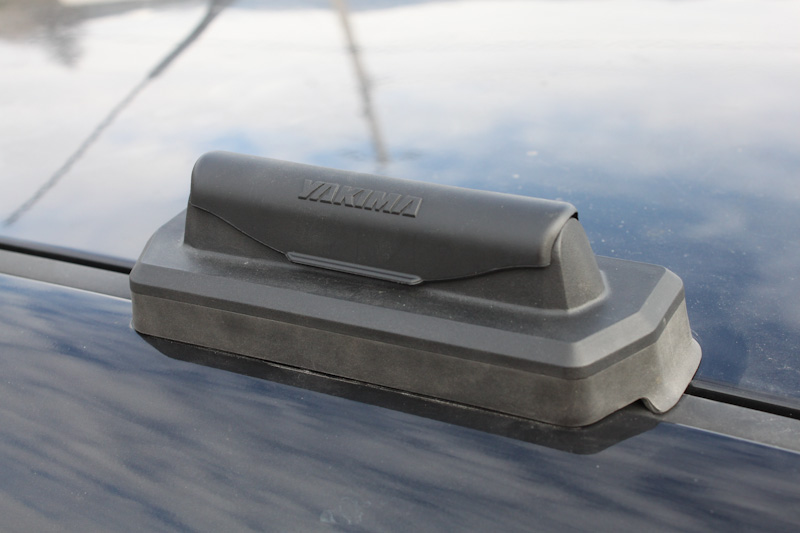
Installation starts with the landing pads. They come with written instructions, but you will also have to reference Yakima’s online fit guide to see if you should use the stepped or flat basepads (both are provided) for your vehicle. One bolt goes into each of the mounts found on your car’s roof, and the pads are left loosely attached so you can get the towers/bars aligned.
The next step is assembling the towers and crossbars. A separate set of instructions comes with the towers, and again they are clear and easy to follow. The only thing I expected to find, but didn’t, is a glaring warning in the tower’s instructions to snug up the landing pads after aligning your crossbars. You have to look back at the landing pad instructions to find this important reminder.

Installing the HighRoad carrier is very easy. It simply straps to the crossbars, and all you have to do is set each strap’s tension as you clip their buckles into place. Plastic covers slide over the hardware to keep dirt and water out.
Only one issue came up during installation, but it was a major one – the bolts Yakima’s fit guide recommended for my vehicle were definitely too short! It said the 28mm bolts were ideal, but when I put the landing pads on I noticed those bolts were only threading about one full turn into my car’s mounts. Thankfully Yakima supplies several lengths, so I swapped them out for the 33mm bolts. These threaded deep into my mounts and didn’t bottom out, so I stuck with them. Trust your gut, people! I suspect the whole rack system may have ripped clean off my car if I didn’t switch to the longer bolts.
Details and Impressions:
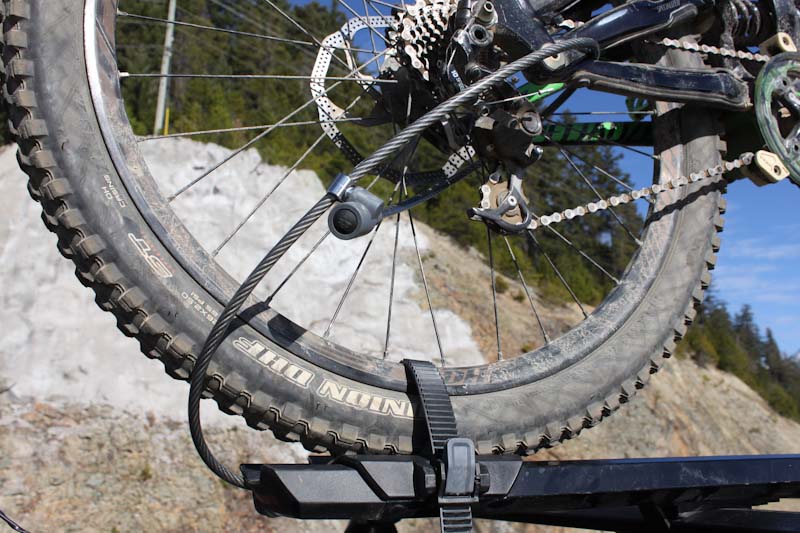
Yakima offers lock cylinder kits for this system, and I’d recommend buying a full set. I didn’t receive any locks, and got a bit nervous when I realized how easy it was to remove the HighRoad bike carrier and the bars from the vehicle. I don’t want to spell it out online, but it wouldn’t take much…
With six cylinders, you can lock every tower to the landing pads, lock the bike carrier to the rear crossbar, and use the HighRoad’s Whiplash cable to secure your frame to the carrier (note – the cable is built into the carrier but you must add a lock cylinder to use it). Yakima also recommends connecting a longer cable to the Whiplash in order to secure more parts of your bike.
Throughout the summer I regularly checked that the rack was tight with a simple tug on the bike carrier and each crossbar. I also watched my bikes as I drove (through my sunroof!), and keeping in mind that I only drove on paved roads, I never saw anything more than a bit of side-to-side wiggle.
After four months of use I checked the bolts on the Landing Pads. I did tighten each a bit, but none caused me any concern. If I had two bikes up there a few times a week I’d probably suggest a mid-summer bolt check, but that’s just playing it safe – I’d bet everything would hold tight through a full season’s use.

The big question in my mind while testing the roof system was; is this going to be easier or quicker than just tossing my bike in the trunk? In the end I’d say not having to remove the front wheel made the job quicker, but easier all depends on two things – How high your roof is, and how heavy your bike is.
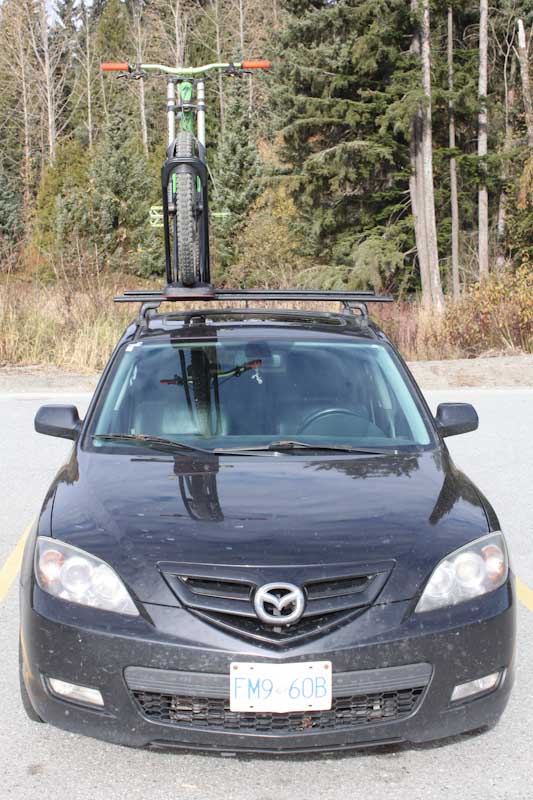
I’m 5’9”, and with the carrier mounted above the passenger seat I’m just tall enough to get my bikes into it without standing on my toes. My Mazda 3 is not a tall vehicle, so I’d advise anyone looking at a roof rack to consider their vehicle height vs. their own. Heaving my 40lb DH onto the roof took a good amount of oomph, but tossing my 31lbs trail bike up there was no problem.
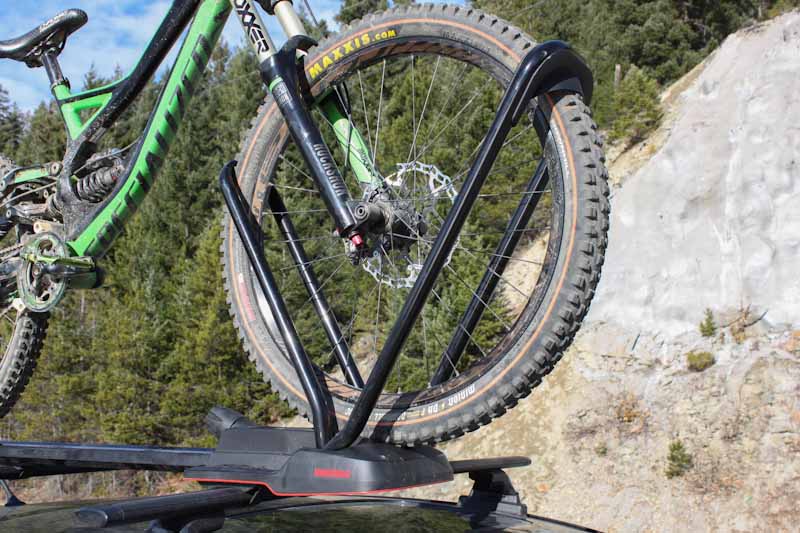
Once you’ve lifted the bike, it only takes a few seconds to roll your front wheel into the HighRoad’s front hoop and raise the rear hoop to hold it in place. You can now let go of the bike while you tighten down the rear hoop to squeeze the front wheel, and strap your rear wheel onto the carrier.
Another obvious advantage to using a roof rack vs. the trunk is that it leaves a lot more storage space inside your vehicle. With this rack I was finally able to haul two bikes and two people to go riding!
 After several months of sun exposure and a fair bit of rain, the carrier, crossbars and landing pads aren’t showing any wear and tear. There is no damage to report to any component of the rack, and the finish on the crossbars is still pristine. The aero-shaped components seem to cut through the wind nicely; the rack produces a bit of wind noise with a bike mounted, but is almost silent without.
If you decide to remove the rack, you can leave the Landing Pads on and clip in the provided plastic covers to keep water out of your roof mounts. If you decide to remove the Landing Pads too, it won’t cost you much time to re-install them later.
Aside from the fit guide recommending Landing Pad bolts that I fear were dangerously short, I had no issues with Yakima’s roof rack system all summer long. My bikes held stable up on the roof, I did find it quicker than throwing a bike in the trunk, and it increased my small car’s capacity to two people and two bikes! I would recommend adding lock cylinders, as your bike, the bike carrier, and the crossbars/towers are not secure without them.
The total price of this rack system is $819 (Jetstream crossbars- $219, Skyline towers- $225, Landing Pads- $126, HighRoad carrier- $249). A set of six lock cylinders will cost you $80 more. All components are available now online or through Yakima dealers.