In Part One, we discussed sag, which puts your suspension in the right position, setting the stage for good performance. In Part Two, we talked about low speed compression and the various “platform” settings available on modern forks and shocks, recommending you try them wide open to fully utilize all that R&D that went into them in the first place.
For Part Three, we’ve once again turned to Duncan Riffle (Rockshox PR manager & 2x U.S. DH Champ), Mark Fitzsimmons (Fox’s pro athlete suspension tuner), Eric Porter (veteran pro mountain biker, Manitou test athlete) and Josh Coaplen (Cane Creek’s VP of engineering).
As a quick primer, your compression and rebound circuits control the motion of the suspension by controlling the rate of movement. Without it, you’d basically be riding a pogo stick. They do this by forcing oil through an orifice, and the size of that hole controls the speed at which the oil flows through it. Smaller holes mean slower oil flow, which means more damping. Bigger holes mean less damping, which equals faster movement. There are two types of control over hole size. Usually for low speed, you have a fixed port size with a needle or some other barrel that opens or closes access to that port in steps. High speed compression is typically handled with a spring or shim stack holding a seal over larger ports. With enough force, the shims flex or the spring is compressed and the ports are opened, letting more oil flow through to handle big hits. The strength of the shims/spring dictates the amount of force required to flex them. Your particular fork or shock may operate differently, but the principle is the same: Control oil flow and you control the rate of compression or rebound.
Here’s how to use that to your advantage and help keep the rubber on the trail…

For all intents and purposes, low speed compression damping was covered in Part Two, but as far as it’s effect on traction goes, our experts had a few things to add:
“If your compression is too stiff, your wheels will not absorb impacts as well as they could, instead bouncing up,” says Riffle. “On repetitive hits, it ends up lifting up off the ground as it resists the impacts, which can be felt as chatter. On the flip side, how do you know when your compression is too soft? Easy, when you’re blowing through your travel, getting to the bottom of your travel on high speed, repetitive hits or you’re bottoming out too frequently.”
Fox’s Fitzsimmons adds: “Traction is affected by the amount of weight on each wheel, the tire, and how quickly the wheel is able to follow the surface. Damping (and spring) must also work with the natural frequency of the tire and its characteristics. On a fork, the best traction is achieved when it is consistently loaded and able to follow the terrain at the speed a rider is traveling. If there is too much damping, the suspension is unable to absorb the obstacles in the terrain causing it to deflect. If there is not enough damping, the suspension will load and unload too quickly causing too much weight transfer and a loss of traction.”
If you’re fortunate enough to have equipment that lets you adjust high speed compression, that’ll let you tweak how the fork and shock respond to big hits and landings, but the low speed compression plays a larger role in maintaining constant traction.

Let’s say you’ve followed the advice so far and are now running a bit more sag and opened up your compression damping, but maybe it feels like you’re just blowing through your travel when it gets rough. Before you dial it back again, it might be time to speed up your rebound damping. Rebound is arguably more important to traction, yet it’s more often set up improperly.
“I think rebound adjust is the most overlooked setting on suspension,” Porter explains. “So many people set up their rebound too slow, either because they don’t know any better, or because they don’t want to get bucked when going off of jumps, compressions, etc. When your rebound is set too slow your fork or shock will pack up. That means the hits will be coming one after another faster than the fork or shock has enough time to extend again. You basically want your rebound as fast as you can get it without feeling like a pogo stick and bouncing around on the trail. You definitely want some control, but you want it to be on the fast side. If your rebound is too fast on the other hand, it will be extending too quickly in between hits and will be bouncing you upwards, and therefore bouncing your tire knobs off of the trail.”
“Rebound has an even more profound effect on traction than compression,” says Riffle. “If your rebound is too slow, then the compression setting might be dialed, but the wheel won’t return to the ground quick enough. It ends up having the same feeling as too-slow compression in that the wheel isn’t able to maintain contact with the ground. It’s a huge misconception is that when their rebound is too slow that their compression is too stiff. This keeps you in the bottom part of your travel, which is known as packing up. It’ll feel like you’re gliding over bumps and the hits will feel harsher.
“If you’re rebound is too fast, a multitude of things can happen. It’ll feel like you have a spring in the back, giving you the ‘huckle buck’ and possibly ejecting you for no reason. It can also feel similar to the chattery feeling over repetitive hits, except that it’s happening because the wheel is returning too fast and can start to resist the compression a little.”
So what’s the sweet spot?
“When the bike feels supple, controlled and stable,” says Riffle. “You don’t want it to blow through travel, and you don’t want to start chattering and having the wheels skip away from you in the corners. You also want front-to-rear balance. If you can compress your suspension and feel one end of the bike compress or rebound faster, then you’re not where you want to be, and that’s really done by feel. We can’t tell you specific numbers because it’s so different for each bike because of leverage ratios, head angles and more.”
Porter adds that “you want your fork and shock to match the trail, always putting the tire back on the ground, but not so quickly that it bounces back upwards.”
Now, are you ready for a really techy answer?
Coaplen, who helps develop and tests Cane Creek’s suspension, brings the engineer’s perspective: “Damping is always opposite the direction of velocity. One nice rule to remember is that compression damping tries to keep the wheel on the ground, rebound damping tries to keep the wheel off the ground.”
Sound backwards? Just remember, the damping is what resists movement. So, dialing back the damping from 100% allows movement. Controlled movement. Just the kind we like. The damping circuits built into our forks and shocks control the movement enough to let the tire move up just quick enough to absorb the bump, then let it back down just quick enough to immediately get back in contact with the ground.

Fortunately, the rest of Coaplen’s advice is in laymen’s terms:
“First up, the tire is the most important part of your setup with regards to traction. If you have too high air pressure in your tires, the best suspension the world won’t help you. As you will likely hear from everyone because its true, (damping settings) are highly dependent on user preference. Assuming we’re discussing low speed compression (LSC) and low speed rebound (LSR) damping, too much LSR damping will not allow the wheel to track terrain, leading to skipping. Another problem with too much LSR (when no HSR circuit exists) is packing up, obviously a bad thing. Too little rebound damping will feel like an uncontrolled spring (which it is!), but I suggest running rebound as quickly as possible while staying out of the uncontrolled spring range.
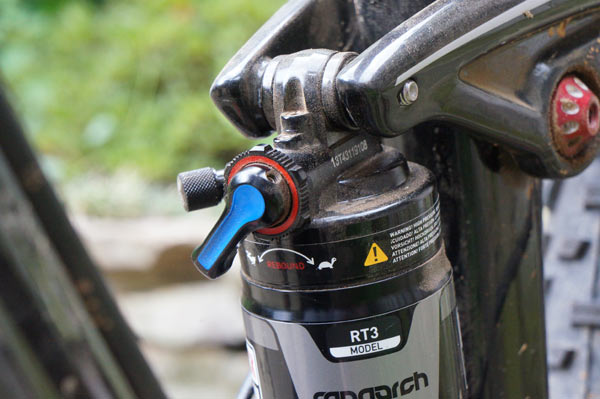
“One beauty of the Climb Switch on our Double Barrel shocks is that rebound can be run faster (less damping) in “open” mode than is allowed by other shocks. This is because a shock properly damped in rebound for “fast riding” will feel too bouncy and annoying when climbing with your weight back and on saddle. If you only have one setting, you’re compromising between performance when you’re seated and when you’re standing and descending. So, if you’re not running a Double Barrel with CS, I’d recommend setting rebound damping a hair slower for climbing and a hair faster for descending.”
That last bit mirrors much of what we’ve heard throughout this series: It’s OK to change it based on the course you’re riding.
So, where to start?
My recommendation is finding a short, mild descent that lets you get some speed, carve a few turns and hit a couple roots/ruts/rocks and small drops or jumps. Something between 30-60 seconds long so you can quickly ride back to the top and repeat. At the top, open your shock’s rebound all the way and make a run. Then do it again with your rebound as set as slow as it’ll go. Go back and forth for a couple runs until you get a good feel for each setting. Now, do the same with the fork, making sure your slowest setting actually lets it return quick enough to prevent nose diving. By moving from one extreme to the other with one component at a time, you’ll get a good sense of what fast and slow rebound settings feel like. You almost certainly won’t settle at either end of the spectrum, but it provides good base knowledge from which you can find your ideal settings.
Stay tuned for parts four through six, where we dive into more complicated adjustments…

