In Part One, we discussed the most basic of starting points to get your suspension set up properly: Sag. In Part Two, we covered most of the compression damping settings, followed by rebound in Part Three. Those were the low hanging fruit and, for most riders, should put you in a pretty happy place on your bike. After all, most bike manufacturers work very closely with suspension brands to develop a shock tune specific to the bike it’s going on. But, shocks and forks are tuned to work best for a broad range of riders, and sometimes your size, weight or riding style put you on the fringes (or beyond) of that range, letting the standard external controls getting you only part of the way there.
“We always use sag as a starting point, but it’s not an absolute for everyone,” says Darren Murphy, owner of PUSH Industries, a suspension tuner out of Loveland, CO. “A lot of people lock into that, though, and running more or less sag than is recommended is not a bad thing. Don’t feel like you have to lock into a certain number. Everyone’s riding style and size are different.
“But when you’ve gone through the compression and rebound settings and the ride quality is good but you’re either not getting through all the travel or your bottoming out all the time, that’s when you should start looking at your air volume.”
Fortunately, it’s easier than ever to adjust air volume…
Before we dive in, it’s worth a look at leverage ratios. This only really applies to rear shocks, and it’s important to understand why your bike has the shock that it does. The leverage ratio is the ratio of rear wheel travel to shock stroke movement. We’ll use the Niner JET9 RDO (100mm rear travel) and RIP9 RDO (125mm rear travel) as our examples. The amount of travel has little to do with how much air volume the shock needs. It’s mainly about how much leverage the suspension has to compress the shock, aka Leverage Ratio. From the simplest perspective, a 100mm bike with a 50mm shock stroke would have a 2:1 leverage ratio. Pivot placement and kinematics also come into play, too. Niner’s product manager Barrett James explains:
“There’s a beginning and ending leverage ratio, and it changes as the bike moves through its travel based on where the pivots are and how things move (aka Kinematics). So, the numbers here are rough averages across the travel for each. The JET9 has about a 2.1:1 ratio and the RIP9 has a 2.4:1. The RIP9 doesn’t just have a higher overall leverage ratio, it has a much stronger beginning leverage ratio than the JET9. Both have a falling ratio, meaning the leverage ratio gets weaker as it moves through the travel, but the RIP9’s falls farther. In other words, it has a wider spectrum of change.
“A larger volume air shock is easier to activate, so the JET9 gets a bigger volume shock because its leverage ratio is lower. The RIP has a smaller volume shock because the frame has more leverage over it. If it had a high volume shock, it’d smash through the travel way too fast. ”
BUT SHOULD YOU GO BIGGER OR SMALLER?
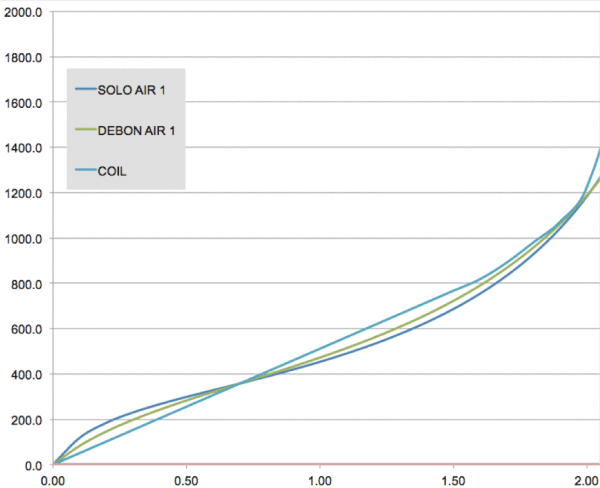
All else being equal, larger volume shocks will move through their travel much easier with a smoother, more linear ramp at the end of their travel. Smaller volume shocks will feel firmer and ramp much more progressively. Controlling the air volume lets you take more control over the progressive nature of the fork or shock’s compression, which can be a more powerful tuning tool for bigger or smaller riders at either end of the weight spectrum.
“It’s a common misconception that heavier riders need larger air volume and lighter riders need less,” says Darren. “In reality, it’s the opposite.”
“Smaller, lighter riders in particular will benefit from a shock that moves easier in the first half of its travel, and that’s when you might want to increase your air volume,” says Barrett. “You’ll get the softer top end, helping you stay in the sweet spot of your travel, then allow it to ramp up appropriately at the bottom.”
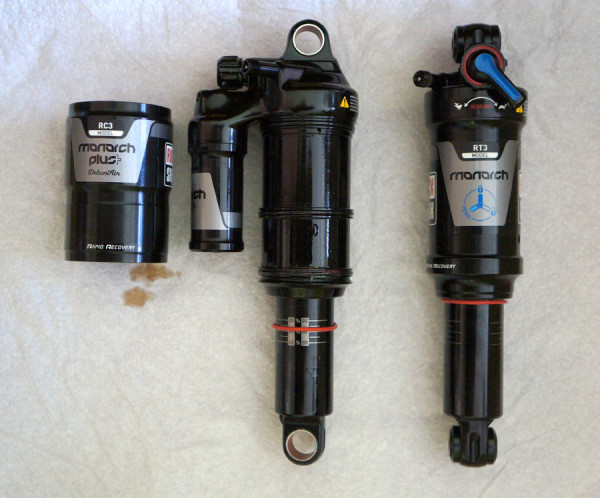
So, if your sag is set properly but you’re not able to use all of your travel, you could either remove air spacers or go with a larger volume shock. The latter was the premise behind the Rockshox Debonair upgrade kit:
“We want the most supple and soft top end because that equates to traction,” adds Duncan Riffle, former U.S. DH champ and current SRAM MTB PR manager. “It should be conforming to every little bump on the ground (and the increased air volume achieves that).”
A larger volume shock can also be used to tweak the feel of shorter travel bikes:
“When you have more volume, you have a much more adjustable range with a longer, slower ramp,” says Riffle. “This can be particularly helpful for making shorter travel 100/120mm bikes that have short stroke shocks to feel ‘bigger’ and more plush.”
“The tradeoff was that sometimes meant you’d blow through your travel or have excessive brake dive. The solution is reducing air volume (with Bottomless Tokens or Spacers) in the positive air chamber. This keeps the top end supple while giving it a higher ramp to prevent bottoming out. I suggest when you add a spacer, you can try going a little lower air pressure. That’ll make it even more supple off the top but the reduced volume helps control bottom out.”

And that leads into the other end of the spectrum, reducing volume. Say you’re a bigger rider and things feel good but you’re blowing through the travel. Or, you ride terrain that’s a notch above what your bike is rated for and the rear end feels way too soft. If you simply increase air pressure, you won’t be as sagged into the travel and you’re moving the air spring rate up all the way through the travel. The curve will follow the same pattern, it’ll just move up on the graph. And it won’t feel nearly as good or track the ground as well.
Reducing the air volume, though, will keep the graph in the softer range at the beginning of travel, then let it ramp faster in the second half of the travel to prevent it from bottoming too harshly or too often.
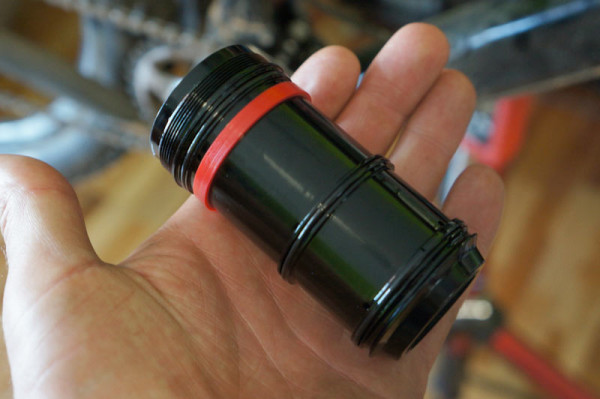
Air volume changes aren’t just for making it work for larger and smaller riders, they can also be done simply to improve ride feel. Manitou sponsored rider and veteran pro mountain biker Eric Porter explains:
“If your suspension feels too linear, then it’s time to adjust the volume. In the end you want to be using all of your travel without having a hard bottom out. It’s great to hit something big, have it feel smooth, and then look down and see that you used everything you had but it didn’t smash the bottom. Reducing the volume with a spacer can also make it feel more supportive, so if you like to pop off of lips and roots and whatever, less volume can help because it will ramp up more as you compress it.”
I’d add that it can also be a way to help an overwhelmed rear shock keep up with a longer travel fork, a common spec these days given the popularity of enduro.
WHAT ABOUT SUSPENSION FORKS?
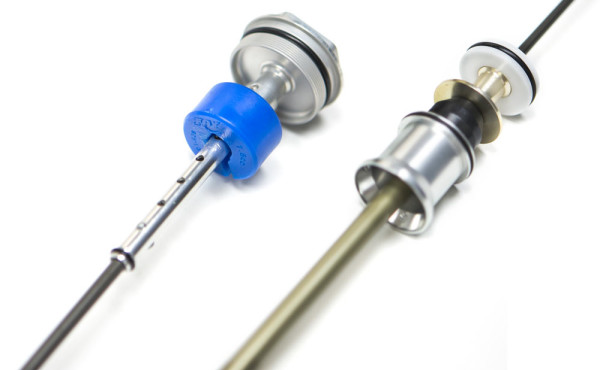
Since forks are not affected by linkages, leverage ratios or anything other than your body weight, it’s a little simpler to see how changing the air volume can help. Unfortunately, you may only be able to move in one direction – smaller.
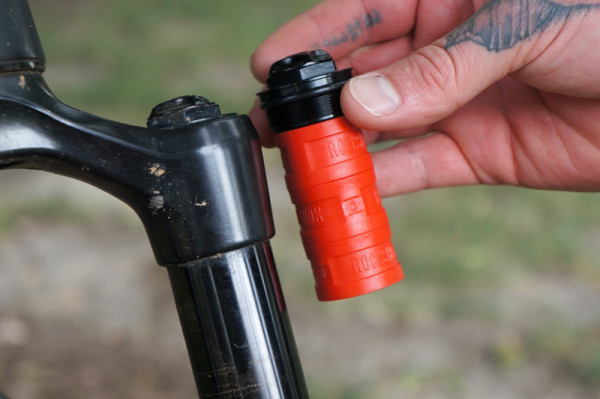
Current forks from Magura, Rockshox and Fox (and likely others) use simple-to-install volume spacers. Sometimes, your stock fork or shock may have spacers preinstalled. Bike brands will spec not only specific damping tunes but also specific size spacers. So, you may be able to remove what’s already in there to increase the volume. If not, you’ll only be able to reduce the volume, which has this effect:
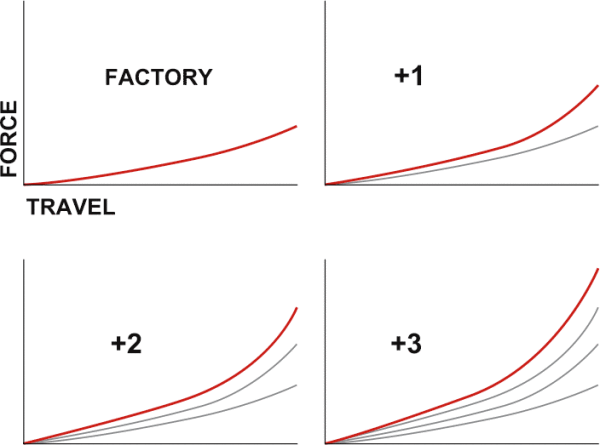
This chart shows the spring curve for a Rockshox fork with 0/1/2/3 Bottomless Tokens in it. The first half of the travel sees minimal changes, it’s the second half that gets way more progressive. Like the rear end, if you want to keep the soft feel at the top of the fork but are bottoming out to frequently, try adding a spacer to reduce air volume.
REAL WORLD EXAMPLES
Niner’s sponsored riders Chloe Woodruff and Evelyn Dong are both about 115 pounds and ride extra small JET9 RDOs. Both had their shocks tuned by PUSH to better suit their diminutive size. Darren says the stock Fox shock had a mid-level 0.6 cubic inch air volume reducer/spacer in it, so the girls were having to run really low air pressure in order to get full travel. But that meant it wasn’t providing good overall ride quality. If they put more air in it to get the sag in the right range, they’d only get about 70%-80% of the travel. The solution was to put a smaller reducer in. The smallest Fox provides is a 0.2, but PUSH machined it down to 0.15. (They also completely changed out the damping mechanisms, but that’s another story)
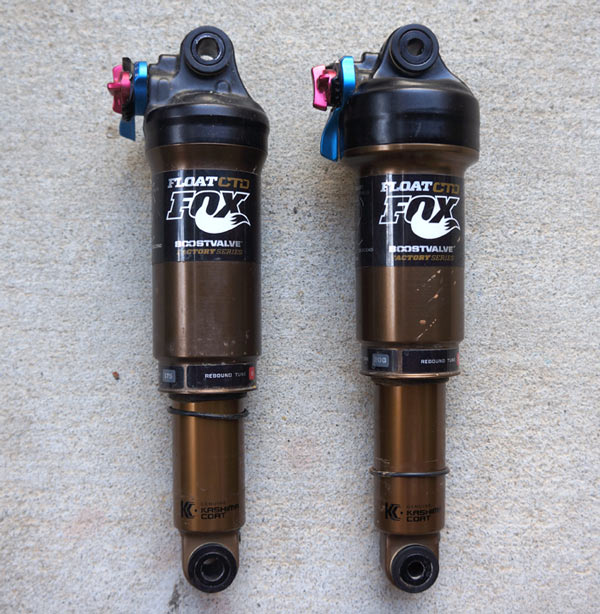
For me personally, the white Fox spacer you see inserted into the shock above was for the RIP9 RDO I’m testing. I have the bike set up with the massive 150mm Fox 36 fork up front, which gets 25mm more travel than the rear. On big mountain descents and runs like Beech Mountain’s DH course, the rear end was simply overpowered when using the fork for what it’s worth. Keep in mind, I’m also 6’2″ and, when fully geared up for “enduro”, have a package weight of about 205lbs. Adding the spacer to the shock helped give it a bit firmer cushion at the end of its stroke, feeling like I had more travel to use rather than blowing through it. The fun-o-meter sag ring showed I was still getting full travel, it just felt much more supportive on the big hits and drops. Which is exactly what I wanted.
Spacers and kits are pretty cheap and available through any good bike shop, which can also do the install if you don’t have the tools. Fortunately, both fork and shock spacer installs are super simple, often requiring nothing more than a socket set and/or bench vise. The Fox shock spacer install took me 15 minutes including taking the shock on and off the bike. Most brands have downloadable step by step instructions from their websites, too. Or you could send your parts off to a pro like PUSH or Suspension Experts. If you’re not afraid of tinkering, some (most) of the spacers we’ve seen can be drilled out or cut down to customize the air volume adjustment, but you run the risk of voiding your warranty. If you do, just make sure no sharp edges or burrs are outward facing, and as always, you do this at your own discretion and risk. All I’m saying is I’ve seen it done.
If you do change your air volume, then it’s time to head back to the beginning of the series and get your sag and damping set up again. Then, if things still don’t seem right, it might be time to look at the overall tune. And that’s coming in Part Five!
