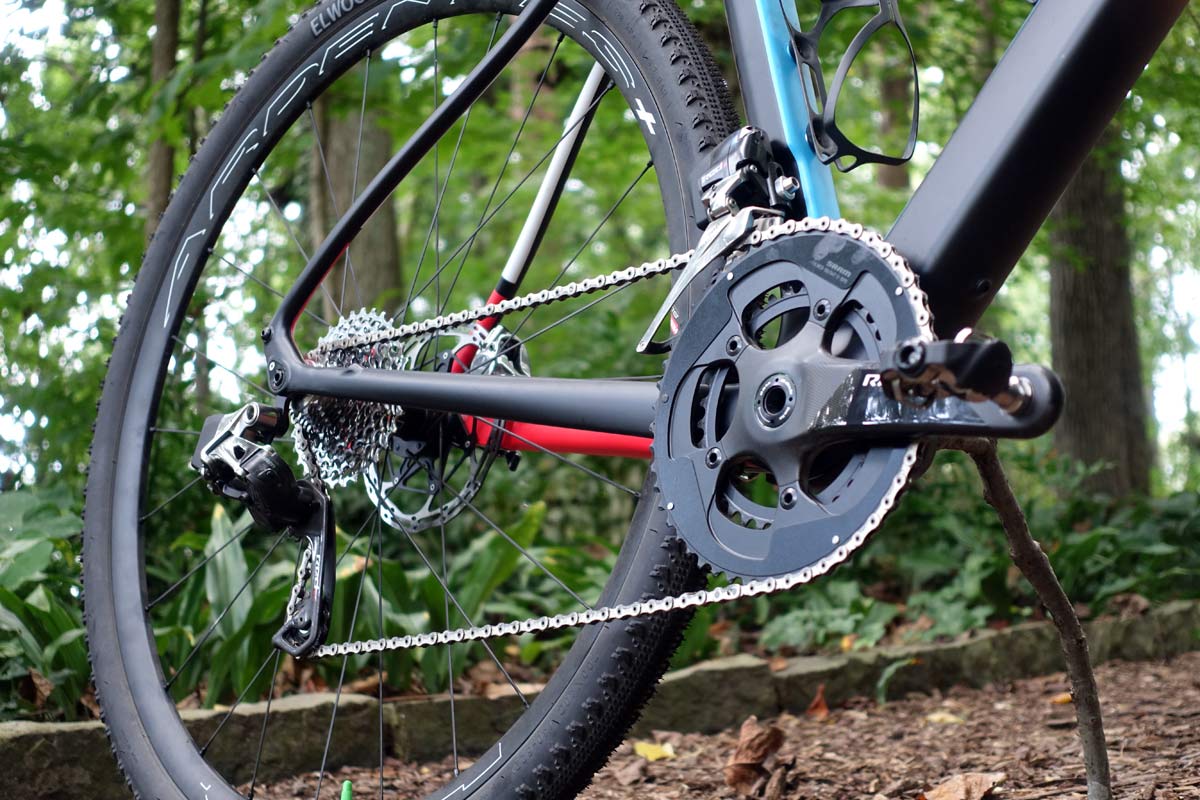
For Part 4 of the 2017 World’s Funnest Bike project, we explore my drivetrain choices. Namely, SRAM RED eTap, a Wheels Manufacturing threaded PFBB30 bottom bracket, and Speedplay’s long awaited SYZR pedals. As with the cockpit, there are mostly pros to this build, with a few concerns – one of which I can do something about, the other is simply what it is, and any solution ends up being a worse compromise.
I chose these parts because, well, it’s SRAM Red eTap, and who wouldn’t want to run that? It shifts amazing, controls are ultra intuitive, and installation couldn’t be easier…for the shifting, anyway. Hydraulic brakes run internally are never fun, but the Rodeo Labs Trail Donkey frame made it painless. They still have to be bled, though. The Wheels Mfg. bottom bracket was chosen because I’ve found that one-piece or threaded-to-become-one-piece bottom brackets solve a lot of pressfit BB problems by aligning the bearings and all but eliminating creaking. This particular model was used because it’s been sitting here for a while just waiting for a bike to go on, and this seemed like the right one. And because they make killer stuff. The Speedplay SYZR pedals were the gamble…
SRAM RED ETAP ACTUAL WEIGHTS & INSTALL NOTES
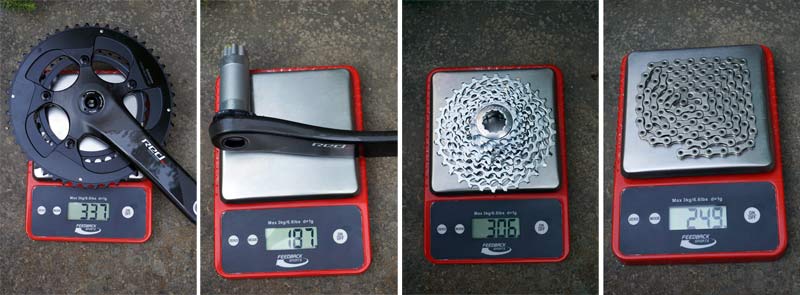
I’m testing the BB30 175mm crank arms with a 50/34 chainring combo and the widest range cassette they offer for eTap (for now, anyway). Actual weights for the crankset with rings is a combined 524g, the 11-32 cassette is 306g and chain without any links removed is 249g (I removed a couple during installation). Why this gearing combo? Because it’s a gravel bike, so I wanted low end on the grunty climbs and trails, and high end on the roads getting to those sections.
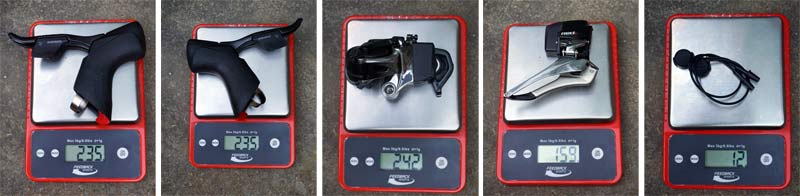
Levers with batteries installed come in at 235g each, but note that there’s no brake fluid in them yet, which will add a few grams once the system is installed and the master cylinder is filled. Rear derailleur is 242g, front is 159g and Blips are 12g without mounting rings. Those are plastic and add a couple more grams.
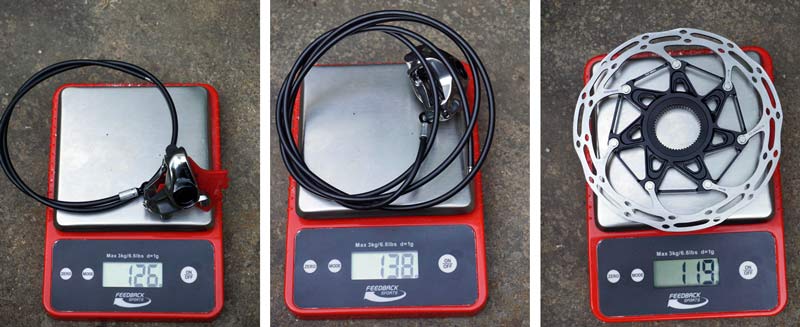
The front brake with uncut hose is actually 118g – it’s weighed here with the wedge installed because I couldn’t get it out for the photo. I ended up sticking the system in my freezer for 30 minutes to reduce fluid volume enough that it would release the wedge, which is weighed separately below to validate actual weights. Rear brake hose, also uncut, is 20g more at 138g. I ended up cutting a little off both during installation. The 160mm 2-piece rotors both weighed in at 119g, so I’m only showing one here.
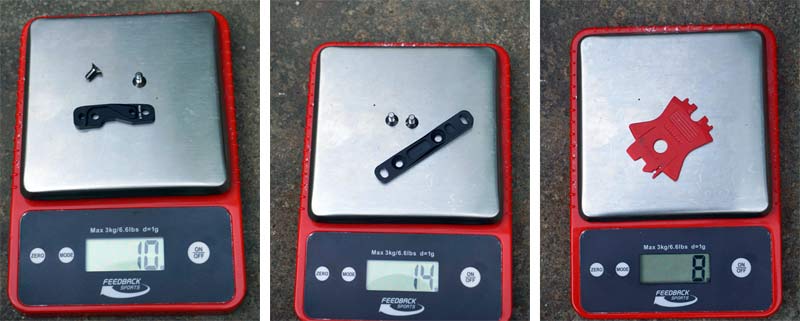
These are the flat mount brake calipers, so they require adapters to adjust them to either 140mm or 160mm rotors (the frame is flat mount, so these aren’t conversion adapters, they’re just rotor size adapters). They add another 24g total.
Altogether, the system is 2,480g, give or take a few grams. Installation of the cranks, derailleurs and shifters couldn’t be easier. We covered the button and setup details in our launch coverage, and SRAM has detailed videos online. The YAW setup of the front derailleur is still required, but it’s much easier than with the cable system. Basically, you’re just lining up guides with the chain and chainring teeth. SRAM sent along their pro bleed kit, and I have a high quality hose cutter. If you’re planning on installing this yourself, consider both of those things essential. Once again, SRAM’s online support videos walk you through the bleed process, so just set up the laptop next to your bike stand and set aside an hour or so. I got the front brakes working great on the first bleed, and the rear required letting a little fluid out after capping it off…I think I just pushed the plunger a little too hard on the last step, which put the fluid pressure just a bit too high and left them with no modulation. Redoing the last couple steps and letting off a little solved the problem.
SRAM RED ETAP RIDE REVIEW
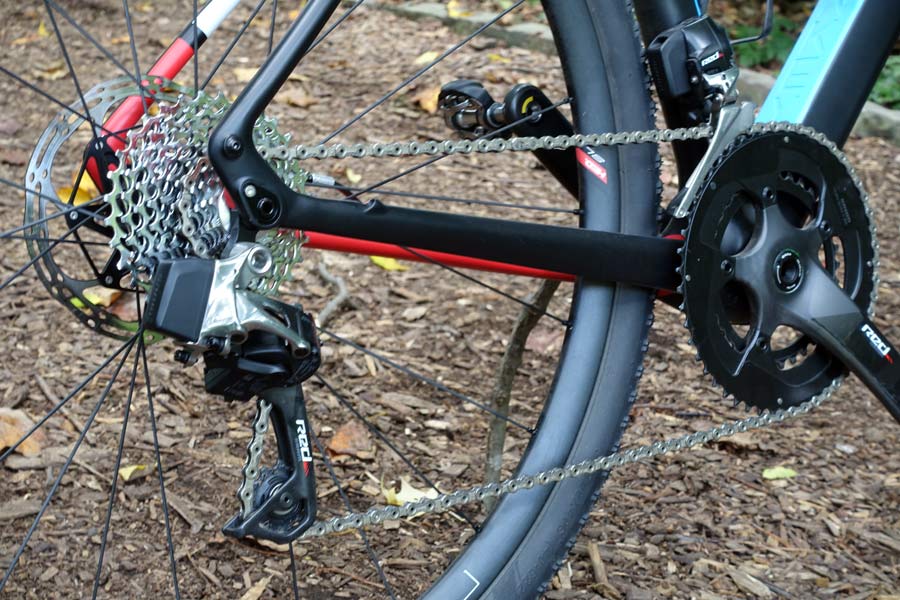
The big question is, how does this system work for gravel bikes without a clutch derailleur? Pretty darn good, I’d say. I’ve been riding this bike on access trails, jumping curbs, and hammering my local root-infested cyclocross training loops. No dropped chain yet, and there’s no chain catcher or other preventative measures installed. Most of my time on these surfaces are in the small chainring, too, so there’s more slack in the system, and still no drops.

Shifting is flawless. I mentioned in my original first impressions piece that it’s not as quick as Di2 or EPS, but only fractionally so, and quick enough for spirited riding (just ask the pros in Le Tour). Even with the larger gap between ring sizes, front shifting is so good that you’ll actually want to use it frequently. That’s the beauty of electronic shifting, it’s flawless regardless of conditions and terrain.


So the question becomes, why choose eTap over Di2 or EPS? Installation ease aside, it’s incredibly intuitive. Left clicker moves the chain to the left, right to the right, and both shifts the front. Takes only a couple minutes to get used to, and then it’s like second nature. Add in the ability to put the Blips remote shifters anywhere you want, and it’s a system that both works around your riding style and complements it at the same time.
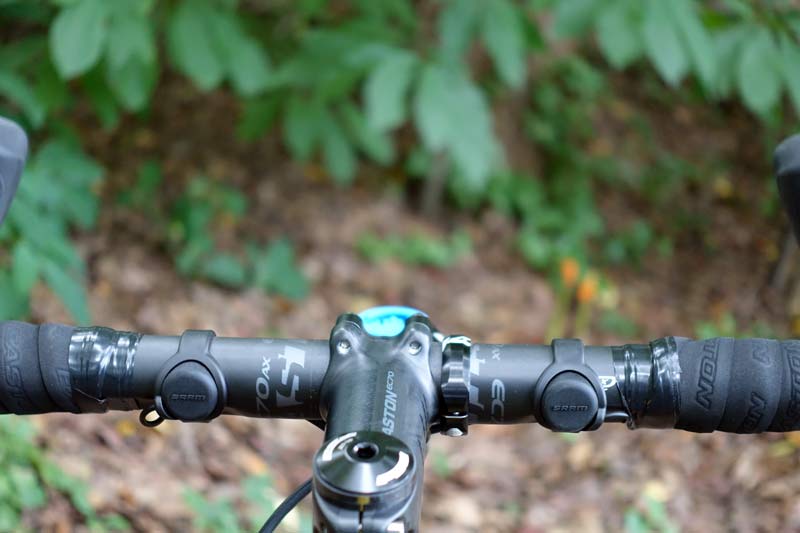
I intentionally left just a bit of extra wire poking out from the bar tape so I had room to adjust the Blips. I’m likely going to rotate them up a few degrees, putting them in a more ergonomic spot for my thumbs to hit while riding on the flats. Once you know where you want them, you can even wrap them under the tape for a stealthier install.
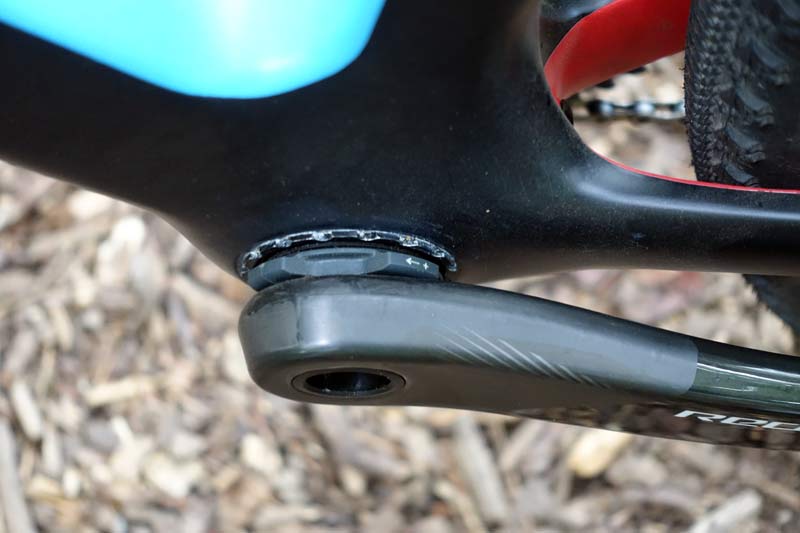
The Wheels Mfg. bottom bracket’s flange is very thin, which requires a delicate install to avoid scratching the frame. It also kinda sorta requires their own tool if you want the best results easily. Their wrench is thin, which mates perfectly with the thin flange. But, for SRAM installs, I recommend this particular model because deeper flanges or ones with much of a recess leading to the bearings can interfere with SRAM’s preload adjustment bezel and give you headaches.
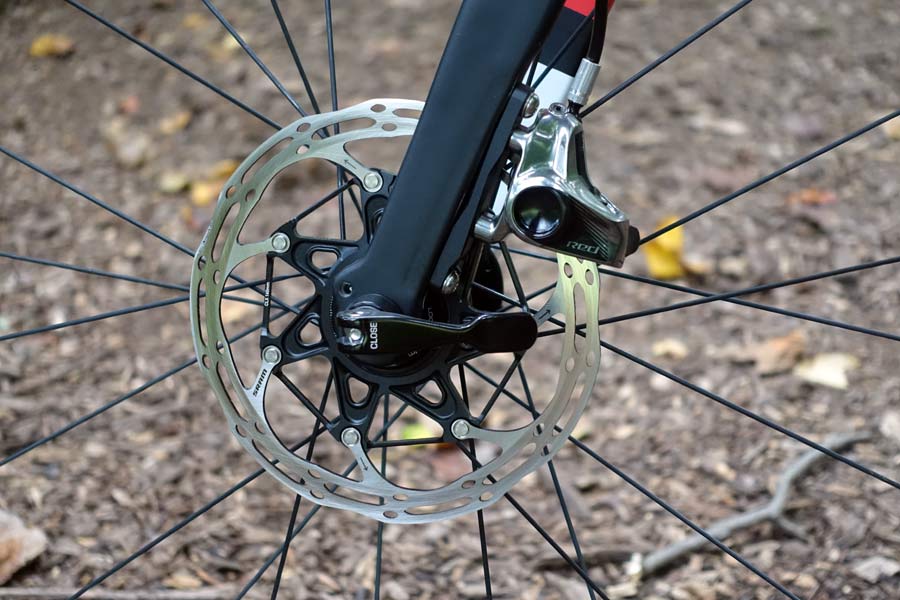
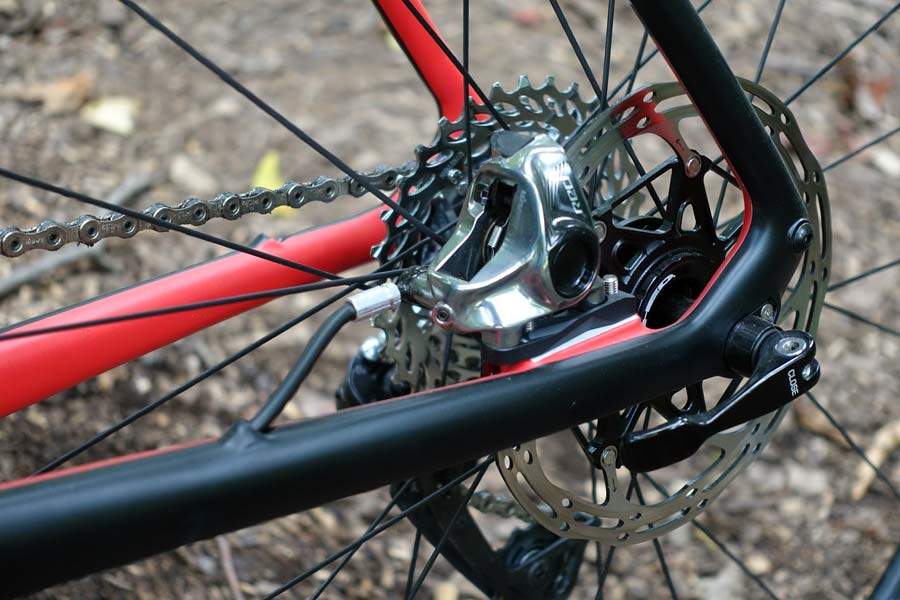
I called in the SRAM Centerline rotors for Centerlock because that’s how HED makes their hubs. HED’s hubs come with the lock rings. Installation of the calipers is easy, getting them lined up is mostly easy. The one downside to flat mount brakes is that you’re mounting the rear caliper to the adapter, then the adapter is bolted to the frame from the underside. depending on the frame, this can take a little extra time to get it aligned properly. The rear brake hose exit port on the frame is very close to the caliper, which creates a tight bend that also puts load on the caliper, adding to the “fun” of getting it aligned with the rotor. I’d prefer if the hose port were moved about an 3cm forward on the chainstay.
Braking performance is exactly as awesome as you’d expect from hydraulic disc brakes.
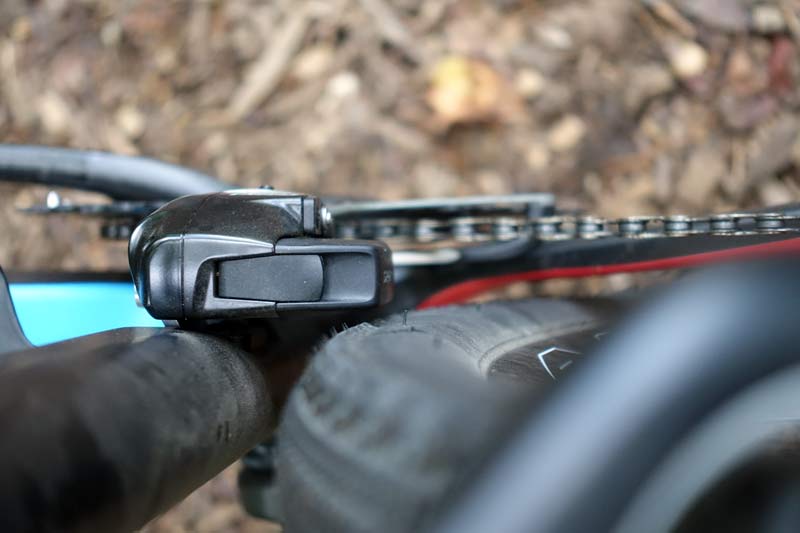
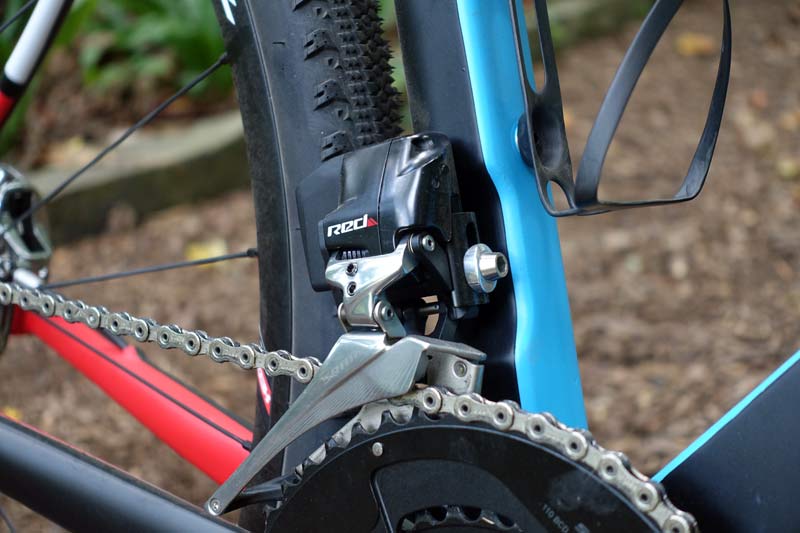
Here’s where we get to the first concern: SRAM’s eTap front derailleur battery sits perilously close to the tire on gravel bike setups. With the Terrene Elwood 700×40 measuring out at 44mm wide here, there’s only a few millimeters between the tire and the battery. SRAM is well aware of this issue, and it’s likely they’re addressing it in future products. The battery doesn’t move during shifts, and there’s plenty of clearance around the cage, so I don’t anticipate problems, but I also can’t put wider tires on this bike. If you’re planning a similar build, limit it to 40mm (claimed) tires and check clearance before you ride.
SPEEDPLAY SYZR “MOUNTAIN BIKE” PEDALS
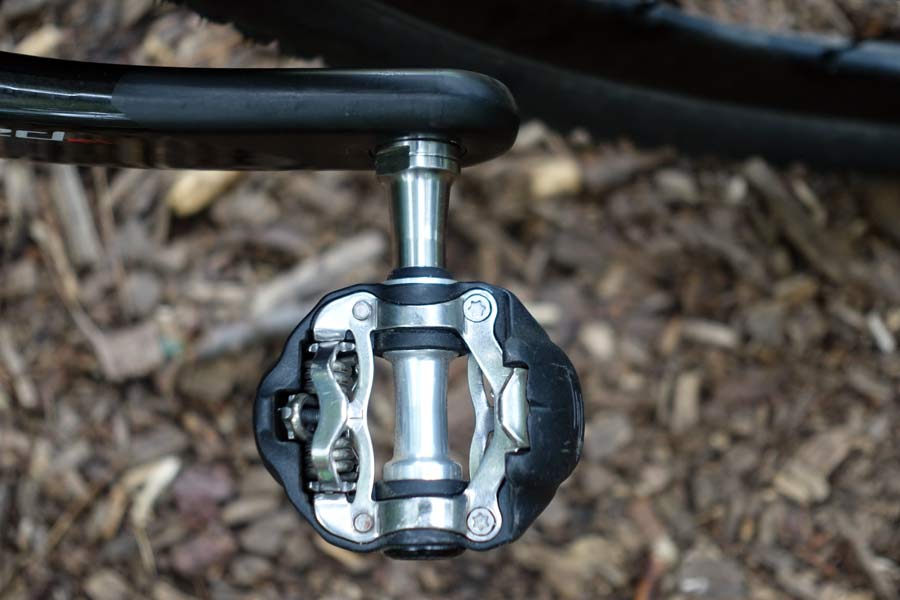
OK, we’re going long form here. Back in January, I sat down with Speedplay’s founder, Richard Bryne, and discussed the SYZR pedals. He says people wanted more stability in an off-road pedal, to feel more like a road pedal. In the process of figuring out how to do that, he looked at Shimano’s MTB pedals, which are more or less the standard against all others are judged. What he found was that the SPD design was leaving efficiency on the table because they relied on resting the rubber treads on the body of the pedal. That meant there were soft points that were supposed to provide stability.
His solution was to eliminate the reliance on the tread to provide stability. Instead, the sides of the cleat are raised slightly and match up with raised sections on the pedal’s body, putting metal on metal. To ensure full, consistent contact, the shape of the “claws” on the pedal that grab onto the cleat’s are angled to provide downward force, pulling the two together. This also helps accommodate wear, and even though they’re designed with very high tolerances, it also makes up for any manufacturing variations.
Lastly, he wanted to improve the biomechanics, offering a similar float as they do on the Zero road pedals. This is accomplished by using a “floating” cleat similar to what’s on their road pedals where the cleats rotate on the mount, and two screws let you adjust the amount of float.
They also offer five different spindle lengths and a shim system to adjust the height of the pedal on the pedal itself rather than putting shims under the cleat (on the shoe), allowing for riders and fitters to accommodate leg length discrepancies.
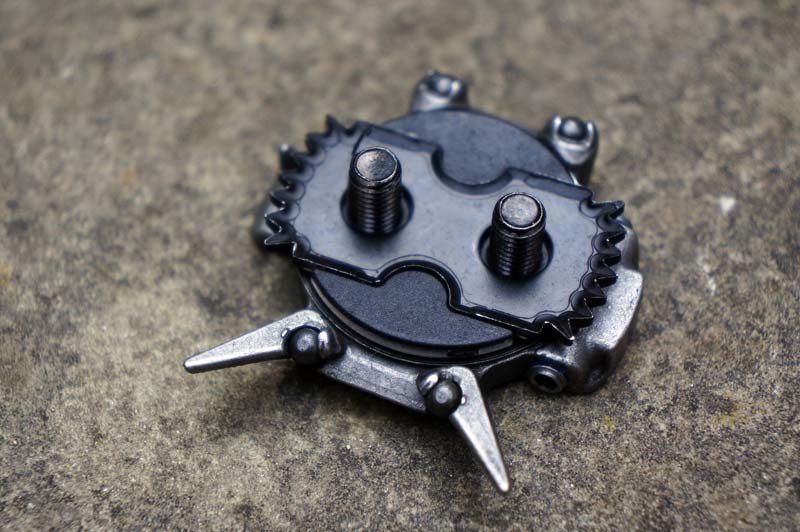
With the extremely high tolerance and fit, they found that it had some issues releasing in foul conditions. Solving this is what delayed the launch the most. Different metals don’t play nicely together, sometimes sticking or trying to cold weld to each other. Eventually, he developed small ceramic rollers on each corner of the cleat that helped things slide more freely and release even when they got dirty.
The pedals themselves have needle bearings inboard with two seals (lip and o-ring) and a cartridge bearing on the outboard side with a grease injection port. Stainless steel spindles and titanium spindles are made in California, as are some of the metal parts of the body. They also offer a more affordable chromoly spindle option.
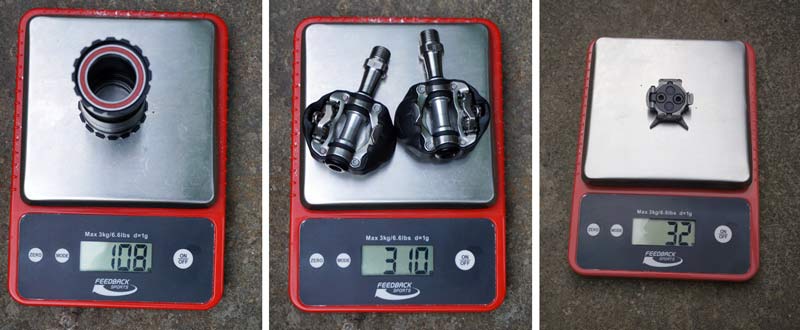
The pedals weigh in at 310g with the stainless spindles in normal length. Cleats are 32g each, so total weight to put them on your bike and shoes is 374g. That Wheels Mfg. BB is 108g.
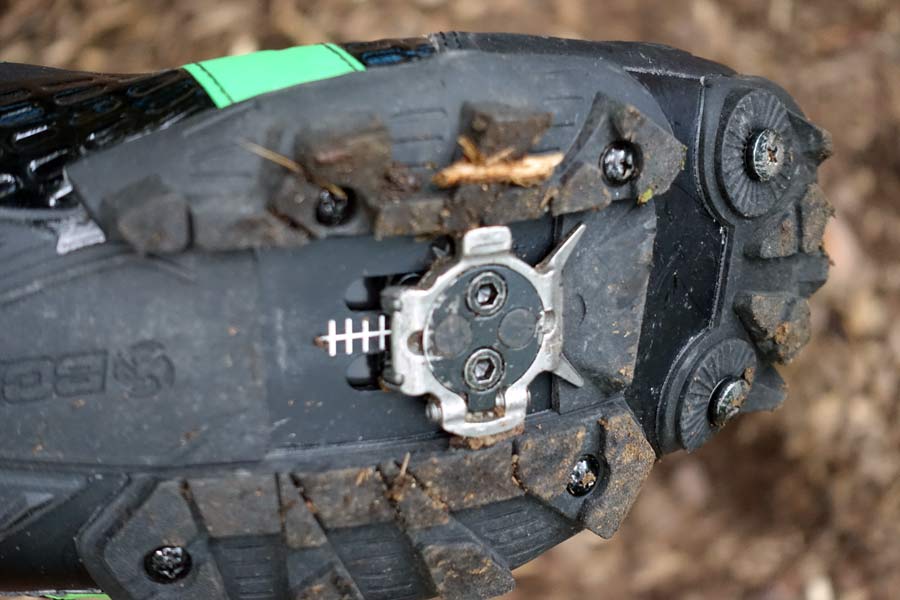
So, how do they perform? This is where I’m still on the fence. Richard very strongly recommended trying these out on the road first, which seemed odd for a “mountain bike” pedal. Gravel is my compromise, and he seemed relieved at that prospect. My first impressions are that they release far too easily. The recommended way around this is NOT to increase spring tension on the release mechanism, but rather to open up the outward float angle a little. I’ve done both, actually, but looking at my shoes, I’m thinking the cleats may not be rotating as designed because they’re tightly packed in between the treads on Bont’s Riot mountain bike shoes. So, I’m going to file down the tread to give the cleats breathing room, open up the angle a bit more and see what happens. As is, they don’t inspire confidence, which makes it hard to really rip the bike hard or jump stuff for fear of coming out. And I wouldn’t use them for mountain biking or cyclocross. That said, I’ve ridden hard and fast over rooty trails and NOT come out of them unintentionally, but I still don’t feel locked in the way I’m used to. I’ll report back in a future roundup review on this project bike.
Check out Part 1 for the frameset, Part 2 for the wheels and tires, and Part 3 for the cockpit. Stay tuned for Part 5, where I discuss the small bits that add to the bike’s character.