Dropper posts enable us to adjust our saddle height with the push of a lever, enhancing comfort, efficiency, and, most importantly, control while out on the trail. Many people would argue that dropper posts are one of the most important innovations in mountain bike technology, essentially transforming the way we ride.
The ability to adjust the height of your saddle on the fly ensures it is always positioned perfectly for the terrain you are riding. Dropper posts have become a staple on nearly all new mountain bikes and are also working their way onto gravel bikes these days. With their meteoric rise to becoming a standard part, we now have more great options to choose from than ever before.
If you’re looking for a new dropper post for your bike, we’re here to help. We rounded up the top options available to test and compare side by side. Over months and sometimes years, we put each model in this guide through its paces while assessing important performance. From the value-packed OneUp Components V3 Dropper to the high-end Fox Transfer Neo, we have recommendations to suit your needs and meet your budget.
Editor’s note: This guide previously appeared on our sister site, GearJunkie.com, and was relocated to Bikerumor on December 3, 2025, and updated with the addition of the 2nd-generation RockShox Reverb AXS.
The Best Dropper Posts of 2026
Wolf Tooth Resolve Rev2

- MSRP: $350 – $400
- Available travel Lengths: 125, 160, 200, 242mm
- Overall Lengths: 373, 443, 523, 607mm
- Available Diameters: 30.9, 31.6, 34.9mm
- Size Tested: 31.6 x 200mm travel
- Measured Weight: Post: 565g (2.82 g/mm travel), Lever: 39g
Pros
- Relatively lightweight
- Super smooth
- Self-bleeding cartridge – never develops sag
- Adjustable travel in 5mm increments to dial in perfect length
- Short stack height and insertion depths
- User serviceable – all parts available
Cons
- Fairly expensive
- More sensitive to seatpost clamp torque and air pressure than most
OneUp Components V3 Dropper
- MSRP: $270
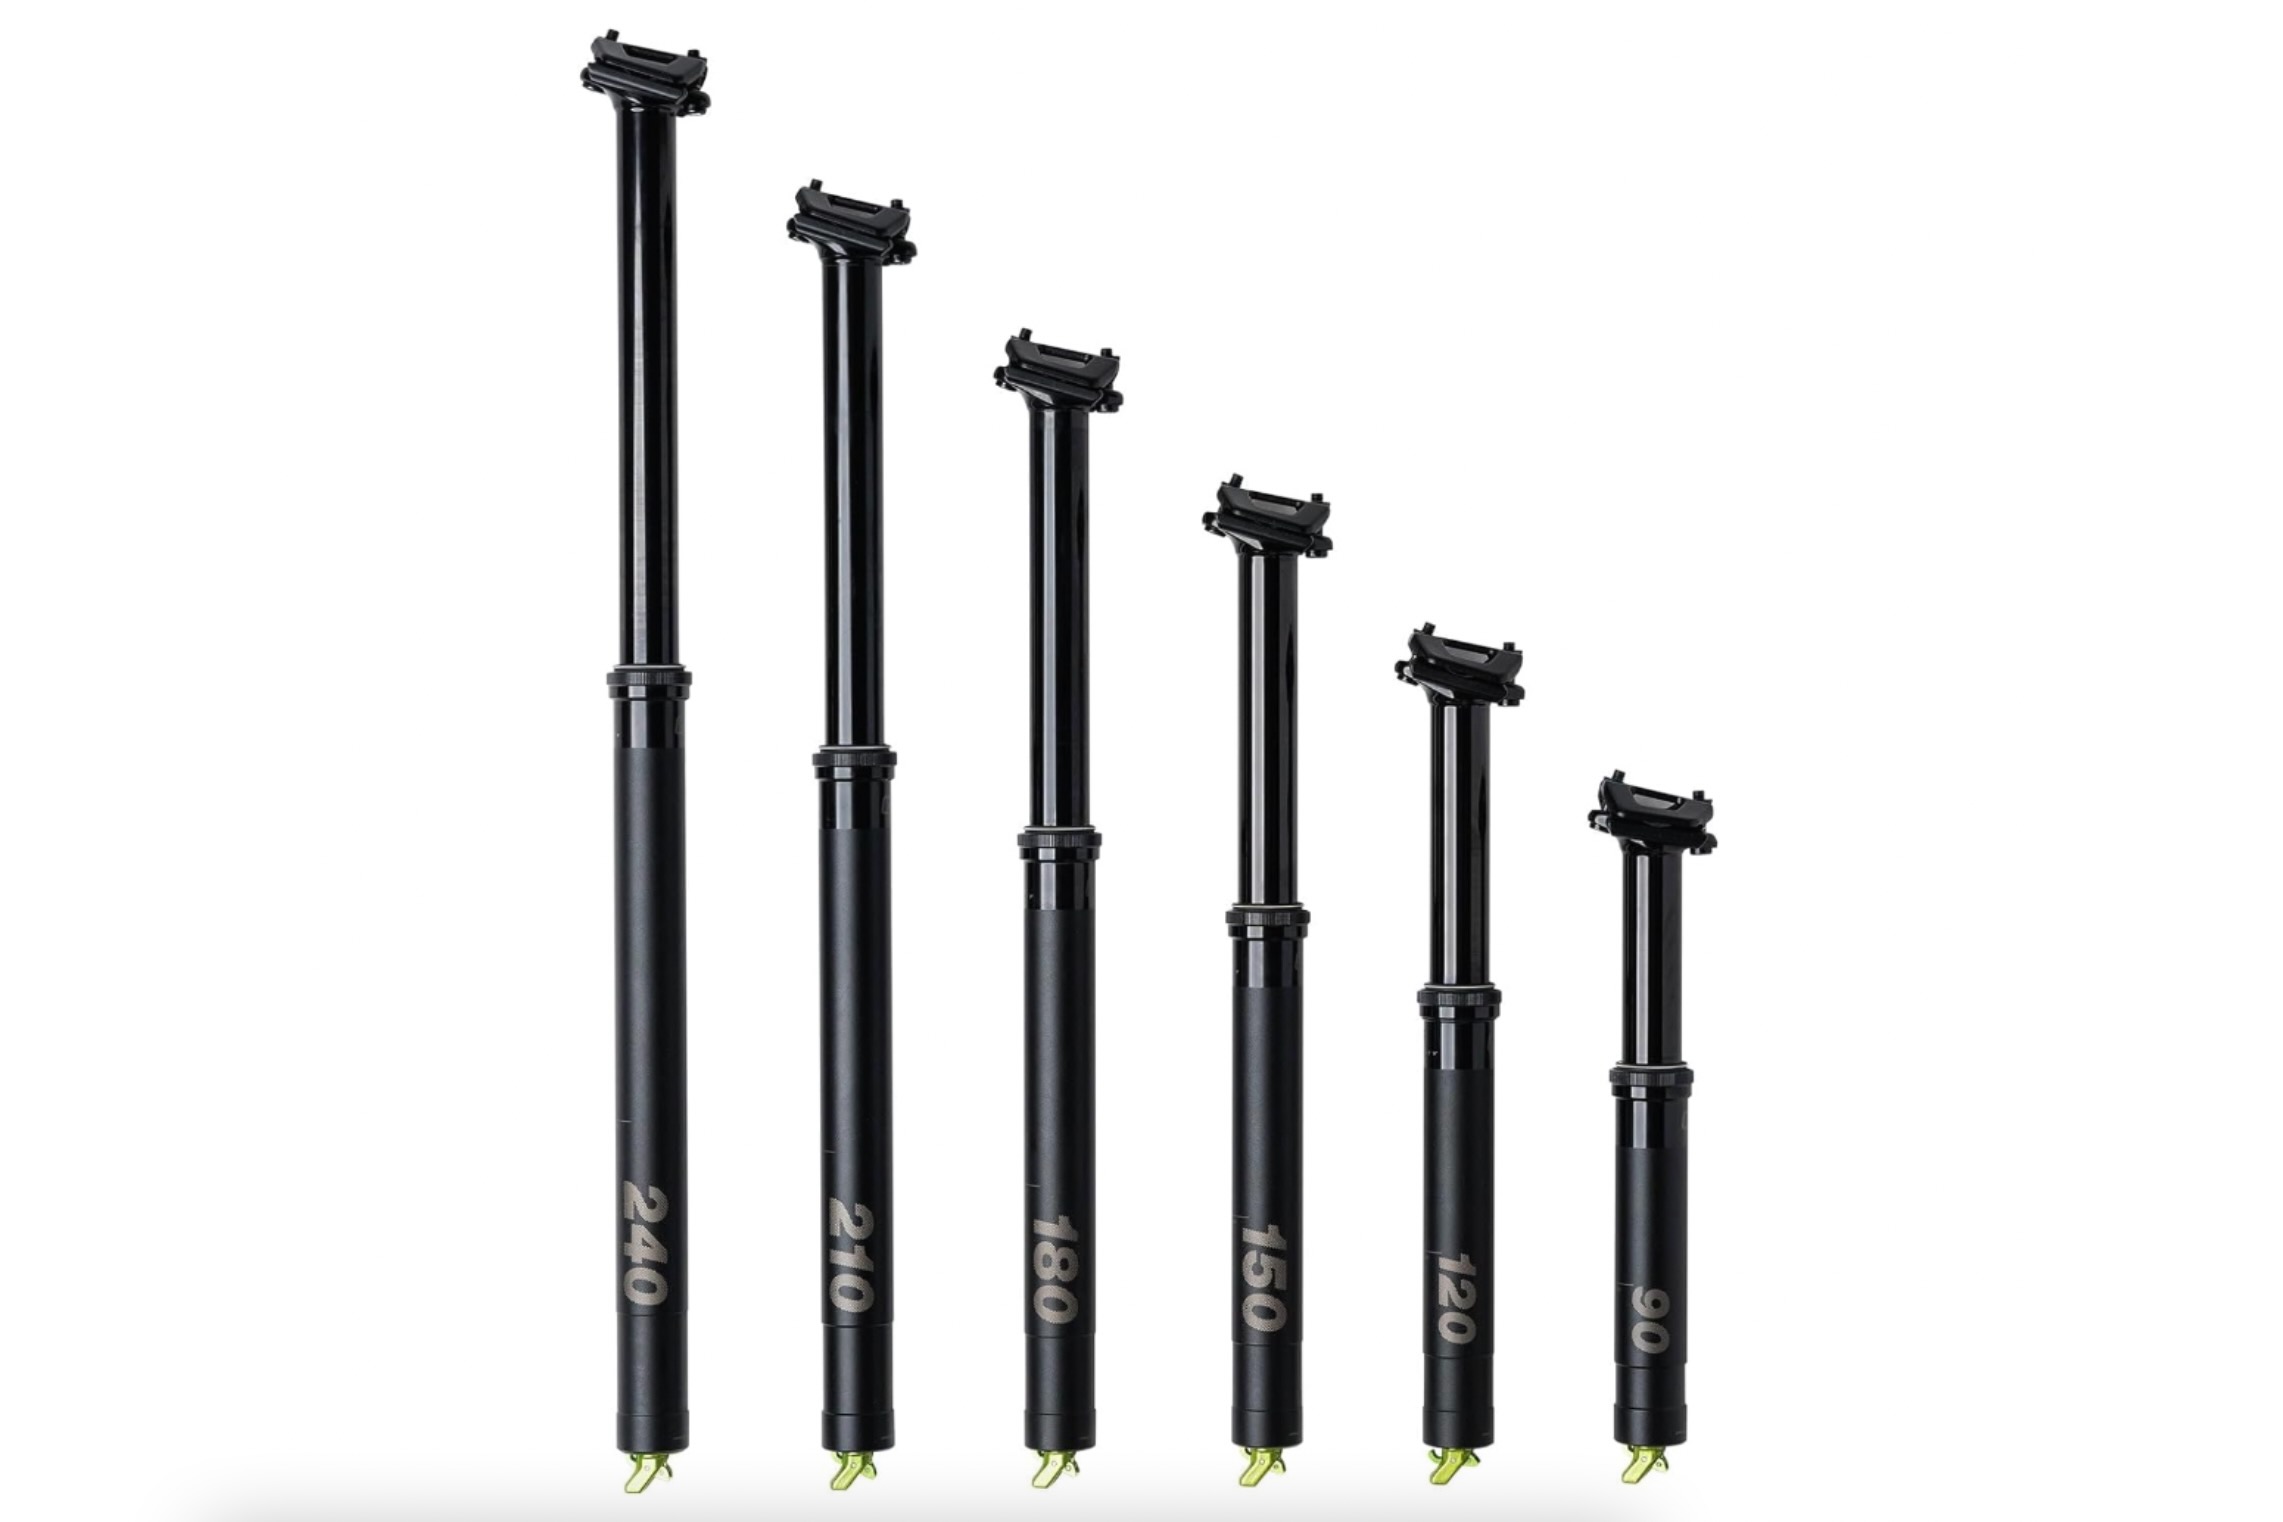
- Available Travel Lengths: 90, 120, 150, 180, 210, 240mm
- Overall Lengths: 295, 350, 415, 480, 545, 610mm
- Available Diameters: 30.9, 31.6, 34.9mm (also a 27.2mm option in 90mm and 120mm lengths)
- Size Tested: 30.9, 210mm travel
- Measured Weight: Post: 515g (2.45g/mm travel), Lever: 42g
Pros
- Still reasonably priced
- Smoother than previous version
- Lighter weight – lighter than most "lightweight" posts
- Very low stack height
- Six travel lengths and 4 diameters offered
- Adjustable travel for ideal fit
- Easy maintenance
Cons
- Slightly more expensive than the V2
- Remote costs extra – but that's pretty standard
- New sealed cartridge has fixed return speed
PNW Components Loam Dropper
- MSRP: $229
- Available Travel Lengths: 125, 150, 170, 200mm
- Overall Lengths: 385, 440, 480, 540mm
- Available Diameters: 30.9, 31.6, 34.9mm
- Size Tested: 31.6, 150mm travel
- Measured Weight: Post: 529g (3.53 g/mm travel), Lever: 49g
Pros
- Great performance at an affordable price
- Easy tool free travel adjust
- Basic but functional and ergonomic lever
- Easy to make small adjustments to saddle height
Cons
- Rubber pieces get dirty very easily
- Slightly higher stack
Bike Yoke Revive 3.0

- MSRP: $350 to $420
- Available travel Lengths: 125, 160, 185, 213mm
- Overall Lengths: 381, 451, 501, 566mm
- Available Diameters: 30.9, 31.6mm (34.9mm Revive Max also offered)
- Size Tested: 31.6 x 213mm travel
- Measured Weight: Post: 633g (2.97 g/mm travel), Lever: 32g (Triggy Alpha Long)
Pros
- Smoothest travel on the market
- Several notable improvements over the Revive 2.0
- Adjustable travel in 5mm increments
- Triggy Alpha remote is super nice
- Get rid of sag quickly and easily with Revive valve
Cons
- More expensive
- Not the lightest – but not exactly heavy either
- 213mm is longest version
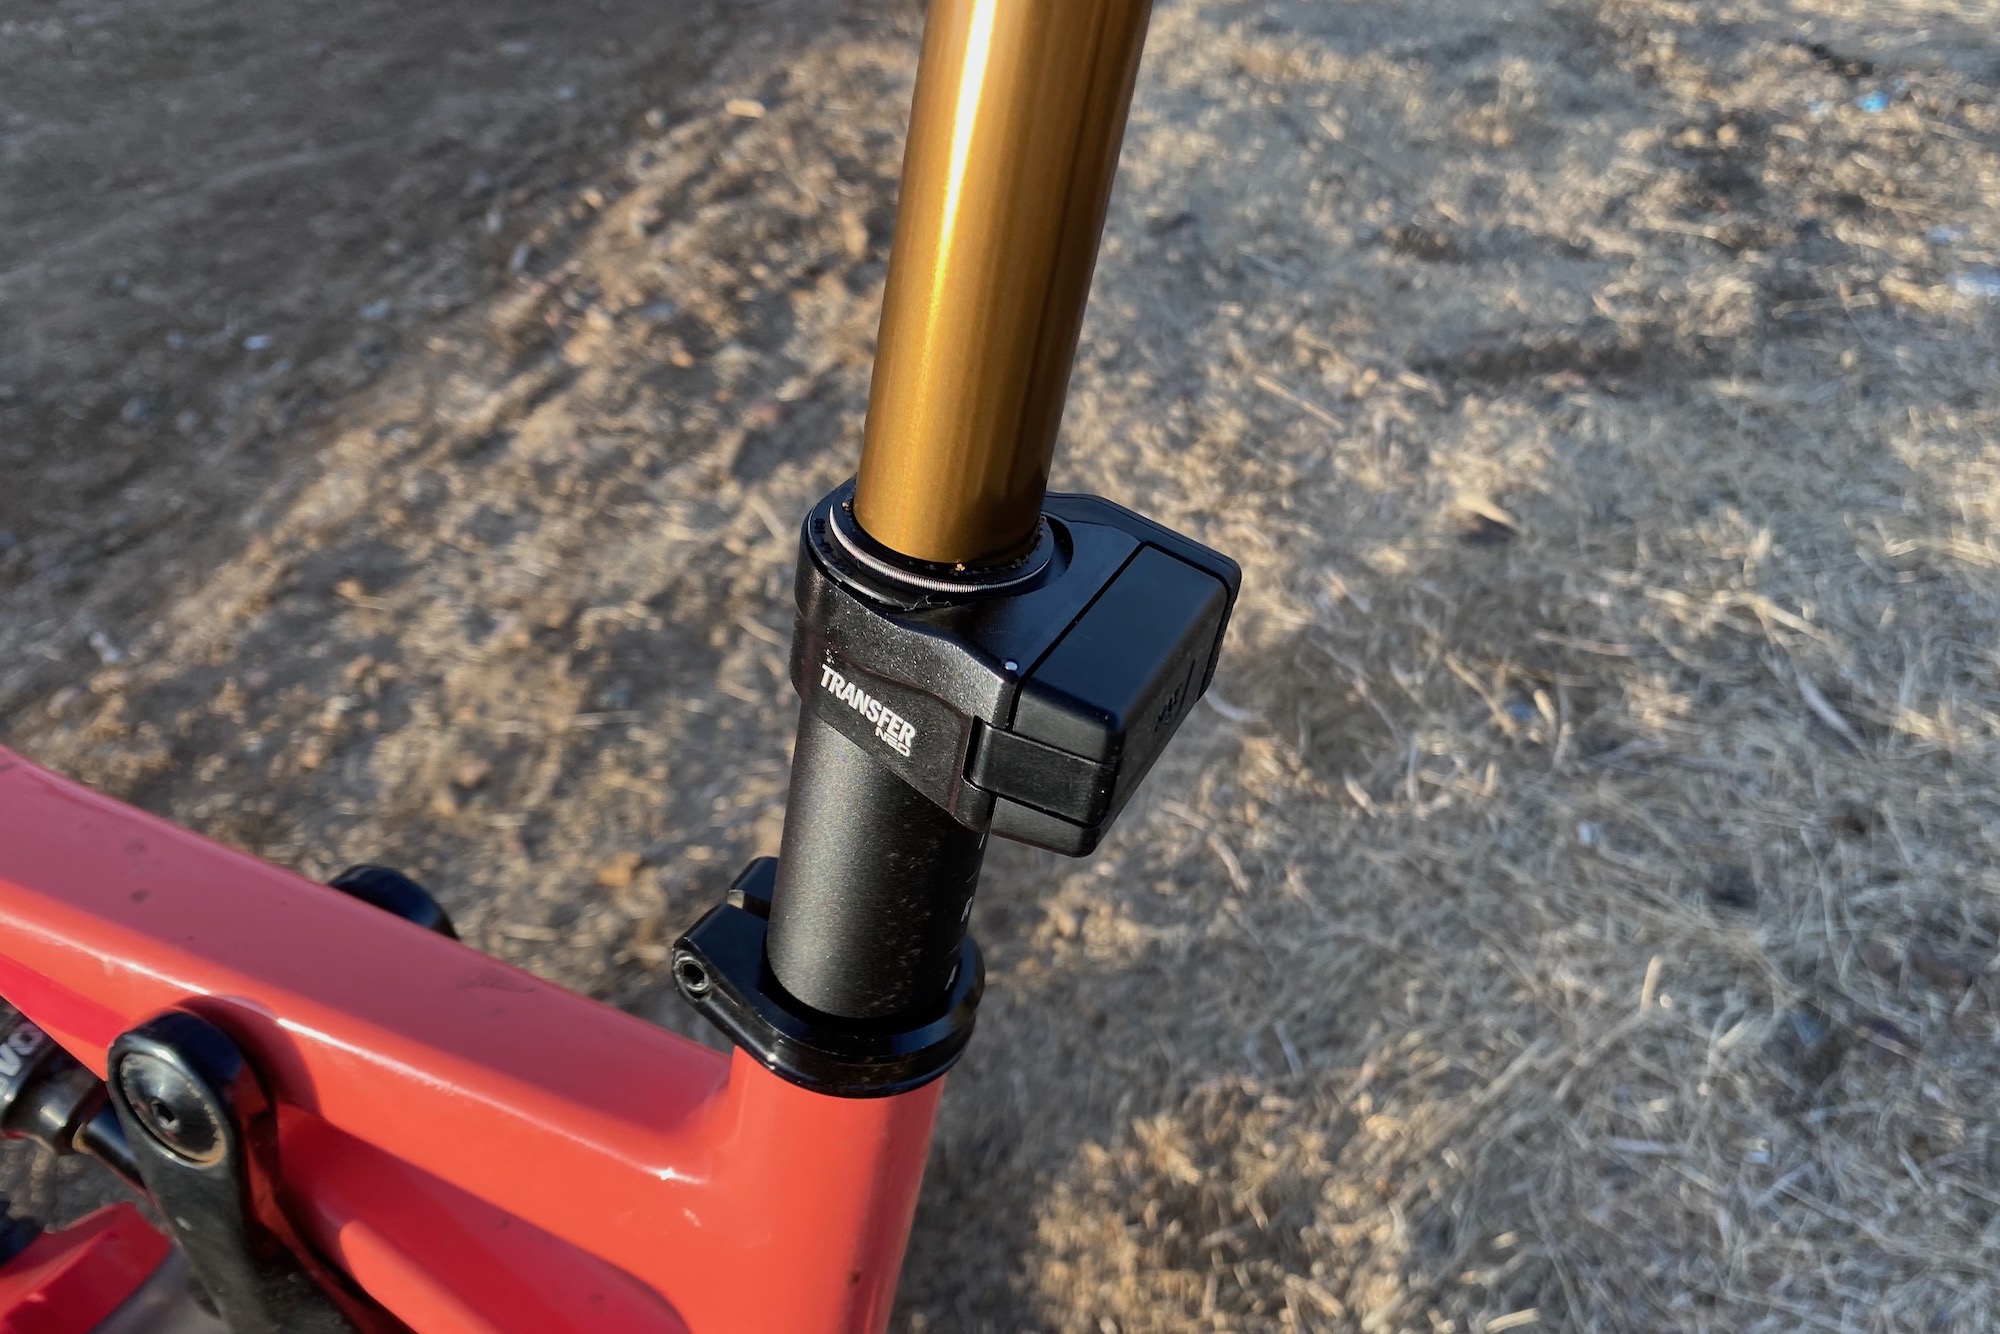
Fox Transfer Neo

- MSRP: $859
- Available travel lengths: 100, 125, 150, 175, 200, 225mm
- Overall length: 569.4mm (200)
- Available diameters: 30.9, 31.6, 34.9mm
- Size tested: 31.6 x 200mm
- Measured weight: Post: 688g (3.44 g/mm travel), Lever: 45g, I-spec adapter: 16g, Total: 749g
Pros
- Super-smooth action
- Lightning fast actuation
- Remote design is more familiar
- Remote has very short throw and easy actuation
- Shorter stack than other electronic droppers
Cons
- Very expensive
- Battery collar has polarizing looks — you get used to it
- Longer insertion and heavier weight than mechanical posts
- No travel adjustment
RockShox Reverb AXS

- MSRP: $599 (remote sold separately)
- Available Travel Lengths: 100, 125, 150, 175, 200, 225, 250mm
- Overall Length: 546mm (200mm drop)
- Available Diameters: 30.9, 31.6, 34.9mm
- Size Tested: 31.6 x 200mm
- Measured Weight: Post: 733g, Remote: 50g (incl. matchmaker clamp)
Pros
- Lower stack than previous version
- Better tire clearance than previous version
- Super easy post installation
- Available in drop lengths greater than 200mm
- More affordable (but still expensive)
- Part of the AXS ecosystem of components
Cons
- Expensive – but cheaper than previous
- Higher stack and heavier weight compared to cable actuated posts
- Need to remember to charge battery
- Controller sold separately
Other Dropper Posts We Tested

- MSRP: $309
- Available travel Lengths: 120, 150, 180, 210, 240mm
- Overall Lengths: 374, 439, 504, 569, 639mm
- Available Diameters: 30.9, 31.6, 34.9mm
- Size Tested: 31.6 x 210mm travel
- Measured Weight: Post: 667g (3.18 g/mm travel), Lever: 46g
Pros
- A major improvement over the previous version
- Smooth travel
- Adjustable air spring/return rate
- Damped feel at bottom of stroke
- Can reduce travel in 5 mm increments
Cons
- Heavier weight
- Long actuator and longer overall lengths may limit fitment for some
- MSRP: $320
- Available Travel Lengths: 80, 100, 125mm
- Overall Lengths: 400, 420, 445mm
- Available Diameters: 30.9, 31.6mm
- Size Tested: 31.6, 125mm
- Measured Weight: Post: 451g (3.61 g/mm travel), Lever: 45g
Pros
- Fast return speed
- Smooth, controlled action
- Relatively lightweight
- "Tech climb” feature went unnoticed (in a good way)
Cons
- Max travel of 125mm
- Longer overall length and stack height
- Weight is low, but weight per mm/travel is higher than other SL model tested
- Availability is hit or miss
- MSRP: $330
- Available Travel Lengths: 100, 125, 150, 170, 200mm
- Overall Lengths: 364, 414, 465, 504, 577mm
- Available Diameters: 30.9, 31.6mm (Highline XC Gravel available in 27.2mm)
- Size Tested: 31.6, 150mm travel
- Measured Weight: Post: 577g (3.85 g/mm travel)
Pros
- Very smooth travel
- Easy to use pivoting bolt seat clamp
- Easily user serviceable (everything but the cartridge) with standard tools
- Easy install
Cons
- Slower, fixed compression and extension speed
- Longer overall length and stack height
- Slightly heavier weight
- MSRP: $419
- Available Travel Lengths: 50, 70, 75, 100, 125, 150mm
- Overall Lengths: 350, 370, 355, 380, 430, 455, 480mm
- Available Diameters: 27.2, 30.9, 31.6
- Size Tested: 31.6, 150mm travel
- Measured Weight: Post: 441g (2.94g/mm travel), Lever 46g
Pros
- Lightweight
- Wide range of shorter travel options for XC riders
- Drop bar lever available
- Very fast return speed
- Extremely light action
Cons
- Two positions – you’ll love it or hate it
- Less controllable than infinitely adjustable posts due to extremely light action
- Longest overall length in the test
Dropper Post Comparison Table
| Dropper Post | MSRP | Available Lengths | Available Diameters | Size Tested | Measured Weight |
|---|---|---|---|---|---|
| Wolf Tooth Resolve Rev2 | $350 – $400 | 125, 160, 200, 242mm | 30.9, 31.6, 34.9mm | 31.6 x 200mm | Post: 565g, Lever: 39g |
| OneUp Components V3 | $270 | 90, 120, 150, 180, 210, 240mm | 27.2, 30.9, 31.6, 34.9mm | 30.9 x 210mm | Post: 515g, Lever: 42g |
| PNW Components Loam | $229 | 100, 125, 150, 175, 200mm | 30.9, 31.6, 34.9mm | 31.6 x 150mm | Post: 529g, Lever: 49g |
| Bike Yoke Revive 3.0 | $350 – $420 | 125, 160, 185, 213mm | 27.2, 30.9, 31.6, 34.9mm | 31.6 x 213mm | Post: 633g, Lever: 32g |
| Fox Transfer Neo | $859 | 100, 125, 150, 175, 200, 225mm | 30.9, 31.6, 34.9mm | 31.6 x 200mm | Post: 688g, Remote: 45g, Adapter: 19g |
| RockShox Reverb AXS | $599 (no remote) | 100, 125, 150, 175, 200, 225, 250mm | 30.9, 31.6, 34.9mm | 31.6 x 200mm | Post: 733g, Remote: 50g |
| Fox Transfer Factory | $309 | 120, 150, 180, 210, 240mm | 30.9, 31.6, 34.9mm | 31.6 x 210mm | Post: 667g, Lever: 46 g |
| Bike Yoke Divine SL | $320 | 80, 100, 125mm | 30.9, 31.6mm | 31.6 x 125mm | Post 451g, Lever: 45g |
| Crankbrothers Highline 7 | $300 | 100, 125, 150, 170, 200mm | 30.9, 31.6mm | 31.6 x 150mm | Post: 577g |
| Fox Transfer SL | $419 | 50, 70, 75, 100, 125, 150mm | 27.2, 30.9, 31.6mm | 31.6 x 150mm | Post: 441g, Lever: 46g |
How We Tested Dropper Posts
It’s fair to say that the team at Bikerumor is obsessed with all things bike-related. This is especially true of products like dropper posts that enhance our riding experience and performance out on the trail.
While there were some reservations about adopting this new-fangled technology when they initially came out, you’ll find droppers on virtually all of our mountain bikes and even some of our gravel bikes these days. And, we’ve tried a lot of them. Whether for product launches, individual reviews, or testing on bikes, we’ve had the opportunity to try nearly every model on the market.
Our Expert Testers
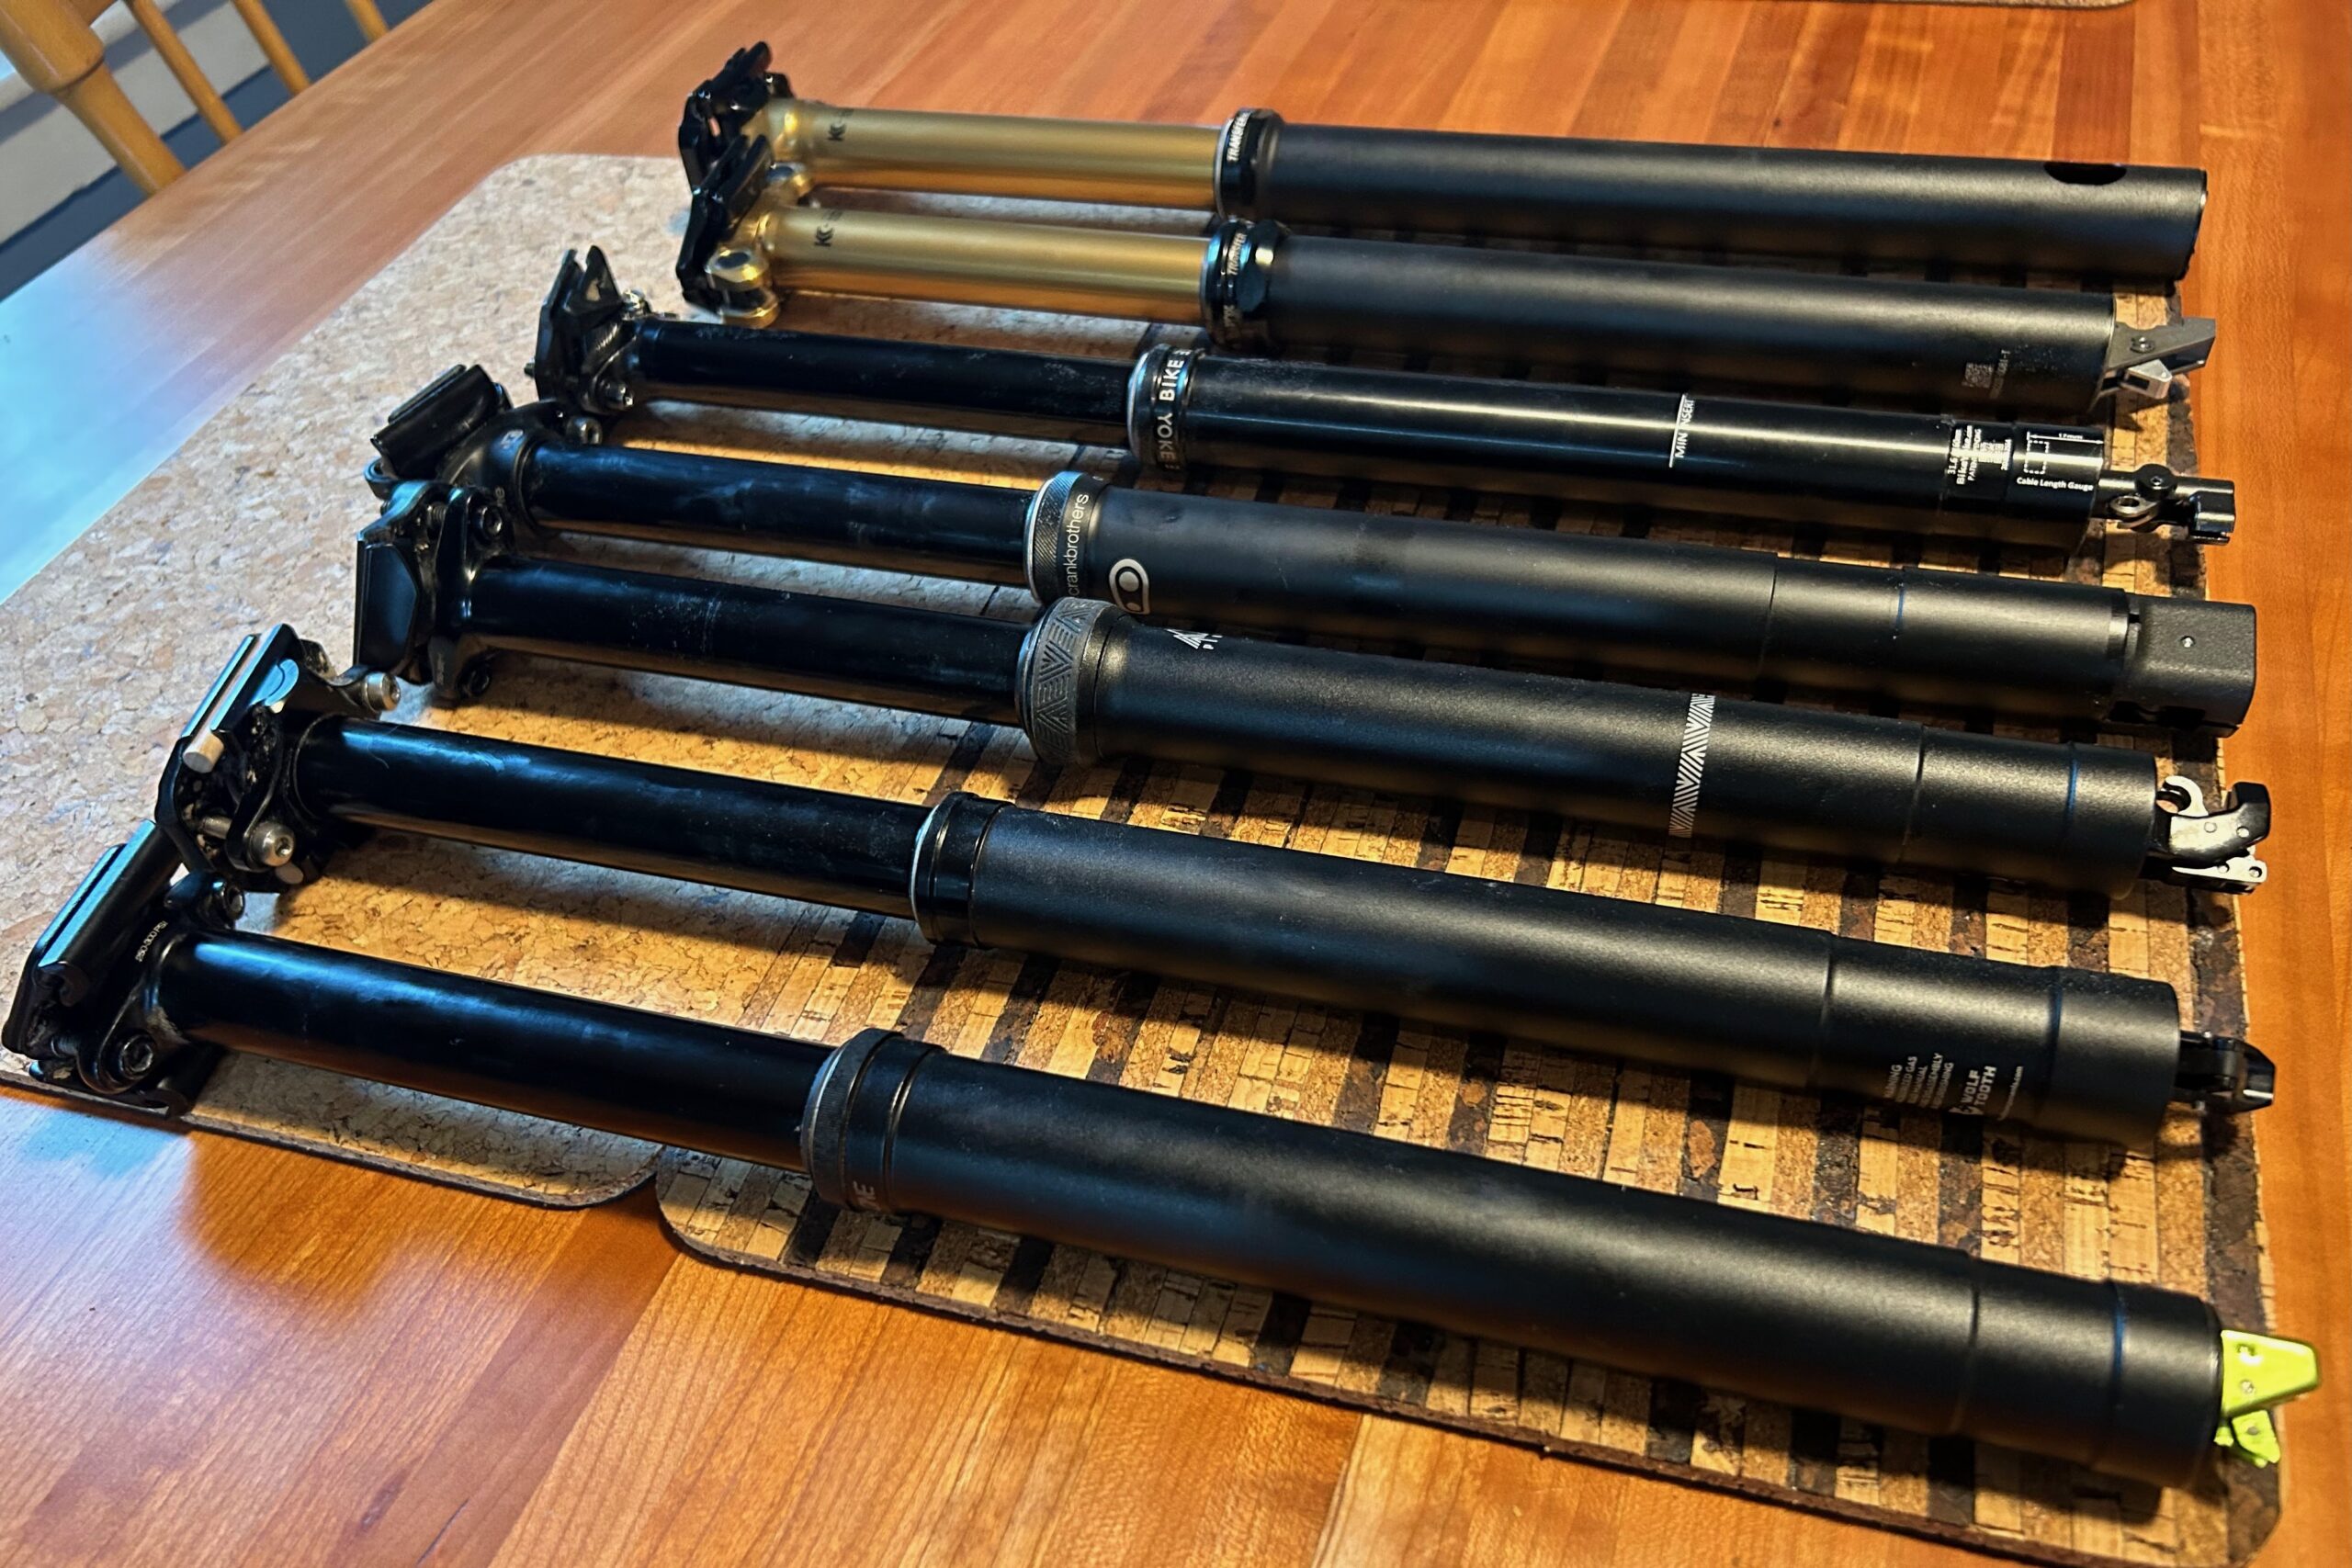
For the purposes of this buyer’s guide, we rounded up ten of the best dropper posts available to test and compare side-by-side. Review author, Paul Clauss, spent months testing these posts in a wide range of weather conditions on technical northern Vermont trails that require lots of raising and lowering of the saddle.
A mechanical engineer by trade and a skilled bike mechanic, Paul enjoys scrutinizing different designs, tinkering with adjustments, and is adept at differentiating subtle performance differences in the workshop and out on the trail.
Paul has an affinity for technical features and rock slabs, and fortunately, the terrain near his home in northern Vermont is an ideal testing ground for dropper posts with plenty of ups, downs, and rocky, rooty challenges that require frequent changes to saddle height. In addition to testing dropper posts, Paul has also contributed to our guides on the best mountain bike jackets and best bike locks.

Bikerumor Editor Jeremy Benson also contributed to this guide. Benson has been testing and reviewing bikes, accessories, and components for 8+ years and has personally tested more than fifteen different dropper posts. As an obsessive rider and racer, he’s always seeking out the highest-performance products he can find and appreciates components that tangibly improve his ride experience.
He’s also experienced the evolution of dropper posts firsthand and recognizes that virtually every dropper on the market is much better than any options we had a decade ago. Some of the other guides that Benson has contributed to include hitch bike racks, cycling sunglasses, and bike locks.
Our Testing Process
After weighing each post and remote for consistency and comparison to the manufacturer’s specs, Paul and Jeremy installed them on one of their several mountain bikes. Installing each post ourselves gave us the opportunity to assess the relative difficulty of doing it on our own and provided valuable insight into the saddle clamps and remote levers. It also gave us the opportunity to assess fitment-related concerns when installing, including choosing the right size to begin with.
Once each post was installed, we performed numerous hand tests in the workshop to compare the smoothness of travel and return speeds. We made any necessary adjustments and then took to the trails. On the trail, Paul and Jeremy both focused on key performance attributes like actuation force at the lever, compression force, return speed, and smoothness while making frequent adjustments to saddle height.
From the technical trails of Vermont to the rough and dusty trails of the Lake Tahoe region, these posts were ridden hard to determine their relative strengths and weaknesses. Paul and Jeremy also switched between posts often for more direct comparison in their efforts to find the best dropper posts.

Buying Advice: How to Choose a Dropper Post
From lightweight cross-country race bikes to long-travel eMTBs, nearly every modern mountain bike comes with a dropper post. There are numerous reasons to use a dropper post on your mountain bike, but it can be tricky to find exactly what you need. Here we’ll break down some of the important considerations that may impact your purchase decision.
Why Ride With a Dropper Post?
Using a dropper post will allow you to raise and lower your seat with the touch of a handlebar-mounted lever. When your saddle is at the appropriate height for pedaling and climbing, it can get in the way when trying to move your body and bike while descending. But when your saddle height is set low for descending, it is not in the proper pedaling position.
Dropper posts allow you to adjust your saddle height on the fly while riding, ensuring you have the proper seat height for the terrain you encounter. With a dropper post, you will experience:
- Improved maneuverability: A dropper post allows you to lower your seat when descending steep or technical terrain, creating more clearance between you and your saddle, making it easier to shift your body and maneuver the bike. This is particularly helpful for bike/body separation when cornering and when jumping.
- Better efficiency: At full extension, your saddle should be in the ideal position for seated pedaling so you can always make the most of your pedaling effort.
- More comfortable riding: A dropper post allows you to adjust your seat height based on the terrain, making for a more comfortable ride overall. Outside of lowering the post for descending, this can be important on technical climbs – sometimes having only 20mm or so of drop can help you put down the power and push up a difficult move.

How to Size a Dropper Post for You and Your Bike
When purchasing a new dropper post, the fit for you and your bike is your first priority. Not only does it need to fit your frame to be compatible, but you want it to suit your body size and needs as well.
Seat Tube Diameter
This is one of the easiest steps – just make sure you select a post that matches the seat tube diameter of your frame. Most modern mountain bikes have 30.9mm or 31.6mm seat tubes, and dropper post manufacturers often provide options for less standard diameters like 27.2mm (for gravel and some XC frames) or 34.9mm diameters.
If you are unsure of your seat tube diameter, you can typically find it printed on the seat post that is currently on your bike, or you can look it up on the manufacturer’s website. While you should be able to find a post that matches your seat tube diameter, you can sometimes purchase a smaller one and shim the seat tube in a pinch.

Dropper Travel Length
Dropper posts are available in a range of travel lengths to suit varying needs, preferences, body types, and bikes. For mountain bikes, the typical range is between 100 and 200mm, with some outliers on either end. For example, the OneUp Components V3 Dropper is available in a wide range of sizes, with 90, 120, 150, 180, 210, and 240mm travel lengths. Not surprisingly, as post-travel increases, so does the overall length, insertion depth, and weight of the post.
While many people try to fit the most drop possible on their bike to increase mobility, some riders may prefer a shorter drop length for various reasons. How much travel you want is usually a matter of personal preference, but it is also often a function of what will fit your frame and work for your body size.
Fortunately, some brands are doing their best to minimize the overall lengths and stack heights of their posts, which makes it easier to fit a longer travel dropper. Additionally, some brands provide the option to reduce travel with adjustments, making fitment much easier than it used to be. At the same time, many modern bikes are being designed with lower stand-over heights and shorter/straighter seat tubes that help make fitting longer travel droppers easier.
Determining If a Dropper Will Fit Your Frame
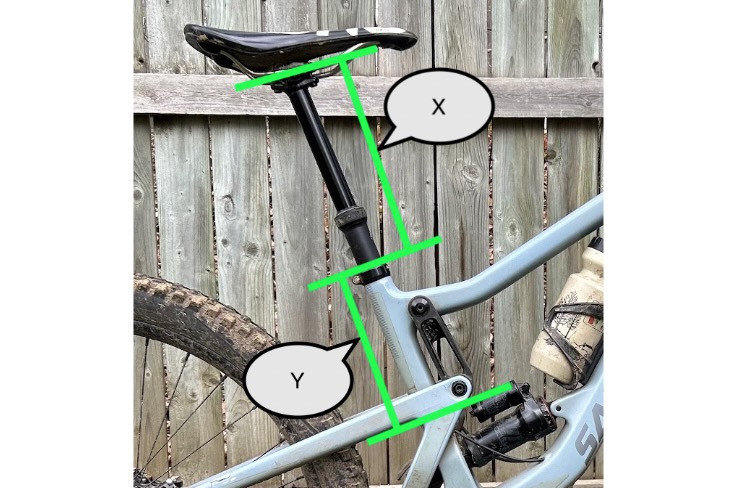
Most manufacturers’ websites have a tool to help you appropriately size a post for your bike to maximize travel (and the OneUp website will even show you which competitor’s posts will fit with their Dropper Post Length Selector). To use these tools, you’ll take two measurements from your frame and consider a few post measurements:
- X – your Measured Ride Height, from the top of your seat collar to the center of your seat rails (not the top of your saddle). For example, on the small Santa Cruz Bronson used for testing, this is 260mm.
- Y – the maximum seat tube insertion length for your frame. On the small Bronson, this is 210mm.
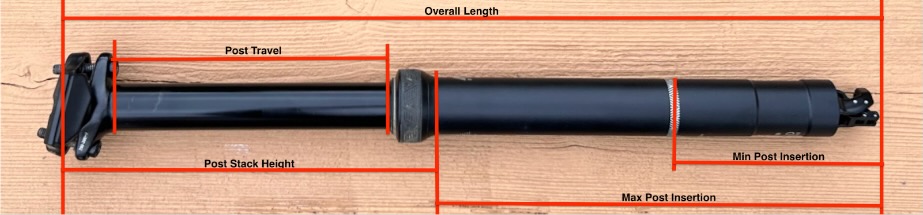
With these numbers, use the tools available on most manufacturers’ websites to determine the maximum travel for their post on your frame. To double-check if a dropper post will fit on your own, make sure that:
- Your Measured Ride Height (X) is GREATER than the Stack Height (extended) of the post, measured from the bottom of the collar to the center of the seat rails of the seat at full extension.
- On the Bronson test bike, the Measured Seat Height of 260mm is greater than the 150mm Travel PNW Loam post’s Stack Height of 200mm. This means the post can be positioned at the preferred height, assuming the other two measurements below are true.
- The Overall Length minus your Measured Ride Height (X) is LESS than the maximum seat tube insertion length for your frame (Y).
- For the PNW Loam post at 150mm travel, the Overall Length is 440mm. 440 – 260 = 180mm, which is the length of the post I expect to be in the seat tube at full seat height. This is less than the measured seat tube insertion of 210mm, leaving 30mm of clearance at the bottom of my seat tube with the post at the measured seat height.
- The Insertion Length (from #2) falls between the minimum and maximum insertion lengths of the post. The insertion length must be between the maximum/minimum insertion lengths for the post.
- Minimum insertion of 90mm is less than 180mm (from #2, the expected insertion length with the post), which is less than 210mm (the maximum insertion depth). At the expected insertion on the Bronson frame, the insertion length falls between and maximum and minimum insertion lengths of the post.
Types of Dropper Posts
Most dropper posts available today utilize a cable to actuate an internal floating piston (IFP), which releases a pressurized chamber, typically an adjustable air spring or a sealed hydraulic cartridge, to raise and lower the seat. While they all perform the same task of raising and lowering your seat on the fly, dropper posts come in a variety of different designs.
Adjustable vs Fixed Rate of Return
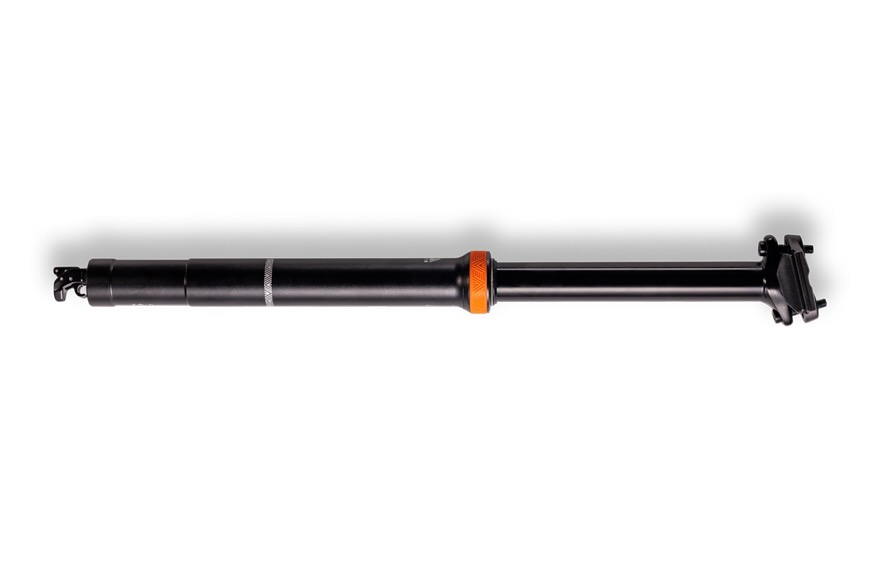
Many dropper posts have an adjustable rate of return. Typically, this involves an air spring, the pressure of which can be adjusted (within a recommended range) to speed up or slow down the rate at which the post compresses and extends. This gives the user greater control over their post and the ability to dial in its performance to meet their needs or preferences. The Bike Yoke Revive 3.0, Divine SL, Wolf Tooth Resolve Rev2, Fox Transfer Factory, and the PNW Loam all feature adjustable air springs.
Some posts use sealed cartridges that have a fixed rate of compression and extension. These posts have a predetermined spring rate chosen by the manufacturer that usually aims to hit the happy middle ground of compression force/return speed. The OneUp V3 and Crankbrothers Highline 7 are two examples of droppers that do not have adjustable air springs.

Infinitely Adjustable vs Fixed Interval Travel
The vast majority of dropper posts feature what is called infinitely adjustable travel, meaning they can be adjusted anywhere within the available travel range, from full compression to full extension. While it is most common to ride with the post all the way up or all the way down, there are plenty of circumstances where dropping the post just a little bit is more ideal, and infinitely adjustable posts allow you to do so.
A few posts on the market have fixed interval travel, meaning they stop only at certain spots within their travel range. Typically, this style of post uses a simpler mechanical spring to control the travel. The only post we tested that adjusts at fixed intervals is the lightweight Fox Transfer SL, which stops in only two positions, fully compressed and fully extended.
Internal vs External Routing
Most modern mountain bikes are designed to be used with dropper posts and usually feature internal cable routing. Consequently, most droppers are also designed to be used with bikes that have internal cable routing. The actuator where the cable connects is at the bottom of the post inside the frame. All of the droppers we tested are made for internal cable routing, other than the RockShox Reverb AXS and the Fox Transfer Neo, which are wireless.
Many older bike frames and some gravel bikes do not have ports for internal cable routing. Thankfully, there are some externally routed droppers on the market, though they are less common. PNW components make several models of externally routed droppers, and you can often find similar options from Brand-X and PRO if you look around.
Actuation Styles
Cable-Actuated
The majority of modern dropper posts are cable-actuated, meaning that a cable connects between the remote lever and an actuator at the bottom of the post. When you press the remote lever, it pulls on the cable, which in turn actuates the post and allows it to move up or down. Cables are relatively easy to deal with and inexpensive to replace.
Hydraulically Actuated
This style of actuation is less common than cable-actuated posts, but it operates in a similar manner, utilizing hydraulic fluid. The RockShox Reverb (not AXS) is the only post on the market that uses this system, and it works fairly well. The main drawback is that it is more difficult to install and remove your post, given the presence of hydraulic fluid in the hose and remote lever, and it can be quite messy. Older models were also quite sensitive to cold temperatures.
Wireless/Electric
Given the rapid pace of technological development, it comes as little surprise that more and more products are electronic. Wireless or electronic posts forego the cable and housing altogether and instead use a wireless signal that transmits between a handlebar-mounted remote and a small motor on the post to raise and lower it.

The RockShox Reverb AXS was the first wireless post to really gain a foothold in the market. It was released in 2019, and with no serious competition, it quickly became the benchmark. It took Fox a while to enter the wireless dropper market, but the brand finally launched the Transfer Neo in 2024. We recently tested the wireless Fox dropper and believe it has set a new standard for ease of use, actuation speed, and overall performance. In 2025, RockShox finally updated the Reverb AXS, addressing most of its shortcomings — including adding travel lengths up to 250mm.
Dropper Features
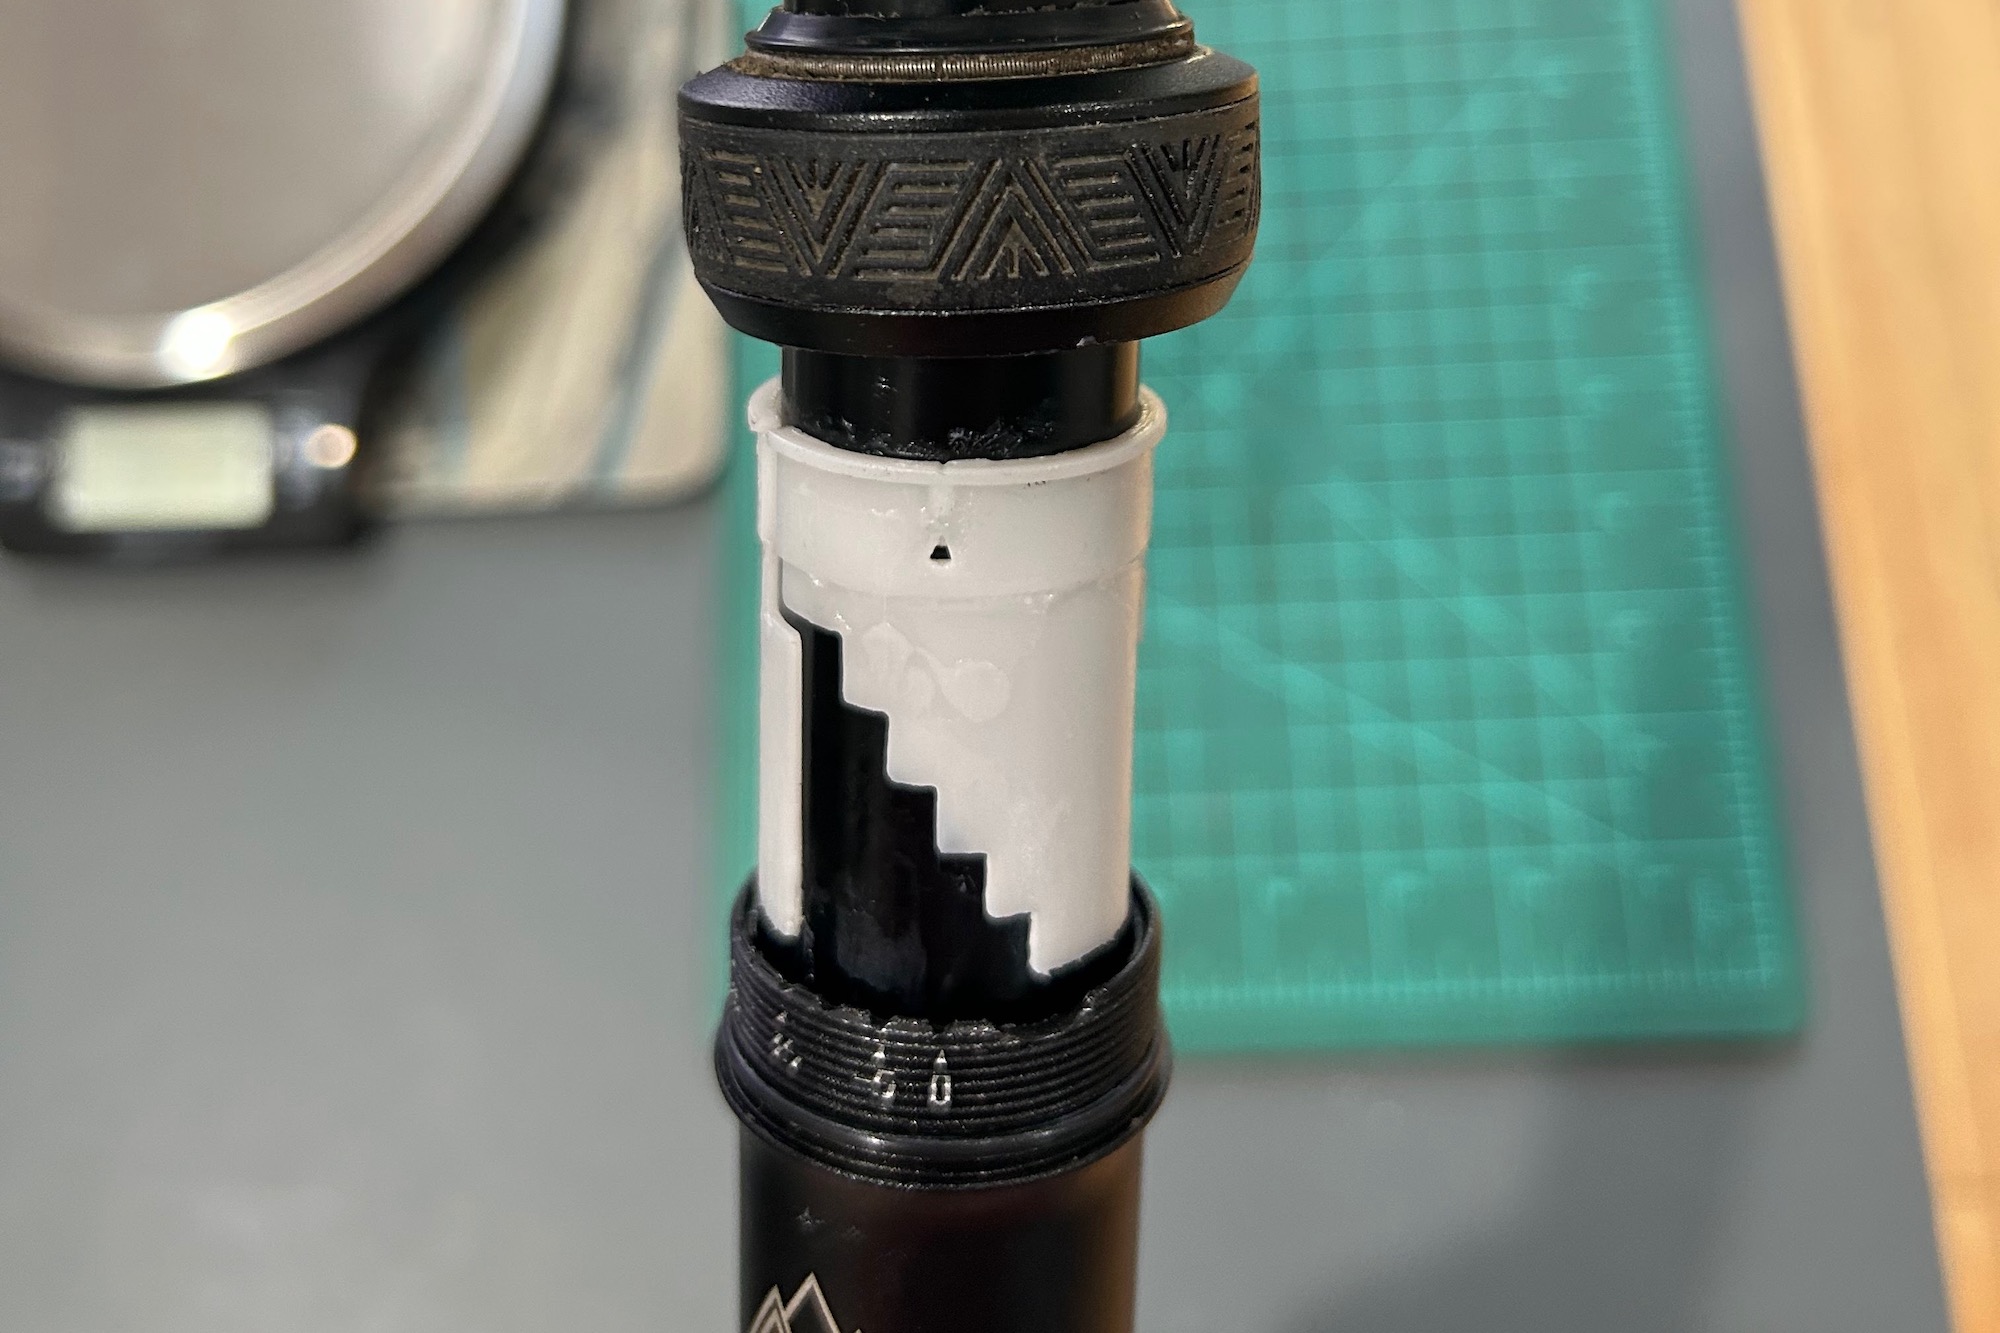
Travel Reduction
Some posts allow you to decrease the maximum post travel, ensuring you can get the maximum drop available for your bike. For example, on the bike used for testing, with a stack height of 260mm and a maximum seat tube insertion of 210mm, the OneUp size calculator indicates a maximum drop for my setup of 170mm, achieved by reducing the travel of their 180mm post by 10mm.
The PNW Loam Dropper features a tool-free system that allows for decreasing the maximum travel by up to 25mm (in 5mm increments) with a built-in nylon shim. The OneUp V3 Dropper employs a similar system, but limits travel adjustment to 10 or 20mm, utilizing pins and guide slots instead of a nylon shim. The Bike Yoke Revive 3.0 also allows for up to 20mm of travel adjustment, but a set of four 5mm shims must be purchased separately, and the post must be removed from the bike for installation.
Similarly, the Wolf Tooth Resolve Rev2 can have its maximum travel reduced, and they will install spacers for you when you order the post. Alternatively, you can purchase travel reduction shims after the fact and install them yourself, or bring it to a shop to have it done for you.
Reset Valves
All hydraulic dropper posts can experience air ingestion into the inner tubes over time, resulting in a saggy or spongy feel when sitting on the saddle. To combat this without requiring a full rebuild of the post, the Bike Yoke Revive 3.0 utilizes a reset valve. While Bike Yoke only expects Revive users to use the reset valve once or twice a year, this is a nice feature to ensure consistent performance of the post without needing to pull it out of your frame.
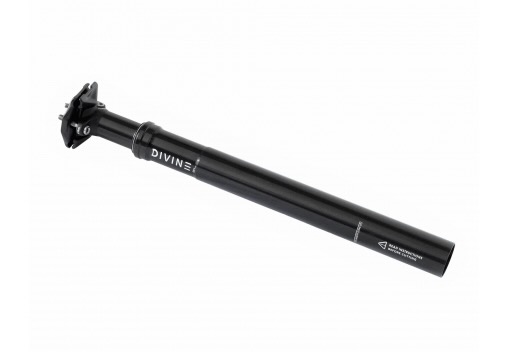
Other posts, like the Wolf Tooth Resolve and the Bike Yoke Divine SL, have “self-bleeding” cartridges designed to purge any air from the system every time the post is fully dropped.

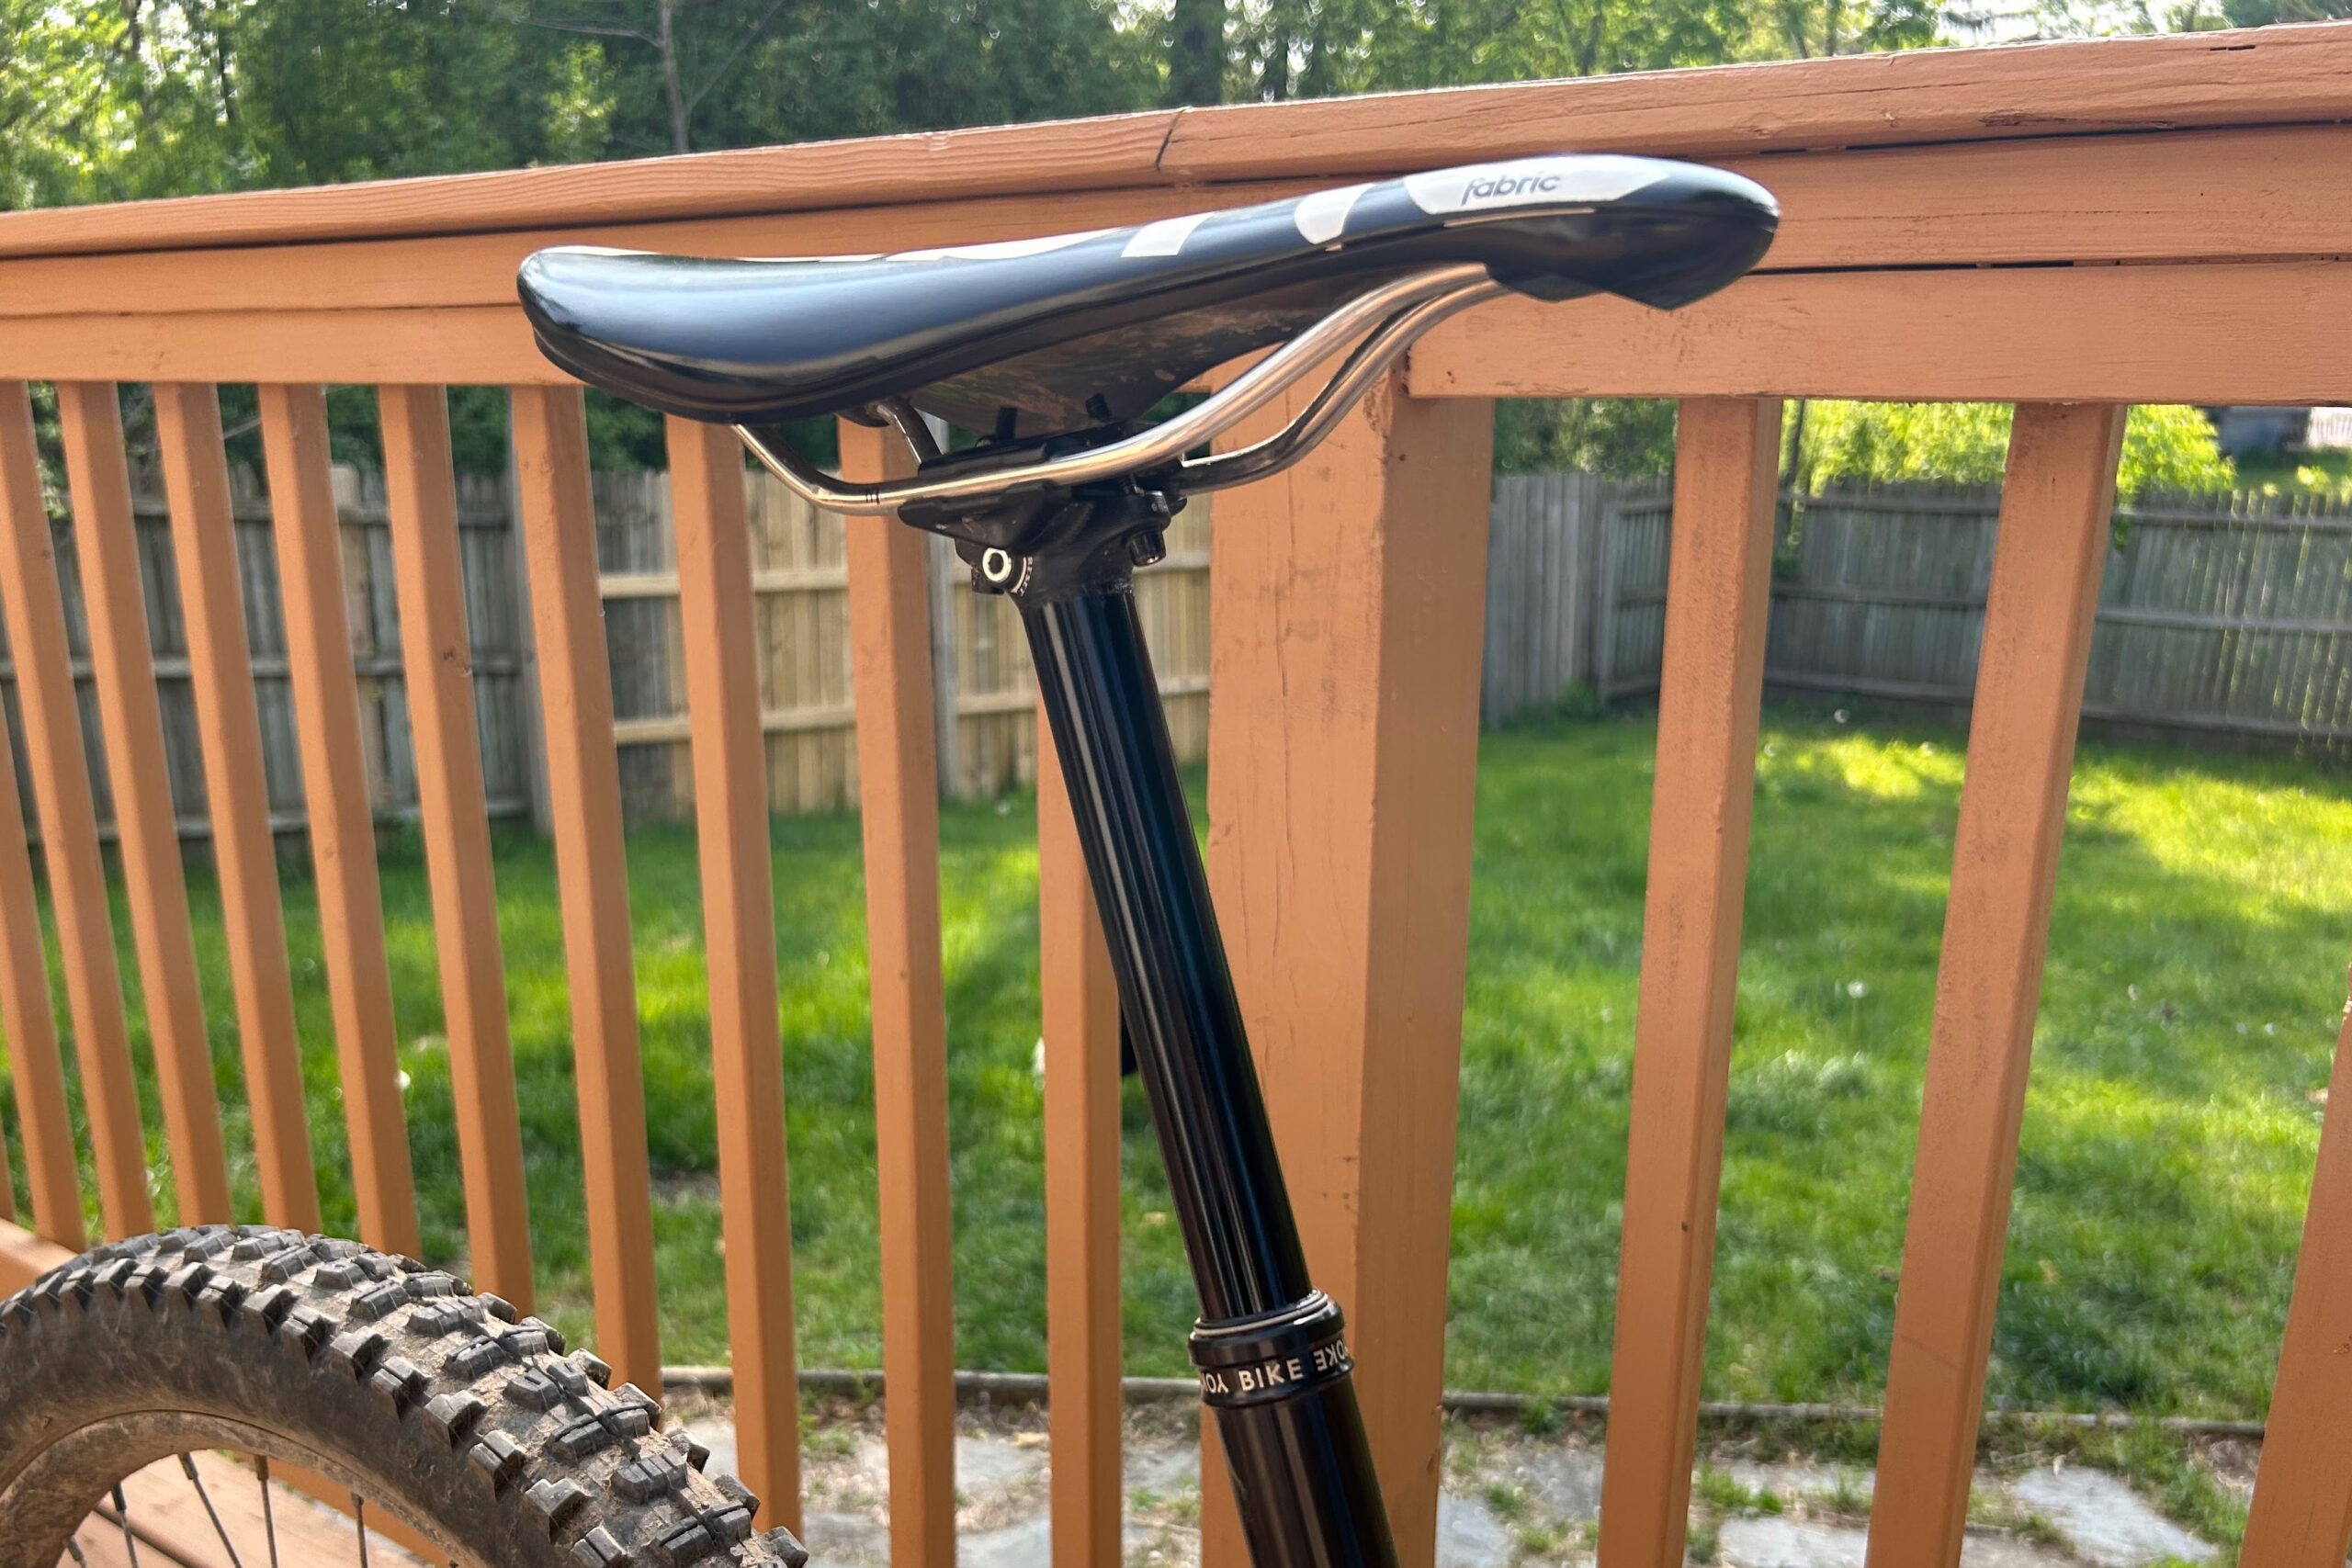
Saddle Clamp
The saddle clamp at the seatpost head is where your saddle rails attach to the seatpost. Good saddle clamps are quiet, stay at the appropriate torque, and make saddle installation/removal reasonably easy. Most of the posts in this guide use a standard two-bolt head design to adjust saddle angle and fore/aft position. A few models have clamp designs that help make the installation and removal process slightly easier.
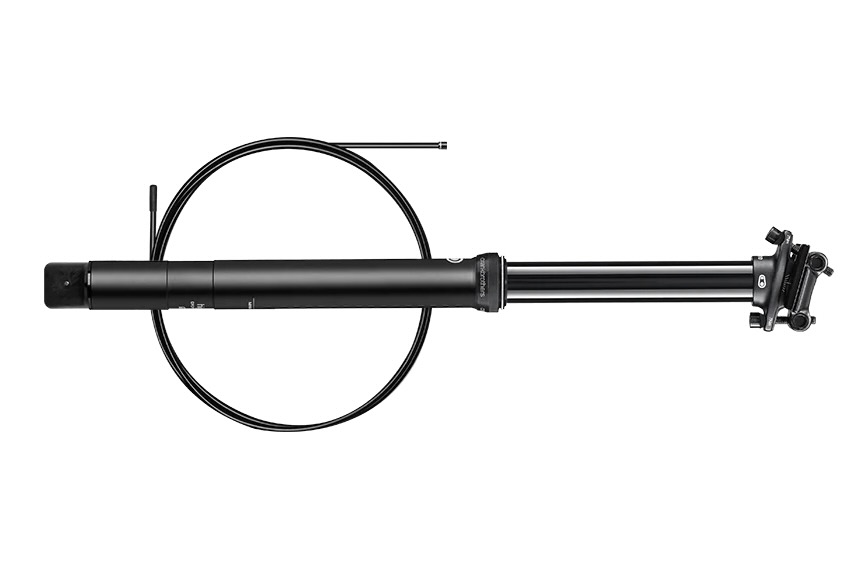
The Crankbrothers Highline 7 has hardware that swivels, while the OneUp V3 dropper has slotted plates. Though we don’t typically install/remove our saddles frequently, these seemingly trivial design features are really quite helpful when testing dropper posts back to back.

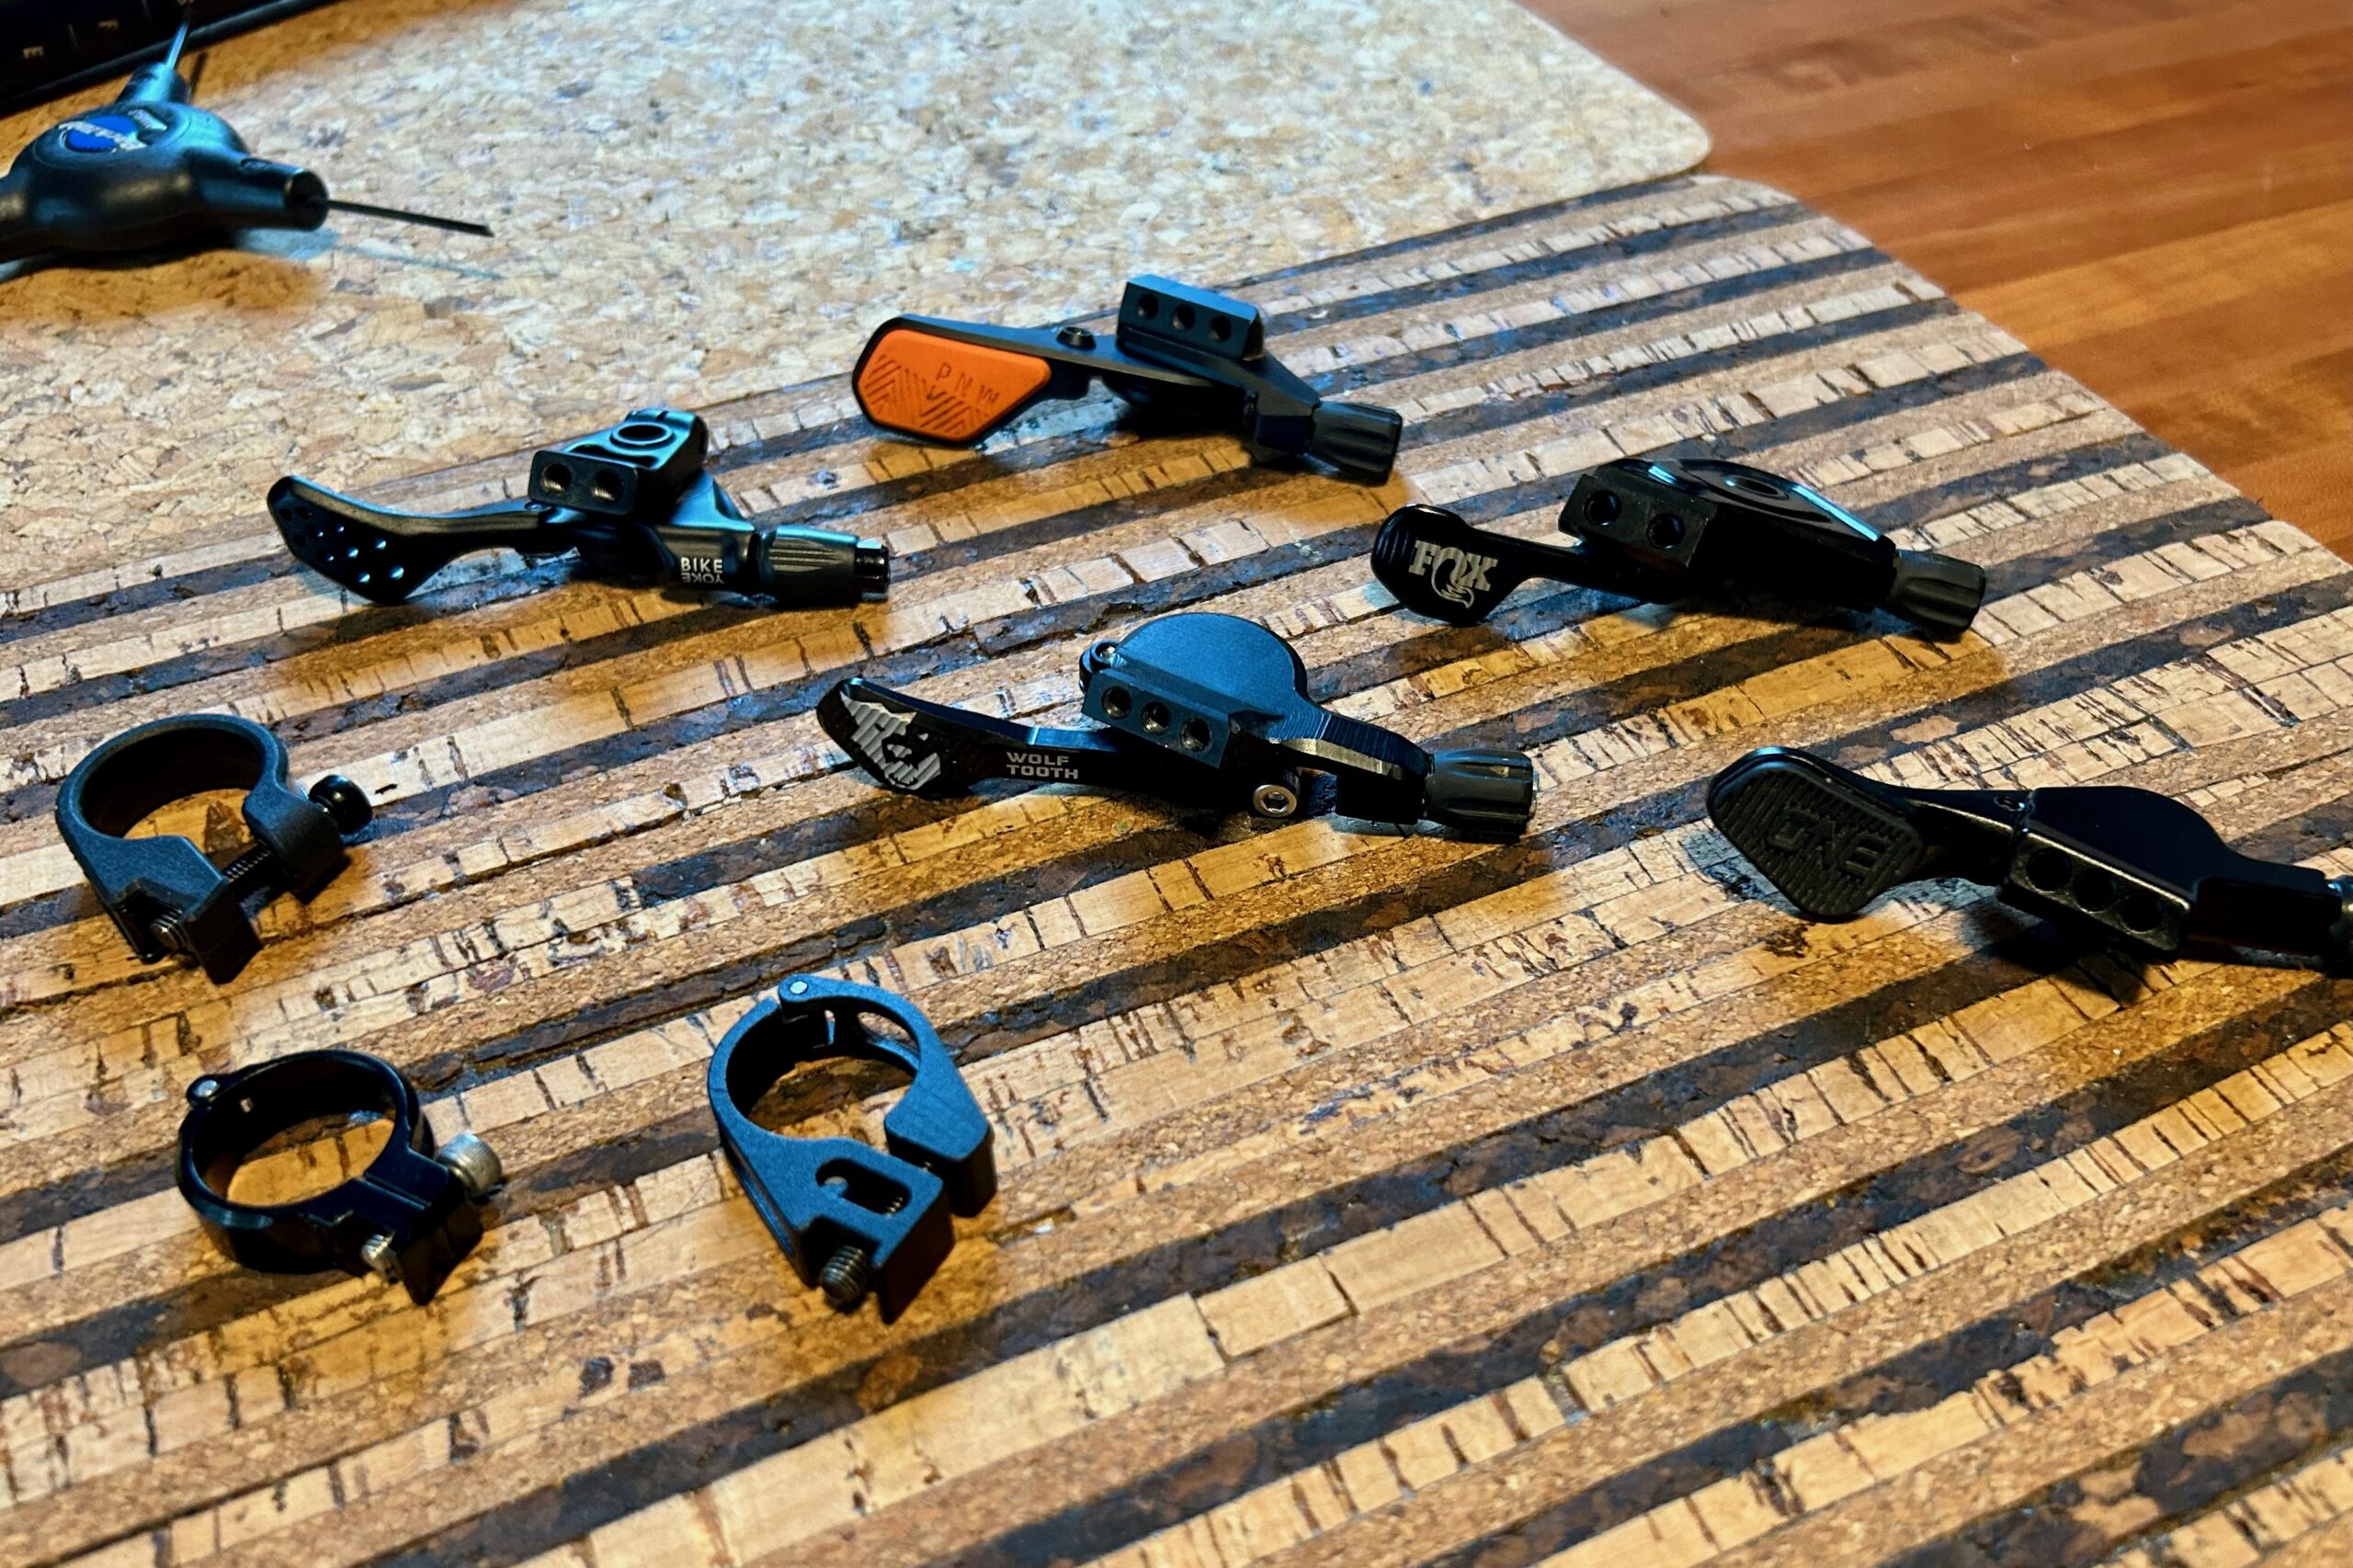
Remote Levers
Every dropper post uses a remote to actuate the travel up and down. While many posts used to come with a lever, most posts are sold without one these days, meaning you can usually choose whatever remote you like. Most levers for cable-actuated dropper posts (that clamp the free cable end at the lever) are compatible with any post, allowing you to choose the lever that works best with your ergonomics and cockpit setup. The exception to this rule is the wireless droppers, which require their own electronic control unit. For most of these posts in this review, we tested them with their brand’s respective remote levers to get a feel for how they work together.
The advent and proliferation of 1x drivetrains freed up some space on the left side of the handlebar where the front derailleur shifter used to be, so the majority of dropper remotes are 1x levers that resemble a shifter paddle that you press with your left thumb. Examples of 1x remote levers include the Wolf Tooth Remote Pro, Fox Transfer 1x Remote, Bike Yoke Triggy Alpha, PNW Loam Lever, and OneUp V3 Lever. Many have textured metal surfaces to provide traction for the thumb, while some now use replaceable rubber pads for grip.
Some brands still make remote levers that are designed to be used with 2x drivetrains and/or suspension lockout levers, and drop-bar levers are becoming more common as droppers gain popularity on gravel bikes.
Like any other handlebar-mounted control, it is important to consider ergonomics, lever feel, and actuation force when selecting a dropper post lever. While most lever manufacturers do provide options for Shimano i-Spec or SRAM MMX shifter/brake mount connections, they also offer basic 22.2 and 31.8mm handlebar clamps. Often, you can find adaptors for other brake configurations like Magura, Hayes, Hope, etc, so that’s something you’ll likely want to consider depending on the brakes you use.
Because most levers have multiple attachment points to adjust the horizontal position of the lever, it is usually fairly easy to position the remote in a good spot so that reaching it with your thumb feels natural and intuitive. Some levers have additional adjustments that allow ergonomics to be customized even further.

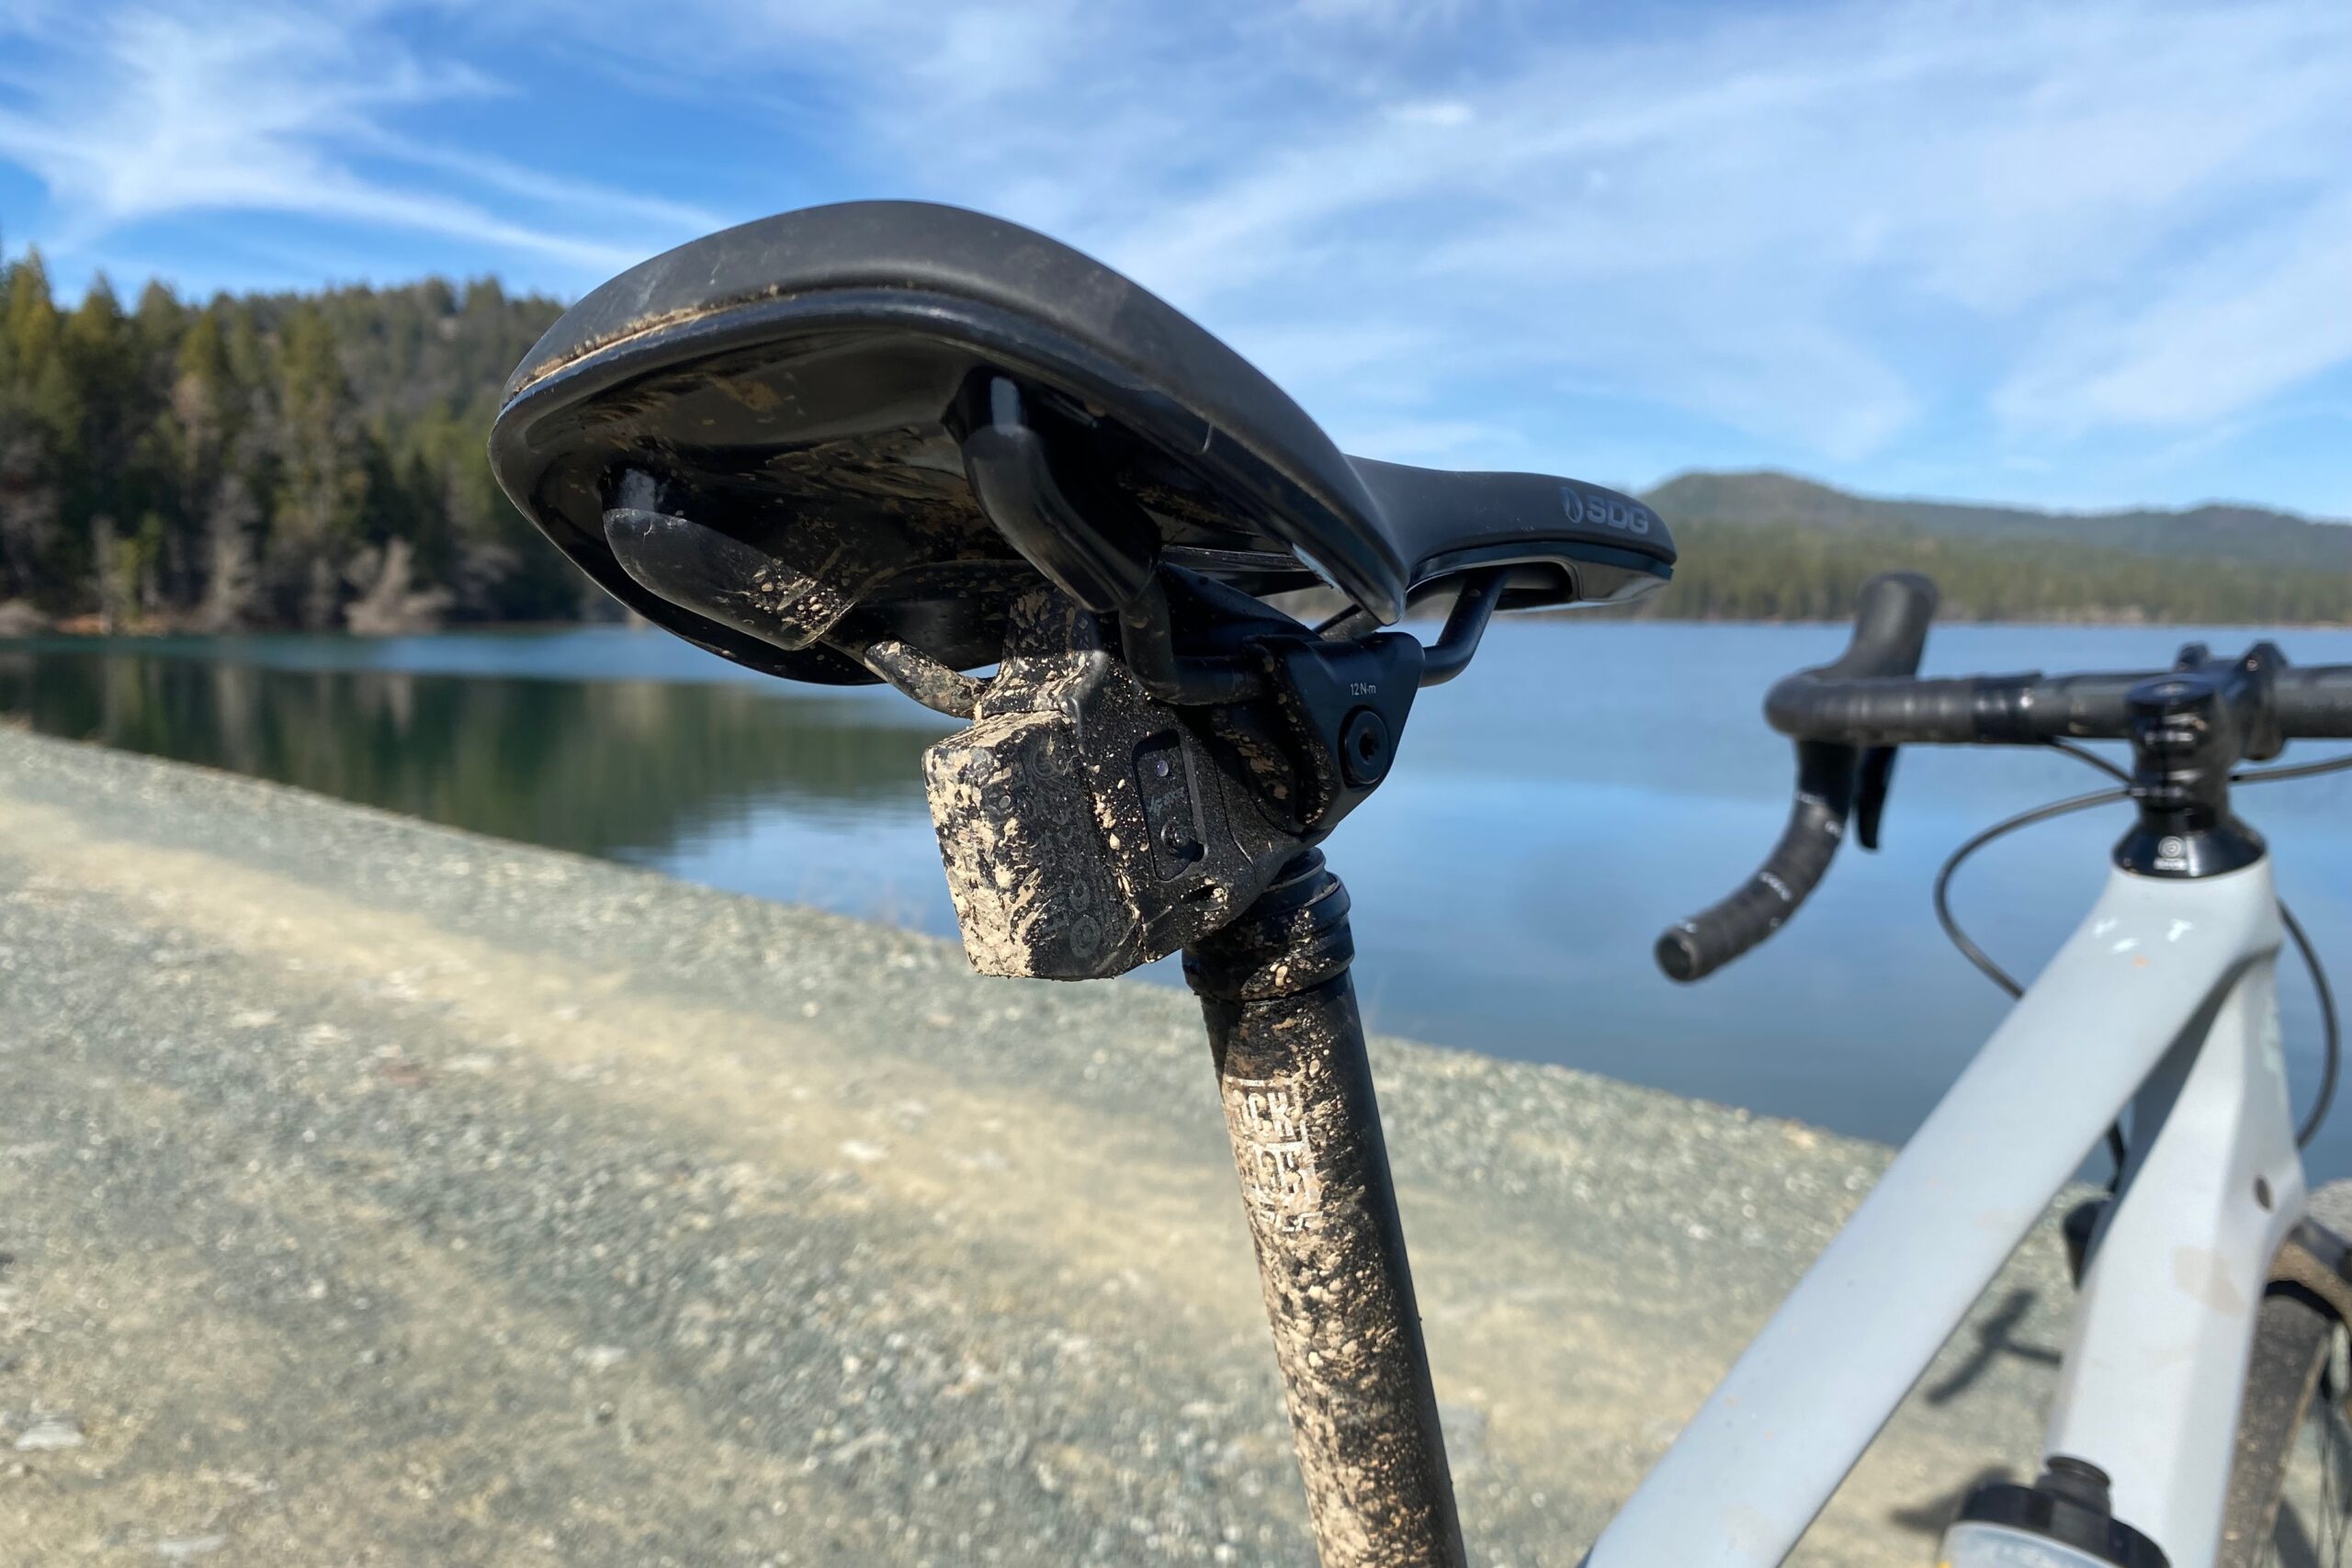
The exceptions to the cable-actuation rule are the RockShox Reverb AXS and the Fox Transfer Neo, both of which require their own wireless control units. These remotes run off battery power and transmit a wireless signal to the post. One great thing about the Transfer Neo remote is that it comes with adapters for both SRAM and Shimano brakes, as well as a standard bar clamp. It also transfers the actuation signal incredibly quickly — noticeably faster than the Reverb AXS.
Weight
Dropper posts will always weigh more than a standard seatpost, but most riders (and increasingly, even competitive cross-country racers) are willing to take a weight penalty for the enhanced handling and control benefits of using a dropper post. Of course, all other things being equal, lighter is generally considered better, assuming performance isn’t compromised in the name of weight savings.
For this test, we weighed the post only, knowing that the weight of the cable housing will vary slightly depending on the length required for your frame, and that will also generally be consistent for your bike, regardless of which cable-actuated post you choose. It is also worth noting that longer travel posts weigh more than shorter travel versions of the same post due to the additional materials needed to make them longer. And, since our testers used different lengths of posts, it is challenging to get a perfect weight comparison.
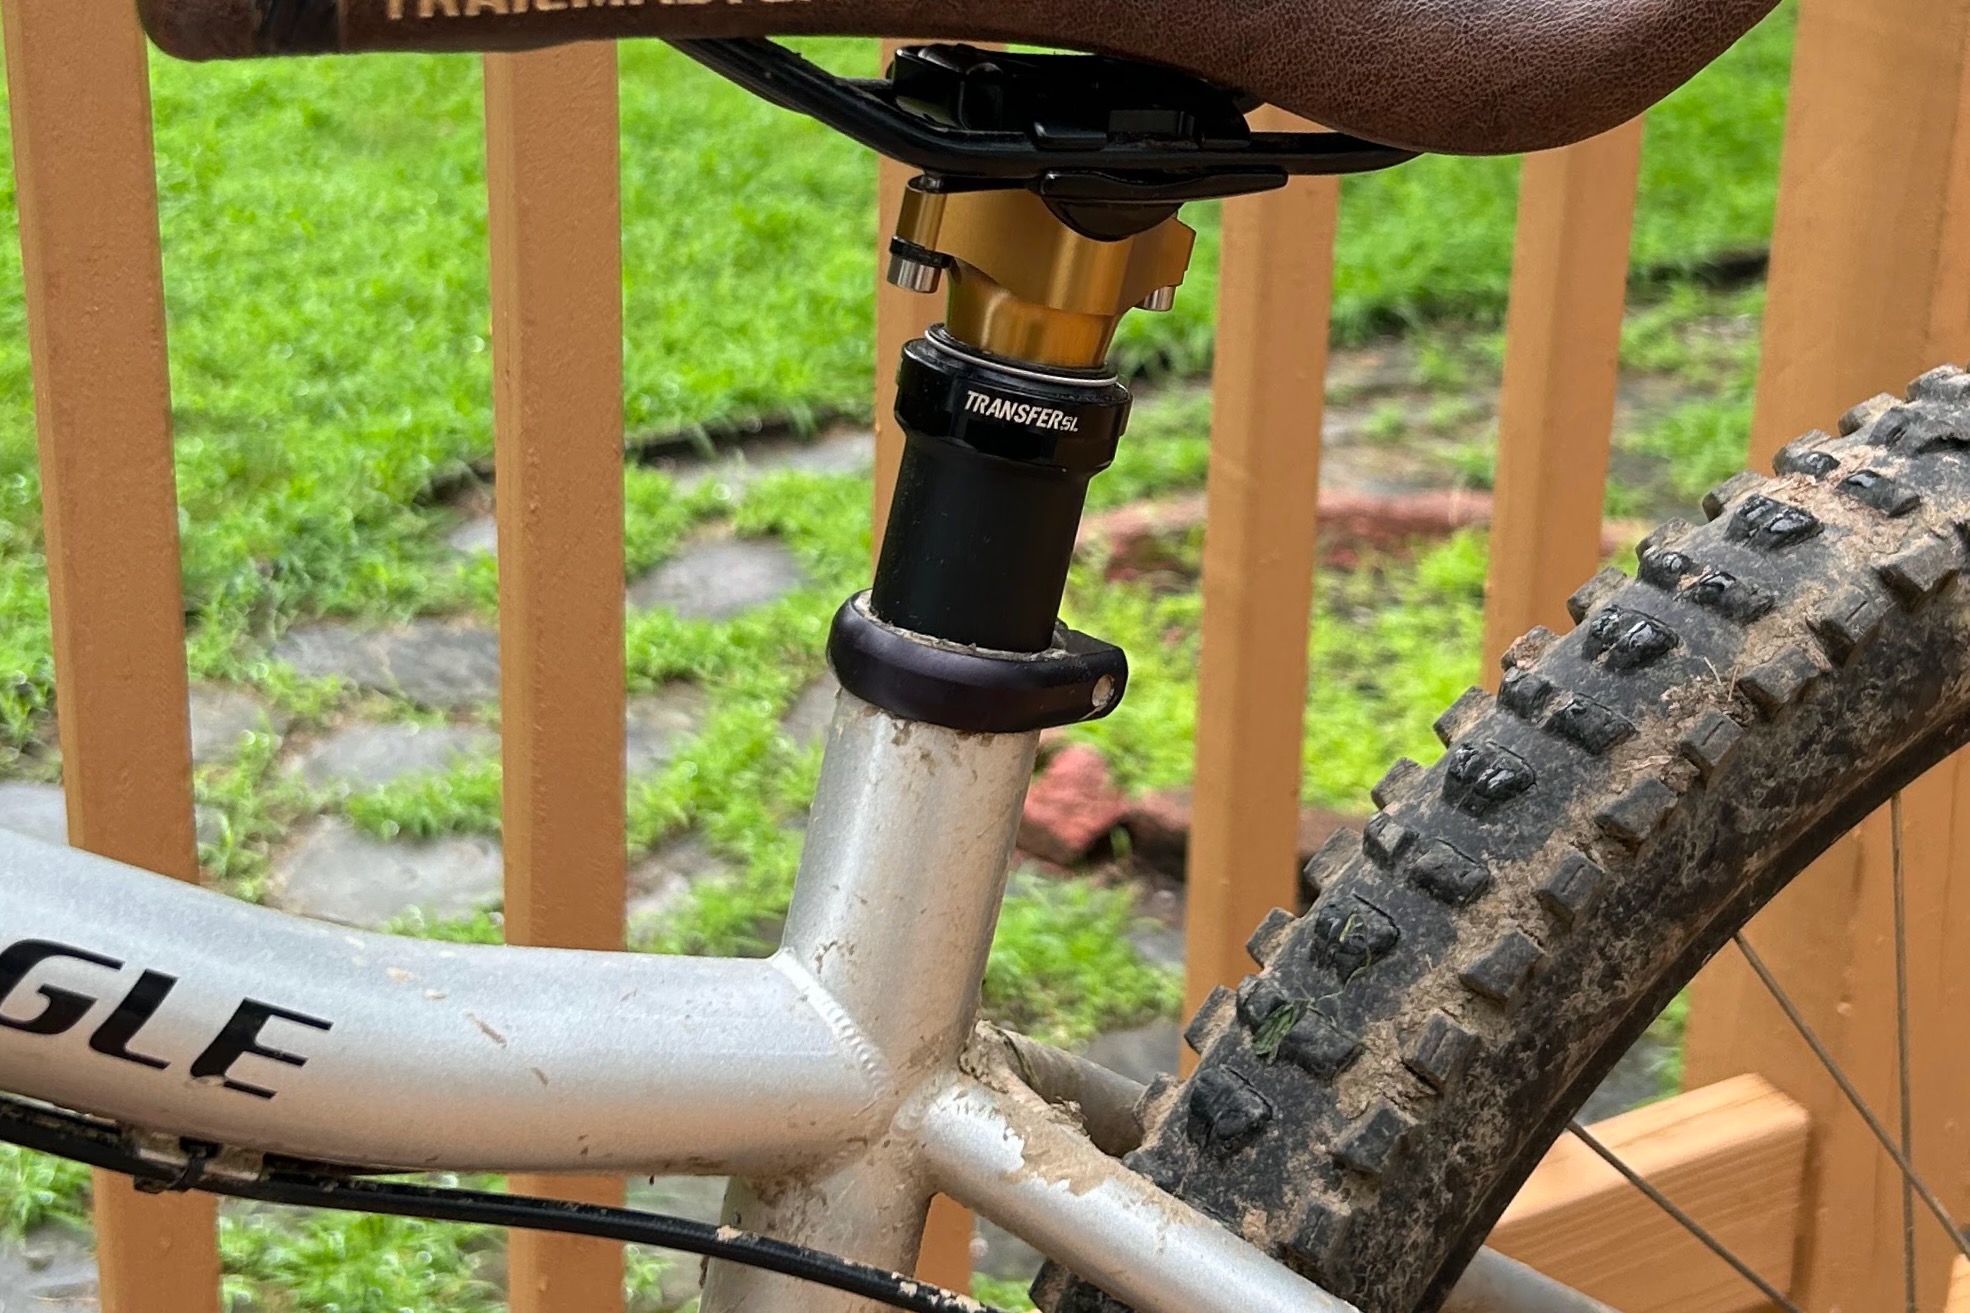
While a heavier dropper post won’t be as noticeable on the trail as a heavy set of tires or wheelset, it will add to the overall weight of your bike and may be a consideration for you. All the posts in this test weighed between 441g (Fox Transfer SL) and 733g (Rockshox Reverb AXS). For the cable-actuated droppers, the OneUp V3 is consistently one of the lightest weight options, weighing in at 515g in the 210mm travel length (433g for the 150 mm version).
The Wolf Tooth Resolve is close behind at just 565g at 200mm of travel. For those super conscious about weight, like XC racers, there are some “superlight” options on the market nowadays, like the Fox Transfer SL and the Bike Yoke Divine SL. These lightweight models do save a fair amount of weight, coming in at 441g and 451g, respectively, but they are offered in a narrower range of drop lengths. It is definitely worth mentioning that the OneUp V3 droppers are now lighter than the SL models we tested (in the same drop lengths).
Installation
If you purchase a new dropper from a bike shop, it is common that they will install it for you. If you purchase a dropper from an online retailer, you can bring it to a local shop and pay to have it installed. Alternatively, if you prefer to do it yourself, the process is relatively straightforward, assuming you have cable/housing cutters and reasonable mechanical skills.
The installation process is largely the same regardless of the actuation method:
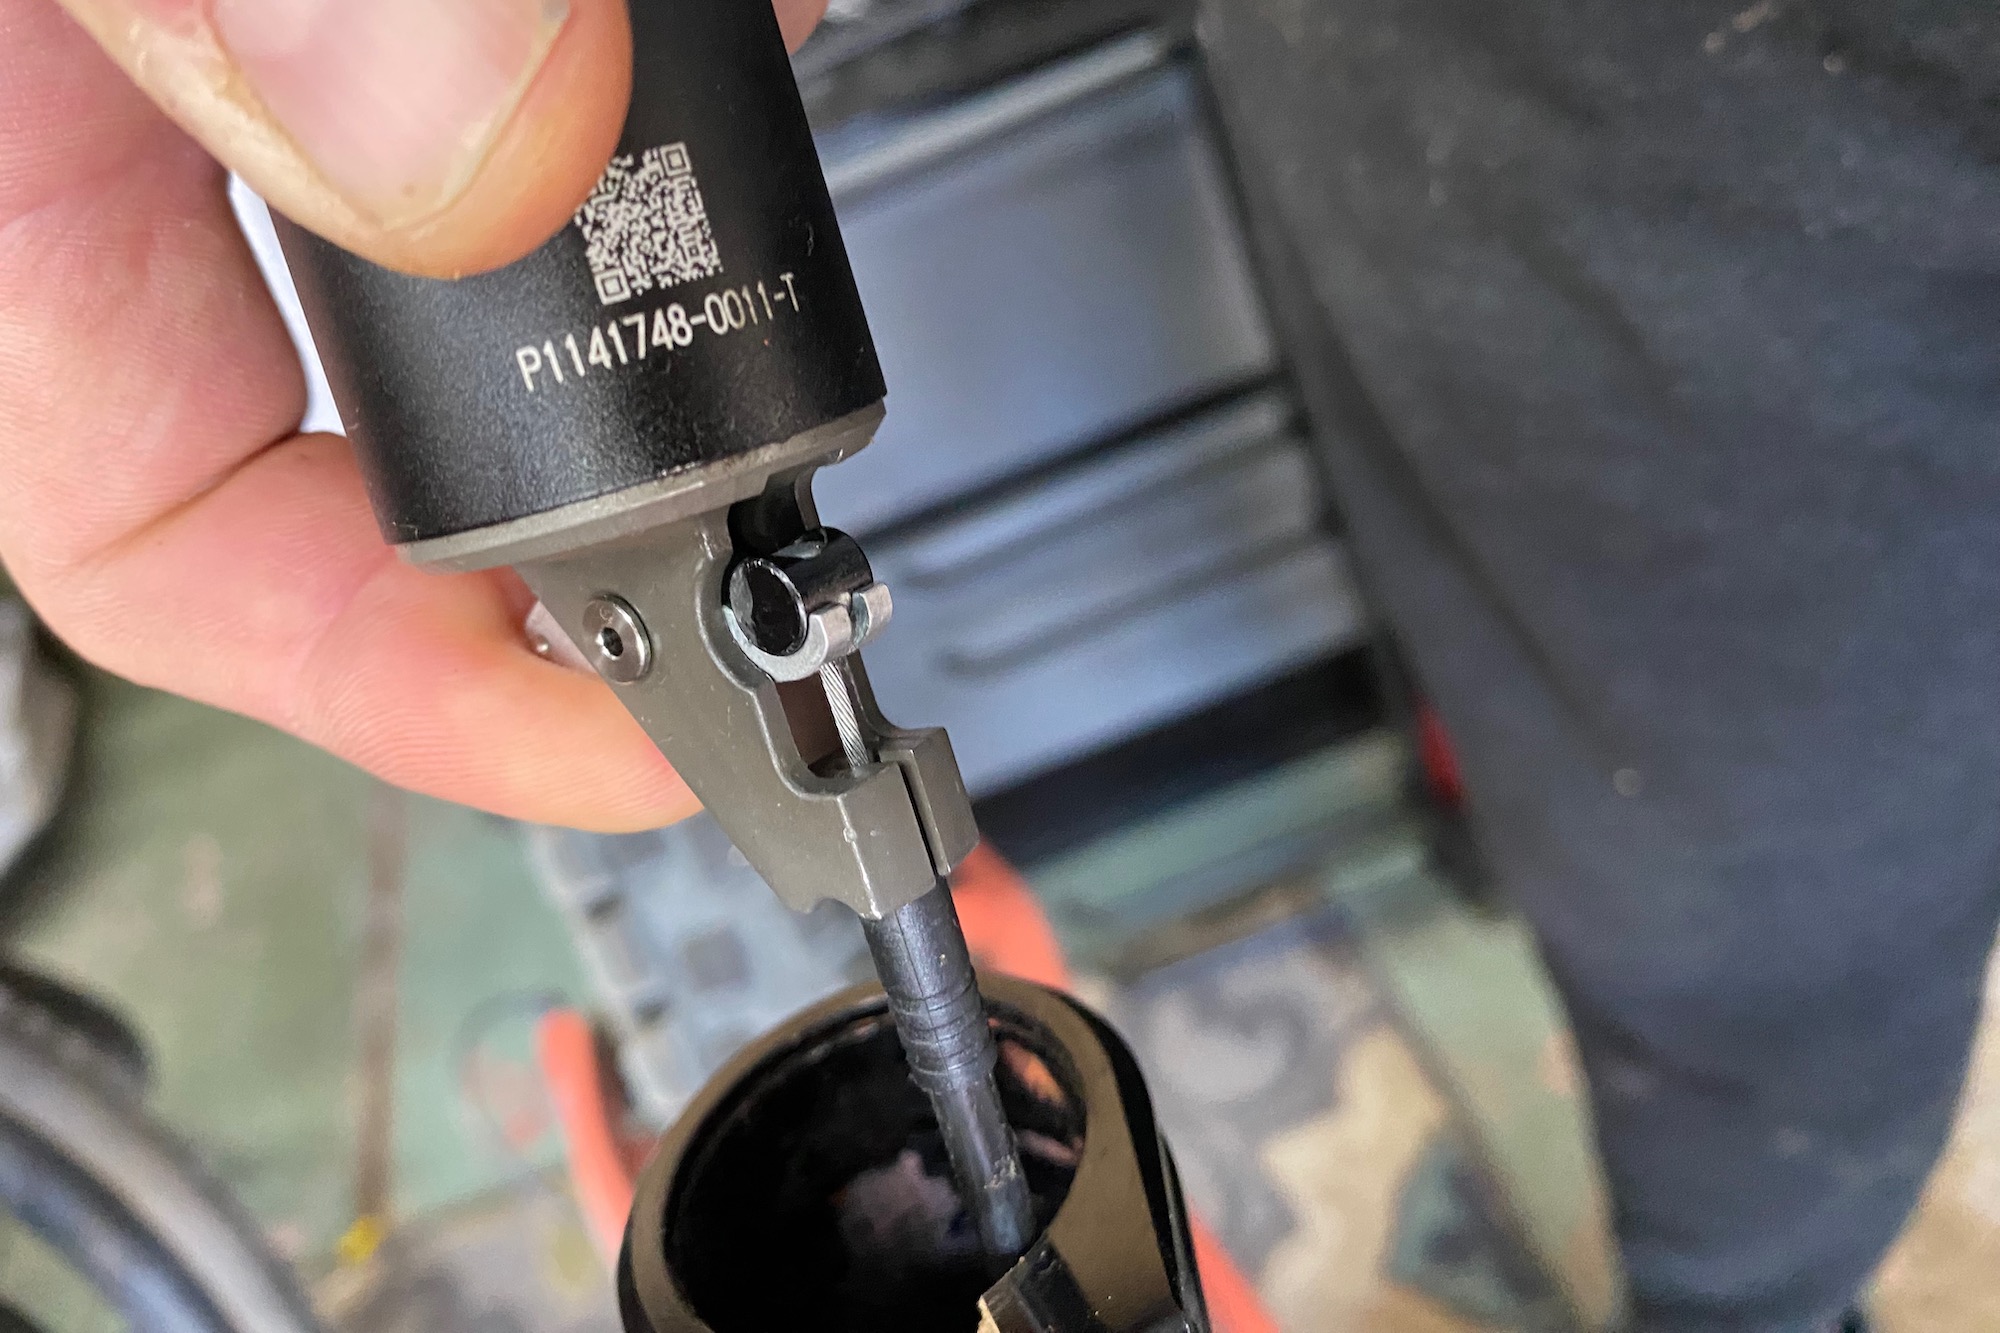
- Run a section of cable housing (or hydraulic line) from the seat tube to the exit port near the head tube. The direction you pull the housing through can depend on your frame, and it is always a good idea to use existing housing to pull through new housing whenever possible. This helps guide the new housing through tight curves in the internal routing.
- Attach the cable to the actuator at the bottom of the post and run it through the housing. Position the housing in the housing stop at the base of the post
- Push the post into the frame while simultaneously pulling the cable/housing (or hydraulic line) out of the exit port near the head tube.
- Attach the cable/housing to the lever after mounting it to the handlebars.
- For posts with hydraulic actuation, bleed the system. For cable-actuated posts, clamp the cable to the lever, trim the cable and add a cable end, and use the barrel adjuster to achieve proper cable tension.
Maintenance
Similar to moving suspension parts, most dropper post manufacturers recommend cleaning, inspecting, and lubricating your post after every ride and performing their version of a full service between 100 and 200 hours of riding. Many posts are designed to be user-serviceable, and they can be taken apart, cleaned, and relubricated with standard tools and a little time. Parts for many posts are available for purchase, and this can save you money while keeping your dropper working well in the long term. For a deep dive on dropper post maintenance, please see our Suspension Tech: How to maintain your dropper seatpost article.
Droppers for Gravel Bikes
As the gravel bike market continues to grow and mature, some models are coming equipped with dropper posts, and/or the frames feature internal cable routing to accommodate one. Of course, not everyone needs or wants a dropper on their gravel bike, but those who ride steeper, rougher roads or like to venture onto singletrack trails may find that the benefits outweigh the slight weight penalty.
Most, but not all, gravel bikes have smaller 27.2mm seat tube diameters, and fortunately, many brands now make droppers in this size to meet the growing demand. In general, dropper posts made for gravel bikes have less travel, ranging from around 50mm to 125mm. On the more affordable end of the spectrum, OneUp Components makes the V3 27.2 in 90 and 120mm drop lengths.
Crankbrothers offers one of the largest ranges of drop lengths, with 60, 80, 100, and 125mm options for their Highline XC Gravel post. Fox makes a 27.2mm version of their lightweight Transfer SL in both Factory and Performance Elite in both 50mm and 70mm drop lengths. At the high end of the price spectrum, the RockShox Reverb XPLR AXS brings wireless dropper technology to your gravel rig.

Price & Value
Dropper posts are almost always more expensive than rigid posts, but considering the performance benefits they provide, we feel they are worth their weight in gold. Like anything in mountain biking, we have quite a few options, and they come at a pretty wide range of prices.
Thankfully, most modern mountain bikes come with dropper posts, but many people choose to upgrade to something that works or fits better than the stock option. So, how much should you spend, and what’s the difference?
Note: Most aftermarket dropper posts do not come with a remote lever. Most dropper posts will work with most dropper levers, so if you already have one, you might be able to use it with whatever post you choose. That said, not all dropper post remotes are created equal, and some simply work, feel, and look better than others. When purchasing a new post, you may also need to factor in the cost of a new remote lever into the equation. They typically cost between $40 and $70, depending on the brand/model.
Budget
These days, you can get a functional dropper for around $150, but we think most people adding an aftermarket post to their bike should expect to spend about $200. It’s not that less expensive droppers don’t work, but based on our experience, we think you get a higher level of performance and durability by spending just a little bit more.
For those operating on a budget, the least expensive model in this guide, the PNW Loam, will set you back around or just over $229 (plus a bit more for a remote if you don’t already have one). This post doesn’t reinvent the wheel, but it performs very well and is an exceptional value for anyone who doesn’t have more to spend.
Mid-Tier
Moving just a bit higher in the price range, we think most people will find the best ratio of price and performance in the $270-400 range. We realize that’s a pretty big spread, but that’s also where most of the best dropper posts on the market land on the price spectrum. Here, we often find smoother travel, lighter weights, and special features that set some models apart.
At the lower end of this range, the $270 OneUp V3 Dropper is super smooth, has a short stack height and short overall length, comes in the most drop length options, and is one of the lightest models on the market. The OneUp V3’s combination of performance attributes makes it one of our absolute favorites and arguably the best value you can find.
As prices climb, we start to see features like the fancy Kashima-coated stanchion on the Fox Transfer Factory ($309), the bleed valve on the Bike Yoke Revive 3.0 ($350-420), or the self-bleeding cartridge on the Wolf Tooth Resolve rev2 ($350-400). Generally speaking, we also see an increase in smoothness and quality, and these posts are meant to be user-serviceable and provide many years of faithful service. Most brands also sell small parts, so at-home mechanics can keep them running smoothly without needing to shell out more cash to get them repaired at a shop.

Premium
Above the mid-tier price range, the cost of dropper posts increases significantly to $600 or more. There are only a small handful of models way up here in the price stratosphere, with much higher costs associated with wireless technology. RockShox was the first to market with the first version of the wireless Reverb AXS at the eye-watering price of $861, making a significant splash both in terms of price and as a major advancement in wireless technology for mountain bikes. They have since updated the Reverb AXS and reduced its price to $599, although you still need to buy a remote for $165 or $220 if you don’t already have one.
Fox arrived a bit later to the wireless dropper post party but has developed its own wireless protocol in an attempt to gain the upper hand. Launched in the summer of 2024, the Fox Transfer Neo ($859) is now the most expensive option you can buy. That said, it has a shorter stack height, the remote is very ergonomic, and the actuation is lightning fast. It’s arguably the best dropper you can buy, but it’s also a total splurge. It also tops out at 200mm, so taller riders will likely need to look elsewhere for now.
Does anyone actually need a wireless dropper on their bike? Absolutely not. Is it cool that we have the option? We think so. Still, unless you’re swimming in disposable income, we think the added cost of upgrading to wireless is hard to justify when less expensive options perform just as well (but with cables).
Frequently Asked Questions
Mountain bikes can certainly be ridden without a dropper post, and for many years we didn’t even have the option. While many riders were slow to adopt this new technology due to weight and reliability concerns with early models, they have since become ubiquitous on most bikes for many reasons.
Over the past decade, dropper posts have come down in weight and have become more reliable and durable. Having the ability to raise and lower your seat for the terrain in front of you allows you to always have the appropriate saddle height whether you are riding up or downhill. Being able to adjust saddle height on the fly makes it easier to move about the bike and move the bike beneath you, resulting in greater control.
While some posts are quite expensive, there are also many more affordable options that work very well. So, yes, unless you are an elite-level XC racer who is trying to have the lightest bike possible, you should absolutely be riding with a dropper post on your mountain bike. The performance benefits far outweigh the weight penalty of adding one to your bike.
Leaving your MTB dropper post compressed for an extended period of time is not recommended. When the dropper post is compressed, the internal air pressure is increased, which can put additional stress on the internal components of the dropper post, potentially leading to premature wear and failure.
Additionally, leaving your dropper post compressed can cause the hydraulic fluid to become trapped on one side of the post, which can affect its performance when you next use it. This could lead to damage to the seals and other internal components over time.
To maximize the lifespan and performance of your post, it’s best to store it in the fully extended position when not in use. This will help to ensure that the internal components are not subjected to unnecessary stress or pressure and that the hydraulic fluid is distributed evenly throughout the post.
That’s not to say you can’t leave your dropper post compressed for shorter periods of time. For example, we often travel with our bikes on hitch bike racks for many hours at a time with our droppers compressed to keep the bikes from interfering with each other. We’ve never had any issues.
It’s generally not recommended to hang your bike by the dropper post for extended periods of time, as this can put excessive stress on the internal components of the post and potentially damage it.
While clamping to the dropper post stanchion while working on your bike is not ideal, and some manufacturers recommend against it because it is possible to crush the stanchion tube with clamping pressure, we’ve had no issues doing so consistently for short periods of time with any post.
You will, however, want to clamp lightly and wrap the post in a rag or use rubber jaws to avoid scratching the post stanchion. Like with suspension components, scratches on the post stanchion can cause premature wear on seals and introduce dirt and dust into the dropper internals.
Related Content
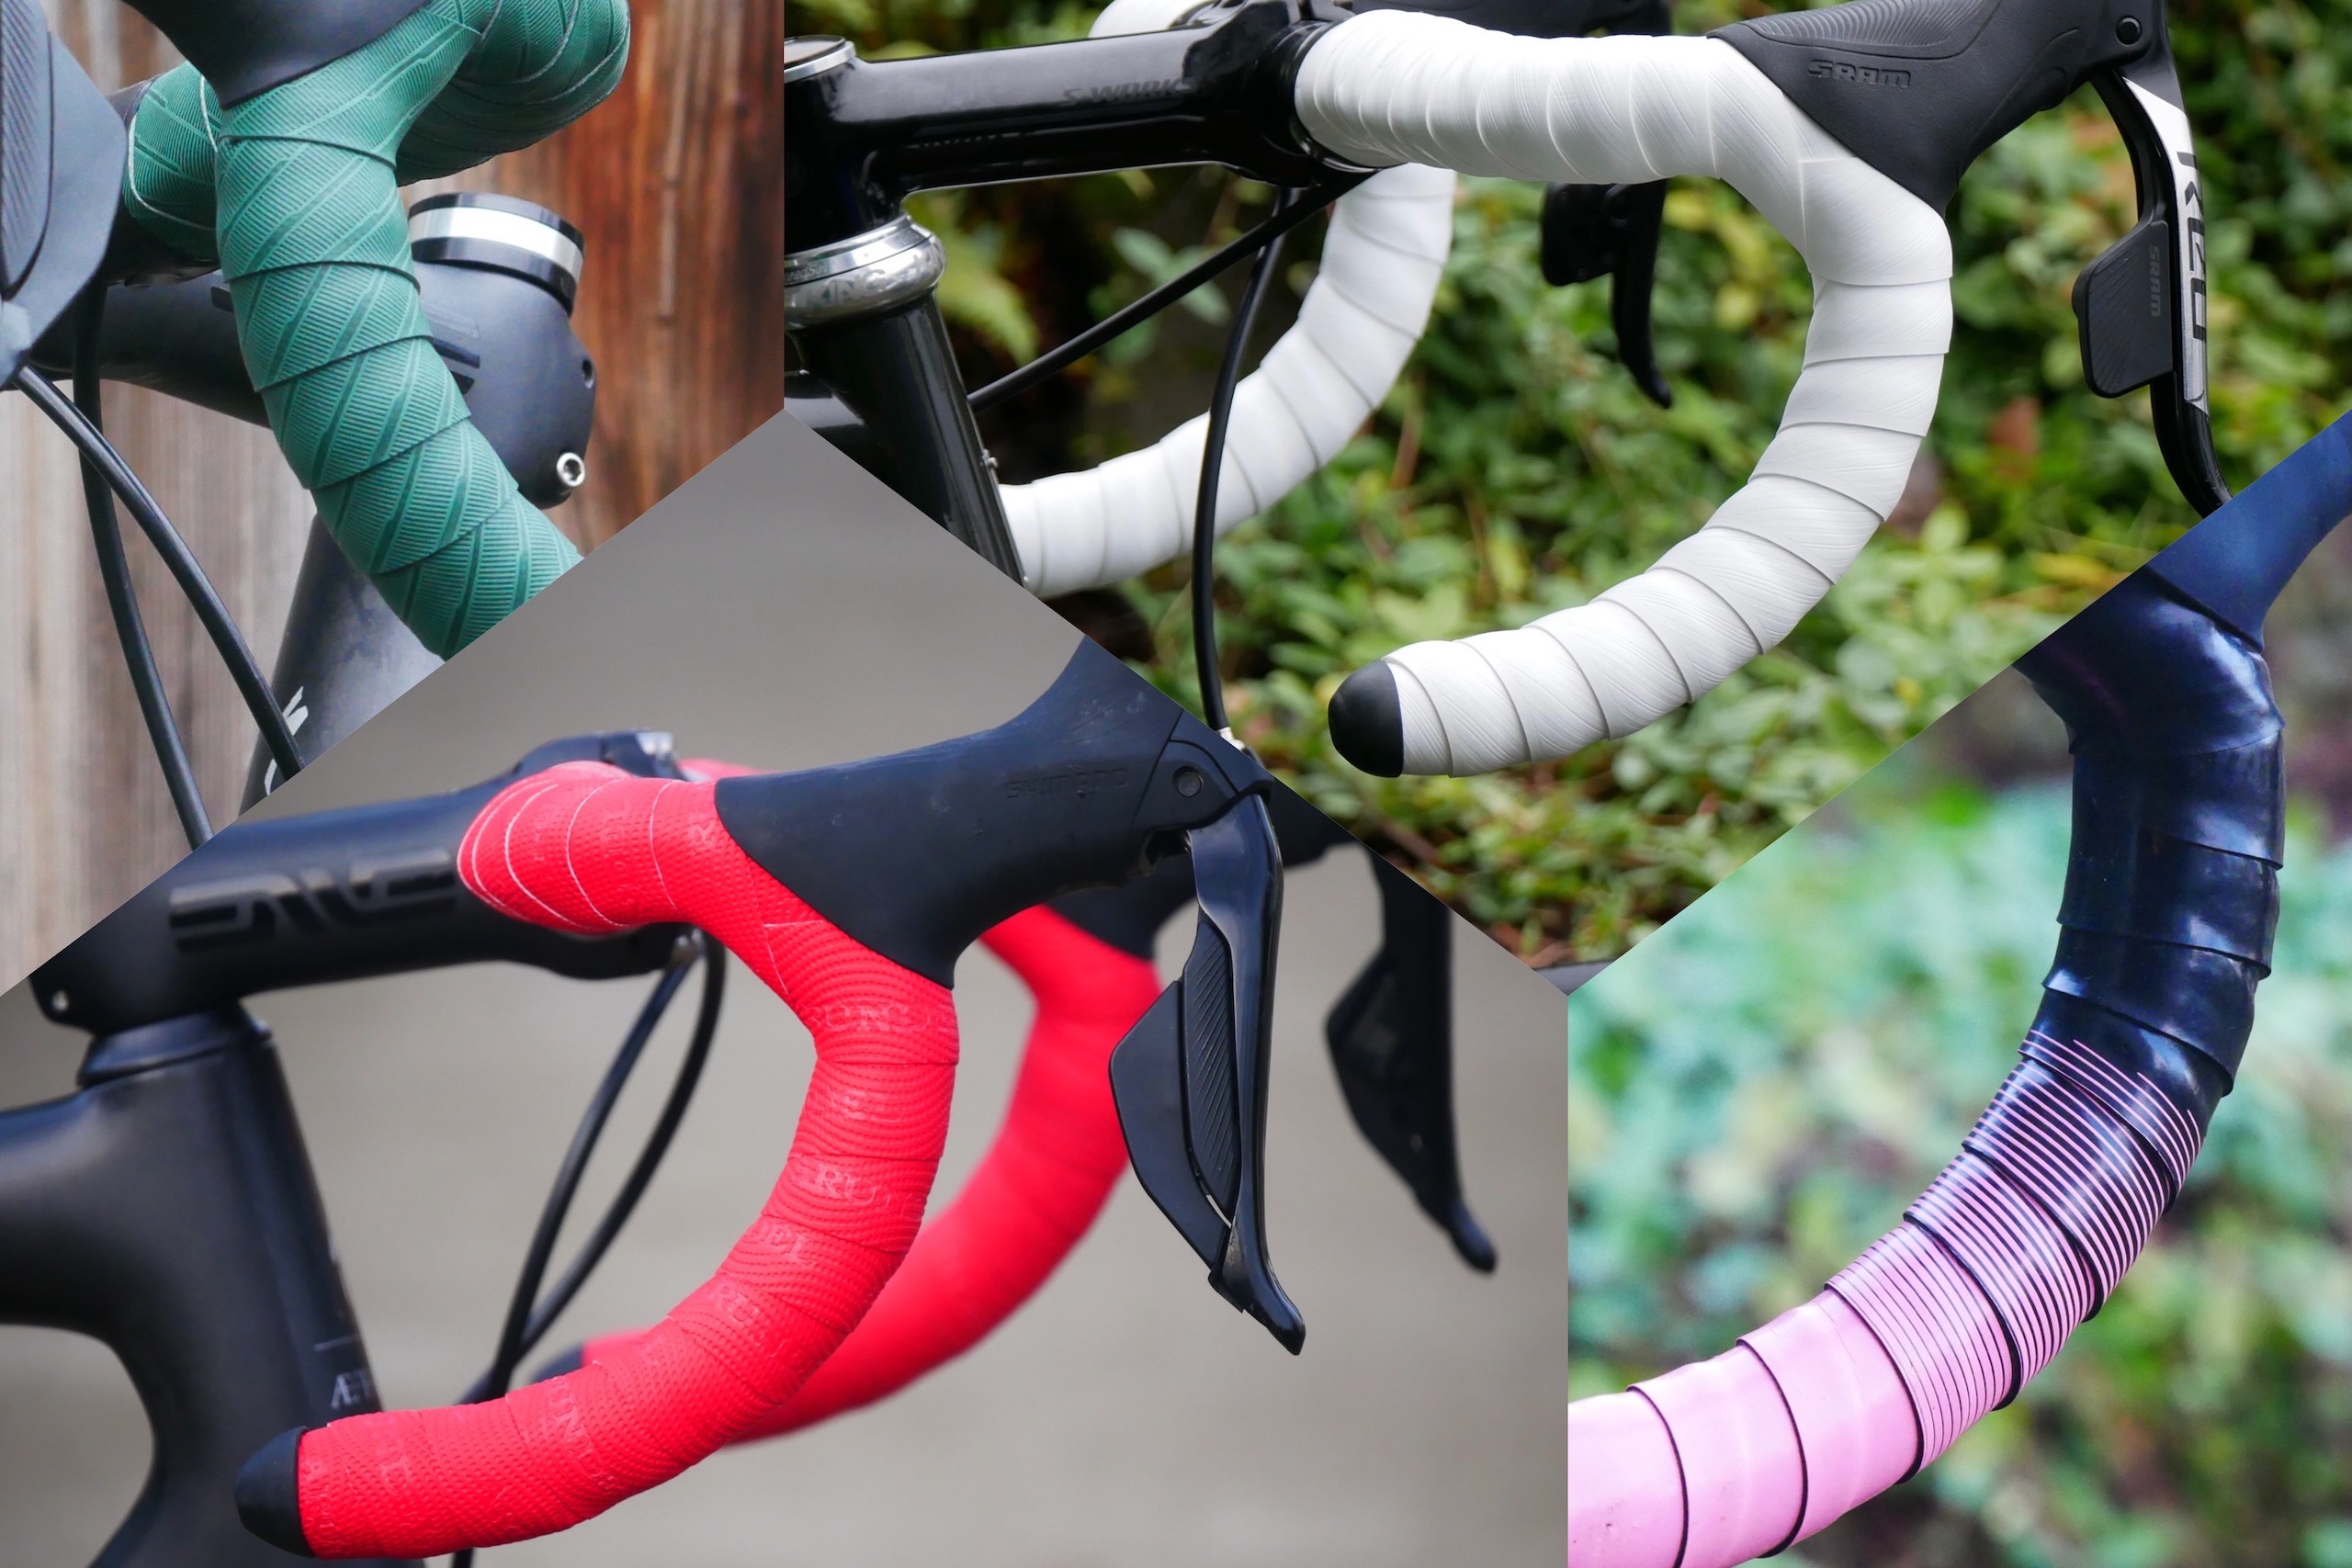
The Best Handlebar Tape of 2026
We tested 16 of the best handlebar tapes on the market to help you find the best one for this critical contact point on your bike.
The Best Mountain Bike Handlebars of 2025
After testing 11 of the best mountain bike handlebars on the market, we’ve got recommendations to suit your needs, preferences, and budget.